
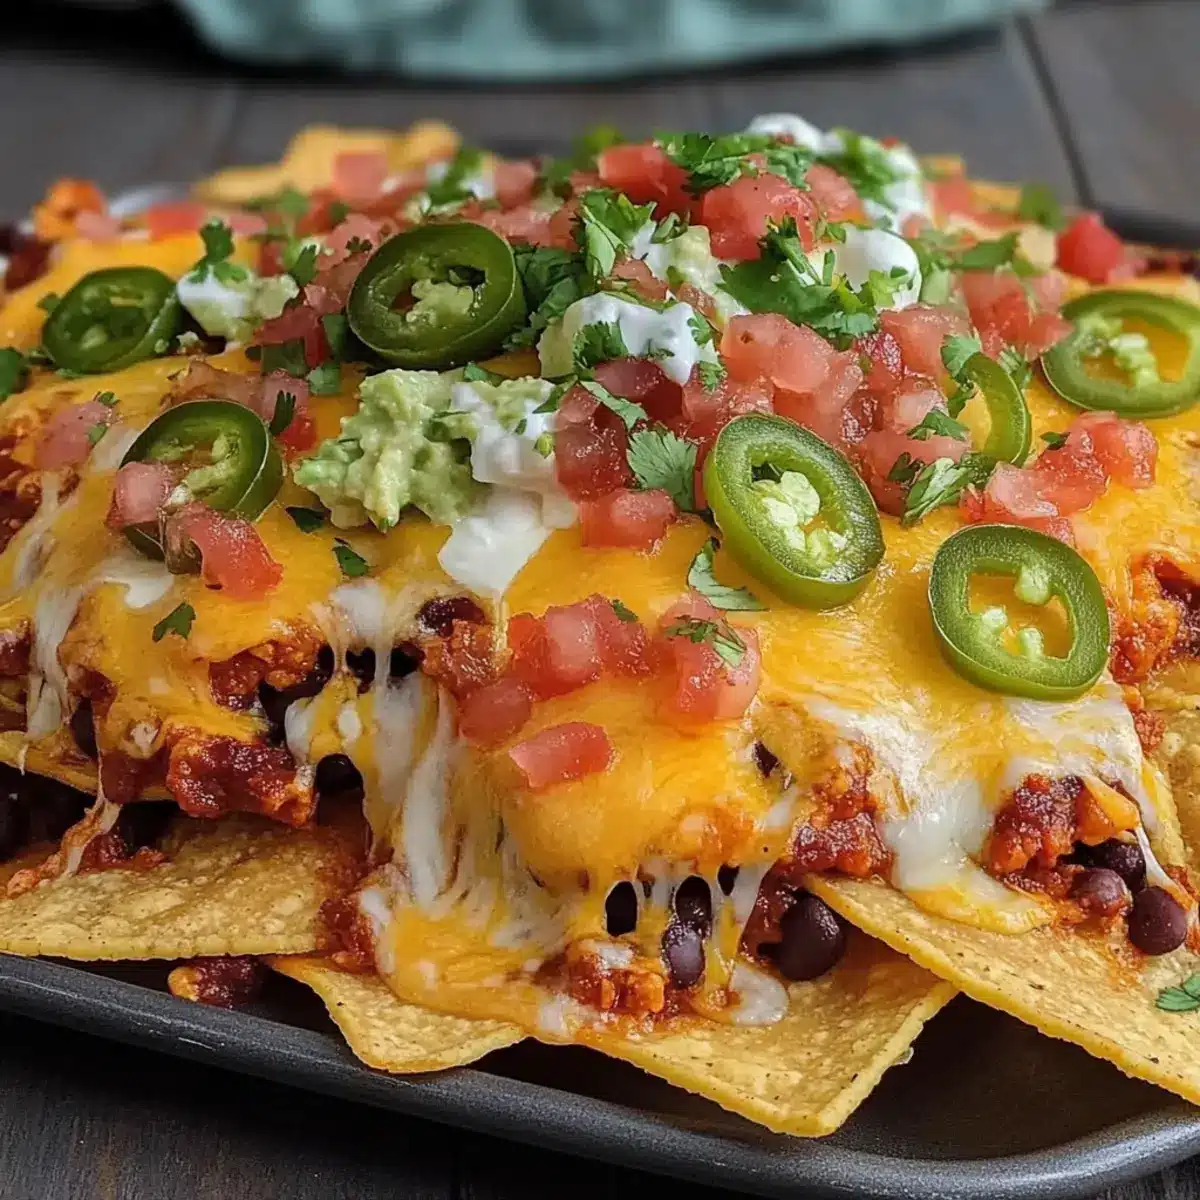
The aroma of melted cheese and spices wafting through the kitchen instantly transported me back to lively game nights with friends. There’s something irresistibly comforting about Crispy Loaded Nachos—just imagine sinking your teeth into golden, crunchy chips layered with warm, gooey cheese and all your favorite toppings. This easy nachos recipe takes less than 30 minutes to whip up, making it a perfect choice for spontaneous gatherings or cozy nights at home. With simple ingredients you probably already have in your pantry and the flexibility to customize, these nachos can be gluten-free or dairy-free if you prefer. Are you ready to dive into the ultimate crowd-pleaser that’s sure to impress everyone at the table? Prepare for a flavor-packed feast that brings a little fiesta right into your living room!
Why Are Crispy Loaded Nachos Irresistible?
Ultimate Comfort Food: The harmony of crunchy chips, gooey cheese, and zesty toppings creates a delightful flavor explosion that everyone loves.
Quick and Easy: You can whip these up in under 30 minutes, making them perfect for impromptu gatherings or late-night cravings.
Customizable Options: Whether you’re looking for gluten-free or dairy-free alternatives, or simply want to add your favorite toppings, this recipe allows endless variations.
Crowd-Pleasing Appeal: Serve them at parties or family dinners, and watch as they disappear—nachos are always a hit!
Dive into this delicious dish similarly to our crispy Air Fryer Mozzarella or complement it with some zingy Chinese Chicken Wings.
Crispy Loaded Nachos Ingredients
For the Nachos
- Tortilla Chips – The essential crunch! Opt for sturdy chips to prevent sogginess under toppings.
- Sharp Cheddar Cheese – Offers bold flavor; substitute with medium cheddar for a milder taste or a dairy-free alternative for a lighter twist.
- Monterey Jack Cheese – Provides creaminess and excellent melt; mozzarella can work as a substitute for a different texture.
- Ground Turkey (optional) – A lean protein choice to reduce saturated fat; swap for ground beef or skip for a vegetarian delight.
- Black Beans – Adds fiber and protein; pinto beans can be used instead, or omit for a lighter dish.
- Fresh Jalapeños – Brings the heat! If you’re sensitive to spice, banana peppers can be a milder alternative.
- Pico de Gallo – Fresh and vibrant; you can replace it with salsa or diced tomatoes for convenience.
- Sour Cream – Balances the richness; use vegan sour cream or cashew cream to keep it dairy-free.
- Olive Oil – Helps achieve crispy goodness when lightly sprayed on chips; skip if using pre-packaged chips.
Indulge in the delightful world of Crispy Loaded Nachos with these simple ingredients that cater to your cravings and dietary preferences!
Step‑by‑Step Instructions for Crispy Loaded Nachos
Step 1: Preheat Your Oven
Begin by preheating your oven to 375°F (190°C). This is essential for achieving that perfect level of crispiness in your nachos. While the oven warms up, you can gather your ingredients and prepare the baking sheet, ensuring you’re ready to assemble your delicious crispy loaded nachos.
Step 2: Layer the Chips and Cheese
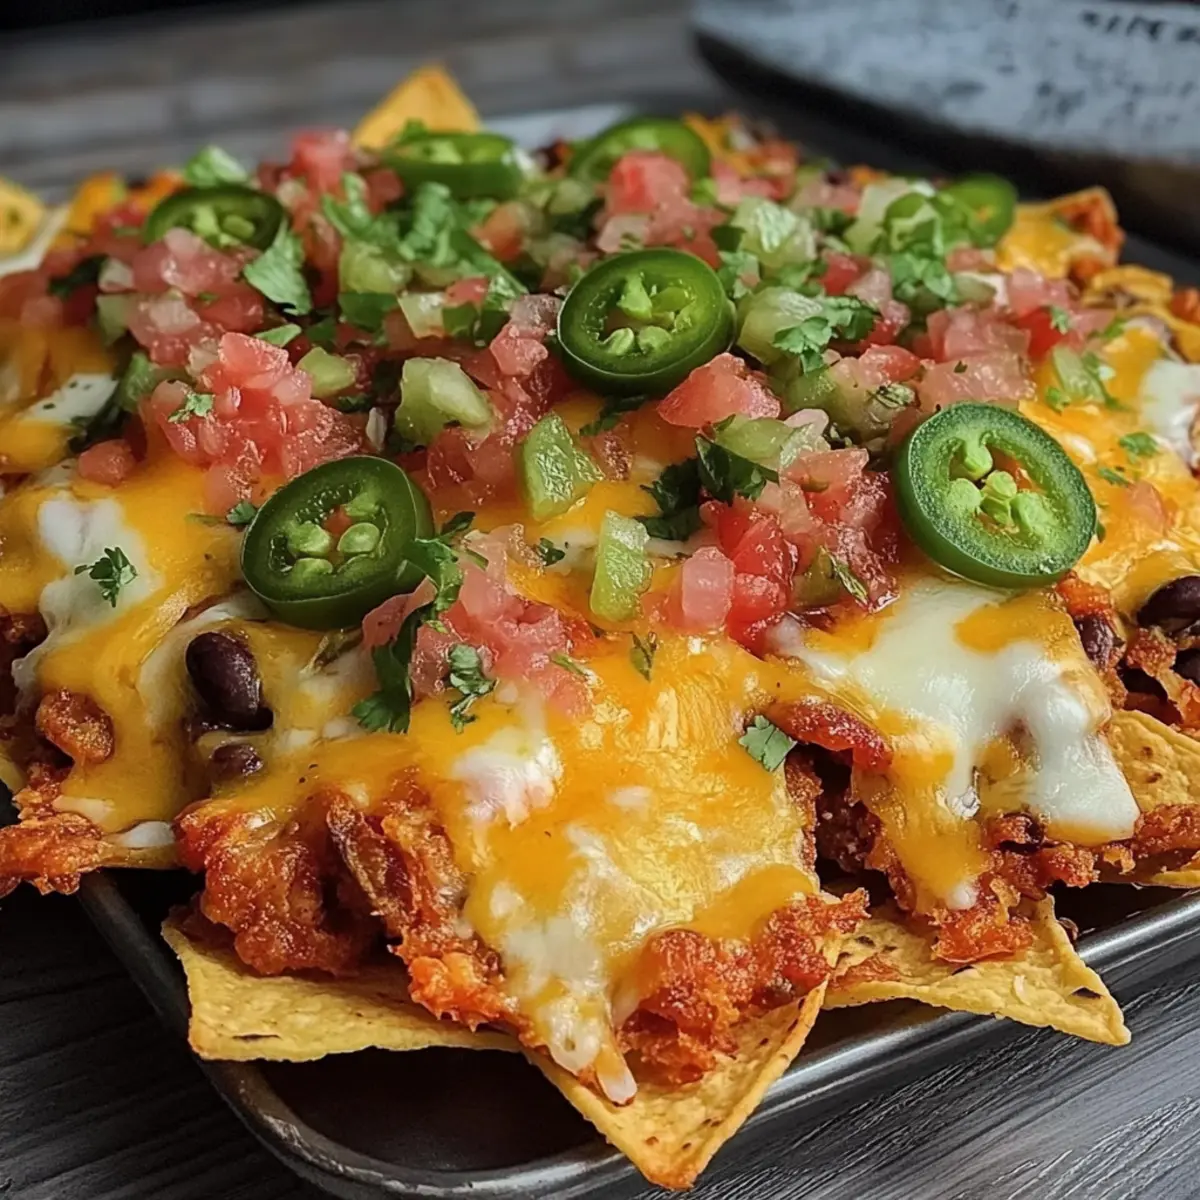
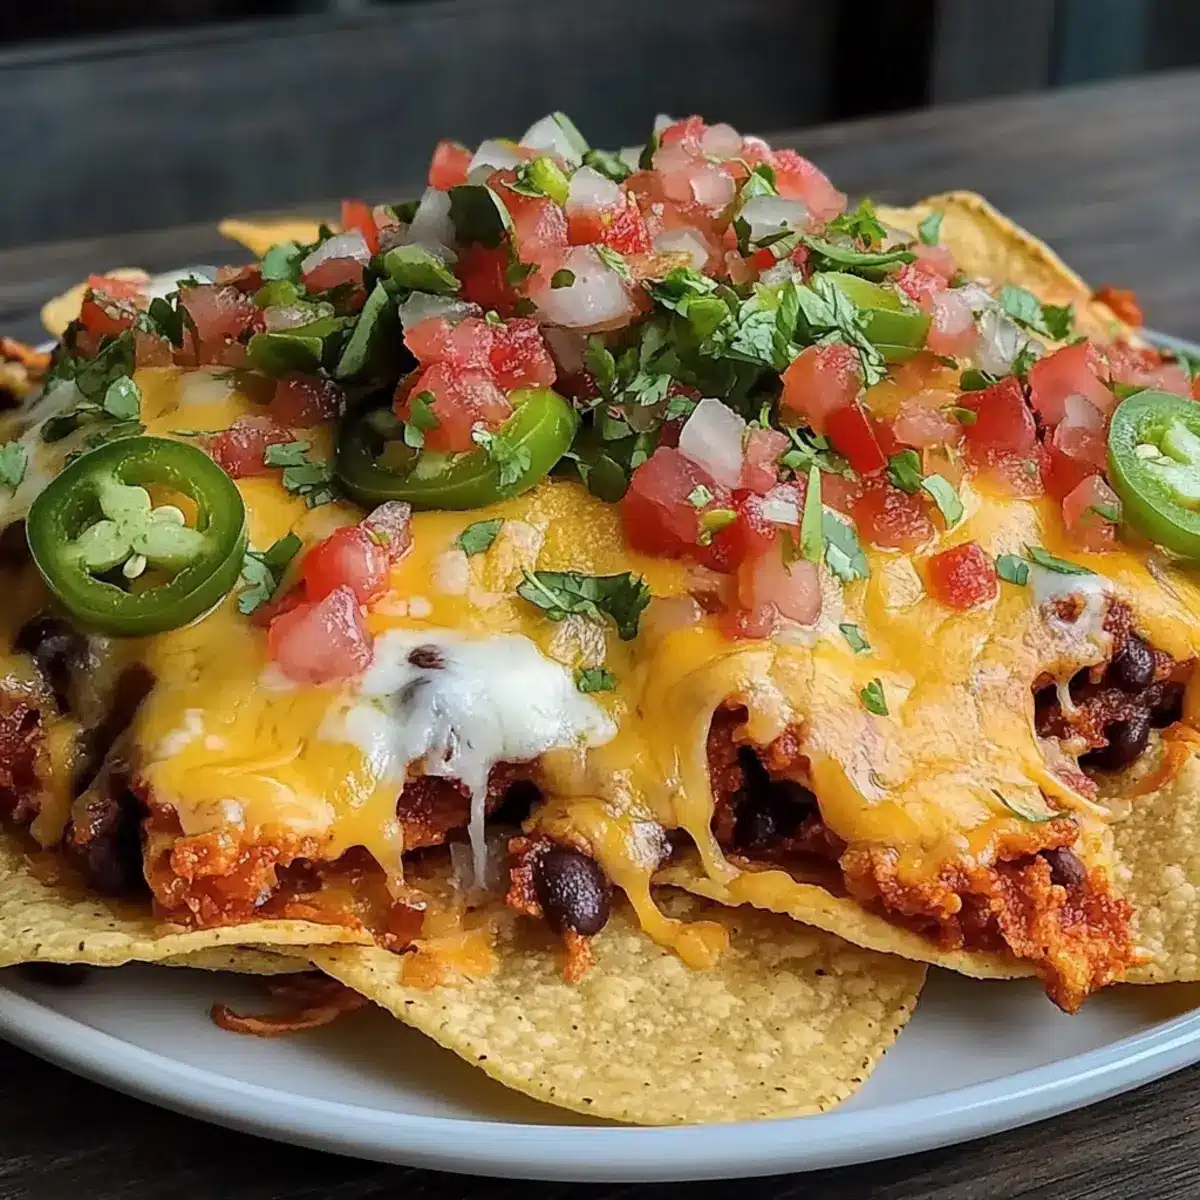
Spread a generous layer of tortilla chips across the baking sheet, making sure they are laid out in a single layer for even cooking. Next, sprinkle a mix of sharp cheddar cheese and Monterey Jack cheese evenly over the chips. Creating multiple layers ensures that every bite of your crispy loaded nachos is packed with cheesy goodness.
Step 3: Add the Toppings
Now it’s time to take your nachos to the next level! Evenly scatter the black beans, fresh jalapeños, and your chosen meat (if using) across the layered chips and cheese. Make sure the toppings are distributed well, so you get a delightful mix of flavors in every bite. This colorful assortment will make your dish look as good as it tastes!
Step 4: Bake to Perfection
Carefully place the baking sheet in the middle rack of your preheated oven. Bake the nachos for 10-15 minutes, or until you see the cheese bubbling and slightly browning. Keep an eye on them to prevent burning, as this is the moment your crispy loaded nachos transform into a gooey, tantalizing treat.
Step 5: Add Fresh Toppings
Once baked, remove the nachos from the oven and let them cool for a minute. Top them with fresh pico de gallo and dollops of sour cream for a burst of brightness and creaminess. These fresh ingredients contrast beautifully with the warm, cheesy layers underneath, enhancing the flavor of your crispy loaded nachos.
Step 6: Serve and Savor
Serve your crispy loaded nachos immediately on a large platter or straight from the baking sheet, inviting friends and family to dig in. The combination of crunchy chips, melty cheese, and zesty toppings creates an irresistible dish that’s perfect for parties or a cozy night at home. Enjoy every delicious bite of your homemade nachos!
How to Store and Freeze Crispy Loaded Nachos
- Fridge: Store leftover nachos in an airtight container for up to 2 days. Reheat in the oven at 350°F (175°C) for 8-10 minutes, ensuring they regain their crispness.
- Freezer: For longer storage, freeze toppings separately and chips in a ziplock bag for up to 3 months. This prevents sogginess and keeps flavors intact.
- Reheating: If frozen, thaw overnight in the fridge before reheating. Bake at 350°F (175°C) until heated through and crispy. Enjoy your crispy loaded nachos fresh!
- Avoid Freezing: It’s best not to freeze assembled nachos, as the chips may become soggy upon reheating. Keep components separate for the best quality.
Make Ahead Options
These Crispy Loaded Nachos are perfect for meal prep warriors striving for tasty convenience! You can prepare the cheese and toppings up to 24 hours in advance. Simply layer the tortilla chips, sharp cheddar, and Monterey Jack cheese in a baking dish, and store it covered in the refrigerator to prevent drying out. Pre-chop your fresh toppings like jalapeños and pico de gallo, and keep them in separate airtight containers. When you’re ready to serve, just add the toppings, bake the nachos at 375°F (190°C) for about 10-15 minutes, and enjoy restaurant-quality flavor with minimal effort! The result? Deliciously crispy nachos that save you valuable time during busy weeknights!
Crispy Loaded Nachos Variations & Substitutions
Feel free to personalize your nachos adventure with these delicious twists that add unique flavors and options for everyone!
- Gluten-Free: Swap regular tortilla chips for gluten-free brands to enjoy the same beloved crunch without the gluten.
- Dairy-Free: Use a blend of dairy-free cheese alternatives, such as cashew cream, to cater to lactose intolerance while keeping the cheese-loving taste.
- Meat Lovers: For a protein boost, layer seasoned ground beef or pulled chicken instead of turkey, creating an even heartier dish.
- Veggie Delight: Add sautéed bell peppers, mushrooms, or zucchini as toppings for a veggie-packed version bursting with color and nutrients.
- Sweet & Spicy: Toss some pineapple with jalapeños for a refreshing twist. The sweet and spicy flavors will dance on your palate!
- BBQ Style: Bring Southern flair by using pulled pork and a drizzle of barbecue sauce, then top with coleslaw for that perfect crunch.
- Spicy Kick: Craving heat? Use spicy queso instead of regular cheese or add crushed red pepper flakes for an extra fiery bite.
- Flavored Chips: Try using flavored tortilla chips, like lime or jalapeño, for an unexpected flavor profile that complements classic toppings beautifully.
Dive into this realm of flavor just like you would with a plate of crispy Air Fryer Mozzarella or pair it with some tangy Chinese Chicken Wings. Experiment and discover your perfect nacho creation!
Expert Tips for Crispy Loaded Nachos
-
Prevent Sogginess: Layer the cheese and toppings carefully to avoid soggy chips while baking. Too many wet ingredients can ruin the crispness.
-
Broil for Extra Gooeyness: If you want that ultimate melty cheese experience, broil for an additional 1-2 minutes. Watch closely to prevent burning!
-
Choose Sturdy Chips: Opt for thicker tortilla chips that can hold up against the weight of toppings. Avoid flimsy chips that might break under pressure.
-
Add Fresh Toppings Last: For the best texture and flavor, add fresh pico de gallo and sour cream after baking. This keeps them vibrant and enhances your crispy loaded nachos!
-
Experiment with Flavor: Don’t hesitate to customize your toppings based on what you like—think avocado, olives, or different cheeses to make this easy nachos recipe uniquely yours!
What to Serve with Crispy Loaded Nachos?
Elevate your nacho experience by adding delightful sides and drinks that complement every cheesy, crunchy bite.
- Creamy Guacamole: A rich, creamy dip that balances the heat of nachos with its smooth texture and fresh flavors.
- Zesty Salsa Verde: This bright green salsa adds freshness and a tangy kick that perfectly enhances the savory taste of the nachos.
- Classic Margaritas: Refreshing and slightly tart, these cocktails bring a festive vibe to your nacho feast, making every bite a celebration.
- Spicy Queso Dip: For an extra cheesy element, this warm dip adds decadent creaminess and a touch of heat to your snack spread.
- Mexican Street Corn Salad: Bursting with sweet and savory flavors, this vibrant side offers a crunchy contrast to the softness of the nachos.
- Chilled Beer: A crisp lager or pale ale pairs beautifully, cutting through the richness while enhancing the overall flavor experience.
Unleash your creativity as you serve up an unforgettable nacho night, inviting friends and family to indulge in this cheesy fiesta full of flavor and fun!
Crispy Loaded Nachos Recipe FAQs
What should I look for when selecting tortilla chips?
Absolutely! Choose sturdy tortilla chips that can hold up under heavy toppings. Look for chips with a thicker texture to avoid breaking when loaded with cheese and toppings.
How should I store leftover crispy loaded nachos?
Leftover nachos can be stored in an airtight container in the refrigerator for up to 2 days. When you’re ready to enjoy them again, preheat your oven to 350°F (175°C) and reheat for 8-10 minutes to restore their delightful crispiness.
Can I freeze my crispy loaded nachos?
Very! For freezing, it’s best to separate the toppings and chips. Place the chips in a ziplock bag and keep toppings like cooked meat and beans in airtight containers for up to 3 months. Before serving, thaw overnight in the fridge and bake at 350°F (175°C) until heated through.
What can I do if my nachos come out soggy?
To prevent soggy nachos in the future, layer the cheese and toppings carefully, avoiding overly wet ingredients before baking. If you notice them getting soft in the oven, you can broil them for an additional 1-2 minutes for a crispy finish.
Are there any dietary considerations for this recipe?
Definitely! For gluten-free options, make sure to choose gluten-free tortilla chips and canned beans. If you have dairy allergies, you can easily substitute with dairy-free cheese and sour cream alternatives, making this recipe inclusive for everyone at the table.
Can I customize my crispy loaded nachos?
Of course! The more the merrier! You can tailor your nachos to suit your taste by experimenting with various toppings such as fresh avocados, various cheeses, or even switching out black beans for pinto beans. Enjoy the creative freedom!

Crispy Loaded Nachos: Your New Go-To Comfort Food Delight
Ingredients
Equipment
Method
- Preheat your oven to 375°F (190°C).
- Spread a layer of tortilla chips across the baking sheet.
- Sprinkle a mix of sharp cheddar and Monterey Jack cheese over the chips.
- Scatter black beans, jalapeños, and ground turkey across the chips.
- Bake in the oven for 10-15 minutes, watching to avoid burning.
- Remove and top with fresh pico de gallo and sour cream.
- Serve immediately and enjoy!
Leave a Reply