
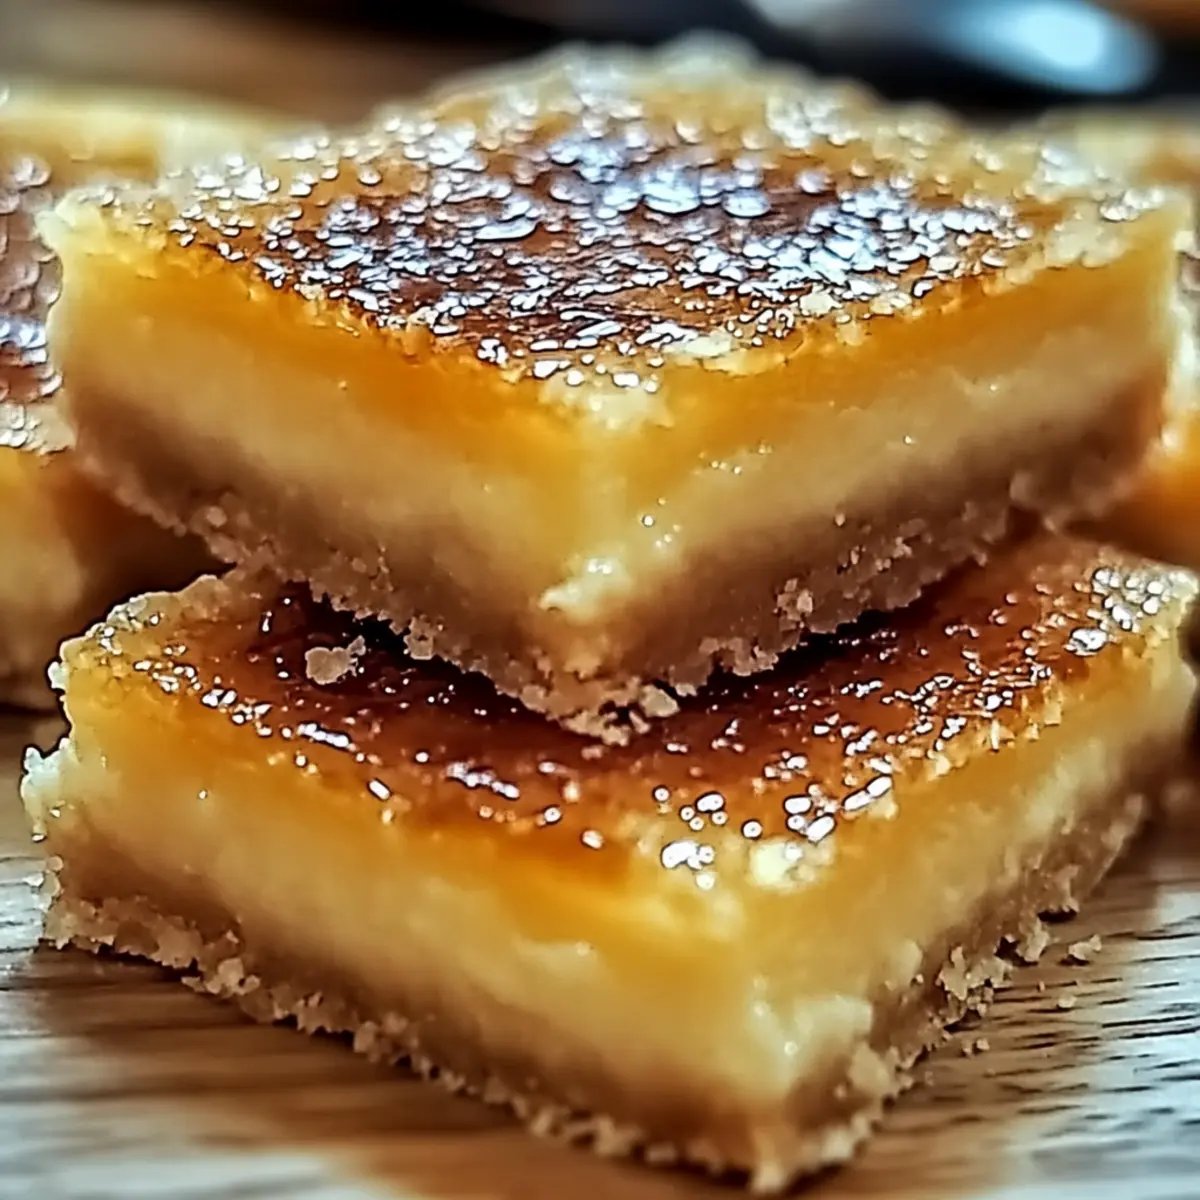
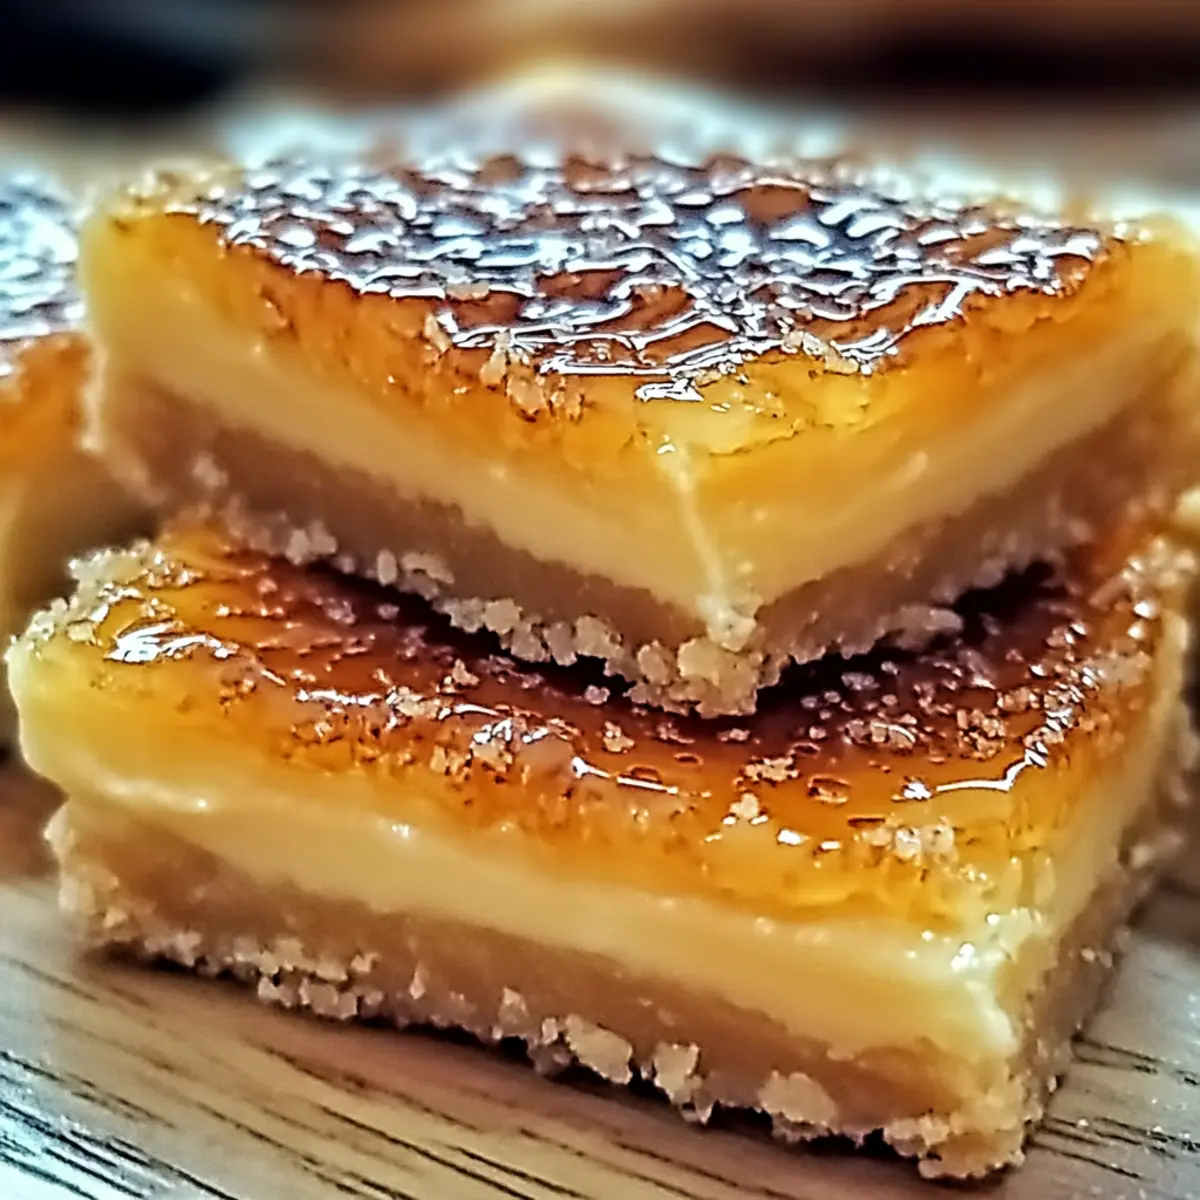
When life feels a bit chaotic, there’s something soothing about sinking your teeth into a homemade dessert. Allow me to introduce you to Crème Brûlée Cookie Bars, the ultimate fusion of two classic favorites. These delicious bars capture the chewy appeal of cookie dough topped with a crunchy, caramelized toffee layer that brings the elegance of crème brûlée right to your kitchen. The best part? They’re not just a treat for the senses; these cookie bars are incredibly quick to prepare, making them a go-to for those weeknight cravings or impromptu gatherings. With minimal effort, you’ll have a dessert that promises to steal the show at any table. Ready to elevate your baking repertoire? Let’s get started on these delightful Crème Brûlée Cookie Bars!

Why Are Crème Brûlée Cookie Bars So Special?
Irresistible Texture: The unique combination of chewy cookie and crunchy toffee creates a dessert that’s satisfying in every bite.
Quick to Make: You don’t need to spend hours in the kitchen; these bars come together easily, perfect for busy weekdays or last-minute guests.
Stunning Presentation: With a luscious caramelized top layer, each slice looks as impressive as it tastes, making them a great centerpiece for any event.
Versatile Flavor: Feel free to swap in chocolate chips or nuts to customize your treat. If you love cookies, try pairing them with a scoop of vanilla ice cream for an indulgent dessert experience! Looking for more sweet inspirations? Don’t miss the rich flavors of Brown Butter Cookie or the delicious Flourless Fudge Cookies.
Crowd-Pleasing Delight: These bars are a hit at gatherings, ensuring everyone leaves with a smile!
Crème Brûlée Cookie Bars Ingredients
Get ready to embark on a delightful baking adventure!
For the Cookie Base
- All-Purpose Flour – Provides structure; substitute with gluten-free flour for a gluten-free version.
- Granulated Sugar – Adds sweetness; can be replaced with brown sugar for a richer flavor.
- Brown Sugar – Enhances moisture and caramel notes; if unavailable, use only granulated sugar.
- Butter – Contributes richness and texture; opt for unsalted for better flavor control.
- Eggs – Acts as a binding agent; egg substitutes can work, but adjust for moisture.
- Vanilla Extract – Infuses the bars with aromatic flavor; use fresh vanilla beans for a gourmet twist.
For the Crunchy Topping
- Toffee Bits – Adds that signature crème brûlée crunch; try chocolate-covered or nut-enhanced varieties for extra flavor.
These irresistible Crème Brûlée Cookie Bars are just one recipe away! Get ready to impress your family and friends with this quick and easy dessert.
Step‑by‑Step Instructions for Crème Brûlée Cookie Bars
Step 1: Preheat the Oven
Begin by preheating your oven to 350°F (175°C). While the oven warms up, take a moment to line your 9×13 inch baking dish with parchment paper, allowing some excess to hang over the edges. This will make it easier to lift the bars out once they’ve cooled.
Step 2: Cream the Butter and Sugars
In a large mixing bowl, add the unsalted butter, granulated sugar, and brown sugar. Use a hand mixer or stand mixer to cream these ingredients together on medium speed until the mixture is light and fluffy, about 3 minutes. You’ll know it’s ready when it looks smooth and creamy, with no visible lumps remaining.
Step 3: Incorporate Eggs and Vanilla
Next, crack in the eggs and pour in the vanilla extract. Beat everything together on medium speed until fully combined, and the mixture turns a pale yellow color, about 1-2 minutes. This step adds rich flavor and helps bind the ingredients together to create the perfect base for your Crème Brûlée Cookie Bars.
Step 4: Mix in the Flour
Gradually add the all-purpose flour to the mixture, mixing on low speed until just combined. Be careful not to overmix; you want to see some flour still visible. Once incorporated, gently fold in the toffee bits using a spatula, ensuring an even distribution of that delightful crunch throughout your cookie dough.
Step 5: Spread the Dough
Scoop the cookie dough into the prepared baking dish and spread it evenly using your spatula. Make sure to press it down gently to create an even surface, which will ensure that your Crème Brûlée Cookie Bars bake uniformly. The dough should fill the dish right to the edges but not overflow.
Step 6: Bake to Perfection
Place the baking dish in your preheated oven and bake for 20-25 minutes. You’ll know they’re done when the edges turn lightly golden and a toothpick inserted in the center comes out clean. Keep an eye on them as baking times can vary slightly depending on your oven’s specifics.
Step 7: Cool and Cut
Once baked, remove the dish from the oven and let it cool completely on a wire rack for about 30-45 minutes. This step is crucial! Cooling ensures the bars hold their shape when cut. After they’ve cooled, use the edges of the parchment to lift them out of the dish and slice into squares for serving.
What to Serve with Crème Brûlée Cookie Bars
Elevate your dessert game by crafting the perfect spread to complement these stunning bars, offering a delightful array of flavors and textures.
- Vanilla Ice Cream: Creamy ice cream adds a cool contrast to the warm cookie bars, creating a decadent indulgence that melts in your mouth.
- Fresh Berries: Raspberries or strawberries introduce a tartness that balances the sweetness of the bars, making each bite a burst of flavor.
- Whipped Cream: Light and fluffy whipped cream provides an airy touch, enhancing the rich custard-like texture of the cookie bars.
- Chocolate Ganache: Rich ganache drizzled on top infuses a luxurious chocolate flavor, elevating this dessert to another level of indulgence.
- Caramel Sauce: A drizzle of warm caramel sauce mirrors the toffee bits, deepening the dessert experience with a buttery sweetness.
- Espresso or Coffee: A bold cup of coffee beautifully contrasts the sweetness of the bars, bringing a rich flavor that enhances their buttery notes.
- Mint Tea: A refreshing herbal tea soothes the palate, making for a delightful contrast after a sweet treat.
- Nutty Biscotti: A crunchy, nutty biscotti served on the side adds both texture and flavor, inviting you to dip into your coffee or tea.
- Salted Dark Chocolate: For the adventurous eater, add chunks of salted dark chocolate to complement the sweetness with a hint of bitterness.
Make Ahead Options
These delectable Crème Brûlée Cookie Bars are perfect for meal prep, making busy weeknights a little sweeter! You can prepare the cookie base up to 24 hours in advance by mixing the ingredients and spreading the dough into the baking dish. Simply cover it tightly with plastic wrap and refrigerate to maintain freshness and prevent drying out. When you’re ready to bake, just remove from the fridge and let it sit at room temperature for about 15 minutes before placing it in a preheated oven. This way, you’re just steps away from enjoying warm, luscious cookie bars that are just as delightful as if they were baked fresh that day!
How to Store and Freeze Crème Brûlée Cookie Bars
Airtight Container: Store your Crème Brûlée Cookie Bars in an airtight container at room temperature for up to 3 days to maintain their fresh taste and texture.
Refrigerator: If you plan to keep them longer, refrigerate for up to a week. Just be sure to wrap them well in plastic wrap to prevent drying out.
Freezer: Freeze individual bars in a single layer between sheets of parchment paper in a freezer-safe container for up to 3 months. Thaw overnight in the fridge before enjoying.
Reheating: When ready to enjoy, warm them in the microwave for about 10-15 seconds to revive that delightful chewy texture of your Crème Brûlée Cookie Bars!
Crème Brûlée Cookie Bars Variations
Customize your Crème Brûlée Cookie Bars to suit your taste and dietary needs with these delightful variations!
-
Gluten-Free: Replace all-purpose flour with a 1:1 gluten-free flour blend to make these bars suitable for gluten-sensitive guests.
-
Choco-Lover’s Delight: Swap toffee bits for semi-sweet chocolate chips, creating a rich, chocolatey treat that will satisfy any sweet tooth.
-
Nutty Crunch: Add chopped pecans or walnuts for an extra crunch and a nutty flavor that pairs beautifully with the sweetness of the cookie bars.
-
Salted Caramel Twist: Drizzle salted caramel sauce over the top after baking for a dreamy flavor boost that perfectly balances sweetness and saltiness.
-
Vanilla Bean Upgrade: Use the seeds of fresh vanilla beans instead of extract for an aromatic, gourmet touch that intensifies the vanilla flavor.
-
Spicy Kick: Incorporate a pinch of cayenne pepper or chili powder into the batter for a subtle yet exciting heat that elevates the dessert experience.
-
Citrus Burst: Add the zest of one orange or lemon to brighten up the flavors, providing a fresh and lively contrast to the rich cookie bars.
As you explore these variations, don’t miss trying other indulgent desserts like French Toast Cookies or creamy Creme Brulee French for even more inspiration!
Expert Tips for Crème Brûlée Cookie Bars
• Cool Completely: Ensure your cookies cool down entirely before cutting to prevent crumbling and help maintain their shape.
• Use a Sharp Knife: For clean edges when slicing, use a sharp knife; this simple tip enhances the presentation of your Crème Brûlée Cookie Bars.
• Monitor Baking Time: Ovens can vary! Keep an eye on the bars and check them a few minutes early to avoid overbaking.
• Lining the Pan: Always line your baking dish with parchment paper; it makes removing the bars effortless and reduces clean-up time.
• Adjust Ingredients: If you prefer, swap toffee bits with chocolate chips or nuts to customize your bars; don’t hesitate to experiment!
Crème Brûlée Cookie Bars Recipe FAQs
What type of flour should I use for Crème Brûlée Cookie Bars?
For the best results, use all-purpose flour as it provides the right structure. If you’re looking for a gluten-free option, simply substitute it with a gluten-free flour blend. I recommend checking for one with a 1:1 baking ratio for ease!
How should I store my Crème Brûlée Cookie Bars?
Store the bars in an airtight container at room temperature for up to 3 days to keep them fresh. If you prefer, you can refrigerate them for up to a week wrapped in plastic wrap, which helps prevent them from drying out.
Can I freeze Crème Brûlée Cookie Bars?
Absolutely! You can freeze your cookie bars for up to 3 months. Simply place each bar in a single layer between sheets of parchment paper inside a freezer-safe container. To enjoy, thaw overnight in the fridge and warm them in the microwave for about 10-15 seconds to regain that chewy goodness.
What can I do if my cookie bars are too crumbly?
If your Crème Brûlée Cookie Bars end up crumbly, it might be due to overbaking or not incorporating enough liquid ingredients. When mixing, ensure you’re not overmixing the dough and check your oven temperature for accuracy. If they’re already baked, serving them with a scoop of vanilla ice cream can help balance the texture!
Are there any allergy considerations for this recipe?
Yes, this recipe contains common allergens including eggs, gluten (in the flour), and dairy (in the butter). If you’re baking for someone with allergies, consider using egg substitutes, gluten-free flour, and dairy-free butter alternatives. But, be sure to test the flavor and consistency as these swaps can alter texture slightly.
Can I make these cookie bars ahead of time?
Certainly! You can prepare the dough the night before and store it in the refrigerator. When you’re ready to bake, let it sit at room temperature for about 10-15 minutes to soften before spreading in your baking dish. This way, you have freshly baked bars ready for any occasion with minimal effort!

Irresistible Crème Brûlée Cookie Bars You Must Try Today
Ingredients
Equipment
Method
- Preheat your oven to 350°F (175°C) and line a 9x13 inch baking dish with parchment paper.
- Cream together the unsalted butter, granulated sugar, and brown sugar until light and fluffy.
- Incorporate the eggs and vanilla extract, beating until fully combined and pale yellow.
- Gradually mix in the all-purpose flour and fold in the toffee bits.
- Spread the cookie dough evenly in the prepared baking dish, pressing down gently.
- Bake for 20-25 minutes until the edges are lightly golden and a toothpick comes out clean.
- Let cool completely on a wire rack for 30-45 minutes before slicing into squares.
Leave a Reply