
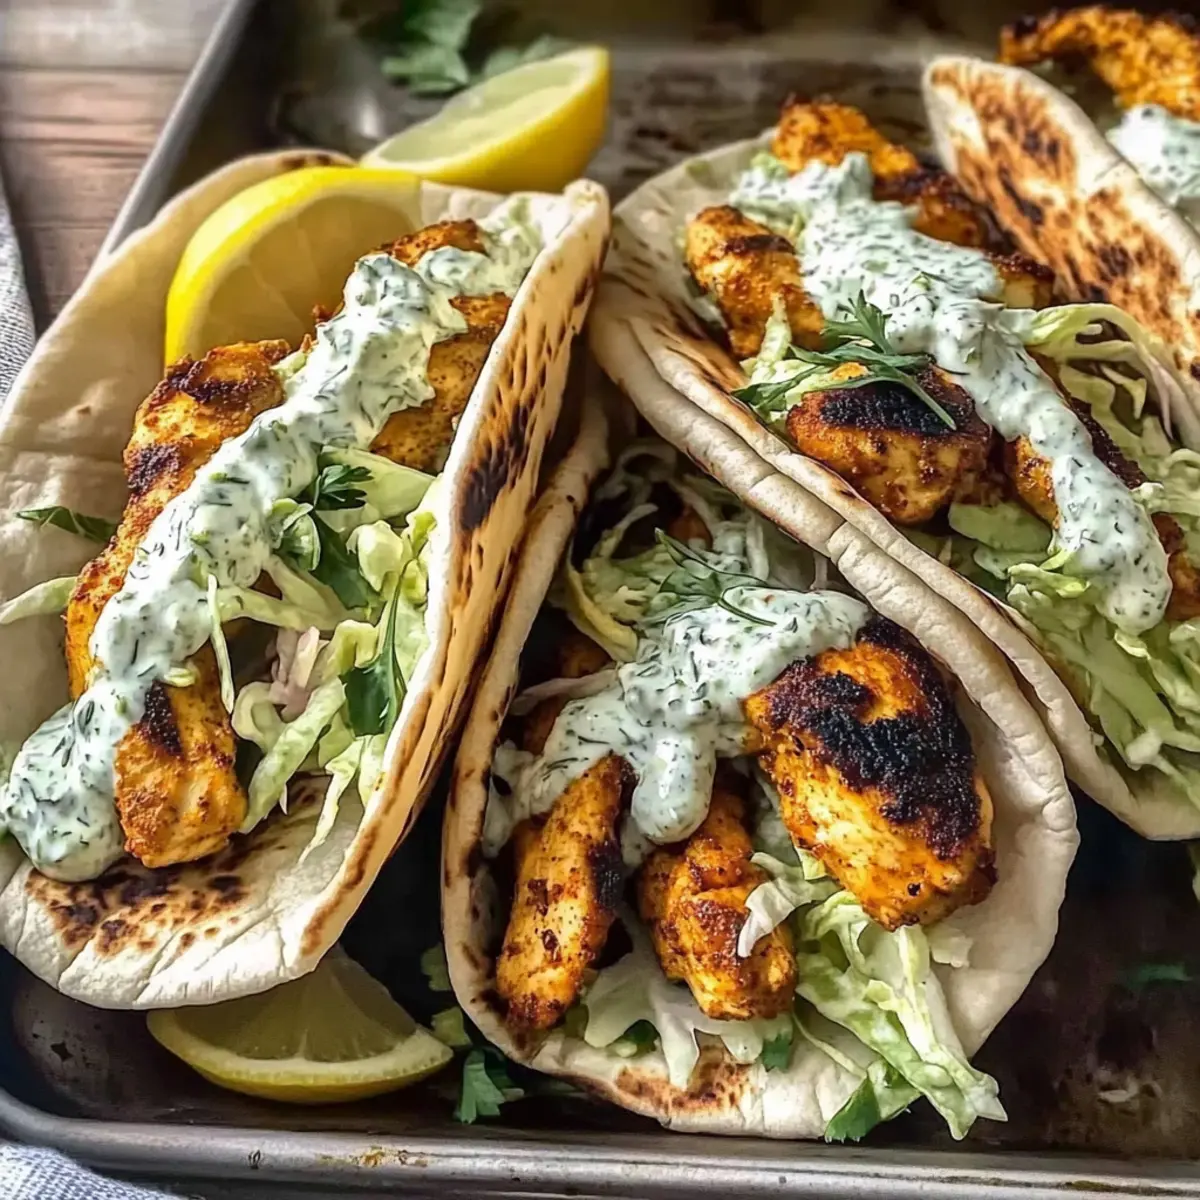
As I rushed through a particularly chaotic Monday evening, I stumbled upon the perfect solution for dinner: Sheet Pan Chicken Pitas with Herby Ranch. The sizzling chicken, roasted alongside zesty lemon slices, filled my kitchen with an irresistible aroma while the creamy herby slaw promised a refreshing crunch. This recipe isn’t just about convenience; it delivers on flavor and is incredibly adaptable, meaning you can easily switch out the chicken for shrimp, tofu, or tempeh! With quick prep and easy cleanup, it’s the ultimate family-friendly weeknight meal, allowing everyone to enjoy homemade goodness without the fuss. So, how can one dish offer such delight and ease? Let’s dive in and find out!
Why Are Sheet Pan Chicken Pitas a Game Changer?
Convenience at its finest: This recipe comes together effortlessly, allowing you to whip up a delicious meal in no time.
Flavor explosion: The combination of spice-rubbed chicken and zesty lemon creates a mouthwatering taste that keeps everyone coming back for more.
Versatile delight: Whether you’re craving shrimp, tofu, or tempeh, you can easily customize this dish to suit your dietary preferences or protein options.
Easy cleanup: One sheet pan means less time scrubbing dishes after dinner, giving you more time to relax with family or friends.
Family-friendly: Piled high with creamy herby slaw and avocado, these pitas are a healthy yet satisfying option, perfect for even the pickiest eaters.
Once you’ve tried these Sheet Pan Chicken Pitas, you might find yourself looking for more quick, flavorful meals like Honey Lime Chicken or the comforting Ginger Scallion Chicken. Enjoy the ease and taste of your new favorite dish!
Sheet Pan Chicken Pitas Ingredients
• Get ready to whip up a delightful meal!
For the Chicken
- Chicken Breasts – Boneless and skinless for hassle-free cooking.
- Brown Sugar – Adds a touch of sweetness and helps caramelization.
- Smoked Paprika – Introduces a wonderful smokiness and depth.
- Garlic Powder – Enhances the overall flavor profile beautifully.
- Onion Powder – Adds a savory note perfect for this recipe.
- Cayenne Pepper – Brings some heat; adjust according to taste preference.
- Kosher Salt – Essential for intensifying flavors; tweak to your liking.
- Olive Oil – Adds richness and aids in cooking; can be swapped with another oil.
- Lemon – Fresh slices brighten the dish when roasted.
For the Herby Slaw
- Plain Yogurt – Forms the base for the slaw; could substitute with a non-dairy option.
- Fresh Dill, Parsley & Chives – Key herbs that add a fresh burst of flavor; feel free to mix based on availability.
- Lemon Juice – Freshly squeezed enhances the slaw; zestiness is key!
- Green Cabbage – Offers a delightful crunch; other slaw mixes work well too.
For Serving
- Pitas – Warm them up for the perfect wrapping for your delicious filling.
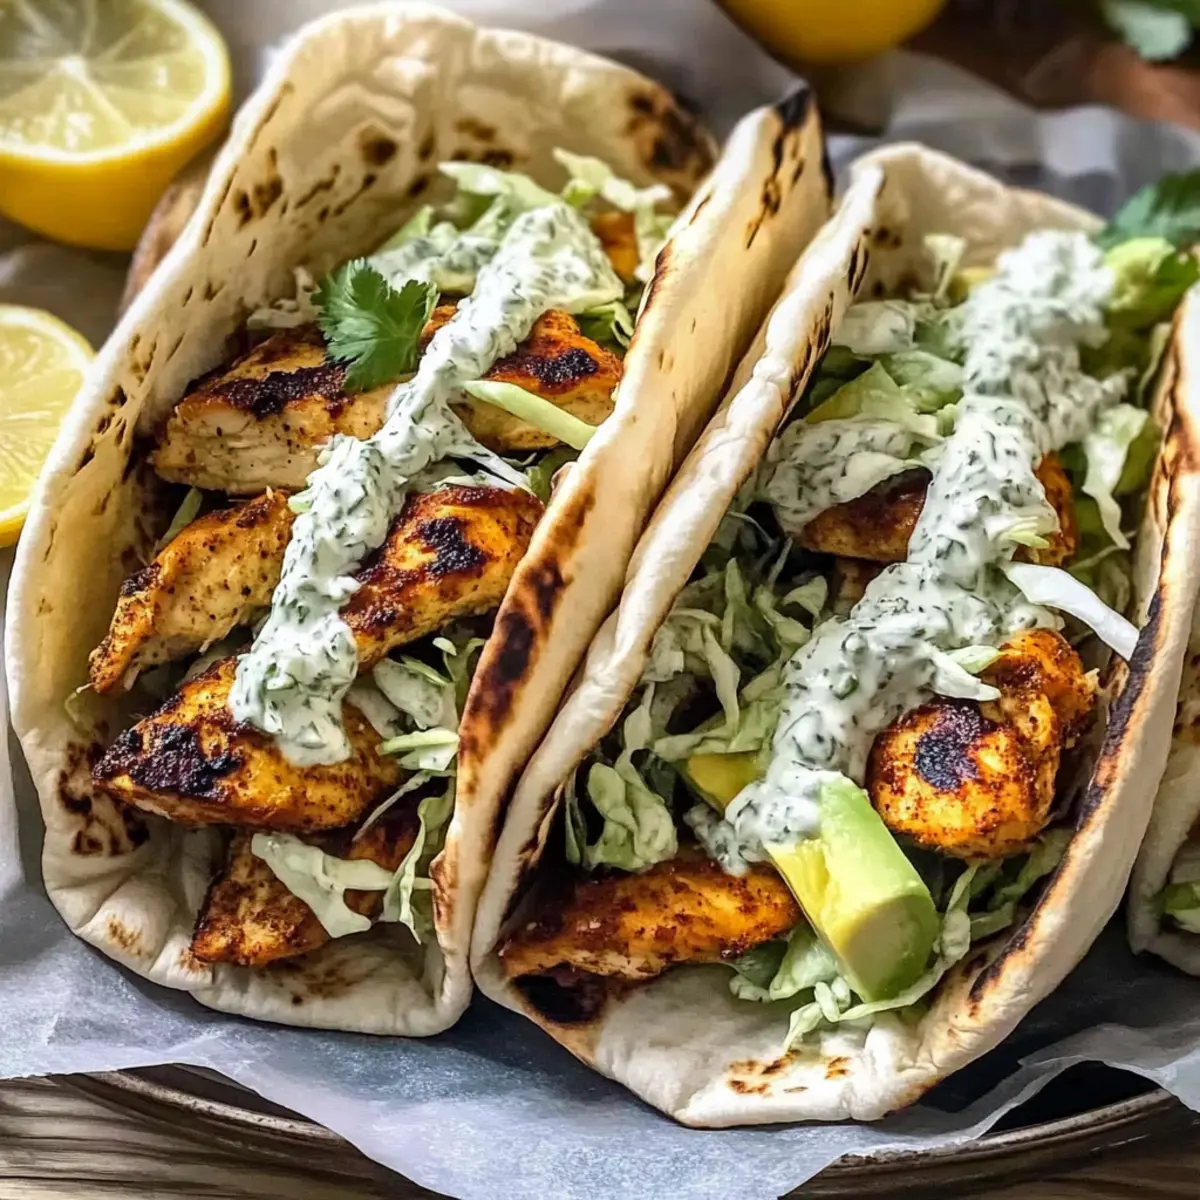
- Avocado – Provides creaminess that complements the pitas perfectly; choose ripe ones for the best flavor.
With these simple yet flavorful ingredients, your Sheet Pan Chicken Pitas will be a hit at the dinner table!
Step‑by‑Step Instructions for Sheet Pan Chicken Pitas
Step 1: Preheat the Oven
Begin by preheating your oven to 425ºF (convection setting recommended). This temperature will help caramelize the chicken beautifully, ensuring it achieves that golden-brown color while remaining juicy. Preheating is essential for even cooking, so let your oven heat for about 10 minutes while you prepare the chicken.
Step 2: Prepare the Chicken Mix
In a large mixing bowl, combine the boneless, skinless chicken breasts with brown sugar, smoked paprika, garlic powder, onion powder, cayenne pepper, kosher salt, and olive oil. Using your hands or a spatula, mix well until the chicken is thoroughly coated in the flavorful rub. The sweetness from the brown sugar will enhance the caramelization as it cooks, so ensure everything is evenly blended.
Step 3: Add Lemon Slices and Roast
Next, add fresh lemon slices to the chicken mixture, tossing them gently to combine. Spread the chicken and lemon evenly on a large, rimmed sheet pan in a single layer, ensuring good airflow between pieces. Roast in the preheated oven for 15 minutes, watching for the chicken to develop a lovely golden color.
Step 4: Toss and Continue Roasting
After the initial roasting, remove the sheet pan from the oven and give the chicken a good toss to promote even cooking. Return it to the oven for an additional 4 to 7 minutes, or until the chicken is fully cooked with an internal temperature of 165ºF. It should be golden brown and slightly crispy on the edges, while the lemons will become wonderfully caramelized.
Step 5: Make the Herby Slaw
While the chicken is roasting, prepare the herby ranch slaw. In a separate bowl, whisk together plain yogurt, chopped fresh dill, parsley, chives, lemon juice, and a pinch of salt. Once mixed, gently fold in the shredded green cabbage. Allow the slaw to sit for about 10 to 15 minutes for the flavors to meld and develop a delightful tanginess.
Step 6: Warm the Pitas
When the chicken is ready, it’s time to warm up the pitas. You can do this by placing them in a dry skillet over medium heat for about 1-2 minutes per side until they’re soft and pliable, or wrap them in a damp paper towel and microwave for about 20-30 seconds. Warm pitas will make it easier to wrap around the tasty filling.
Step 7: Assemble the Pitas
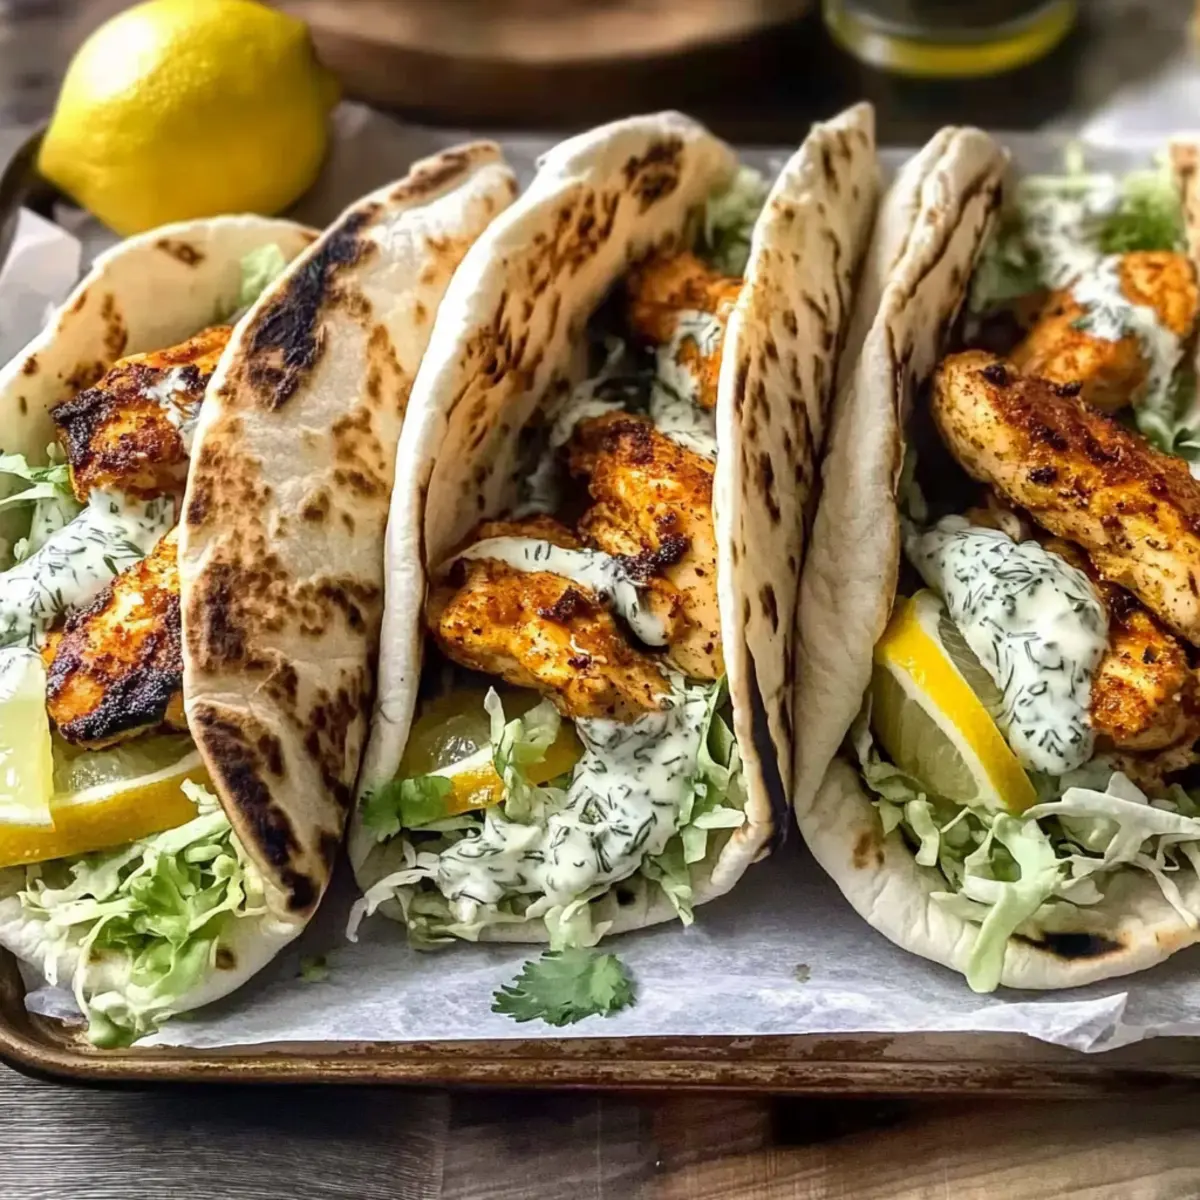
Now comes the best part! Take each warm pita and generously layer in the creamy herby slaw, followed by pieces of the roasted chicken and a few avocado cubes for that creamy finish. Aim for a beautiful balance of flavors in every bite, making these Sheet Pan Chicken Pitas a nutritious and savory choice for your meal.
Step 8: Serve and Enjoy
Serve your freshly assembled pitas warm, inviting your family to dig in! These Sheet Pan Chicken Pitas are perfect for a quick weeknight meal that offers an explosion of flavor with minimal cleanup. Enjoy the vibrant tastes and the satisfaction of a homemade meal!
Make Ahead Options
These Sheet Pan Chicken Pitas are a fantastic choice for meal prep enthusiasts! You can marinate the chicken with the spice mixture and refrigerate it up to 24 hours in advance, allowing the flavors to deepen. Additionally, the herby slaw can be prepared ahead of time and stored in an airtight container for up to 3 days; just be sure to add the shredded cabbage just before serving to maintain its crunch. When you’re ready to enjoy your pitas, simply roast the marinated chicken and lemon slices as directed, warm the pitas, and assemble with the slaw and avocado. This prep-ahead strategy saves you valuable time during busy weeknights while still delivering delicious homemade meals!
Storage Tips for Sheet Pan Chicken Pitas
Fridge: Store cooked chicken and herby slaw separately in airtight containers for up to 3 days to maintain freshness and crispness.
Freezer: You can freeze the cooked chicken (without slaw) in an airtight container for up to 2 months. Thaw overnight in the fridge before reheating.
Reheating: For the best results, reheat chicken in the oven at 350ºF until warmed through (about 10-15 minutes). Warm the pitas separately to enjoy that fresh taste.
Prep Tip: If you plan to enjoy leftovers, make sure to assemble your Sheet Pan Chicken Pitas just before serving to keep all elements fresh and flavorful!
What to Serve with Sheet Pan Chicken Pitas
Embarking on a culinary adventure with sheet pan chicken pitas opens up a world of delightful possibilities to create a full-bodied meal.
- Creamy Mashed Potatoes: These buttery potatoes provide a comforting side, balancing the savory and zesty flavors in the pitas.
- Crisp Garden Salad: A fresh garden salad with mixed greens, cherry tomatoes, and cucumbers adds a refreshing crunch that enhances the meal.
- Roasted Vegetables: A colorful medley of seasonal vegetables brings out natural sweetness while complementing the dish’s roasted goodness.
- Sweet Potato Fries: These tasty fries deliver a delicious sweet contrast, making every bite an adventure for your palate—it’s a family favorite!
- Grilled Corn on the Cob: Charred corn adds a lovely smokiness, perfect for summer dinners or any occasion. Serve with a squeeze of lime!
- Hummus Platter: A vibrant hummus platter with pita chips, olives, and veggies offers a satisfying appetizer that can be enjoyed before the main dish.
- Zesty Lemonade: Pair your meal with a glass of zesty lemonade, refreshing your taste buds and elevating the flavors of the pitas.
- Classic Tiramisu: End on a sweet note with a mini tiramisu for dessert; the coffee and cocoa contrast beautifully with the herbaceous meal you’ve created.
Delight in the versatility of your sheet pan chicken pitas, complemented by these scrumptious side dishes that will leave everyone at the table happily satisfied.
Sheet Pan Chicken Pitas Variations
Feel free to get creative with your Sheet Pan Chicken Pitas to suit your taste buds and pantry!
-
Seafood Delight: Substitute chicken with shrimp for a quick-cooking, light twist. Shrimp will soak up the flavors beautifully as they roast.
-
Plant-Based Option: Use tofu or tempeh instead of chicken for a vegan-friendly version. Both options absorb the spices and provide a satisfying texture.
-
Tortilla Swap: Try using whole wheat or corn tortillas for a different wrapping experience. The change in texture can add a fun element to your meal.
-
Slaw Upgrades: Add shredded carrots or crispy bell peppers to the slaw for a splash of color and additional crunch. These vegetables will elevate the freshness of the dish.
-
Dairy-Free Ranch: Replace yogurt with coconut yogurt or cashew cream for a creamy, dairy-free herby slaw. This swap offers a delightful twist without compromising flavor.
-
Hearty Greens: Incorporate chopped kale or spinach into the slaw for an extra boost of nutrients. The greens will add beautiful color and additional health benefits.
-
Spicy Kick: For heat lovers, mix in diced jalapeños or a dash of your favorite hot sauce into the chicken rub or herby slaw. This will leave everyone reaching for a glass of water!
By experimenting with these variations, you’ll easily find new family favorites. And if you want even more delicious recipes, check out these Chicken Enchiladas Home or the aromatic Ginger Scallion Chicken. Enjoy your culinary adventure!
Expert Tips for Sheet Pan Chicken Pitas
-
Juiciness Factor: Consider using chicken thighs instead of breasts for added juiciness and flavor. They’re less prone to drying out during the roasting process.
-
Slaw Flavor: Let the herby slaw sit for longer—up to 30 minutes—before serving. This enhances flavor absorption, making each bite even more delicious.
-
Storage Know-How: For the best freshness, store the chicken and slaw separately in airtight containers in the fridge for up to 3 days. This keeps the slaw crisp!
-
Spice It Up: Adjust the cayenne pepper according to your spice tolerance. You can always add more during serving if you like it hot!
-
Serving Flexibility: Use the slaw as a topping not just for pitas, but also on tacos or burgers. The flavors work beautifully in various contexts!

Sheet Pan Chicken Pitas Recipe FAQs
How do I select the right chicken for this recipe?
Absolutely! For the best results, choose boneless, skinless chicken breasts as they cook evenly and stay juicy. Look for breasts that are firm and pale pink without any dark spots. If you prefer a juicier option, chicken thighs are a fantastic alternative as they rarely dry out.
How should I store leftovers from the Sheet Pan Chicken Pitas?
Very simple! Store your cooked chicken and herby slaw separately in airtight containers in the refrigerator for up to 3 days. This will help keep the slaw from getting soggy and maintain the chicken’s flavor. When you’re ready to eat, you can reheat the chicken in the oven at 350ºF for about 10-15 minutes until warmed through.
Can I freeze the chicken from the Sheet Pan Chicken Pitas?
Absolutely! To freeze the cooked chicken, allow it to cool completely, then place it in an airtight container or a freezer bag, squeezing out excess air. It will keep well for up to 2 months. When you’re ready to enjoy it again, thaw overnight in the fridge and reheat in the oven for the best texture.
What should I do if my chicken isn’t cooking evenly?
If you find your chicken isn’t cooking evenly, ensure it’s spread out in a single layer on the pan for proper airflow. If some pieces are larger than others, consider slicing them into smaller chunks for quicker cooking. If they’re done earlier, you can remove them and keep the rest cooking—and always check with a meat thermometer for an internal temperature of 165ºF!
Is this recipe suitable for those with dairy allergies?
Definitely! If you’re concerned about dairy, you can easily substitute the plain yogurt in the herby slaw with a non-dairy alternative, such as coconut yogurt or a cashew-based yogurt. Both options provide a creamy base while keeping it dairy-free, ensuring that everyone can enjoy these Sheet Pan Chicken Pitas.
Sheet Pan Chicken Pitas: Quick, Flavor-Packed Weeknight Delight
Ingredients
Equipment
Method
- Preheat your oven to 425ºF, allowing it to heat for about 10 minutes.
- In a large mixing bowl, combine chicken breasts with brown sugar, smoked paprika, garlic powder, onion powder, cayenne pepper, kosher salt, and olive oil. Mix well.
- Add fresh lemon slices to the chicken mixture and toss gently. Spread chicken and lemons on a large, rimmed sheet pan in a single layer.
- Roast in the oven for 15 minutes, until chicken is golden brown.
- Remove from the oven, toss the chicken, and return for an additional 4 to 7 minutes, cooking until internal temperature reaches 165ºF.
- In a separate bowl, whisk together yogurt, chopped herbs, lemon juice, and a pinch of salt. Fold in shredded cabbage.
- Warm pitas in a dry skillet for 1-2 minutes per side or microwave for 20-30 seconds.
- Assemble pitas by adding herby slaw, roasted chicken, and avocado before serving.
- Serve warm and enjoy!
Leave a Reply