
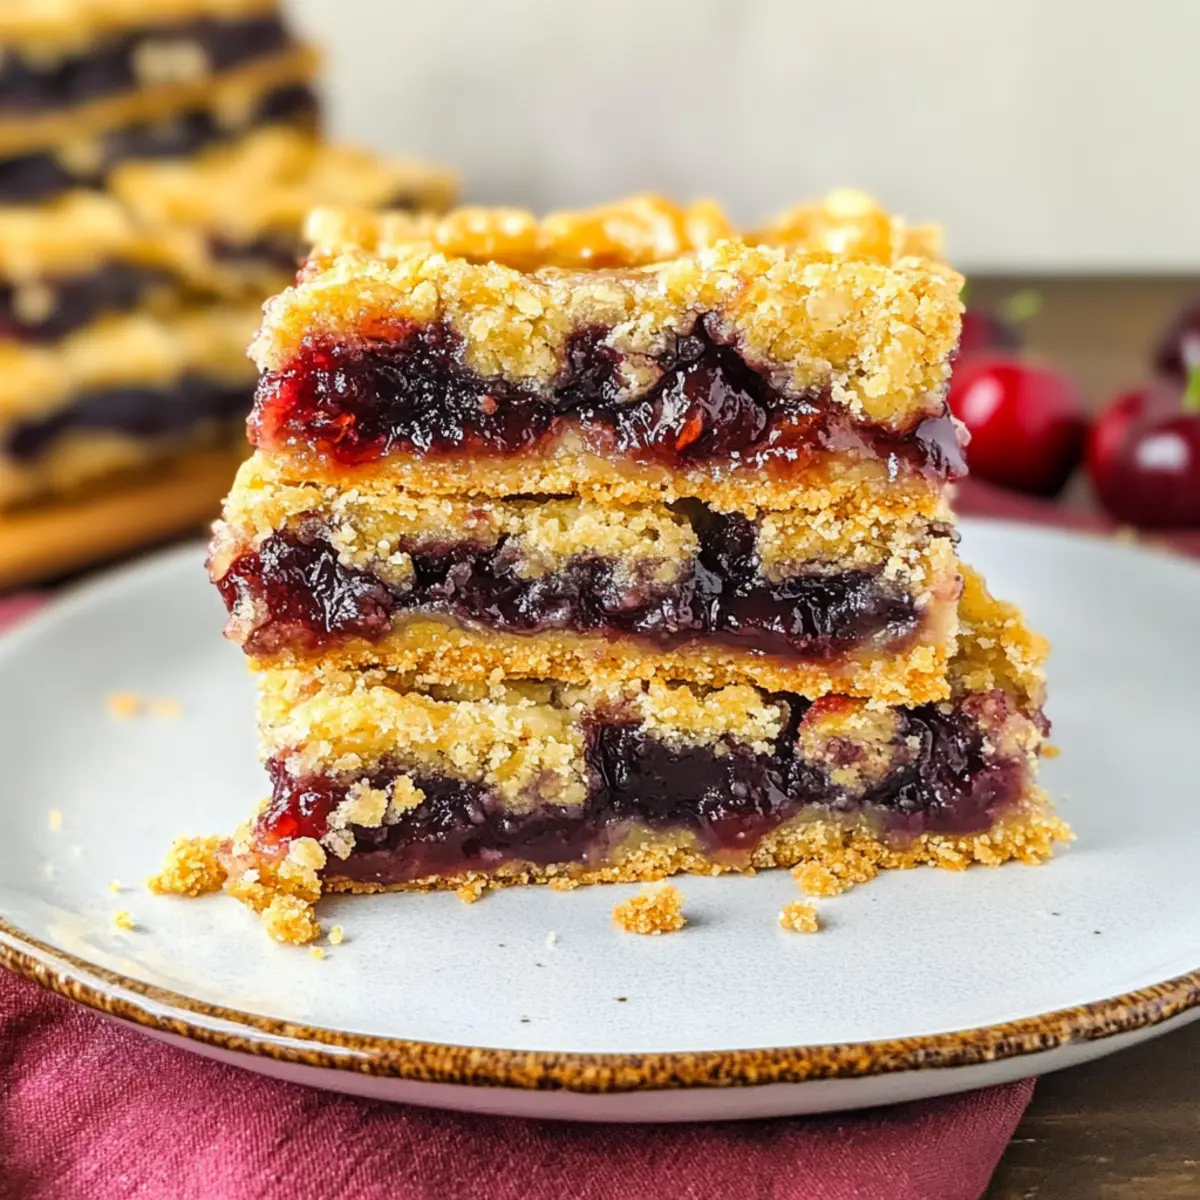
The sweet aroma of cherries wafting through the air can transport me back to my childhood summers, where fresh fruit reigned supreme on dessert tables. If you’ve ever craved the comforting flavors of homemade cherry pie but wanted a simpler, quicker option, then these Easy Cherry Pie Bars are just what you need. With a buttery crumb base and a luscious cherry filling, this recipe takes only 35 minutes from prep to plate—perfect for those spontaneous gatherings or weeknight treats. Plus, these bars are not just quick to make; they’re also a crowd-pleaser, making them ideal for occasions where you want to share a little joy. Ready to dive into this delightful dessert? Let’s get baking!
Why Make Cherry Pie Bars?
Simplicity at Its Best: These Easy Cherry Pie Bars require minimal effort, making them perfect for home bakers of all skill levels.
Fresh Ingredients: Using fresh cherries intensifies the flavor, bringing a taste of summer straight to your table.
Quick Bake Time: Whip up this delightful dessert in just 35 minutes, perfect for satisfying sweet cravings on short notice.
Crowd-Pleaser: Whether for a party or a family gathering, these bars are sure to impress everyone—just like my Classic Beef Pot Pie!
Versatile Options: Love experimenting? Try swapping cherries for blueberries or peaches for a fun twist.
Memorable Flavor: The buttery crumb and juicy filling create a heavenly balance that will leave everyone asking for seconds.
Cherry Pie Bars Ingredients
For the Crust
- Unsalted Butter – Provides richness; remember to melt it for the best texture.
- Sugar – Sweetens the crumb base and balances the filling.
- Salt – Enhances all the flavors in the crust.
- Baking Powder – Helps create a light, fluffy texture in the bars.
- Baking Soda – Works with baking powder to prevent density.
- All-Purpose Flour – The backbone of your crust, giving it structure.
For the Cherry Filling
- Fresh Cherries – Key for a bright, natural flavor; you can substitute frozen or canned if needed.
- Lemon Juice – Adds a zesty brightness to the filling, enhancing the cherry flavor.
- Cornstarch – Thickens the filling, ensuring it holds together beautifully when baked.
- Sugar – Sweetens the cherry mixture, harmonizing with the pie crust for a perfect balance.
For Serving
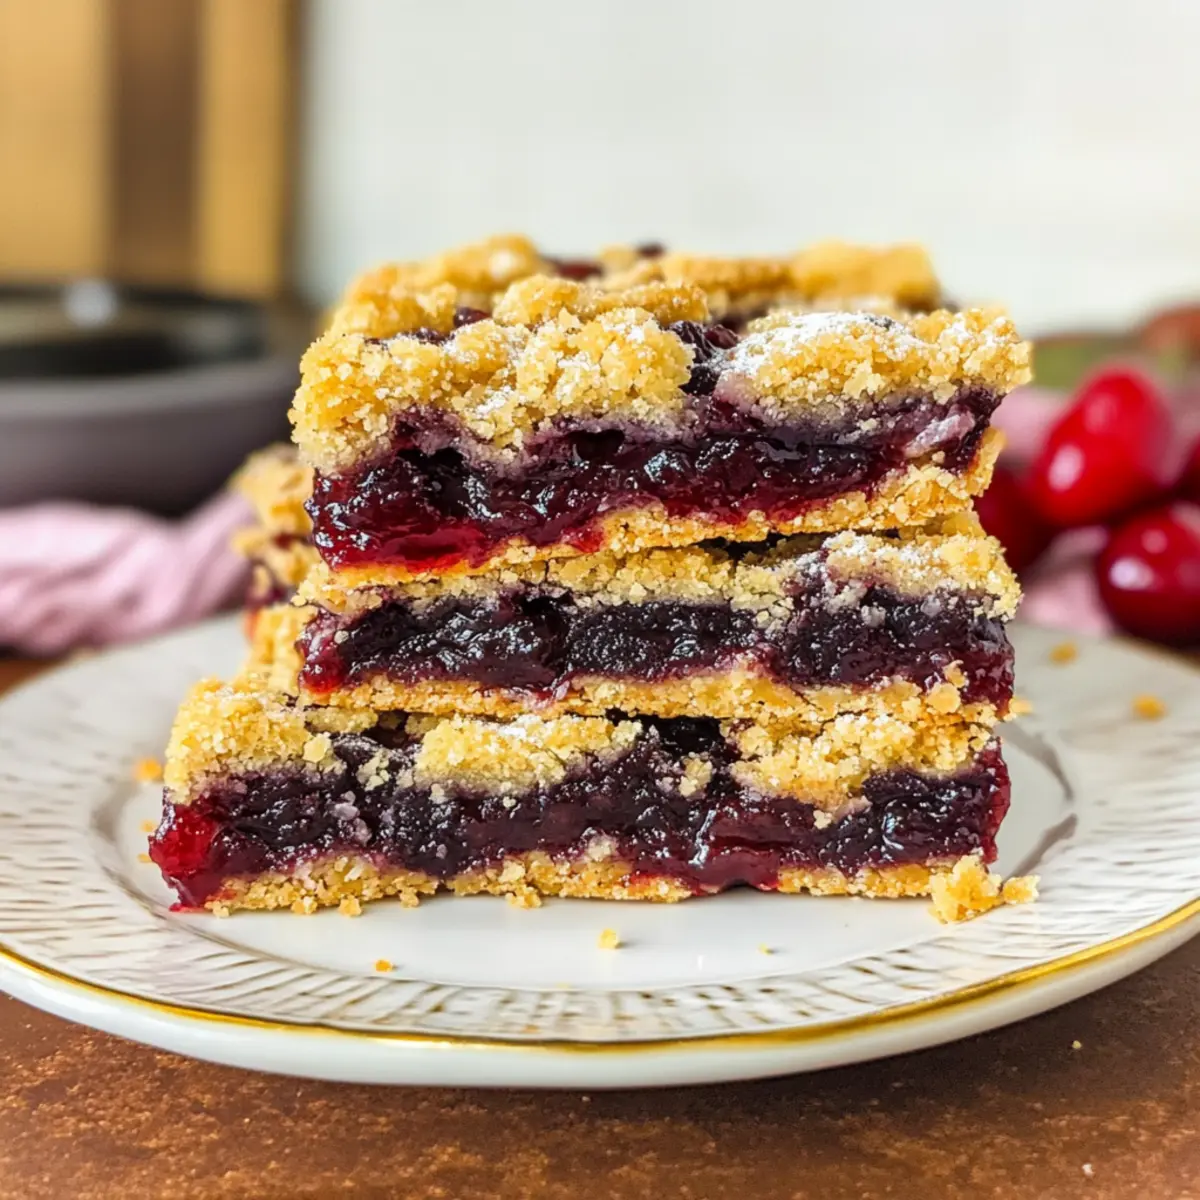
- Extra Sugar – Sprinkle on top after baking for a delightful, sweet finish.
Step‑by‑Step Instructions for Cherry Pie Bars
Step 1: Preheat the Oven
Start by preheating your oven to 375°F (190°C). While the oven warms up, line an 8×8-inch baking dish with parchment paper, ensuring it covers the bottom and sides for easy removal later. This step is crucial, as a properly prepared pan will prevent sticking and make your Cherry Pie Bars easier to slice once baked.
Step 2: Prepare the Cherry Filling
In a mixing bowl, combine your pitted and sliced fresh cherries with a squeeze of lemon juice and a sprinkle of cornstarch. Gently toss the mixture until the cherries are completely coated, which should take about 2 minutes. The lemon juice will brighten the flavor, while the cornstarch helps thicken the filling as it bakes, creating a luscious center for your Cherry Pie Bars.
Step 3: Make the Crust Mixture
In a separate large bowl, mix together the melted unsalted butter and sugar until well combined. Next, add in the salt, baking powder, baking soda, and all-purpose flour. Stir until the mixture becomes crumbly and your Cherry Pie Bars crust is formed. Reserve about three-quarters of this crumb mixture for the topping, setting it aside in a small bowl while you prepare the base.
Step 4: Form the Crust
Press the remaining crust mixture firmly into the bottom of the lined baking dish. Aim for an even layer, about 1/4 inch thick, which will become the sturdy foundation for your Cherry Pie Bars. Bake this crust in the preheated oven for 10 minutes, or until it starts to set and just begins to turn golden.
Step 5: Add the Cherry Filling
Once the crust is done, remove it from the oven and spread the cherry mixture evenly over the top of the warm crust. Make sure to distribute the cherries so that each bite of your Cherry Pie Bars has a bit of that delicious filling. This step ensures a perfect balance of crust and filling in every slice.
Step 6: Top with Crumb Mixture
Sprinkle the reserved crumb mixture evenly over the cherry filling. This layer will not only provide a contrasting texture but will also help create a delightful, golden topping as it bakes. It should look somewhat like streusel, providing a beautiful finish to your Cherry Pie Bars.
Step 7: Bake and Cool
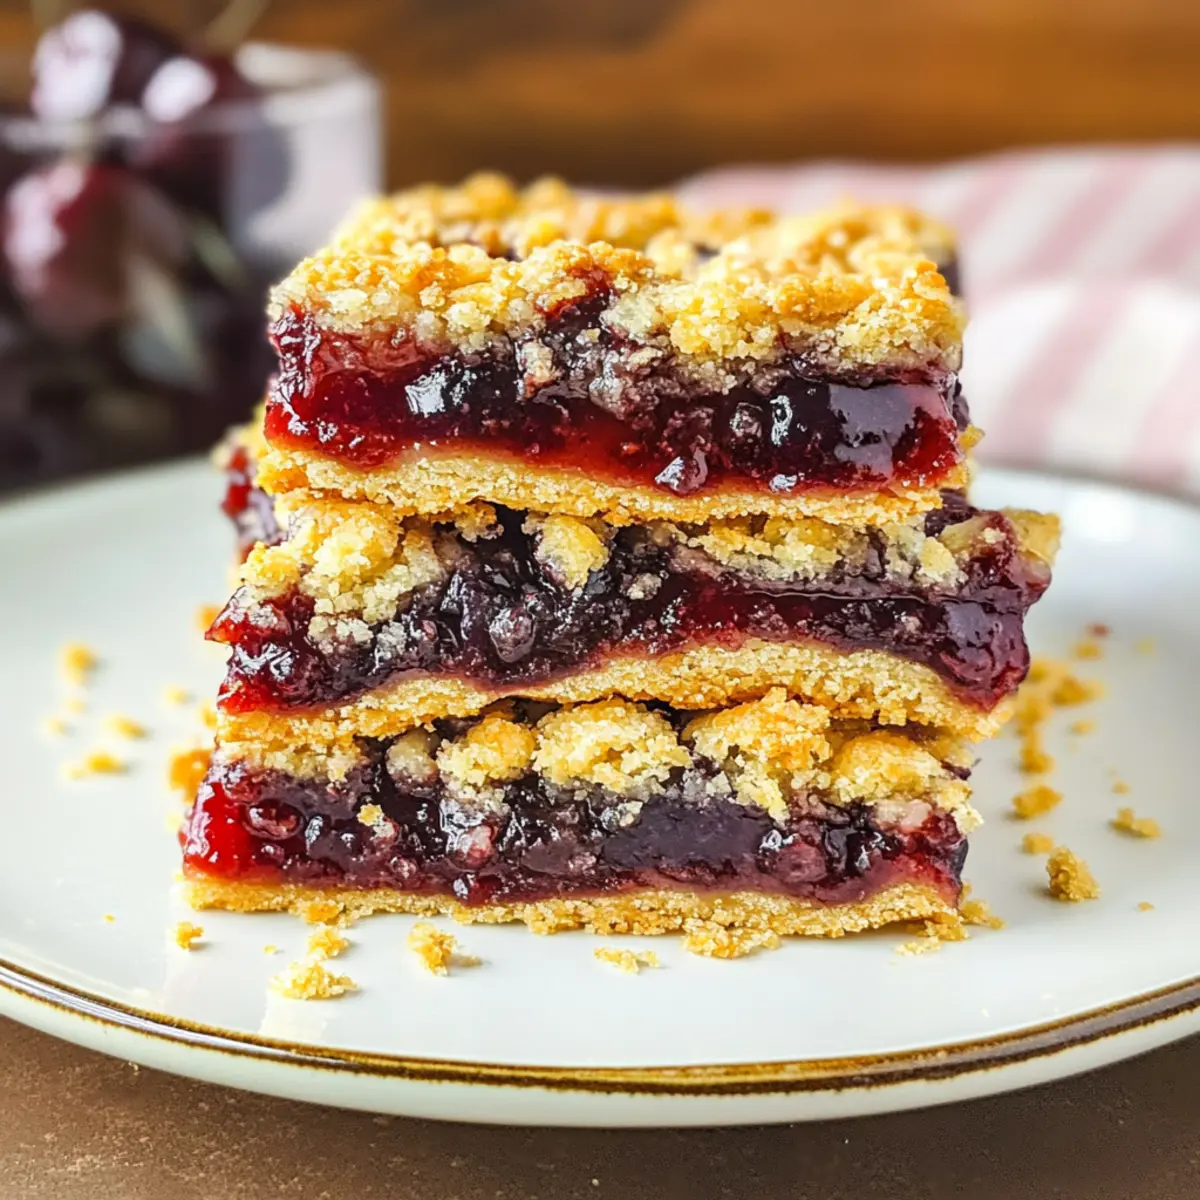
Return the dish to the oven and bake for an additional 25 minutes or until the top is golden brown and the filling is bubbly. Once baked, remove the dish from the oven and allow your Cherry Pie Bars to cool in the pan. This cooling period helps the bars firm up, making them easier to slice without losing their shape.
Step 8: Finish and Serve
After your Cherry Pie Bars are cooled down, sprinkle the top with a little extra sugar for that sweet finish. Allow them to set for 10 minutes before slicing into squares. These bars can be served warm or chilled, making them a versatile dessert that’s perfect for any occasion!
How to Store and Freeze Cherry Pie Bars
Fridge: Store any leftover Cherry Pie Bars in an airtight container for up to 3 days. This will keep them fresh while retaining their luscious cherry filling and crumbly texture.
Freezer: If you want to enjoy these bars later, wrap them tightly in plastic wrap and foil before placing them in a freezer-safe container. They can be frozen for up to 2 months.
Thawing: To enjoy frozen Cherry Pie Bars, simply transfer them to the fridge overnight or allow them to thaw at room temperature for about 2 hours. This ensures they regain their delightful texture.
Reheating: For a warm treat, reheat the bars in the oven at 350°F (175°C) for about 10–15 minutes, or until warmed through. This will revive their buttery crumb and bring out the cherry flavor beautifully.
Cherry Pie Bars Variations & Substitutions
Feel free to get creative with these adaptations to make your cherry pie bars truly your own!
-
Berry Bliss: Swap out cherries for fresh blueberries or raspberries for a tangy twist. Each berry brings its own unique flavor, ensuring a delightful surprise in every bite.
-
Peach Perfection: Replace cherries with ripe peaches, adding a sweet, summery brightness. These bars will evoke a warm day at the orchard.
-
Nutty Crunch: Incorporate chopped pecans or walnuts into the crumb mixture for added crunch and a nutty flavor that pairs beautifully with the sweet filling.
-
Spiced Up: Add a dash of cinnamon or nutmeg to the crumb mixture for a comforting warmth that elevates the dessert to cozy status.
-
Almond Twist: A splash of almond extract in the cherry filling creates a luxurious depth of flavor, reminiscent of classic cherry desserts.
-
Vegan Delight: Use coconut oil in place of butter and a flax egg (1 tablespoon flaxseed meal + 2.5 tablespoons water) to create a vegan version without compromising on taste.
-
Gluten-Free Option: Substitute all-purpose flour with a gluten-free flour blend to make these bars friendly for those with gluten sensitivities.
-
Zesty Lemon: Mix in the zest of a lemon or orange into your cherry filling for a refreshing citrus punch that brightens every bite.
For even more delicious ideas, check out my Veggie Pot Pie for alternatives that can inspire your next baking adventure!
Expert Tips for Cherry Pie Bars
-
Choose the Right Cherries: Fresh cherries yield the best flavor, but if unavailable, ensure to drain canned ones thoroughly to avoid excess moisture.
-
Optimal Crust Texture: Avoid overmixing the crust mixture; it should be crumbly yet hold together. Overmixing can lead to a dense texture in your Cherry Pie Bars.
-
Cool for Best Slicing: Allow the bars to cool completely in the pan before slicing. This helps them maintain their shape and makes for cleaner cuts.
-
Customize Your Filling: For a fun variation, try adding a teaspoon of almond extract to the cherry filling for a richer flavor that pairs beautifully with the cherries.
-
Store Properly: Keep any leftover Cherry Pie Bars in an airtight container in the fridge for up to three days. Bring to room temperature before serving for the best taste.
What to Serve with Easy Cherry Pie Bars?
The delightful aroma of cherries suggests a cozy dessert experience, and pairing these bars can elevate your meal even further.
-
Vanilla Ice Cream: A scoop of creamy vanilla perfectly complements the tart cherries, adding a delightful contrast to the buttery crust. Drizzled with a bit of warm cherry sauce, it becomes a decadent treat.
-
Whipped Cream: Light and airy, freshly whipped cream adds a fluffy texture that balances the richness of the bars. Sprinkle a bit of cinnamon for extra warmth; it enhances both flavor and presentation.
-
Coffee: A steaming cup of coffee pairs beautifully with cherry pie bars, its rich flavor cutting through the sweetness. Consider a dark roast to really elevate the experience, making it perfect for brunch gatherings.
-
Tea: Serve with a gentle chamomile or refreshing mint tea. The herbal notes provide a calming contrast, inviting you to savor each bite slowly. It’s a lovely way to unwind after a long day.
-
Fruit Salad: Fresh, colorful fruit salad introduces a delightful crunch and a touch of acidity. This light option showcases seasonal fruits that brighten up your dessert table while keeping things refreshing.
-
Cheese Plate: A selection of mild cheeses can balance the sweetness with their savory taste. Think creamy brie or tangy goat cheese; it adds an unexpected yet enjoyable twist to your dessert experience.
-
Lemonade: For a refreshing drink, a glass of sweet-tart lemonade elevates the flavors of the cherry pie bars. It’s especially refreshing during warm months and matches the vibrant fruitiness of the dessert.
-
Chocolate Drizzle: Enhance your cherry pie bars with a drizzle of melted dark chocolate. The rich chocolate adds a luxurious finish, turning each slice into indulgent bliss.
-
Almond Slices: Topped with toasted almond slices, these bars not only gain a delightful crunch but also a nutty aroma that enhances their overall flavor. It’s an elegant garnish that surprises and delights your guests.
Make Ahead Options
These Cherry Pie Bars are a fantastic option for meal prep, allowing you to enjoy their deliciousness with minimal stress! You can prepare the cherry filling and the crumb mixture up to 24 hours in advance. Simply combine the pitted and sliced cherries with lemon juice and cornstarch, then store it in an airtight container in the refrigerator. For the crumb mixture, mix together the melted butter, sugar, flour, and leavening agents, and keep it in a separate container. When you’re ready to enjoy your bars, press the crust into the baking dish, assemble with the cherry filling and topping, and bake as directed. This way, you’ll have freshly baked Cherry Pie Bars that taste just as delightful with every bite!
Cherry Pie Bars Recipe FAQs
How do I select the best cherries for my Cherry Pie Bars?
Absolutely! When choosing fresh cherries, look for those that are firm, plump, and vibrant in color. Avoid cherries with dark spots all over, as they may be overripe. If fresh cherries aren’t available, frozen cherries work well too—just remember to thaw and drain them before using.
How should I store leftover Cherry Pie Bars?
Very! To store any leftovers, place them in an airtight container in the refrigerator for up to 3 days. This helps maintain their delicious flavor and texture. For the best taste, let them come to room temperature before serving.
Can I freeze Cherry Pie Bars, and if so, how?
Certainly! To freeze, wrap each bar tightly in plastic wrap, then place them in a freezer-safe container. They can be frozen for up to 2 months. When you’re ready to enjoy them, just transfer them to the fridge overnight to thaw or leave them at room temperature for about 2 hours.
What should I do if my crust turns out too dense?
If your crust is dense, it might be due to overmixing. When combining the ingredients, mix just until they form a crumbly texture. If you overmix, the gluten in the flour can develop too much, leading to a heavier texture instead of that light and crumbly finish we’re aiming for.
Are Cherry Pie Bars safe for pets, or do they contain allergens?
Great question! Generally, cherries are safe in small amounts for dogs, but you should avoid the pits. As for allergens, this recipe contains butter and flour, which may not be suitable for those with dairy or gluten sensitivities. Always be sure to check for any allergies before sharing these with guests!

Delicious Cherry Pie Bars Ready in Just 35 Minutes
Ingredients
Equipment
Method
- Preheat your oven to 375°F (190°C) and line an 8x8-inch baking dish with parchment paper.
- Combine pitted and sliced fresh cherries with lemon juice and cornstarch in a bowl and toss until coated.
- In a large bowl, mix melted butter and sugar, then add salt, baking powder, baking soda, and flour until crumbly.
- Press the crust mixture into the bottom of the baking dish evenly, about 1/4 inch thick, and bake for 10 minutes.
- Spread the cherry mixture evenly over the baked crust.
- Sprinkle the reserved crumb mixture over the cherry filling.
- Bake for an additional 25 minutes until golden brown and bubbly.
- Allow to cool for 10 minutes, then sprinkle with extra sugar and slice into squares.
Leave a Reply