
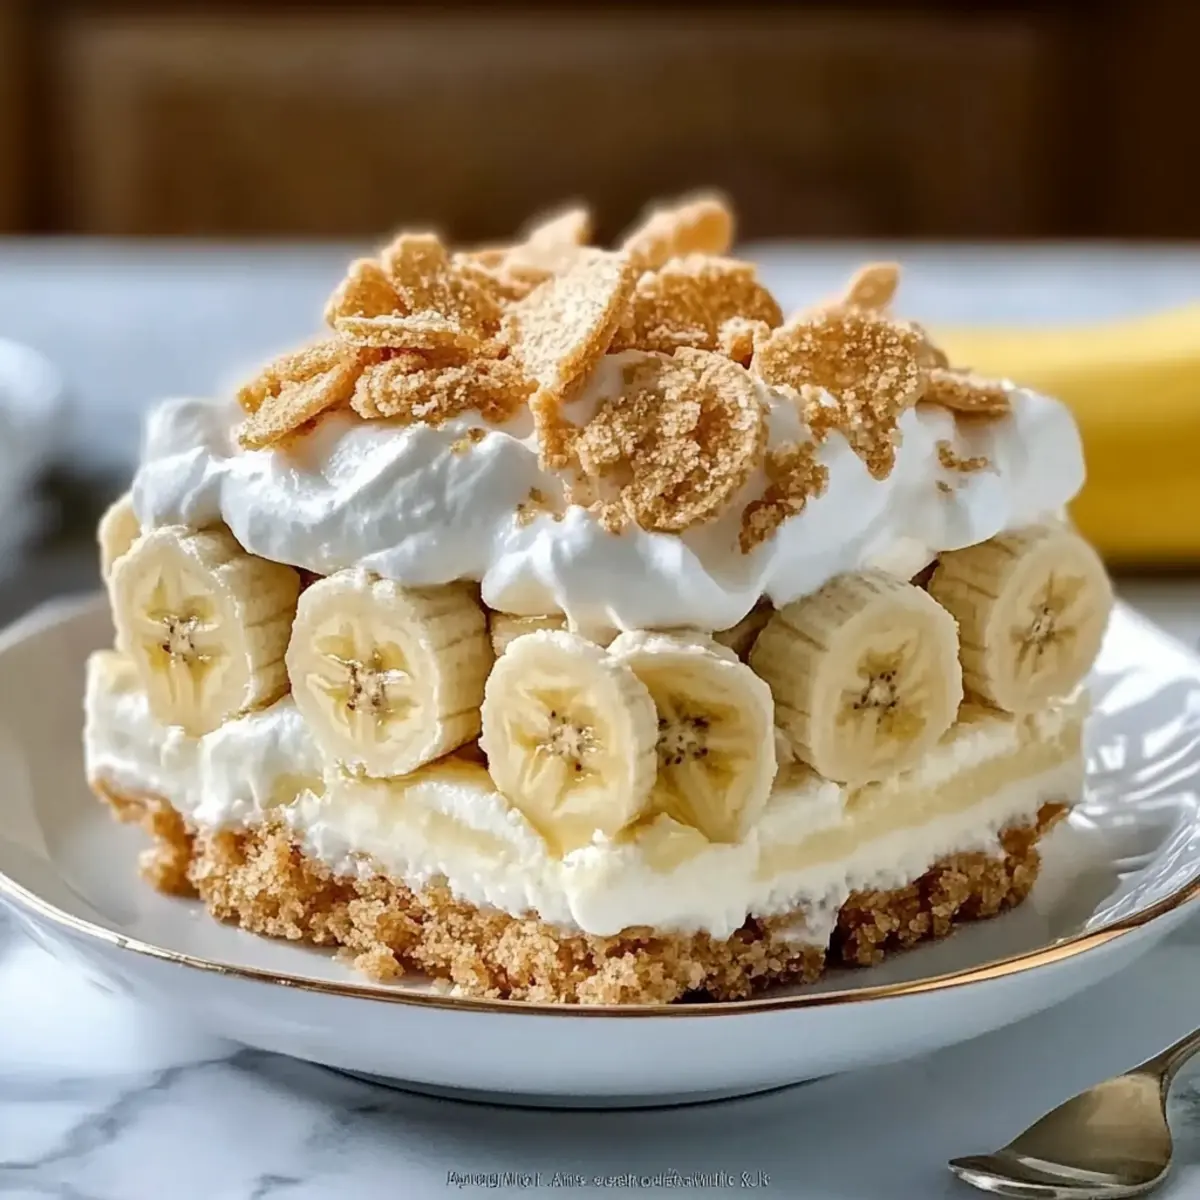
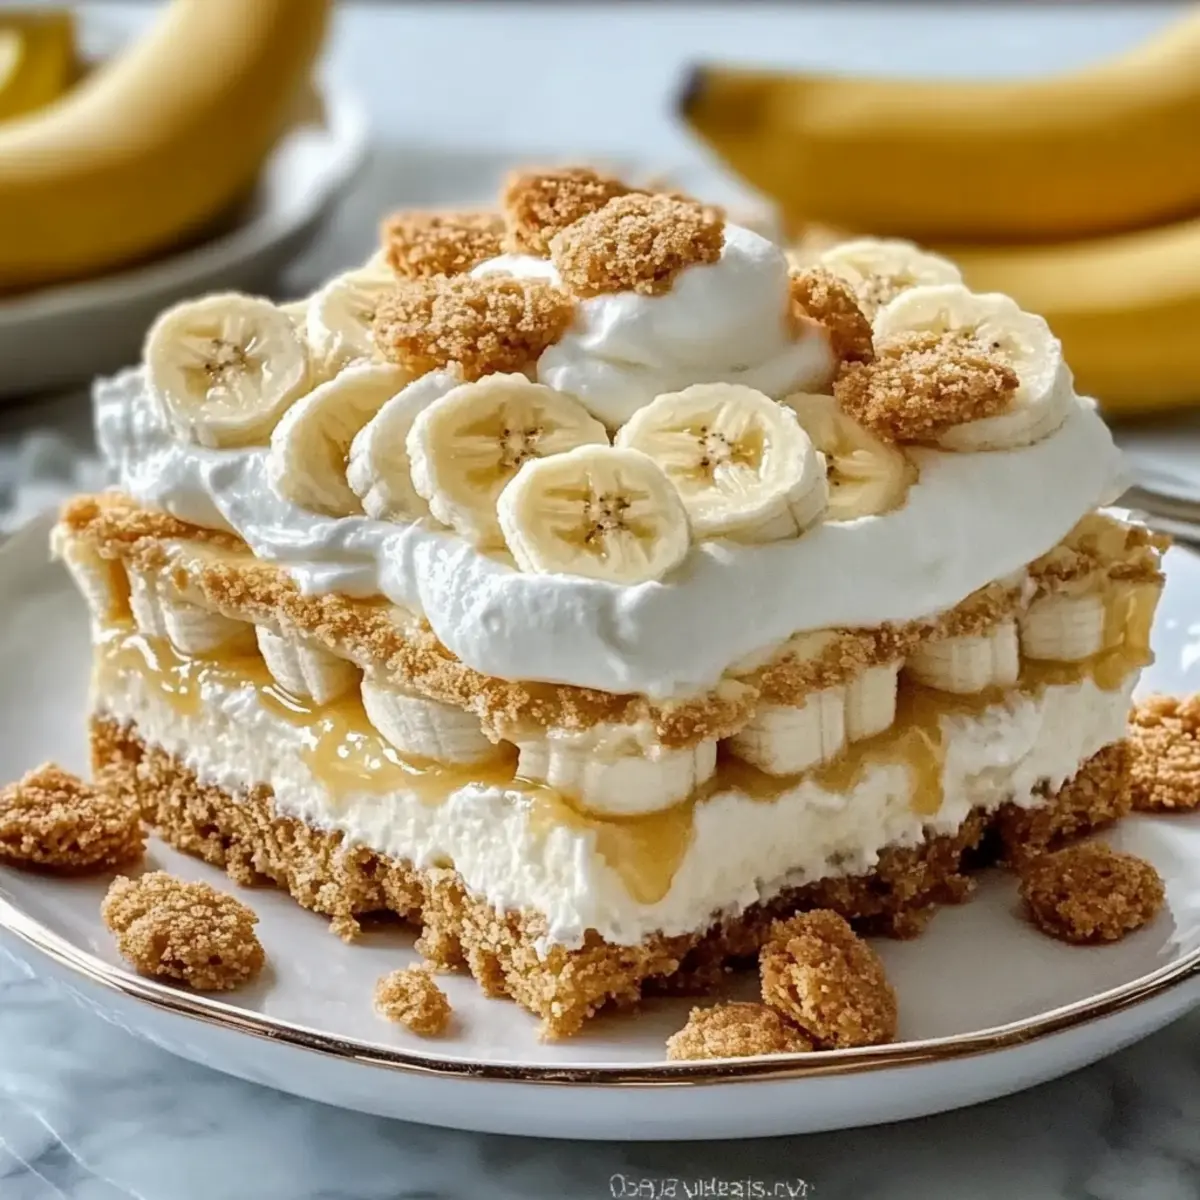
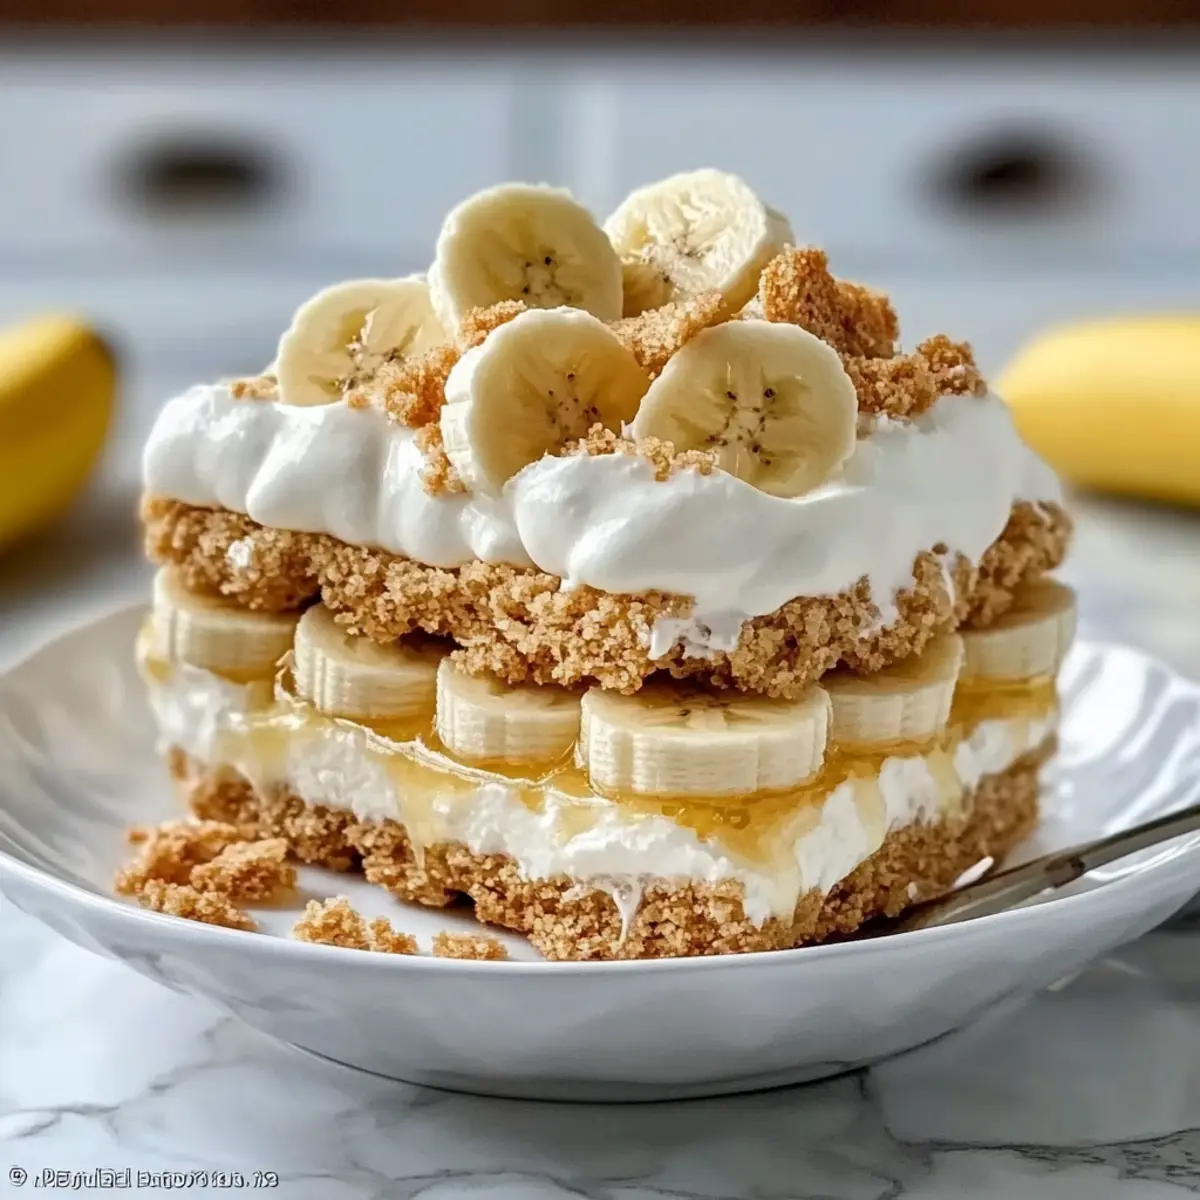
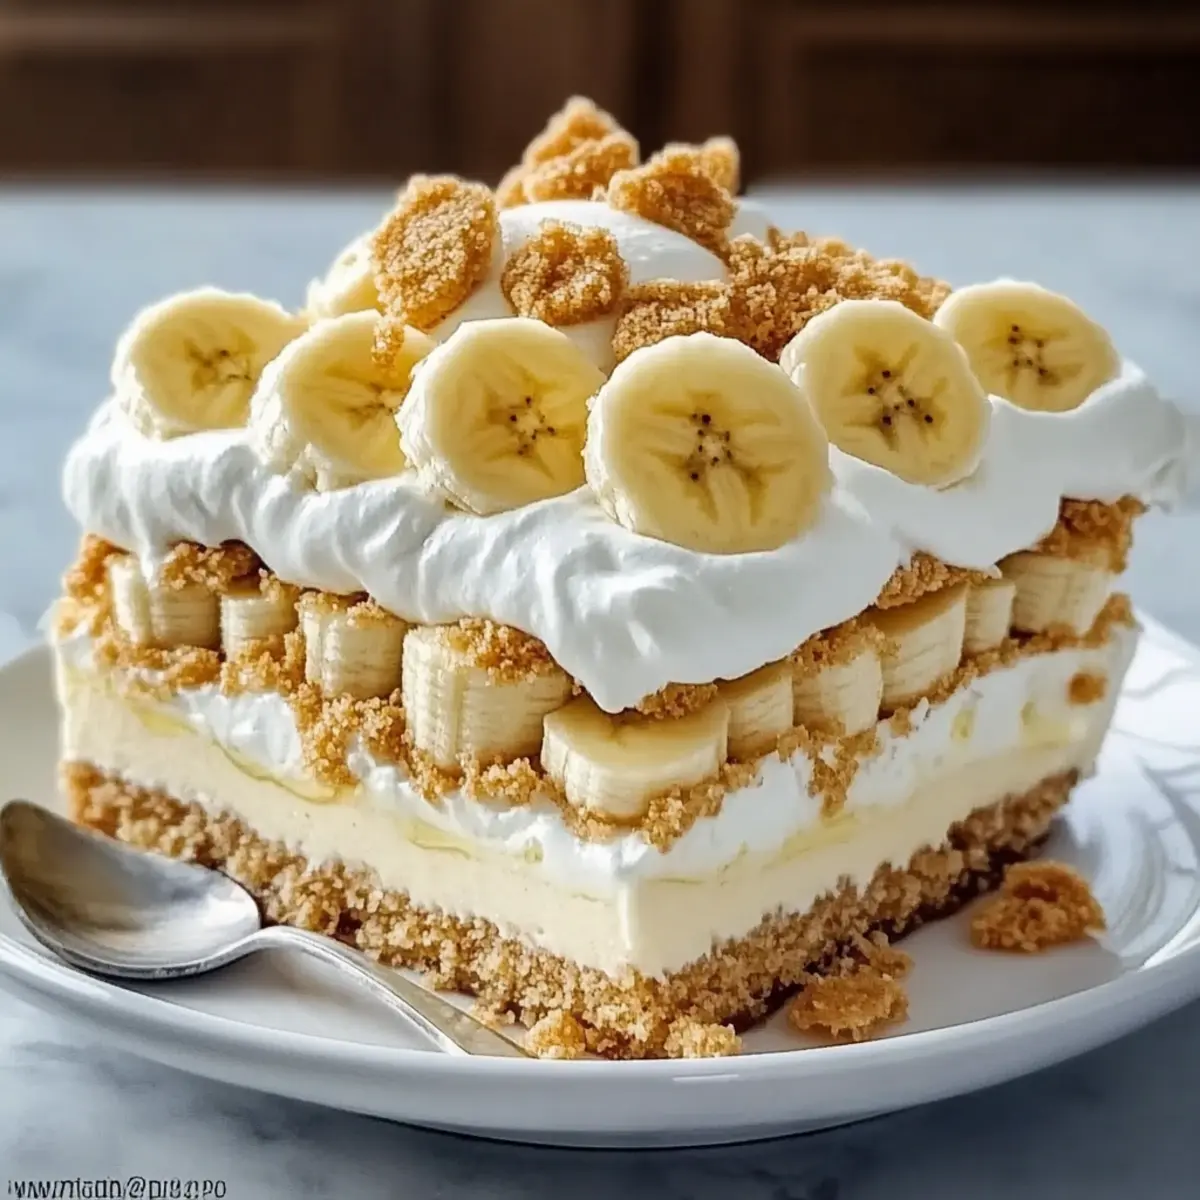
There’s something magical about a dessert that can take you straight back to childhood, isn’t there? Enter the Classic No-Bake Banana Pudding—a dish that never fails to evoke warm memories and bring smiles at any gathering. This creamy delight combines silky layers of pudding, fluffy whipped topping, and the satisfying crunch of vanilla wafers, creating a dessert that’s not only a crowd-pleaser but also incredibly quick to prepare. Perfect for those busy days when you crave comfort but don’t want to spend hours in the kitchen, this pudding is your go-to solution. Trust me, after one taste, you’ll be wondering how something so simple can be so delicious! Ready to layer on the bliss? Let’s dive into this irresistible recipe together!
Why Is This Banana Pudding Irresistible?
Nostalgic Comfort: This Classic No-Bake Banana Pudding brings back fond memories, serving as a delicious reminder of childhood pleasures.
Effortless Creation: No-baking means you can whip it up quickly, making it perfect for last-minute gatherings or simply satisfying your sweet tooth without fuss.
Textural Delight: The layers of creamy pudding, fluffy whipped topping, and crunchy vanilla wafers create a delightful contrast that keeps everyone coming back for more.
Versatile and Customizable: Feel free to add a sprinkle of cinnamon or swap in your favorite cookies for a personal touch!
Crowd-Pleasing Appeal: This dessert is a guaranteed hit at any event, appealing to kids and adults alike—who can resist that creamy goodness?
Elevate your dessert experience with this recipe, and if you’re in the mood for more banana treats, check out our delightful Banana Bread Moist or the indulgent Chocolate Chip Banana options!
Banana Pudding Ingredients
-
For the Pudding Base
• Instant Vanilla Pudding Mix – Provides the creamy base; you can substitute with homemade pudding for a richer flavor.
• Cold Whole Milk – Helps thicken the pudding; low-fat or non-dairy options can be used, but may alter thickness.
• Sweetened Condensed Milk – Adds sweetness and creaminess; for a lighter version, try unsweetened almond milk. -
For the Whipped Layer
• Cool Whip or Whipped Topping – Creates a light, airy texture; homemade whipped cream is a great substitute, though it may soften faster. -
For the Assembly
• Vanilla Wafers – Provides crunch and structure; feel free to use Nilla Wafers or shortbread as alternatives.
• Ripe Bananas – Infuses natural sweetness; overripe bananas are preferred for added flavor, and caramelized bananas can deepen the taste.
This classic no-bake banana pudding is bound to become a cherished family recipe—just gather these ingredients and let the fun begin!
Step‑by‑Step Instructions for Banana Pudding: Creamy and No-Bake
Step 1: Prep Pudding Mixture
In a large mixing bowl, whisk together 1 pack of instant vanilla pudding mix and 2 cups of cold whole milk vigorously for about 2 minutes. You’ll know it’s ready when the mixture thickens to a smooth consistency that can hold its shape. Make sure to scrape the bottom and sides to combine thoroughly.
Step 2: Combine with Condensed Milk
Gently fold in 1 cup of sweetened condensed milk into the pudding mixture using a spatula. This adds a luxurious creaminess and sweetness to your Banana Pudding. Mix until it’s completely smooth and glossy, ensuring there are no lumps left; the mixture should feel thick yet velvety.
Step 3: Incorporate Whipped Topping
Now, it’s time to add some airiness! Carefully fold 1 tub of Cool Whip or whipped topping into the pudding mixture using a gentle hand. This step is crucial—aim to retain the light, fluffy texture. Continue folding until both mixtures are well combined, achieving a soft and creamy pudding base for your banana pudding.
Step 4: Layer the Dish
Grab a 9×13 inch glass baking dish as it allows you to see those beautiful layers! Start by placing a layer of vanilla wafers at the bottom, gently pressing them down to form a solid base. You want to cover the bottom completely—this will provide a delightful crunch in your Banana Pudding.
Step 5: Add Bananas
Next, thinly slice 2-3 ripe bananas and evenly distribute them over the layer of vanilla wafers. The bananas should be spread out to ensure that every bite gets a piece. Their sweet, fruity goodness pairs perfectly with the creamy layers, creating a delicious contrast in textures.
Step 6: Layer Pudding
Time to bring it all together! Pour one-third of your creamy pudding mixture over the sliced bananas, using a spatula to smooth it out evenly across the top. This layer is where the magic happens—watch as it envelops the bananas, making for a wonderfully decadent layer in your Banana Pudding.
Step 7: Repeat Layers
Continue the layering process by repeating the vanilla wafers, banana slices, and pudding mixture until all ingredients are used up. For the final layer, ensure you finish with the pudding on top. Smooth it out nicely for a neat presentation. This creates a beautiful height and consistency for your dessert.
Step 8: Chill
To achieve the perfect texture, cover your banana pudding tightly with plastic wrap and refrigerate it for at least 4 hours—overnight is best. This chilling time allows the vanilla wafers to absorb moisture while the flavors meld together beautifully, ensuring your Banana Pudding is both delicious and satisfying.
Storage Tips for Banana Pudding
Fridge: Keep your banana pudding tightly covered in the refrigerator for up to 3 days to maintain its freshness and creamy texture.
Freezer: While banana pudding is best enjoyed fresh, you can freeze it for up to 1 month. However, the texture may change upon thawing.
Serving: When serving leftovers, give the pudding a gentle stir to redistribute the layers, and add fresh banana slices on top for a pop of freshness.
Make-Ahead: You can prepare your banana pudding up to 24 hours in advance. Just remember to cover it well to prevent any absorption of fridge odors!
Make Ahead Options
These Classic No-Bake Banana Pudding cups are perfect for meal prep lovers! You can assemble the entire dessert up to 24 hours in advance, just be sure to keep it tightly covered in the refrigerator to maintain that creamy texture. Start by preparing the pudding mixture and layering it with the vanilla wafers and sliced bananas as instructed. The key to preserving quality is to add the bananas just before serving if you’re planning to store them for more than a day; this prevents browning and keeps them fresh. When you’re ready to serve, simply pull it from the fridge, and you’ll have a delightful dessert that tastes just as delicious as if you made it the same day!
What to Serve with Classic No-Bake Banana Pudding
Looking to create the perfect meal experience beyond this creamy dessert? Let’s explore some delicious pairings that will elevate your serving!
-
Creamy Mashed Potatoes: Their rich, buttery flavor contrasts beautifully with the lightness of the pudding. It’s comfort food at its finest!
-
Grilled Chicken Salad: Fresh greens and protein balance out the sweetness of the pudding, creating a wholesome meal that everyone can enjoy.
-
Roasted Vegetables: The natural sweetness of roasted carrots or sweet potatoes harmonizes well with the flavors in banana pudding, enhancing the overall taste experience.
-
Lemonade or Iced Tea: A refreshing drink helps cleanse the palate between bites, creating a delightful balance with the rich, creamy dessert.
-
Chocolate Chip Cookies: The classic duo of cookies and milk complements the pudding’s texture, and the chocolate adds a delightful contrast to the banana flavor.
-
Fruit Salad: A medley of fresh fruits provides a refreshing crunch and additional sweetness, making it a perfect side dish to accompany the pudding.
-
Ice Cream: A scoop of vanilla or caramel ice cream on the side offers a delightful extra indulgence that pairs perfectly with the soft banana layers.
-
Chocolate Sauce Drizzle: A touch of chocolate sauce poured over the pudding gives an added twist that many will appreciate.
Expert Tips for Banana Pudding
• Mixing Technique: Avoid over-mixing when combining the whipped topping. This keeps your banana pudding light and fluffy, ensuring that dreamy texture.
• Layer Visibility: Use a glass dish for layering. It not only looks beautiful but allows you to see those tempting layers of vanilla wafers, bananas, and creamy pudding.
• Chill Time Importance: Stick to a minimum of 4 hours chilling time. This is crucial for the vanilla wafers to soften perfectly, creating the ultimate banana pudding experience.
• Banana Selection: Choose overripe bananas for the best flavor. Their sweetness enhances the entire dessert and complements the pudding’s creaminess beautifully.
• Creative Variations: Don’t hesitate to experiment! Try adding a sprinkle of cinnamon on the final layer for extra warmth, giving your banana pudding a unique twist.
Banana Pudding: Creative Variations Await
Feel free to personalize your no-bake banana pudding with these delightful twists that will surprise and please every palate!
-
Rich & Creamy: Swap Cool Whip for heavy cream to make the pudding even more luxurious and decadent.
-
Spiced Delight: Dust the top layer with cinnamon or nutmeg before serving for added warmth and flavor. A sprinkle can transform the entire dish!
-
Chocolate Touch: Add a layer of chocolate pudding between the bananas for a deliciously rich contrast. If you’re a chocolate lover, this is a must-try.
-
Banana Flambé: For a touch of flair, caramelize banana slices in a skillet with brown sugar before adding them to the layers. The warm, melted goodness enhances sweetness!
-
Nutty Crunch: Fold in crushed walnuts or pecans into the pudding mixture for a delightful texture and nutty flavor that lives up to its comfort-food status.
-
Vegan Twist: Use non-dairy milk and whipped coconut cream instead of traditional ingredients to create a vegan version without sacrificing flavor.
-
Flavor Fusion: Incorporate peanut butter into the pudding for a nutty, satisfying twist that pairs wonderfully with the bananas.
If you’re enjoying this pudding magic, consider exploring our delicious Cinnamon Swirl Banana options for an indulgent treat or try out our rich Chicken Macaroni Cheese soup for a wholesome family meal!
Classic No-Bake Banana Pudding Recipe FAQs
What kind of bananas should I use for banana pudding?
Absolutely! For the best flavor and sweetness, opt for overripe bananas. Their naturally sweet taste enhances the creaminess of the pudding layers. Look for bananas with some brown spots, indicating full ripeness.
How should I store leftover banana pudding?
Keep your banana pudding tightly covered in the refrigerator for up to 3 days. It’s important to prevent it from absorbing any odors. If you’re worried about freshness, you can also stir the layers gently before serving to rejuvenate them!
Can I freeze banana pudding?
While banana pudding is best enjoyed fresh, you can freeze it for up to 1 month. However, be mindful that the texture may change upon thawing. To freeze, make sure it’s in an airtight container, and when ready to eat, let it thaw overnight in the fridge.
What should I do if my pudding mixture is too thin?
Very good question! If your pudding mixture seems too thin, it’s possible you didn’t whisk it long enough. Make sure to whisk it for a full 2 minutes or until it thickens to a creamy consistency. If that fails, you can gradually add more pudding mix in 1 tbsp increments while whisking until you achieve your desired thickness.
Is there a way to make this recipe dairy-free?
Yes! You can easily make this banana pudding dairy-free by using plant-based milk, such as almond or coconut milk, in place of whole milk and opting for coconut whipped cream instead of Cool Whip. Just be aware that this may slightly alter the taste and texture.
What’s the best way to serve banana pudding?
I often recommend serving banana pudding in individual cups for a fun and elegant touch! Layer it beautifully and top with additional banana slices and a dollop of whipped cream for that extra flair. Enjoy!
Creamy No-Bake Banana Pudding That Brings Back Memories
Ingredients
Equipment
Method
- In a large mixing bowl, whisk together 1 pack of instant vanilla pudding mix and 2 cups of cold whole milk for about 2 minutes until it thickens to a smooth consistency.
- Gently fold 1 cup of sweetened condensed milk into the pudding mixture with a spatula until smooth and glossy.
- Fold in 1 tub of Cool Whip or whipped topping into the pudding mixture until well combined, keeping a light texture.
- Layer vanilla wafers at the bottom of a 9x13 inch glass baking dish.
- Thinly slice 2-3 ripe bananas and distribute them over the wafers.
- Pour one-third of the pudding mixture over the sliced bananas and smooth it out.
- Repeat the layering process until all ingredients are used, finishing with pudding on top.
- Cover tightly with plastic wrap and refrigerate for at least 4 hours, ideally overnight.
Leave a Reply