
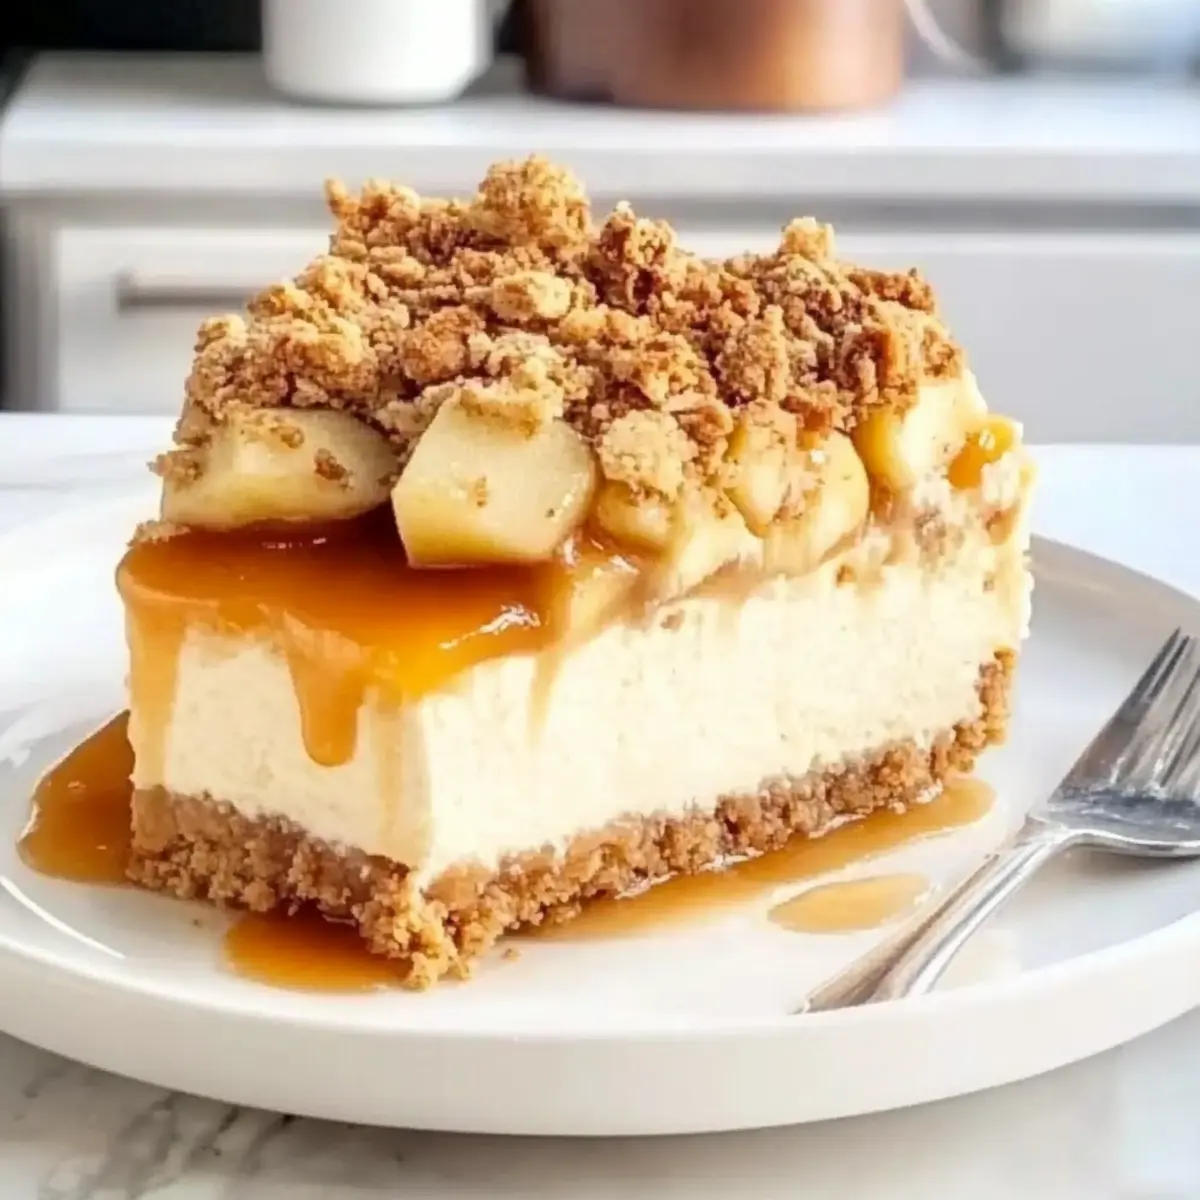
As I stood in my kitchen, the heavenly scent of apples mingling with cinnamon filled the air, transporting me to cozy autumn days. That’s when I decided to create something truly special—an Apple Crisp Cheesecake. This delightful recipe is a perfect blend of creamy cheesecake and the rustic charm of apple crisp, making it an absolute showstopper for gatherings or an indulgent weekend treat. Not only is it a crowd-pleaser, but it’s also make-ahead, allowing you to savor moments with loved ones rather than spending all day in the kitchen. Picture a rich, velvety texture complemented by a crunchy topping and sweet, spiced apples—how could anyone resist? Are you ready to make this cozy dessert your new favorite?
Why choose Apple Crisp Cheesecake?
Uniquely irresistible: This recipe blends the best of both worlds, marrying classic apple crisp flavors with the creamy indulgence of cheesecake.
Make-ahead magic: Perfect for gatherings, prepare it in advance to relieve stress and enjoy your time with guests.
Timeless comfort: The combination of warm spices and sweet apples evokes nostalgic warmth, making it a cozy dessert for any occasion.
Versatile creativity: Feel free to swap in different fruits or add nuts to the topping—personalize it to your heart’s content!
Crowd-pleasing: With its stunning presentation and rich taste, it’s sure to impress family and friends—like when I served it along with Apple Cinnamon Pancakes at brunch and everyone clamored for seconds!
Apple Crisp Cheesecake Ingredients
Discover the perfect harmony of flavors and textures in this delightful recipe!
For the Crust
- Graham Cracker Crumbs – Provides the base structure and crunchy texture for the crust. Note: Can substitute with digestive biscuits or gluten-free crumbs.
- Brown Sugar – Adds sweetness and a caramel-like flavor to both crust and apple mixture. Note: Light or dark can be used interchangeably.
- Cinnamon – Enhances the warm, cozy flavors of the apple crisp. Note: Nutmeg can be added for extra depth.
- Butter (melted) – Binds the crust ingredients together and adds richness. Note: Can be swapped with coconut oil for a dairy-free version.
For the Apple Filling
- Apples (diced) – Main fruit component providing natural sweetness and texture. Note: Granny Smith or Honeycrisp are recommended for balance between sweet and tart.
- Granulated Sugar – Sweetens the cheesecake filling. Note: Adjust to taste if using sweeter apples.
- Cornstarch/Flour – Stabilizes and thickens the cheesecake mixture. Note: Gluten-free flour can be used as a substitute.
For the Cheesecake Filling
- Vanilla Extract – Adds a foundational flavor to the cheesecake. Note: Use pure vanilla for best results.
- Sour Cream – Contributes creaminess and a slight tang. Note: Greek yogurt can be used as a substitute.
- Eggs – Provides structure and richness to the cheesecake filling. Note: Ensure at room temperature for easy blending.
For the Topping
- Oats – Adds wholesome texture to the topping. Note: Feel free to use quick or rolled oats based on your preference.
- Additional Brown Sugar – Enhances sweetness and creates a delightful crunch. Note: Increase according to taste for a sweeter topping.
This Apple Crisp Cheesecake is a perfect blend of comforting flavors, designed to satisfy your sweet cravings while making any gathering feel extra special.
Step‑by‑Step Instructions for Apple Crisp Cheesecake
Step 1: Preheat and Prepare
Begin by preheating your oven to 350°F (180°C). Take a 9-inch springform pan and wrap the bottom in aluminum foil to prevent leaks. Grease the sides lightly to ensure the cheesecake releases easily after baking. Place the pan on a baking sheet, which will make it easier to transfer later.
Step 2: Make the Crust
In a medium bowl, combine graham cracker crumbs, brown sugar, cinnamon, and melted butter until the mixture resembles wet sand. Press this crumb mixture firmly into the bottom of your prepared springform pan, creating an even layer. Bake the crust in the preheated oven for about 10 minutes, until lightly golden and fragrant, then remove it to cool.
Step 3: Prepare the Apple Filling
While the crust bakes, dice your apples and toss them in a bowl with additional brown sugar and cinnamon. Stir until the apples are evenly coated and set this mixture aside to let the flavors meld together. The apples should be slightly softened after resting, making them even more flavorful and sweet.
Step 4: Create the Crumb Topping
In another bowl, mix together oats, flour, brown sugar, cinnamon, and a drizzle of melted butter. Use your fingers or a fork to combine until the mixture takes on a crumbly texture. This topping will add a delightful crunch to your Apple Crisp Cheesecake, so set it aside for later.
Step 5: Prepare the Cheesecake Filling
In a large mixing bowl, beat the cream cheese until smooth and creamy, about 2-3 minutes. Gradually add the granulated sugar, cornstarch, vanilla extract, sour cream, and eggs, mixing well after each addition. Make sure the mixture is entirely smooth with no lumps; this will result in a beautifully creamy cheesecake filling.
Step 6: Assemble the Layers
Once your crust has cooled slightly, layer the apple mixture evenly over the crust. Then, gently pour the cheesecake filling on top of the apples, being careful not to disturb the apple layer beneath. Finally, sprinkle the crumb topping generously over the cheesecake filling, creating a deliciously crunchy layer.
Step 7: Bake in a Water Bath
To avoid cracking, place the springform pan into a larger baking dish filled with boiling water until it reaches halfway up the sides of the cheesecake pan. Bake for 50-60 minutes in the oven, checking for a slight jiggle in the center when done. The edges should be set and lightly golden.
Step 8: Cool Gradually
Once baked, turn off the oven and let the Apple Crisp Cheesecake cool inside with the door ajar for about 1 hour. This gradual cooling prevents sudden temperature changes that could crack the cheesecake. Afterward, refrigerate it for at least 4 hours or overnight for best results before serving.
How to Store and Freeze Apple Crisp Cheesecake
Fridge: Keep your Apple Crisp Cheesecake in an airtight container in the fridge for up to 5 days. This preserves its creamy texture and delicious flavors.
Freezer: For longer storage, freeze the cheesecake wrapped tightly in plastic wrap and aluminum foil for up to 2 months. Thaw it in the fridge before serving for the best texture.
Reheating: If you prefer your cheesecake slightly warmed, gently warm individual slices in the microwave for about 10-15 seconds. It will enhance the creaminess!
Make Ahead Options
These Apple Crisp Cheesecake preparations are a lifesaver for busy home cooks looking to save time! You can prepare the crust and crumb topping up to 24 hours in advance. Simply make the crust and let it cool, then store it covered in the refrigerator. The crumb topping can be mixed and kept airtight too. Additionally, you can slice the apples and toss them in lemon juice (to prevent browning) up to 3 days ahead, storing them in the fridge until you’re ready to assemble. When you’re set to serve, layer everything and bake according to the original recipe instructions for a delightful cheesecake that tastes just as delicious as if it were freshly made!
Apple Crisp Cheesecake Variations
Feel free to get creative with your Apple Crisp Cheesecake by trying out these delightful variations and substitutions!
-
Fruit Swap: Replace apples with pears for a uniquely sweet flavor. The tender bites of pear will bring a gentle elegance to your dessert.
-
Nutty Crunch: Add chopped walnuts or pecans to the crumb topping for an earthy crunch. This extra texture elevates the dish, making each bite even more satisfying.
-
Dairy-Free Delight: Use coconut oil instead of melted butter and swap sour cream for cashew cream. Your cheesecake will remain rich and creamy while fitting a dairy-free diet.
-
Spice It Up: Introduce 1/4 teaspoon of nutmeg alongside cinnamon for a deeper warmth. This subtle change can take your flavor profile a notch higher, reminiscent of homemade autumn treats.
-
Caramel Drizzle: Drizzle with caramel sauce just before serving for an extra touch of indulgence. This gooey topping will elevate your presentation and taste, reminiscent of your favorite café desserts.
-
Cheesecake Twist: Incorporate a layer of cream cheese frosting or whipped cream topping after baking for a classic look and added decadence. This extra creamy layer transforms it into a truly luxurious dessert.
-
Gluten-Free Option: Substitute regular graham crackers with gluten-free alternatives for the crust. Your cheesecake will be as delectable as ever, ensuring everyone can enjoy it!
-
Frozen Treat: Freeze the cheesecake in individual portions for a refreshing treat anytime you crave something sweet. Enjoy them slightly thawed for an ice-cream-like experience that’s perfect for summer!
These variations allow you to personalize your Apple Crisp Cheesecake effortlessly! For more tasty inspiration, check out my Sticky Apple Cider Chicken for a wonderful dish that pairs perfectly with cozy desserts like this one. And don’t miss out on my delicious Blueberry Cheesecake Protein Bites for a healthier sweet fix. Enjoy your delightful journey in the kitchen!
What to Serve with Apple Crisp Cheesecake
Pairing this delightful dessert with complementary flavors and textures will elevate your dining experience and create a memorable meal.
-
Creamy Mashed Potatoes: The buttery richness pairs beautifully with the crispy topping, creating a comforting contrast that delights the palate.
-
Roasted Brussels Sprouts: Their slight bitterness and crunch offer great balance to the sweetness of the cheesecake, making for a well-rounded meal.
-
Seasonal Salad: Fresh greens, nuts, and a tangy vinaigrette add vibrancy and a refreshing crunch, enhancing the overall experience.
-
Spiced Hot Apple Cider: Warm and cozy, this drink echoes the flavors in the cake while providing a delightful warm contrast.
-
Caramel Sauce Drizzle: A touch of sweet caramel over the cheesecake adds another layer of flavor, tantalizingly enhancing its rich creaminess.
-
Vanilla Ice Cream: The creamy vanilla complements the cheesecake’s texture, creating an indulgent treat that your guests will love.
-
Chocolate Coffee Stout: This bold beverage adds depth to each indulgent bite, balancing the sweetness with rich, dark notes.
-
Fresh Berries: A medley of tart berries, like raspberries or blackberries, provides brightness and acidity that cuts through the richness of the cheesecake.
Expert Tips for Apple Crisp Cheesecake
-
Perfectly Soften Cream Cheese: Ensure your cream cheese is at room temperature before mixing to avoid lumps in your filling and achieve a silky smooth texture.
-
Water Bath Magic: Bake your cheesecake in a water bath to prevent it from cracking. The steam helps maintain a gentle temperature and creates that creamy texture you’ll love.
-
Cool Gradually: After baking, let the cheesecake cool in the oven with the door ajar. This gentle cooling helps avoid sudden temperature changes that can cause cracks.
-
Test for Doneness: Look for a slight jiggle in the center of the cheesecake when baking. It will continue to set as it cools, ensuring a perfect consistency.
-
Chill for Flavor: Allow the Apple Crisp Cheesecake to chill in the refrigerator for at least 4 hours, or overnight if possible. This gives the flavors time to meld beautifully!
Apple Crisp Cheesecake Recipe FAQs
What type of apples should I use for the filling?
Absolutely! For the best flavor and texture, I recommend using Granny Smith apples for a nice tartness balanced with the sweetness of the cheesecake. Honeycrisp apples are also a fantastic choice, providing a sweet yet crisp bite. Mix and match if you like!
How should I store my leftover Apple Crisp Cheesecake?
You can store your Apple Crisp Cheesecake in an airtight container in the refrigerator. It will stay fresh for up to 5 days, so you can enjoy a slice each day! Just remember to cover it well to preserve its creamy texture.
Can I freeze Apple Crisp Cheesecake, and how do I do it?
Yes, you can certainly freeze this cheesecake! Wrap it tightly in plastic wrap and then in aluminum foil to prevent freezer burn. It can be stored for up to 2 months. When you’re ready to enjoy it, simply move it to the fridge to thaw overnight before serving.
Why is my cheesecake cracked?
No worries, this happens sometimes! A cracked cheesecake is usually a result of sudden temperature changes or overbaking. To avoid this, always use a water bath during baking and let the cheesecake cool gradually in the oven with the door slightly ajar. This will help keep that silky smooth surface intact!
What if I have a gluten allergy; can I make this recipe gluten-free?
Very much! You can easily make this Apple Crisp Cheesecake gluten-free by substituting the graham cracker crumbs and flour in the recipe with gluten-free alternatives such as almond flour or gluten-free gingersnaps. Just double-check the other ingredients to make sure they are also gluten-free.
Can I add nuts to the topping for extra texture?
The more the merrier! Adding nuts like chopped walnuts or pecans to the crumb topping is a great idea. Just toss them in with the oats before you mix in the melted butter. This will give your cheesecake an extra crunch and a nutty flavor boost!
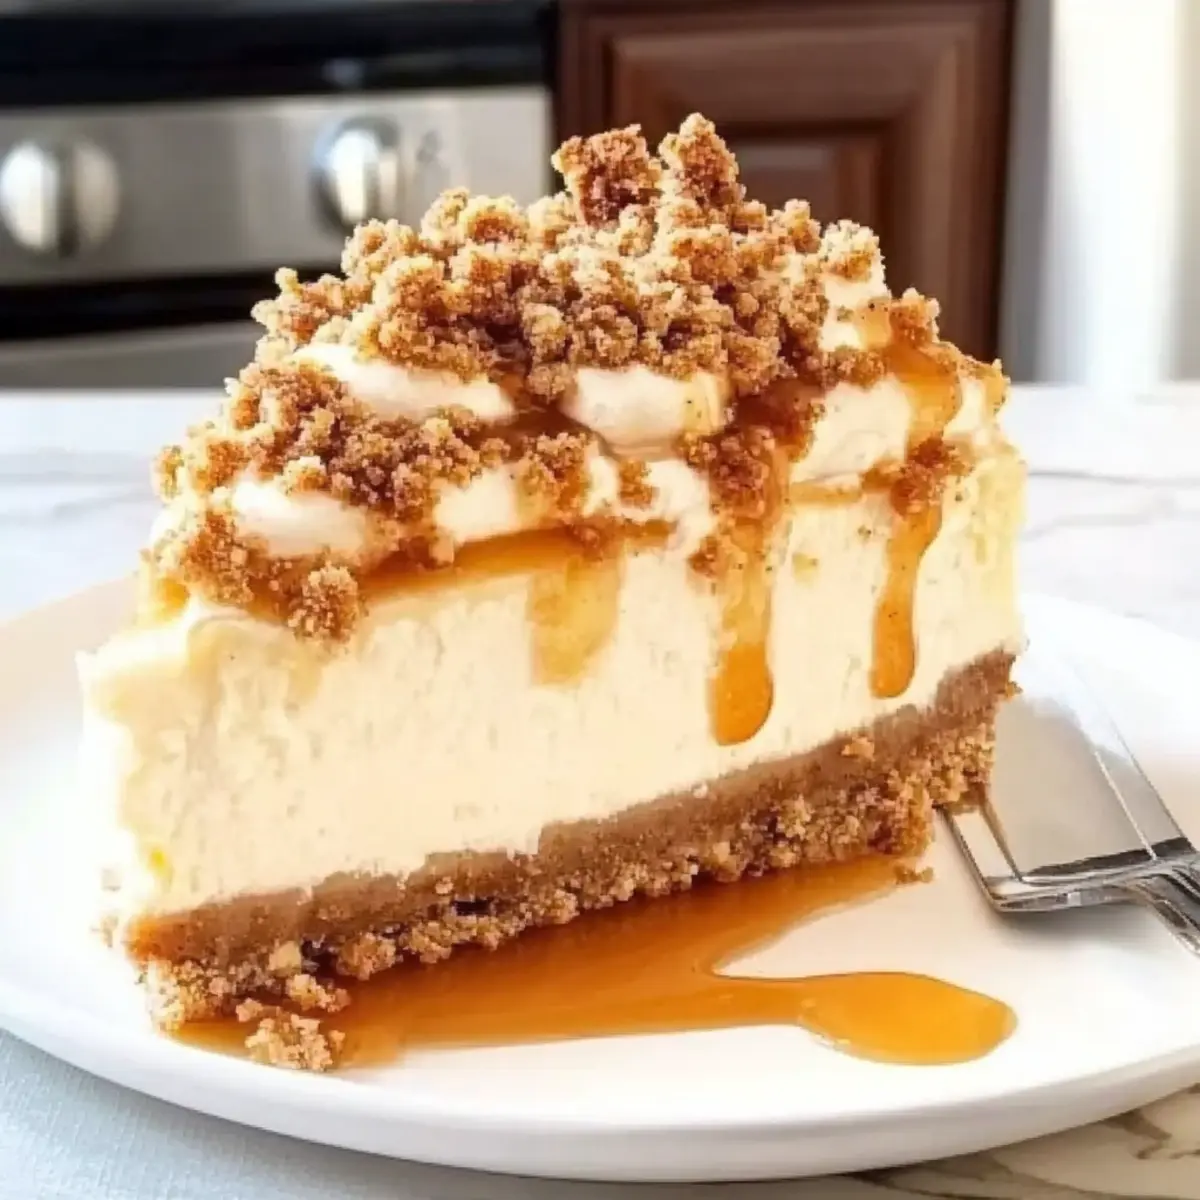
Creamy Apple Crisp Cheesecake for Cozy Gatherings
Ingredients
Equipment
Method
- Preheat your oven to 350°F (180°C). Wrap the bottom of a 9-inch springform pan in aluminum foil to prevent leaks and grease the sides lightly.
- Combine graham cracker crumbs, brown sugar, cinnamon, and melted butter in a medium bowl until resembling wet sand. Press into the bottom of the springform pan and bake for about 10 minutes. Remove to cool.
- Dice the apples and toss them with additional brown sugar and cinnamon in a bowl. Set aside to let the flavors meld together.
- Mix oats, flour, brown sugar, cinnamon, and melted butter together until crumbly. Set aside.
- Beat cream cheese until smooth. Gradually add granulated sugar, cornstarch, vanilla, sour cream, and eggs, mixing well after each addition.
- Layer the apple mixture over the cooled crust, pour the cheesecake filling on top, and sprinkle the crumb topping over.
- Place the springform pan into a larger baking dish filled with boiling water and bake for 50-60 minutes until the edges are set and lightly golden.
- Turn off the oven and let the cheesecake cool inside with the door ajar for 1 hour, then refrigerate for at least 4 hours before serving.
Leave a Reply