
Strolling through my favorite bakery one sunny afternoon, I stumbled upon the most enchanting cookies adorned with playful faces that instantly made me smile. Inspired, I set off to create my own version: Kawaii Strawberry Cookies. These delightful sugar cookies are not only soft and chewy but also brimming with luscious strawberry flavor. The best part? They’re super simple to make and perfect for any occasion, whether you’re surprising a friend or adding a whimsical touch to your dessert table. With customizable icing options and adorably decorated designs, these cookies become an instant hit among kids and adults alike! Ready to whip up a batch of cuteness that will light up your day? Let’s dive in!

What Makes Kawaii Strawberry Cookies Special?
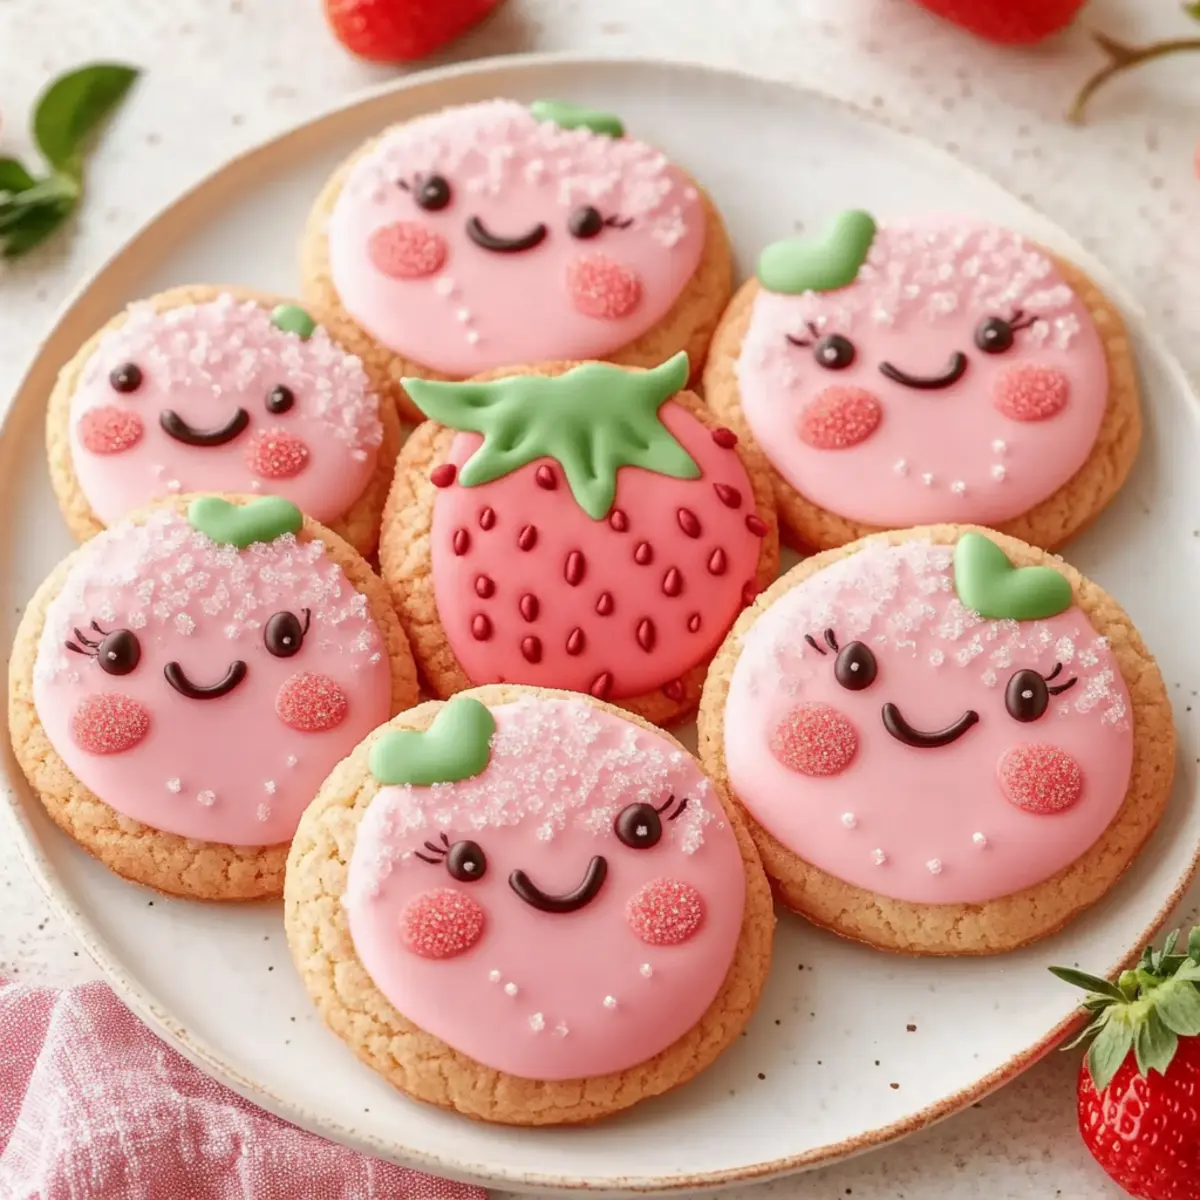
Whimsical Charm: Each cookie is adorned with delightful faces, bringing joy to every bite.
Stunning Visuals: Their vibrant pink hues and playful decorations make them a feast for the eyes, perfect for parties or special occasions!
Easy to Customize: With various icing options, you can tailor each cookie to your taste or theme. Check out my other fun ideas like French Toast Cookies for more inspiration!
Quick to Prepare: These cookies come together in a flash, so you can satisfy your cravings without a lengthy process.
Crowd-Pleasing Treat: Loved by both kids and adults, they’re an ideal addition to any gathering, ensuring smiles and cheerful memories.
Get ready to bake these lovable treats that are sure to charm everyone!
Kawaii Strawberry Cookies Ingredients
For the Cookie Dough
- Butter – Use unsalted for better control over sweetness and flavors.
- Granulated Sugar – Sweetens the cookies; feel free to swap in brown sugar for a richer taste.
- Egg – Binds the ingredients and adds moisture; a flax egg works as a vegan substitute.
- Strawberry Emulsion/Extract – Infuses a delightful strawberry flavor; consider using finely ground freeze-dried strawberries for a natural twist.
- Vanilla Extract – Enhances overall flavor; can be omitted if you prefer a simpler taste.
- All-Purpose Flour – Forms the cookie’s main structure; a gluten-free blend is an excellent alternative.
- Baking Powder – Acts as a leavening agent to achieve a light, chewy texture; omitting it may result in denser cookies.
- Salt – Balances sweetness and enhances flavors; skip it for a sodium-free treat.
For the Icing
- Powdered Sugar – Essential for the icing; adjust the ratio with liquid for desired thickness.
- Milk or Water – Used to adjust the icing consistency; non-dairy alternatives work just as well.
- Pink Food Coloring – Optional for a fun decorative touch; can be replaced with natural colorings for a healthy option.
Whip up these Kawaii Strawberry Cookies for a cute baking adventure that’s both enjoyable and satisfying!
Step‑by‑Step Instructions for Kawaii Strawberry Cookies
Step 1: Prepare Dough
In a large mixing bowl, cream together 1 cup of unsalted butter and 1 cup of granulated sugar until the mixture is light and fluffy, about 3-5 minutes. Add 1 egg, 1 teaspoon of strawberry emulsion, and 1 teaspoon of vanilla extract, mixing until combined. In a separate bowl, whisk together 3 cups of all-purpose flour, 1 teaspoon of baking powder, and 1/2 teaspoon of salt before gradually incorporating the dry ingredients into the wet mixture until a soft dough forms.
Step 2: Chill Dough
Once your dough is combined, turn it onto a clean surface and form it into a disc shape. Wrap the disc tightly in plastic wrap, ensuring there are no air pockets, and refrigerate it for 30-40 minutes. Chilling the dough is essential for easier rolling and cutting into shapes, as it helps the Kawaii Strawberry Cookies maintain their form during baking.
Step 3: Roll & Cut Cookies
Preheat your oven to 350°F (175°C). After chilling, remove the dough from the refrigerator and let it sit for a few minutes to soften slightly. Dust a clean surface with flour, and roll the dough out to a thickness of about 1/4 inch using a rolling pin. Use cookie cutters to shape the dough into your desired forms, and arrange the cutouts on baking sheets lined with parchment paper, leaving space in between.
Step 4: Bake
Place your baking sheets in the preheated oven and bake the cookies for 8-10 minutes. You’ll know they’re ready when the edges are set and slightly golden, while the centers remain soft. Remove them from the oven and allow them to cool on the sheets for a few minutes before carefully transferring them to a wire rack to cool completely.
Step 5: Make Icing
In a medium bowl, whisk together 2 cups of powdered sugar with 2-4 tablespoons of milk (or water) until smooth and glossy, adjusting the liquid for your desired icing consistency. For added fun, mix in a few drops of pink food coloring to achieve a charming pastel hue. Set aside as you prepare to decorate your adorable Kawaii Strawberry Cookies.
Step 6: Decorate Cookies
Once the cookies are completely cooled, ice them with your prepared icing, using a piping bag or knife to spread it smoothly, leaving a small space around the edges for a clean look. Let the icing set for 1-2 hours until it forms a firm crust. This step not only enhances flavor but also adds to the joyful presentation of your Kawaii Strawberry Cookies.
Step 7: Add Faces
For the finishing touch, create cute faces on your iced cookies using a food pen or melted chocolate. Add expressive eyes and rosy pink cheeks to bring your Kawaii Strawberry Cookies to life! Allow any decorations to set fully before serving or packaging them for sharing.

What to Serve with Kawaii Strawberry Cookies?
Create a delightful spread that complements the playful sweetness of these charming cookies!
- Fresh Fruit Salad: A medley of juicy strawberries, blueberries, and melon adds a refreshing contrast, balancing the sweetness of the cookies.
- Creamy Vanilla Ice Cream: The rich, smooth texture of vanilla ice cream enhances the chewy cookies, creating a delightful dessert duo!
- Sparkling Lemonade: The zesty effervescence of lemon complements the sweet strawberry flavor perfectly, making it a refreshing drink choice.
- Chocolate Milk: Smooth and rich, chocolate milk provides a delicious pairing that kids and adults alike will enjoy dipping their cookies into.
- Whipped Cream: Light and airy, whipped cream is a fluffy delight on the side, perfect for adding a touch of indulgence to your cookie experience.
- Mini Cupcakes: Adorned with soft pastel frosting, these add to the festive vibe, providing a fun variety on your dessert table.
- Sweet Tea: A comforting glass of sweet tea balances out the flavors, making it a perfect accompaniment to cookie munching moments.
- Mixed Nut Bowl: Crunchy and savory nuts contrast beautifully with the soft cookie texture, satisfying diverse taste preferences at your gathering.
Pair these delightful options with your Kawaii Strawberry Cookies, and watch smiles bloom all around!
Make Ahead Options
These Kawaii Strawberry Cookies are a fantastic choice for meal prep, saving you precious time on busy days! You can prepare the cookie dough and refrigerate it for up to 24 hours before baking. Simply wrap the dough tightly in plastic wrap to prevent any drying out. Alternatively, bake the cookies in advance and store them in an airtight container at room temperature for up to 5 days, layering parchment paper between the cookies to ensure they stay soft. When you’re ready to serve, just ice and decorate them, which takes minimal time. With these make-ahead options, you can enjoy delightful, homemade cookies without the last-minute rush!
Kawaii Strawberry Cookies Variations
Invite yourself to play with flavors and designs, creating delightful twists on these adorable cookies!
-
Flavor Swap: Try using different fruit extracts like raspberry or blueberry for a unique twist while keeping that fun, cute appeal.
-
Gluten-Free: Substitute all-purpose flour with a gluten-free blend, allowing everyone to enjoy these sweetness without worries!
-
Royal Icing: Experiment with royal icing for a more polished look and intricate designs, perfect for those who love detailed décor.
-
Chewy Texture: For extra chewiness, replace some all-purpose flour with almond flour—this adds a subtle nutty flavor that complements strawberries beautifully.
-
Sprinkle Surprise: Add colorful sprinkles into the icing or on top for an extra festive touch. It’s an easy way to make these cookies pop with color!
-
Heat It Up: Mix in a dash of chili powder or cayenne pepper to your icing for a surprising sweet and spicy combination that will tantalize your taste buds.
-
Chocolate Lovers: Fold in mini chocolate chips to the dough before baking, creating a delightful chocolate and strawberry flavor fusion.
-
Flavored Icing: Enhance the icing with a splash of flavored syrup, such as orange or almond, for a mouthwatering twist on the classic strawberry flavor.
No matter how you choose to customize your Kawaii Strawberry Cookies, the jumping-off point is your loving creation. For extra inspiration, check out these delightful French Toast Cookies for another fun baking idea!
Expert Tips for Kawaii Strawberry Cookies
-
Chill the Dough: Ensure that your dough is well-chilled before rolling. This prevents the Kawaii Strawberry Cookies from spreading and helps maintain their adorable shapes.
-
Watch the Baking Time: Baking too long can lead to dry cookies. Remove them when the edges are set but the centers are still soft for a chewy finish.
-
Use Proper Cutters: For the best presentation, use simple round cutters to create ample space for decorating faces. Get creative with shapes like strawberries for added charm!
-
Allow Icing to Dry: Let the icing set completely for 1-2 hours to avoid smudging when stacking or packaging the cookies. This ensures your delightful designs remain intact.
-
Customize Your Icing: Adjust the icing consistency by varying the liquid to powdered sugar ratio, and don’t hesitate to use natural colorings for a healthier twist.
Baking these Kawaii Strawberry Cookies is all about fun, creativity, and sweet satisfaction!
How to Store and Freeze Kawaii Strawberry Cookies
- Room Temperature: Store decorated Kawaii Strawberry Cookies in an airtight container at room temperature for up to 5 days. Use parchment paper between layers to keep them fresh.
- Fridge: If you prefer, you can keep them in the refrigerator to prolong freshness, but be sure to allow them to reach room temperature before serving for the best texture.
- Freezer: To freeze, place undecorated cookies or dough in airtight containers or freezer bags. They can be frozen for up to 2 months; just thaw before decorating.
- Reheating: For a freshly-baked sensation, gently warm the cookies in the oven at 300°F (150°C) for about 5 minutes. This will revive their soft, chewy texture!
Kawaii Strawberry Cookies Recipe FAQs
What kind of strawberries should I use for the Kawaii Strawberry Cookies?
Absolutely! Using fresh strawberries can enhance the flavor of your cookies. Opt for strawberries that are bright red and firm, avoiding those with dark spots or excessive bruising. If you prefer a more concentrated flavor, consider using strawberry emulsion or extract, which ensures that your cookies are infused with that delightful berry essence.
How should I store my decorated Kawaii Strawberry Cookies?
You can store your decorated Kawaii Strawberry Cookies in an airtight container at room temperature for up to 5 days. Make sure to layer them with parchment paper between the cookies to prevent them from sticking together, keeping them fresh and delicious!
Can I freeze Kawaii Strawberry Cookies?
Certainly! To freeze your cookies, let them cool completely before placing them in an airtight container or freezer bag. They can be frozen for up to 2 months. For best results, freeze the undecorated cookies, and just thaw them before decorating! When you want to enjoy them, simply pull them out, let them thaw, and then proceed with the icing process.
What if my cookie dough is too sticky?
If you find your Kawaii Strawberry Cookie dough is too sticky to roll out, don’t worry! You can simply add a bit more all-purpose flour, about one tablespoon at a time, until the dough reaches a workable texture. Another option is chilling the dough longer, as this will help firm it up, making it easier to handle while cutting your delightful shapes.
Are these cookies suitable for people with allergies?
Those with egg allergies can replace the egg with a flax egg by mixing 1 tablespoon of ground flaxseed with 3 tablespoons of water and letting it sit for about 5 minutes until it thickens. Also, if anyone is gluten-sensitive, you can easily swap the all-purpose flour for a gluten-free blend. Always ensure that your ingredients are free from cross-contamination if necessary for your loved ones’ safety.

Kawaii Strawberry Cookies: Adorably Sweet & Chewy Delights
Ingredients
Equipment
Method
- In a large mixing bowl, cream together unsalted butter and granulated sugar until light and fluffy, about 3-5 minutes. Add the egg, strawberry emulsion, and vanilla extract, mixing until combined.
- In a separate bowl, whisk together all-purpose flour, baking powder, and salt before gradually incorporating the dry ingredients into the wet mixture until a soft dough forms.
- Once combined, turn the dough onto a clean surface and shape it into a disc. Wrap tightly in plastic wrap and refrigerate for 30-40 minutes.
- Preheat your oven to 350°F (175°C). After chilling, remove the dough from the refrigerator and let sit for a few minutes to soften slightly. Roll out to 1/4 inch thickness and cut out shapes.
- Bake for 8-10 minutes until edges are set and slightly golden. Cool on the sheet before transferring to a wire rack to cool completely.
- Whisk together powdered sugar with milk (or water) until smooth, adjusting for desired consistency. Mix in pink food coloring if desired.
- Once cookies are cooled, ice them with the prepared icing using a piping bag or knife, leaving space around the edges. Let the icing set for 1-2 hours.
- Add cute faces using a food pen or melted chocolate to bring your cookies to life!
Leave a Reply