
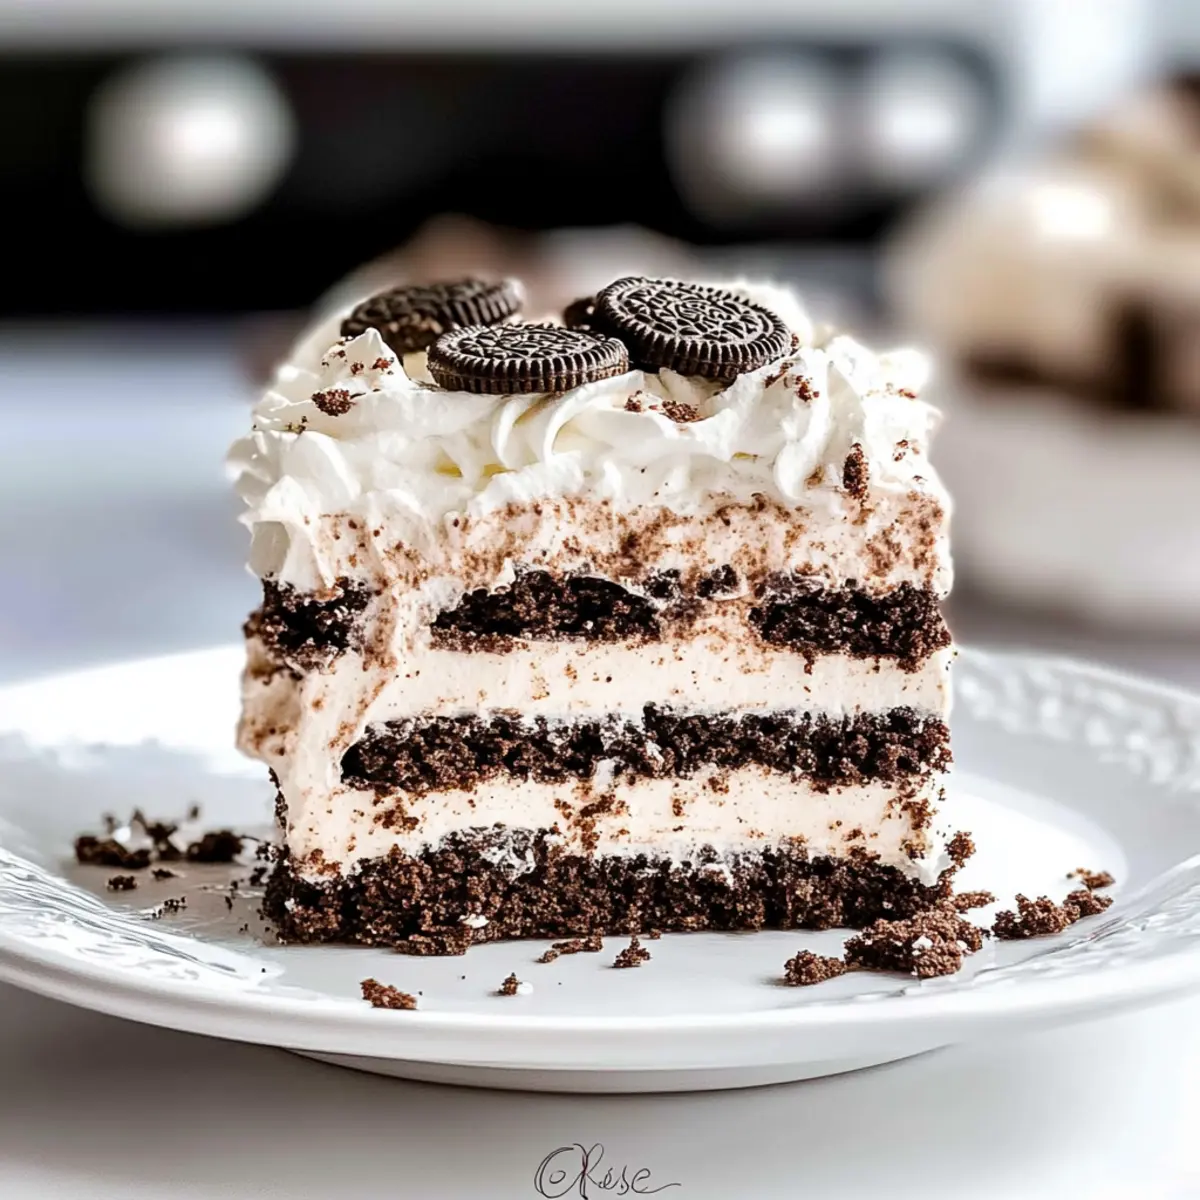
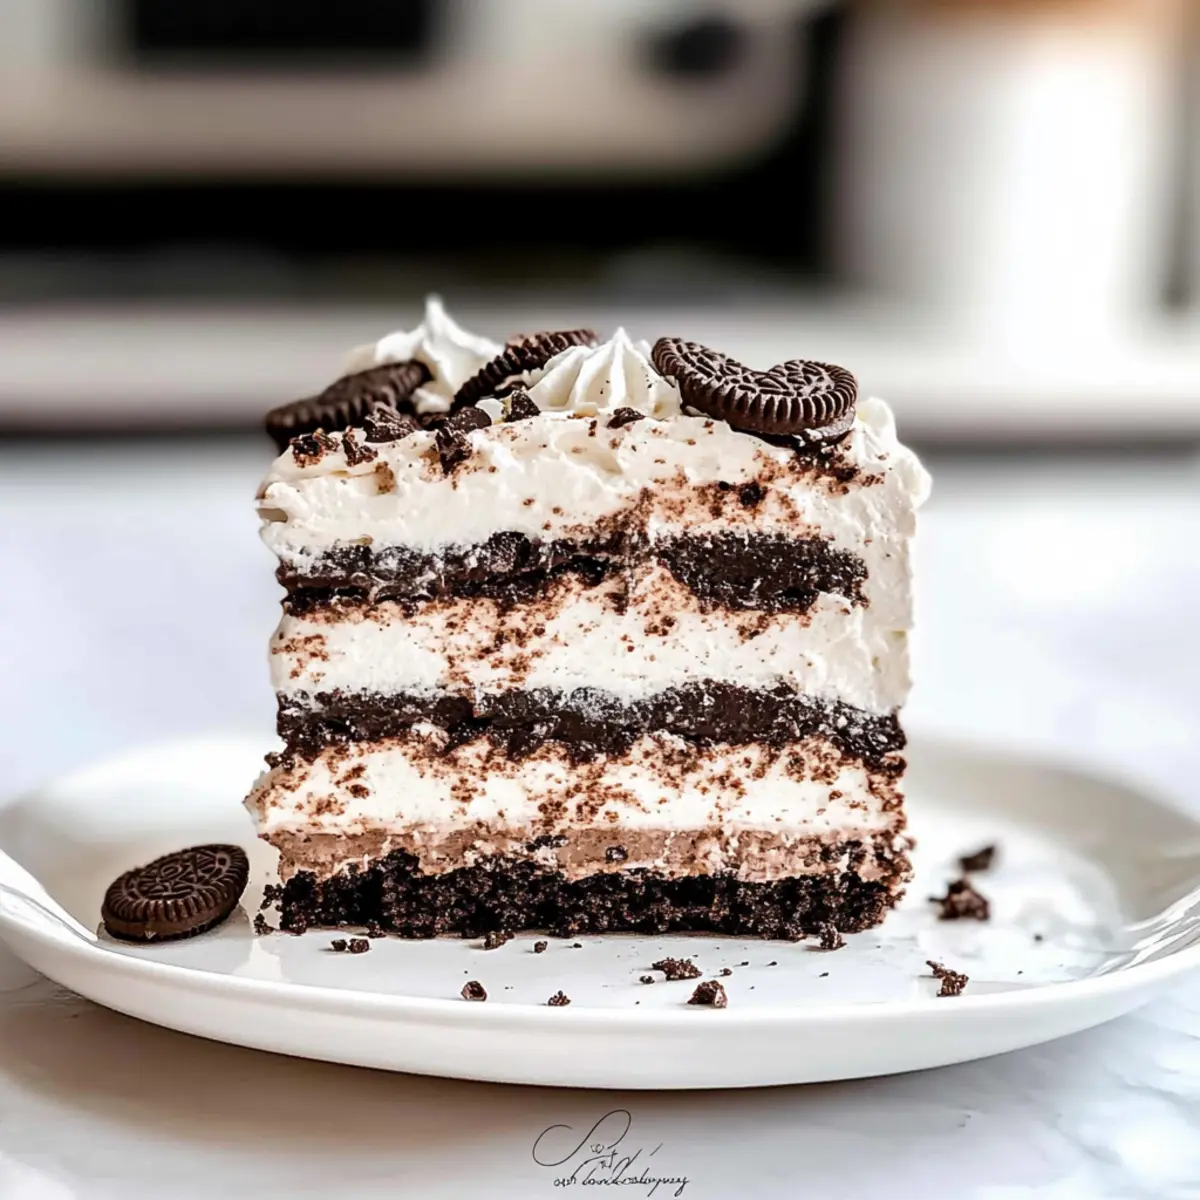
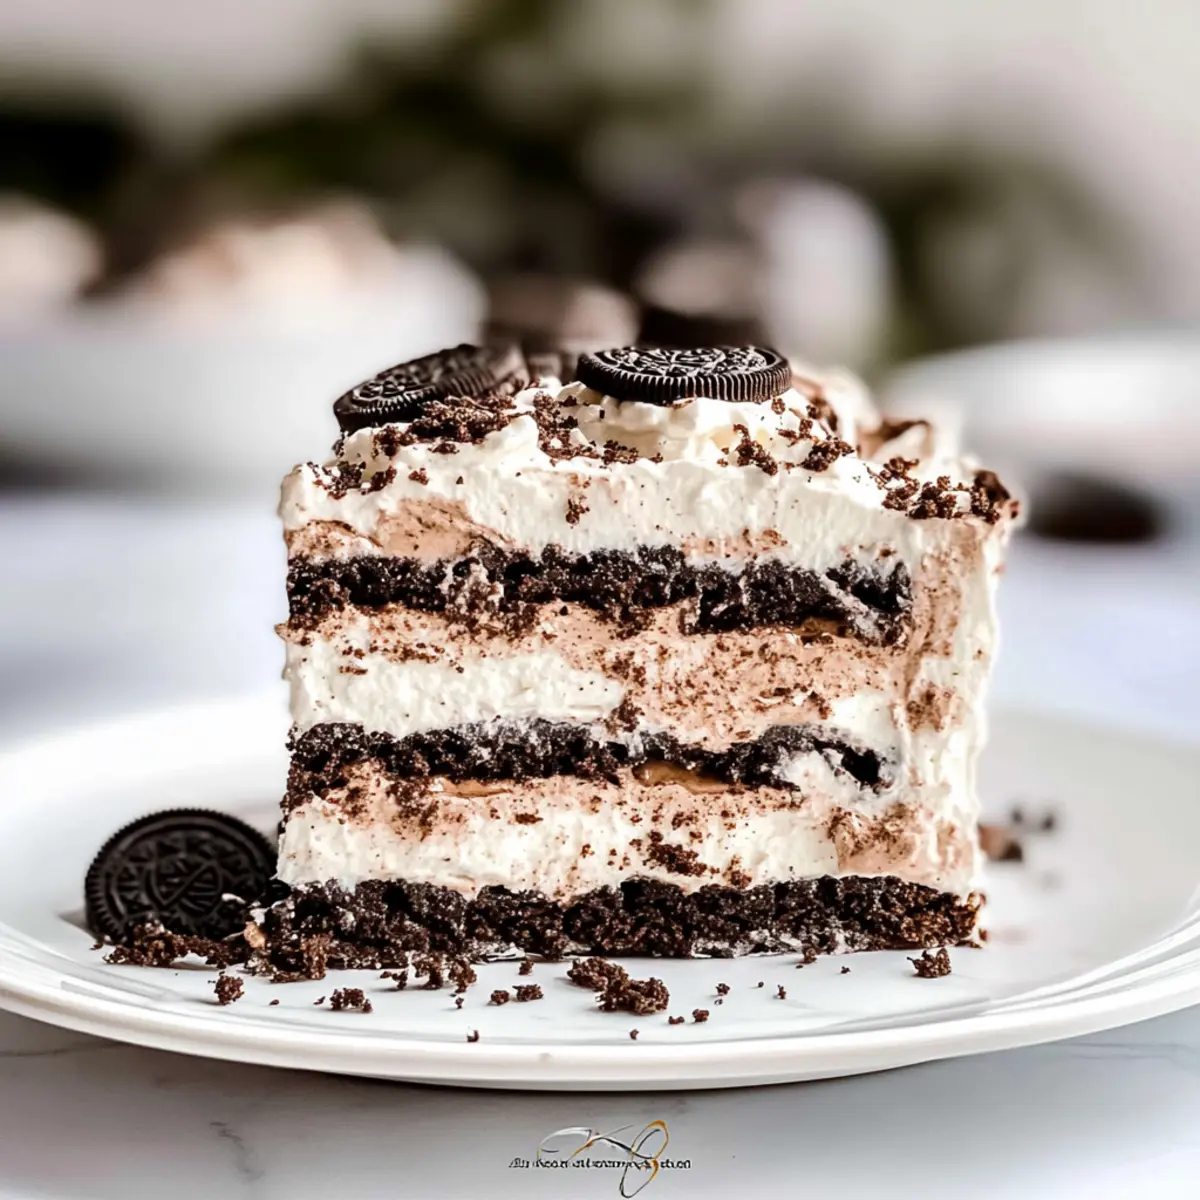
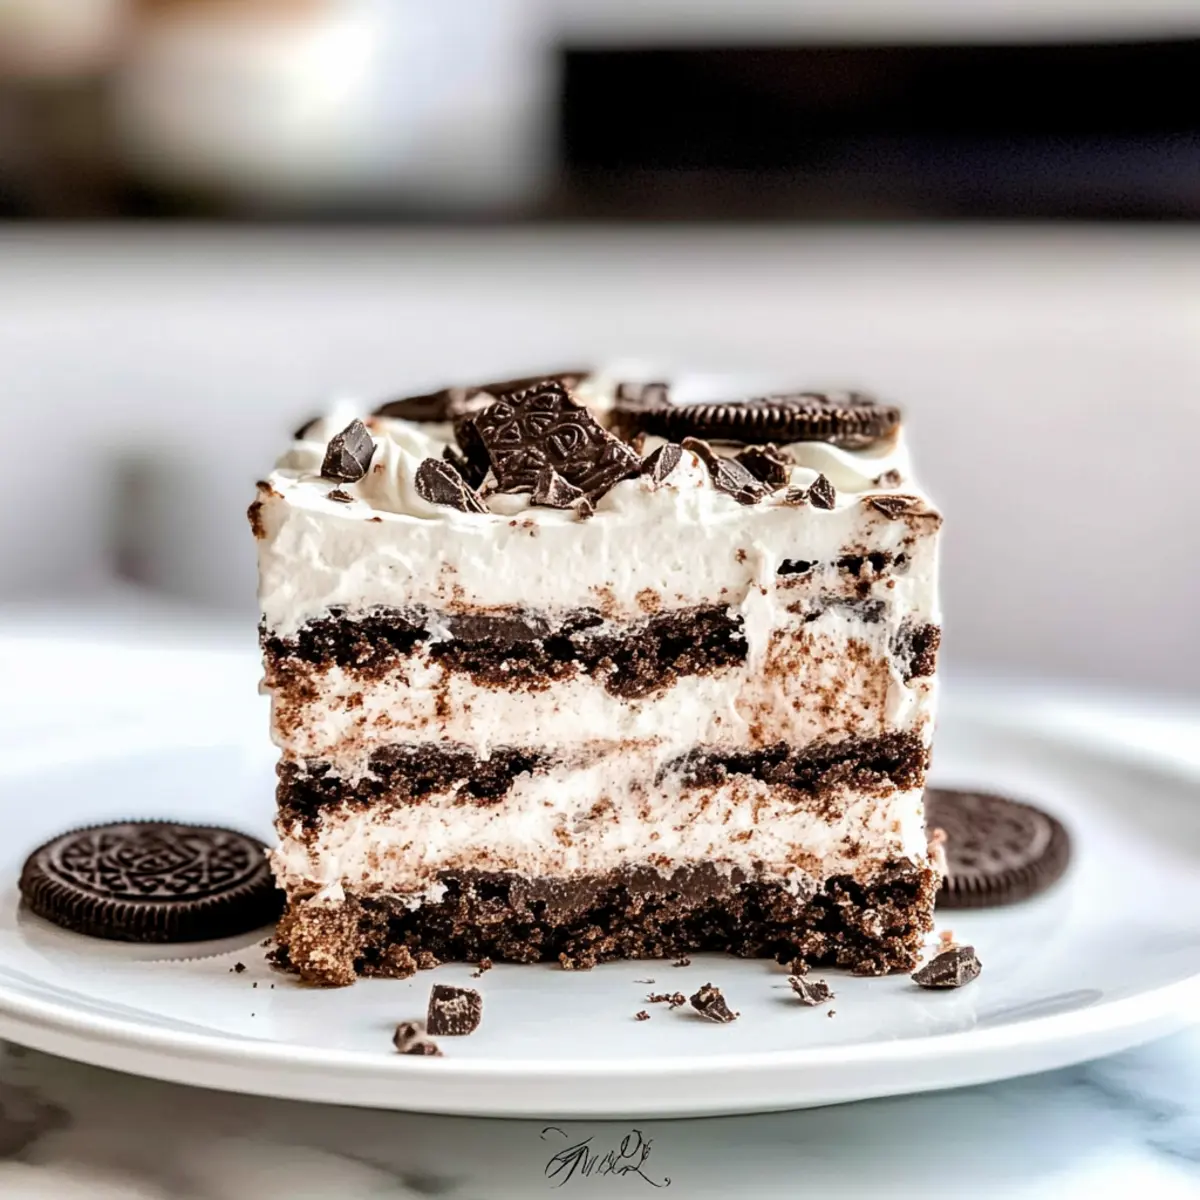
As I stood in the kitchen, raiding the pantry for something sweet, a box of Oreos caught my eye, igniting a spark of inspiration. Enter the No Bake Chocolate Oreo Icebox Cake—my go-to dessert that transforms everyday ingredients into a creamy, dreamy masterpiece. This delightful treat is not only easy to whip up, but it also offers indulgent layers of rich chocolate cheesecake and crunchy Oreo cookies, making it an instant crowd-pleaser. Perfect for those who crave a no-bake option, this cake is sure to revive memories of summer picnics and birthday parties. How about we dive into this delectable creation together? You’ll be just a few steps away from dessert bliss!
Why is this cake a must-try?
Easy Preparation: This No Bake Chocolate Oreo Icebox Cake is a breeze to make, perfect even for novice bakers. Just mix, layer, and chill!
Indulgent Layers: The rich chocolate cheesecake paired with crunchy Oreo cookies creates a dessert that delights all the senses—visually stunning and utterly delicious.
Versatile Variations: Feel free to experiment! Swap Oreos for Chocolate Chip Banana or use your favorite sandwich cookies to personalize this treat.
Crowd Favorite: Its irresistible cookies and cream flavor makes it an instant hit at gatherings, sure to impress friends and family alike.
No Baking Required: Enjoy all the creamy goodness without turning on the oven, making this recipe ideal for hot summer days or busy weeknights!
Chocolate Oreo Icebox Cake Ingredients
For the Whipped Cream
• Heavy Whipping Cream – Adds richness and lightness for a fluffy texture; you can substitute with whipped topping if short on time.
• Powdered Sugar – Sweetens and stabilizes the whipped cream; granulated sugar works but for the smoothest results, stick with powdered.
• Vanilla Extract – Enhances overall flavor; pure vanilla extract is ideal, but imitation works in a pinch.
For the Chocolate Cheesecake Layer
• Cream Cheese – The backbone of the cheesecake layer, contributing a creamy texture; use softened cream cheese for best results or swap with Neufchâtel for a lighter option.
• Semi-Sweet Chocolate Chips – Provides rich chocolate flavor; dark chocolate can be used for a more intense taste.
• Espresso Powder – Boosts the chocolate flavor without adding coffee notes; it’s optional, but it greatly enhances depth.
• Salt – Balances sweetness; a pinch is all you need, and kosher salt can be an excellent alternative.
For the Assembly
• Oreos – The star of the dessert, giving it that beloved cookies and cream flavor; feel free to use other sandwich cookies or gluten-free alternatives as a substitution.
This Chocolate Oreo Icebox Cake is not only a simple and effective dessert but also a celebration of flavors that you’ll want to share with everyone!
Step‑by‑Step Instructions for Chocolate Oreo Icebox Cake
Step 1: Whip the Cream
Begin by pouring 2 cups of heavy whipping cream into a large mixing bowl. Using an electric mixer, whip the cream on medium-high speed until soft peaks begin to form, about 2-3 minutes. Gradually add ¾ cup of powdered sugar and 1 teaspoon of vanilla extract, then continue to whip until you achieve firm peaks, approximately another 2 minutes. Set aside the luscious whipped cream for later use in the Chocolate Oreo Icebox Cake.
Step 2: Prepare the Chocolate Cheesecake Mixture
In a microwave-safe bowl, melt 1 cup of semi-sweet chocolate chips in 30-second intervals, stirring in between until smooth. Allow it to cool slightly while you beat 8 ounces of softened cream cheese in a separate bowl using an electric mixer. Once fluffy, add the remaining ¾ cup of powdered sugar, 1 teaspoon of espresso powder, and a pinch of salt. Mix until well combined, then pour in the melted chocolate and blend until fully integrated.
Step 3: Fold in the Whipped Cream
Gently fold half of the whipped cream into the chocolate cheesecake mixture using a spatula, being careful not to deflate the cream. This adds a light, airy texture to the cheesecake layer that beautifully complements the Oreo layers. Once incorporated, add the remaining whipped cream, folding until the mixture is smooth and creamy. Your Chocolate Oreo Icebox Cake filling is now ready to be layered.
Step 4: Assemble the Cake
In a 9×13 inch dish, create the first layer by arranging a single layer of Oreos along the bottom, covering it completely. Spoon half of the chocolate cheesecake mixture over the Oreos, spreading it evenly with a spatula. Next, add half of the remaining whipped cream over the cheesecake mixture, smoothing it out gently. Repeat this layering process with another layer of Oreos, the rest of the cheesecake mixture, and finally, the remaining whipped cream.
Step 5: Chill to Perfection
Cover the assembled Chocolate Oreo Icebox Cake tightly with plastic wrap. Place it in the refrigerator and chill for at least 4-5 hours; however, overnight is ideal for the best flavor and texture. This chilling time allows the Oreos to soften and the flavors to meld beautifully, resulting in a delightful treat that’s ready to impress when you serve it.
Make Ahead Options
This No Bake Chocolate Oreo Icebox Cake is a wonderful choice for meal prep, allowing you to savor its indulgent flavors without the last-minute rush. You can assemble the cake up to 24 hours in advance, which helps the flavors meld together beautifully. Simply follow the layering instructions, then cover the dish tightly with plastic wrap and refrigerate. For optimal quality, keep it chilled until you’re ready to serve. If you’re planning for a gathering, you can even prep individual slices wrapped in plastic and store them in the refrigerator for up to 3 days. When it’s time to impress your guests, all you need to do is uncover and slice your delightful Chocolate Oreo Icebox Cake, presenting a dessert that’s just as delicious as when you first made it!
Expert Tips for Chocolate Oreo Icebox Cake
-
Room Temperature Cream Cheese: Ensure your cream cheese is at room temperature before mixing to avoid lumps in the cheesecake layer, which can affect the texture.
-
Whip with Caution: Be mindful not to overwhip the heavy cream; stop whipping as soon as soft or firm peaks form. Overwhipping can lead to a grainy texture.
-
Chill Overnight: For the best flavor and texture, let the Chocolate Oreo Icebox Cake chill overnight. This helps the Oreos soften perfectly and the layers meld together nicely.
-
Customize Your Layers: Feel free to replace Oreos with your favorite sandwich cookies for a twist! Think peanut butter or mint varieties for a fun change in flavor.
-
Texture Check: Before serving, ensure the cake is chilled thoroughly. A well-chilled cake ensures every slice holds its shape and is easy to serve, highlighting its creamy layers.
What to Serve with Chocolate Oreo Icebox Cake
Indulging in a slice of this creamy dessert opens the door to a world of delightful pairings that enhance your dining experience.
-
Fresh Berries: Adding raspberries or strawberries brings a tart contrast, balancing the rich flavors of the cake beautifully.
-
Chocolate Ganache: Drizzling a warm chocolate ganache adds an extra layer of decadence, intensifying the chocolate experience in every bite.
-
Vanilla Ice Cream: A scoop of creamy vanilla ice cream offers a refreshing cooldown, perfect for warm days or enhancing the cake’s fabulous textures.
-
Espresso: A short, strong shot of espresso can elevate the dessert, complementing the chocolate notes and offering a delightful contrast to the sweet layers.
-
Mint Leaves: Garnishing with fresh mint leaves not only adds a pop of color but a hint of freshness that cuts through the richness of the cake.
-
Whipped Cream: Serve additional whipped cream on the side for those who love that extra pillowy sweetness alongside their slice.
-
Caramel Sauce: Drizzle a bit of caramel sauce for a sweet and salty burst that pairs wonderfully with the chocolate and cookies.
-
Lemonade: A chilled glass of lemonade provides a zesty, refreshing drink option that counterbalances the cake’s sweetness.
-
Coffee: Enjoying the dessert with a cup of coffee enhances its rich flavors, creating a comforting, indulgent moment perfect for gatherings.
How to Store and Freeze Chocolate Oreo Icebox Cake
Fridge: Keep your Chocolate Oreo Icebox Cake covered in the refrigerator for up to 3 days. This helps maintain its creamy texture and delicious layers.
Freezer: If you want to enjoy it later, freeze slices wrapped tightly in plastic wrap or in an airtight container for up to 2 months.
Thawing: Before serving, allow frozen slices to thaw for about 10 minutes at room temperature for the best taste and texture.
Reheating: This dessert is best enjoyed chilled, so there’s no need to reheat! Just slice, serve, and savor the sweet goodness.
Chocolate Oreo Icebox Cake Variations
Feel free to put your own spin on this delightful dessert and let your creativity shine!
-
Flavor Swap: Try using Peanut Butter Oreos instead for a nutty twist. The creamy peanut butter will harmonize beautifully with the chocolate layers.
-
Fruit Layer: Add layers of strawberries or raspberries between the Oreo and cheesecake layers. The freshness of the fruit will provide a delightful contrast to the rich chocolate.
-
Dairy-Free: Substitute coconut cream for heavy whipping cream and use vegan cream cheese to make this dessert dairy-free. You sure won’t miss the dairy!
-
Coffee Lovers: Elevate the flavor by adding 1 tablespoon of coffee liqueur to the chocolate mixture. It will give the cake a sophisticated edge with caramel notes.
-
Nutty Crunch: Mix in chopped pecans or walnuts into the cheesecake layer for added texture and a touch of nuttiness. This perfect combination will amaze your guests!
-
Cheesecake Swirl: Create a Marbled Cheesecake version by reserving some cheesecake batter before mixing in the chocolate. Swirl the chocolate mixture back into the white cheesecake for an artistic flair.
-
Minty Fresh: Add a few drops of peppermint extract to the cheesecake layer to create a Mint Chocolate Oreo Icebox Cake. It’s a perfect flavor for holiday get-togethers.
-
Gourmet Toppings: Garnish the top with whipped coconut cream, crumbled Oreos, or even a drizzle of caramel sauce. This not only adds elegance but makes for a stunning presentation.
Whichever variation you choose, your Chocolate Oreo Icebox Cake will be a delightful centerpiece that will entice all dessert lovers! As you explore these ideas, don’t forget to check out the rich flavors found in Dark Chocolate Quinoa or indulge in the delightful Blueberry Cheesecake Protein for more inspiration!
Chocolate Oreo Icebox Cake Recipe FAQs
How do I choose ripe ingredients for this cake?
Absolutely! When selecting Oreos, look for cookies that are fresh and intact, without any dark spots or damage. For cream cheese, ensure it’s soft to the touch—this will help achieve a smooth mixture. Also, heavy whipping cream should be fresh; check the expiration date for the best results.
What’s the best way to store Chocolate Oreo Icebox Cake?
To maintain its creamy texture, keep your Chocolate Oreo Icebox Cake covered in the refrigerator for up to 3 days. This ensures every slice stays fresh and delicious. If you’re planning to save it for longer, you can wrap it tightly and freeze it.
Can I freeze this cake? If so, how?
Yes, you can! To freeze your Chocolate Oreo Icebox Cake, cut it into slices first and wrap each slice tightly in plastic wrap. Then, place the wrapped slices in an airtight container or a freezer-safe bag. This way, it will stay fresh for up to 2 months. When you’re ready to enjoy, simply allow it to thaw at room temperature for about 10 minutes before serving.
What can I do if my whipped cream doesn’t hold its shape?
Very! If your whipped cream doesn’t hold peaks, it may be due to under-whipping or not using chilled cream. Ensure that your mixing bowl and beaters are also cold before whipping. To troubleshoot, try whisking it for a bit longer while keeping an eye on its texture. If you’re having ongoing problems, you could add a tablespoon of gelatin to the whipped cream mixture for extra stability.
Can I use alternative ingredients if I have allergies?
Absolutely! If you’re looking for dairy-free options, try substituting the cream cheese with a plant-based cream cheese alternative and using coconut cream in place of heavy whipping cream. For gluten-free needs, use gluten-free sandwich cookies instead of Oreos. This dessert can easily adapt to different dietary considerations, so feel free to get creative!
How long should I chill the cake for the best flavor?
For optimal flavor and texture, I recommend chilling your Chocolate Oreo Icebox Cake overnight. This allows the GRACIOUS flavors to meld and the Oreos to soften perfectly, creating a harmonious balance in every bite. If you’re short on time, however, you can let it chill for a minimum of 4-5 hours.
Decadent Chocolate Oreo Icebox Cake: No-Bake Bliss Awaits
Ingredients
Equipment
Method
- Begin by pouring 2 cups of heavy whipping cream into a large mixing bowl. Using an electric mixer, whip the cream on medium-high speed until soft peaks begin to form, about 2-3 minutes. Gradually add ¾ cup of powdered sugar and 1 teaspoon of vanilla extract, then continue to whip until you achieve firm peaks, approximately another 2 minutes. Set aside the luscious whipped cream for later use in the Chocolate Oreo Icebox Cake.
- In a microwave-safe bowl, melt 1 cup of semi-sweet chocolate chips in 30-second intervals, stirring in between until smooth. Allow it to cool slightly while you beat 8 ounces of softened cream cheese in a separate bowl using an electric mixer. Once fluffy, add the remaining ¾ cup of powdered sugar, 1 teaspoon of espresso powder, and a pinch of salt. Mix until well combined, then pour in the melted chocolate and blend until fully integrated.
- Gently fold half of the whipped cream into the chocolate cheesecake mixture using a spatula, being careful not to deflate the cream. Once incorporated, add the remaining whipped cream, folding until the mixture is smooth and creamy.
- In a 9x13 inch dish, create the first layer by arranging a single layer of Oreos along the bottom. Spoon half of the chocolate cheesecake mixture over the Oreos, spreading it evenly. Next, add half of the remaining whipped cream over the cheesecake mixture, smoothing it out gently. Repeat this layering process.
- Cover the assembled Chocolate Oreo Icebox Cake tightly with plastic wrap. Place it in the refrigerator and chill for at least 4-5 hours; overnight is ideal.
Leave a Reply