
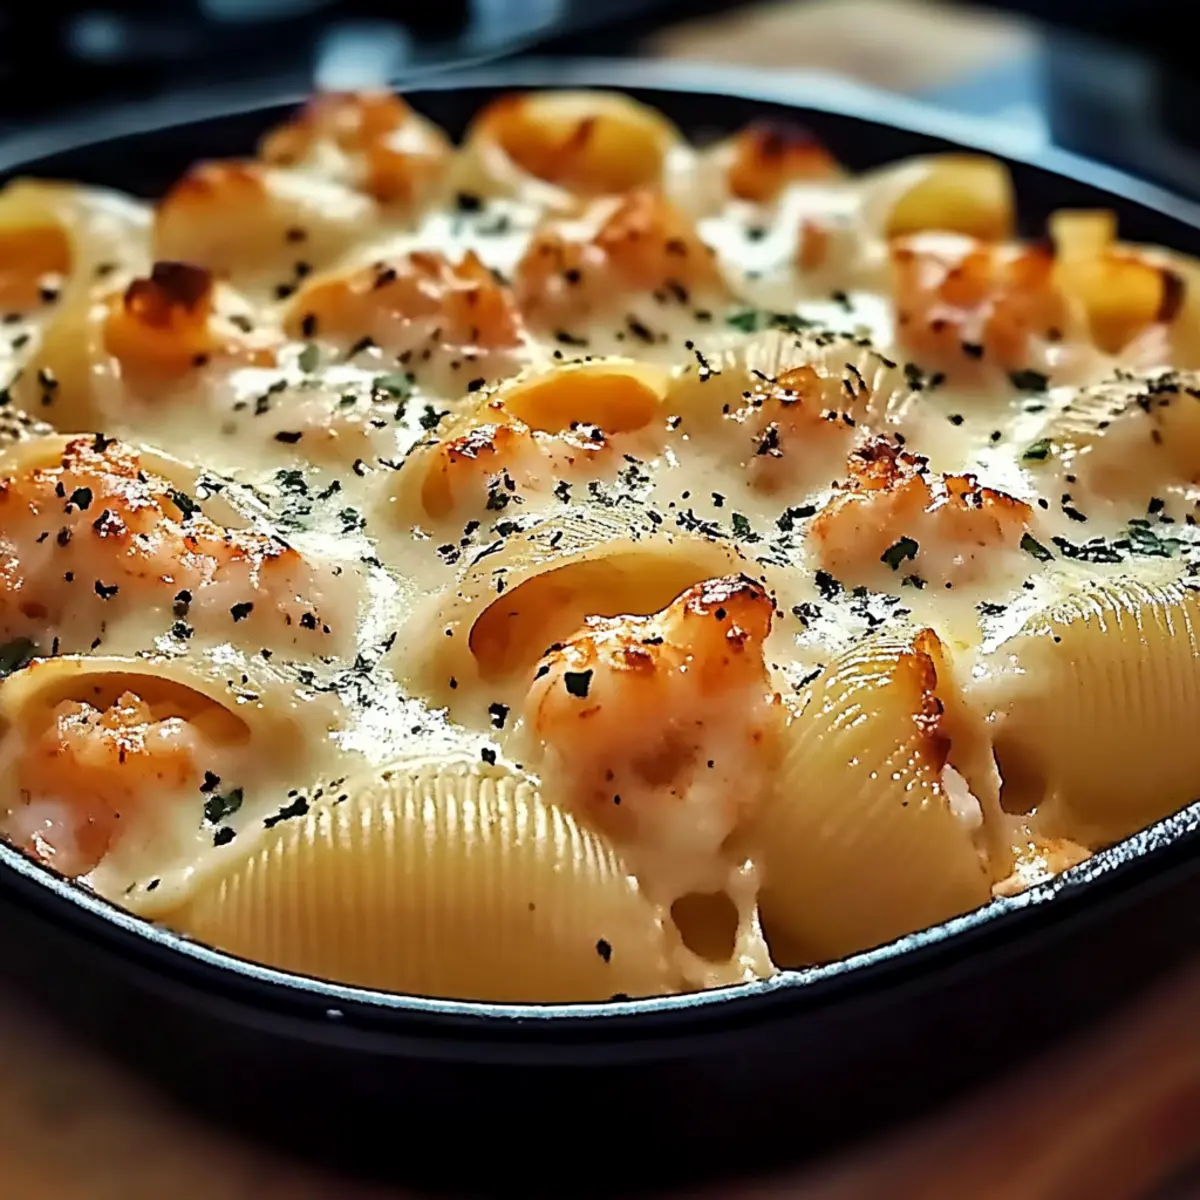
As I rummaged through my pantry, a thought struck me: everyone deserves a comforting dish that feels like a warm hug from the inside. That’s when I decided to whip up these Creamy Seafood Stuffed Shells and transform an ordinary weeknight into something special. This delightful recipe showcases the rich flavors of Italian cuisine, effortlessly combining cheesy goodness with tender seafood. Not only is it a quick-fix meal perfect for busy evenings, but it’s also an impressive centerpiece for dinner parties that will leave your guests raving. Imagine the aroma of bubbling marinara and melted cheese wafting through your kitchen—what’s not to love? Whether you stick with the seafood or opt for a veggie twist, these stuffed shells promise to be a family favorite. Curious about how to make this culinary masterpiece? Let’s dive in!
Why Are Creamy Seafood Stuffed Shells Irresistible?
Decadent Flavors: Each bite is bursting with rich flavors from the seafood and creamy cheese, offering a true taste of Italian comfort.
Quick & Easy: This recipe comes together in a snap, making it perfect for busy weeknights or unexpected guests.
Versatile Sharing: Feel free to substitute seafood for chicken or veggies, ensuring everyone finds a version they adore!
Crowd-Pleasing Aroma: The enticing smell of marinara and melted cheese wafting from your oven will have everyone gathering in the kitchen.
Impressive Presentation: These beautiful stuffed shells are sure to wow your guests, making any dinner feel like a special occasion. Pair them with a light salad or some crispy Lasagna Soup for a complete meal!
Creamy Seafood Stuffed Shells Ingredients
For the Pasta
- Jumbo Pasta Shells – Essential for holding the filling; can substitute with manicotti if needed.
For the Filling
- Olive Oil – Adds flavor and aids in sautéing vegetables.
- Onion – Aromatic base that enhances the overall flavor. Shallots can be used for a milder taste.
- Garlic – Crucial for depth and aromatic flavor.
- Fresh Spinach – Adds nutrition and a pop of color; kale or Swiss chard can be good substitutes.
- Ricotta Cheese – The creamy base for the filling; cottage cheese or mascarpone can be used as alternatives.
- Cream Cheese – Imparts richness and helps achieve a creamy texture.
- Cooked Shrimp – Provides protein and that delightful seafood flavor; can replace with chicken or sautéed mushrooms.
- Cooked Crab Meat – Adds umami and depth; more shrimp or any seafood mix can replace it if unavailable.
- Mozzarella Cheese – For that gooey and melty top layer.
- Salt & Pepper – Essential seasonings; adjust to your taste.
- Red Pepper Flakes – Optional for adding a touch of heat; adjust according to spice preference.
For the Base
- Marinara Sauce – Provides moisture and a tangy flavor; consider Alfredo sauce for a creamier alternative.
- Grated Parmesan Cheese – Finishing touch that adds flavor and crunchy texture when baked.
By gathering these ingredients, you’re one step closer to creating your delightful Creamy Seafood Stuffed Shells that will warm both hearts and bellies at your dinner table!
Step‑by‑Step Instructions for Creamy Seafood Stuffed Shells
Step 1: Preheat and Prepare Pasta
Begin by preheating your oven to 375°F (190°C). In a large pot of salted boiling water, cook your jumbo pasta shells until they are al dente, which typically takes about 9-11 minutes. Once done, drain the shells and set them aside, ensuring they don’t stick together as you prepare the filling.
Step 2: Sauté Aromatics
In a spacious skillet over medium heat, add a drizzle of olive oil and sauté the chopped onion and minced garlic for about 3-4 minutes until they turn translucent and fragrant. The warm aroma should fill your kitchen, signaling that it’s time to add the next ingredient into your Creamy Seafood Stuffed Shells.
Step 3: Add Spinach
Stir in the fresh spinach and allow it to wilt for approximately 2 minutes. Once wilted, remove the skillet from the heat and let the mixture cool slightly. This step is essential for combining the flavors seamlessly in your stuffing, ensuring each cream-filled shell bursts with deliciousness.
Step 4: Make the Filling
In a large mixing bowl, combine ricotta cheese, cream cheese, cooked shrimp, crab meat, half of the mozzarella, salt, pepper, and optional red pepper flakes. Once the spinach mixture has cooled, fold it in gently until all the ingredients are well incorporated. This rich filling is the heart of your Creamy Seafood Stuffed Shells!
Step 5: Prepare Baking Dish
Spread half of the marinara sauce evenly across the bottom of a 9×13 baking dish. This layer of sauce not only adds flavor but also ensures the pasta shells bake perfectly without drying out. Get ready to fill each shell with the delicious seafood mixture you’ve just prepared!
Step 6: Stuff and Arrange Shells
Carefully stuff each cooked jumbo pasta shell with the seafood filling, making sure they are generously loaded for maximum flavor. Arrange the stuffed shells in the prepared baking dish, side by side. Take a moment to marvel at the assembly—you’re well on your way to enjoying your Creamy Seafood Stuffed Shells!
Step 7: Add Sauce and Cheese
Pour the remaining marinara sauce over the stuffed shells, making sure they’re covered but not drowning. Sprinkle the rest of the mozzarella and grated Parmesan cheese on top for a delightful cheesy crust. The combination of sauce and cheese will create a heavenly bake that sings Italian comfort!
Step 8: Bake to Perfection
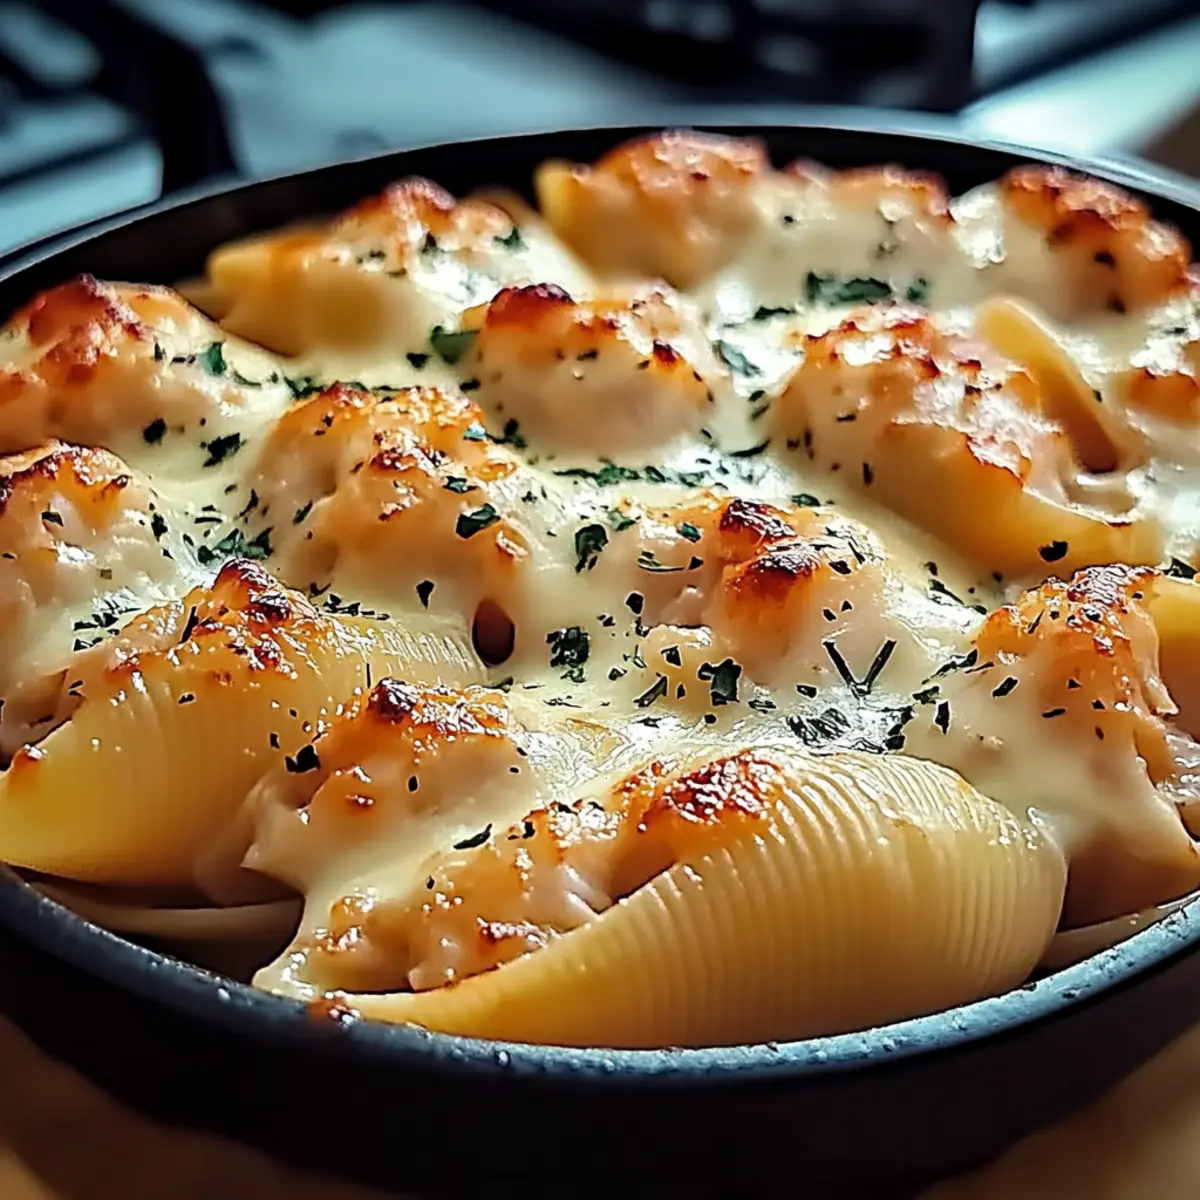
Cover your baking dish with foil and place it in the preheated oven. Bake for 25 minutes, then remove the foil and bake for an additional 10 minutes, or until the cheese is bubbly and golden brown. The sight of melted cheese and bubbling sauce will surely whet your appetite for these Creamy Seafood Stuffed Shells.
Step 9: Cool and Serve
Once baked, remove the dish from the oven and allow it to cool slightly before serving. This brief wait will help everything set beautifully. As you dish out this decadent meal, the satisfying aroma will tempt everyone to gather around the dinner table!
What to Serve with Creamy Seafood Stuffed Shells?
Indulging in Creamy Seafood Stuffed Shells is just the beginning of a delicious dining experience; here are some perfect accompaniments to elevate your meal.
-
Garlic Bread: The warm, buttery crunch of garlic bread brings irresistible flavor that complements the creamy filling beautifully. Plus, who can resist dipping it into marinara sauce?
-
Caesar Salad: Crisp romaine, tangy dressing, and crunchy croutons offer a fresh contrast to the rich pasta. The Caesar’s depth balances the creamy shells perfectly.
-
Roasted Vegetables: Seasonal roasted veggies like zucchini and bell peppers add color and a caramelized flavor that pairs naturally with seafood. They lend a lovely char that enhances each bite.
-
Chardonnay: This crisp white wine, with its fruity notes, acts as a refreshing counterpart to the savory flavors of the dish. Sipping on Chardonnay while enjoying your meal can enhance your culinary experience.
-
Italian Pasta Salad: Bursting with tangy vinaigrette, olives, and cherry tomatoes, this salad offers a refreshing side that complements the comforting stuffed shells without overwhelming the palate.
-
Lemon Sorbet: For dessert, a chilled lemon sorbet is a light, zesty choice that cleanses the palate after the hearty seafood shells. It’s a sweet ending that leaves you feeling refreshed!
By pairing these delightful accompaniments, your Creamy Seafood Stuffed Shells will transform into a full-fledged gourmet experience!
Make Ahead Options
These Creamy Seafood Stuffed Shells are a lifesaver for busy weeknights! You can prepare the stuffed shells up to 24 hours in advance, keeping them covered in the refrigerator before baking. Simply follow the instructions until Step 6, then tightly cover your baking dish with plastic wrap or aluminum foil to prevent drying out and ensure freshness. When you’re ready to dive in, remove the cover and bake as directed, adding an extra 5-10 minutes to the cooking time since they’ll be chilled. This way, you can serve a delightful homemade meal with minimal effort, perfectly balancing convenience and deliciousness!
How to Store and Freeze Creamy Seafood Stuffed Shells
Fridge: Store leftovers in an airtight container for up to 3 days. Reheat in the oven or microwave until warmed through for the best taste.
Freezer: Freeze unbaked stuffed shells by placing them in a tightly sealed container or freezer bag for up to 2 months. Thaw in the fridge before baking for recommended results.
Reheating: To reheat baked shells, cover with foil and warm in a preheated oven at 350°F for about 20-25 minutes until heated thoroughly.
Make-Ahead Tip: Prepare your Creamy Seafood Stuffed Shells and refrigerate them for up to 24 hours before baking. Just allow for a few extra minutes in the oven if they’re chilled!
Expert Tips for Creamy Seafood Stuffed Shells
-
Thaw Seafood Properly: Ensure frozen seafood is completely thawed and drained to prevent excess moisture, which can make your stuffed shells soggy.
-
Prep Ahead: You can prepare the stuffed shells a day in advance. Simply assemble them in the baking dish, refrigerate, and add an extra 10 minutes of baking time for a hassle-free dinner.
-
Crunchy Topping: For an extra layer of texture, sprinkle some breadcrumbs over the cheese before the final bake. This will create a delightful crust on top of your Creamy Seafood Stuffed Shells.
-
Fresh Herbs Boost: Enhance the flavor of your filling by incorporating fresh herbs like parsley or dill; their brightness elevates the dish beautifully.
-
Check Cheese Quality: Use high-quality cheese for the best melting and flavor. Fresh mozzarella melts incredibly well, giving that perfect ooey-gooey top layer.
-
Don’t Overfill: When stuffing the shells, avoid overfilling them to prevent spillage while baking. Leave a little space at the top for cheese and sauce to mingle!
Creamy Seafood Stuffed Shells Variations
Feel free to get creative and personalize your Creamy Seafood Stuffed Shells to suit your taste buds and dietary needs!
- Chicken Twist: Replace the seafood with cooked chicken for a hearty yet different take that still delivers delicious creaminess.
- Veggie Delight: Swap seafood for a medley of sautéed vegetables like zucchini, bell peppers, and mushrooms for a vibrant, colorful meal.
- Cheese Swap: Experiment with different cheeses like goat cheese for a tangy flavor, or gouda for a smoky touch; consider feta for a Mediterranean flair.
- Lighten Up: For a lighter version, substitute cream cheese with Greek yogurt. This will give you a smooth, creamy filling without all the calories!
- Spicy Kick: Increase the heat by adding sliced jalapeños or more red pepper flakes, perfect for those who love a bit of spice in their dish.
- Crunchy Topping: For added texture, sprinkle breadcrumbs or crushed crackers over the cheese before baking. This will give a delightful crunch to each bite.
- Saucy Switch: Use Alfredo sauce instead of marinara for an ultra-creamy, luscious finish; it’s an indulgent twist that takes comfort food to the next level.
- Seafood Medley: Mix different types of seafood, such as scallops and lobsters, for a gourmet touch that’s sure to impress your dinner guests.
Whichever direction you choose, these delightful variations will ensure that your Creamy Seafood Stuffed Shells remain a favorite in your household! Don’t forget to pair them with a fresh side salad or a comforting bowl of Macaroni Cheese Soup for a complete meal experience.

Creamy Seafood Stuffed Shells Recipe FAQs
What seafood should I use for the filling?
You can use cooked shrimp and crab meat as the main seafood components. If you’d prefer to switch it up, feel free to replace the seafood with cooked chicken or sautéed mushrooms for a tasty variation.
How should I store leftovers of Creamy Seafood Stuffed Shells?
Store any leftovers in an airtight container in the refrigerator for up to 3 days. When reheating, you can use the oven or microwave, though baking will help retain that delicious, bubbly texture of the cheese.
Can I freeze Creamy Seafood Stuffed Shells?
Absolutely! To freeze, assemble the stuffed shells in a baking dish but do not bake them. Cover tightly with foil or plastic wrap and freeze for up to 2 months. When you’re ready to enjoy them, thaw the dish in the fridge overnight and then bake as usual, adding about 10 additional minutes to ensure they’re heated through.
What can I do if my filling is too runny?
If you find your filling is too moist, try adding a little more ricotta cheese or a handful of breadcrumbs to help absorb excess moisture. This will keep your filling from spilling out during baking. Additionally, ensure your seafood is well-drained if you used frozen, as excess moisture can contribute to a runny consistency.
Any tips for making Creamy Seafood Stuffed Shells kid-friendly?
For picky eaters, consider substituting the seafood with shredded chicken or finely diced veggies, such as bell peppers or zucchini. You can also use a milder cheese, like a blend of mozzarella and cheddar, which tends to be more appealing to children.
How can I enhance the flavor of my filling?
To elevate the flavor of your filling, add fresh herbs such as parsley, dill, or basil. You might also include a dash of lemon juice or zest for a bright contrast to the creamy filling, giving your Creamy Seafood Stuffed Shells a refreshing punch!

Creamy Seafood Stuffed Shells
Ingredients
Equipment
Method
- Preheat your oven to 375°F (190°C). Cook jumbo pasta shells in salted boiling water until al dente, about 9-11 minutes. Drain and set aside.
- In a skillet, heat olive oil and sauté onion and garlic for 3-4 minutes until translucent.
- Add fresh spinach and wilt for about 2 minutes, then remove from heat to cool slightly.
- In a mixing bowl, combine ricotta, cream cheese, shrimp, crab meat, half the mozzarella, salt, pepper, and optional red pepper flakes. Fold in the cooled spinach mixture.
- Spread half the marinara sauce in a baking dish and stuff each shell with the filling before arranging them beside each other.
- Pour remaining marinara sauce over the shells and top with the rest of the mozzarella and Parmesan cheese.
- Cover with foil and bake for 25 minutes, then uncover and bake for an additional 10 minutes until cheese is bubbly and golden.
- Let cool slightly before serving to allow everything to set beautifully.
Leave a Reply