
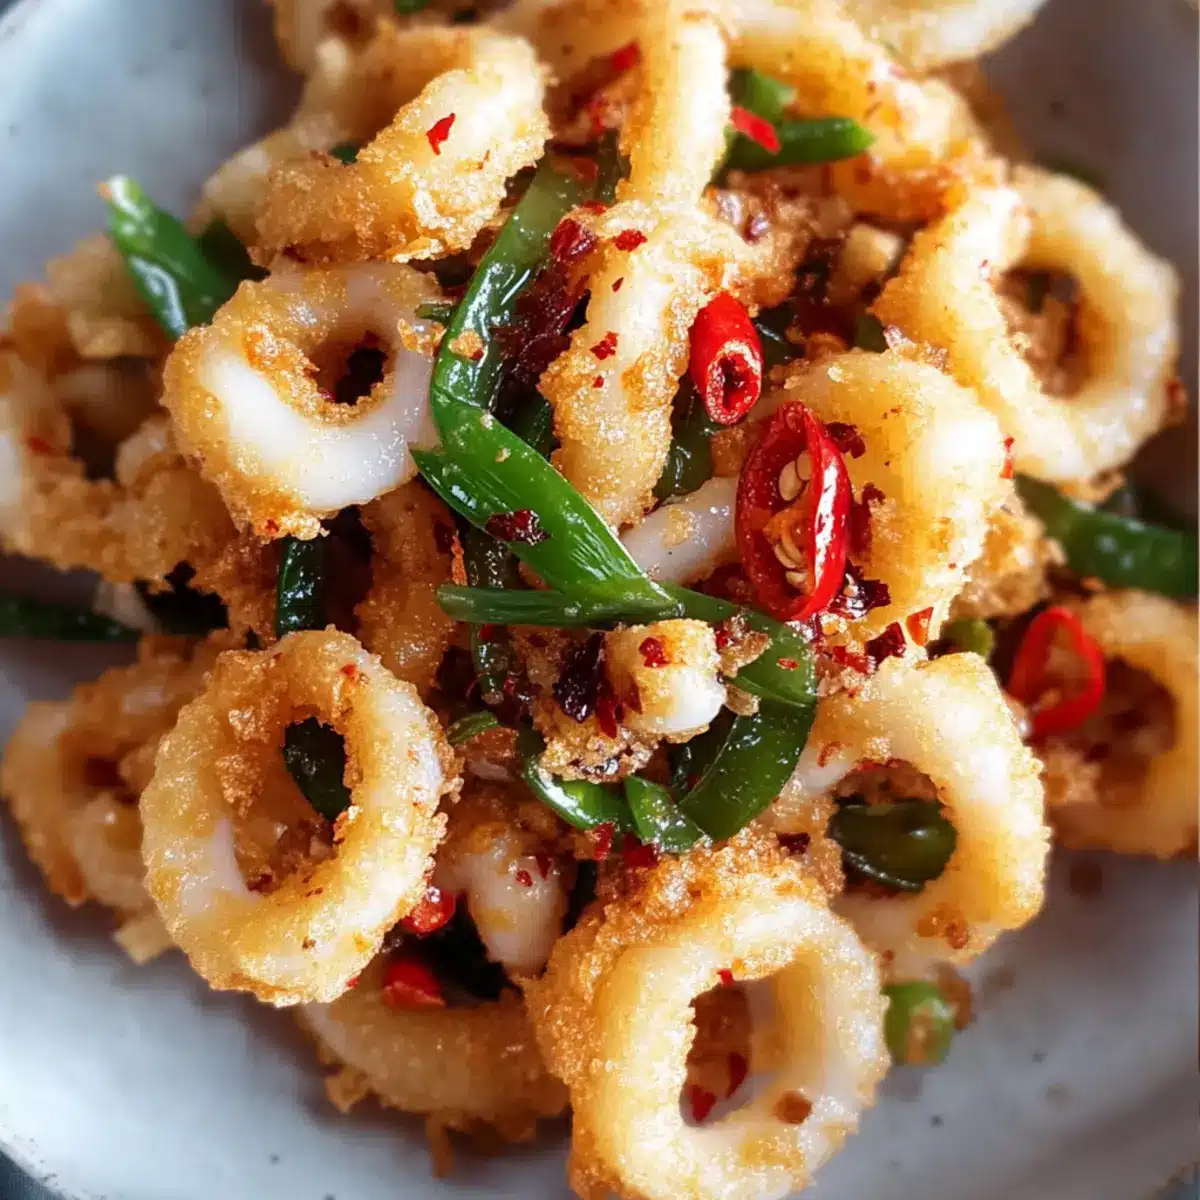
The sizzle and pop of hot oil come alive as I drop in the first batch of squid rings, instantly transporting me to a bustling night market far away. This Crispy Salt and Pepper Squid brings all the exciting flavors of Chinese cuisine right to your home, transforming a simple dinner into an enchanting experience. Not only is it incredibly easy to whip up, but it also excels as a crowd-pleasing appetizer that will have your family begging for more. With its crunchy coating, tender inside, and a delightful kick from scallions and chilies, it’s the perfect way to shake off the fast food rut. Are you ready to dive into a dish that elevates any meal? Let’s get cooking!
Why is Salt and Pepper Squid a Must-Try?
Irresistible Crunch: The crispy batter enveloping the squid creates a satisfying texture that’s hard to resist.
Flavor Explosion: With a perfect marriage of scallions and chilies, each bite packs a punch of savory and spicy goodness.
Quick and Easy: This dish comes together in under 30 minutes, making it a breeze for busy weeknights or entertaining guests.
Crowd-Pleasing Appeal: Serve it at your next gathering, and watch as everyone raves about this delectable appetizer! Pair it with Crockpot Chicken Gravy or Slow Cooker Garlic for a complete menu.
Versatile Ingredients: Feel free to switch up your proteins or adjust the spice level to suit your tastes, making it a customizable favorite.
With its stunning presentation and delightful flavors, this Salt and Pepper Squid will have you ditching fast food for good!
Salt and Pepper Squid Ingredients
For the Squid
• Squid tubes – This is the star of the dish providing that wonderful seafood flavor; ensure they are cleaned and cut into rings.
For the Batter
• All-purpose flour – This forms the base of your frying batter, giving it structure; feel free to use gluten-free flour if needed.
• Corn starch – Essential for achieving that crispy texture in the batter.
• Baking soda – It creates a light, airy batter that enhances crunchiness.
• Egg white – Helps bind the batter and achieves a crispy coating; use an egg replacer for a vegan option.
• Water – Adjust the amount to get your ideal batter consistency.
• Pinch of salt – Enhances the overall flavor of the batter.
For Frying and Toppings
• Oil (for deep frying) – Necessary to achieve the crispy exterior; opt for a neutral oil with a high smoke point.
• Oil (for stir-frying) – Used to sauté the scallions and chilies for a burst of flavor.
• Chopped scallions – Adds a mild onion flavor and freshness; can substitute with green onions if desired.
• Chopped red chilies – Brings heat and vibrant color; adjust based on your spice preference.
• Salt – Essential for seasoning both the squid and the finished dish.
• Ground white pepper – Adds distinctive heat and flavor; black pepper is a good substitution if needed.
With these ingredients, you’re just moments away from creating your mouth-watering Salt and Pepper Squid. Happy cooking!
Step‑by‑Step Instructions for Salt and Pepper Squid
Step 1: Prepare the Squid
Rinse the cleaned squid under cold running water to remove any excess debris, then pat the squid tubes dry using paper towels. Cut them into rings, each about half an inch thick, ensuring they will fry evenly. Arrange the squid rings on a plate and set aside while you prepare the batter for the Salt and Pepper Squid.
Step 2: Make the Batter
In a mixing bowl, combine all-purpose flour, cornstarch, baking soda, and a pinch of salt. Whisk in an egg white and enough water to achieve a smooth, thick batter with a drizzle-ready consistency. Aim for a texture that clings without being too runny; this mixture will create that irresistible crunch when frying the squid.
Step 3: Coat the Squid
Toss the prepared squid rings into the batter, allowing each piece to become fully coated. Use your hands or a fork to ensure an even coating on all sides. This batter will help form a golden crust during frying, enhancing the overall flavor and crispy texture of your Salt and Pepper Squid.
Step 4: Heat the Oil
In a large wok or deep frying pan, pour in enough oil to reach 2–3 inches deep. Heat the oil on medium-high heat until it reaches 350°F (175°C). To test, drop a small dollop of batter into the oil; if it sizzles and rises to the surface, the oil is hot enough to begin frying the squid.
Step 5: Deep-Fry the Squid
Carefully drop the battered squid rings into the hot oil in small batches to avoid overcrowding. Fry the squid for about 2–3 minutes, turning gently with a slotted spoon to ensure even cooking. Watch for a beautiful golden color as a visual cue for doneness. Once crispy, the squid will be ready to remove from the oil.
Step 6: Drain the Squid
Using a slotted spoon, carefully remove the fried squid from the hot oil and place them on a plate lined with paper towels. This step helps absorb excess oil, keeping your Salt and Pepper Squid crispy and light. Allow them to cool for a minute while you prepare the stir-fry toppings.
Step 7: Stir-Fry the Toppings
In a separate skillet, heat ½ tablespoon of oil over high heat. Add the chopped scallions and red chilies, sautéing quickly for about 30 seconds until fragrant. Look for the scallions to soften slightly, which enhances their flavor and brings out the heat from the chilies to complement the Salt and Pepper Squid.
Step 8: Combine and Serve
In a large bowl, toss the crispy squid with the stir-fried scallions, chilies, and a sprinkle of salt and ground white pepper. Make sure all the squid is well-coated with the aromatic mixture. Serve your delightful Salt and Pepper Squid immediately for the best taste and texture, paired with sweet chili sauce or soy sauce if desired.
Make Ahead Options
Preparing your Salt and Pepper Squid in advance is a fantastic way to save time on busy weeknights or for entertaining guests! You can prep the squid rings by cleaning and cutting them up to 24 hours in advance; simply store them in an airtight container in the refrigerator to keep them fresh. You can also mix the batter and refrigerate it for up to 3 days; just give it a quick whisk before using, as it may thicken. When you’re ready to serve, deep-fry the squid and stir-fry the scallions and chilies for that burst of flavor. Following these tips ensures your dish remains just as delicious and crispy as if made fresh!
How to Store and Freeze Salt and Pepper Squid
Room Temperature: Best enjoyed immediately after frying; however, if left out, consume within 2 hours to ensure freshness and safety.
Fridge: Store leftover Salt and Pepper Squid in an airtight container in the fridge for up to 3 days. Reheat in a hot skillet for a few minutes to restore crispness.
Freezer: For longer storage, freeze the cooked and cooled squid in a single layer on a baking sheet. Once frozen, transfer to a freezer bag for up to 1 month.
Reheating: To reheat from frozen, bake at 375°F (190°C) for 10-15 minutes until heated through and crispy again. Enjoy this delightful appetizer at any time!
What to Serve with Crispy Salt and Pepper Squid?
Create a vibrant meal that complements the thrilling flavors and textures of this seafood delight.
-
Steamed Jasmine Rice: This fluffy rice soaks up the savory flavors and balances the dish’s vibrant spice, creating a comforting base.
-
Stir-Fried Vegetables: Opt for colorful bell peppers, snow peas, and vibrant carrots. Their crunch and freshness offer a delightful contrast to the crispy squid.
-
Sweet Chili Sauce: This sweet-and-spicy dipping sauce adds a delicious layer to the dish, elevating every bite with its tangy kick.
-
Sesame Noodles: Serve chilled sesame noodles for a refreshing and nutty flavor that pairs perfectly with the warm, crispy squid.
-
Crispy Spring Rolls: These crunchy appetizers add more texture and a refreshing veggie component, bursting with flavors of fresh herbs.
-
Cucumber Salad: A cool, tangy cucumber salad with a light dressing provides a refreshing counterpoint to the richness of fried squid.
Pairing different textures and flavors brings harmony to the meal and makes each invitation to the table a celebration of deliciousness.
Expert Tips for Perfect Salt and Pepper Squid
-
Oil Temperature: Ensure the oil is at 350°F (175°C) for perfectly crispy squid. Too low, and the squid may become soggy; too high, and it will burn.
-
Batch Frying: Avoid overcrowding the pan when frying the squid. Frying in small batches helps maintain the oil temperature, resulting in a crunchy Salt and Pepper Squid.
-
Short Fry Time: Keep the frying time to just 2-3 minutes. Overcooking the squid can lead to a rubbery texture, diminishing that tender bite.
-
Coating Consistency: The batter should be thick but smooth. A well-coated squid ring will create a beautifully crisp layer that enhances flavor.
-
Quick Stir-Fry: When stir-frying scallions and chilies, keep it brief. Quick cooking preserves their flavors and adds freshness to your salty, peppery delight.
Salt and Pepper Squid Variations to Try
Feel free to unleash your culinary creativity and explore some delightful twists on this crispy dish!
-
Seafood Swap: Use shrimp or calamari instead of squid for a different yet delicious seafood experience. Both options retain the dish’s core appeal while offering their unique flavors.
-
Herb Infusion: Add fresh cilantro or basil to the batter or as a garnish. This brightens the dish with fresh herbal notes that work wonderfully with the squid’s texture.
-
Chili Heat: Experiment with different chili varieties! Use jalapeños for a milder kick or Thai bird chilies for an extra punch of heat, keeping your taste buds excited.
-
Texture Variation: Try a panko breadcrumb coating instead of standard flour for an even crunchier bite! It elevates the texture, making every mouthful a delightful crunch.
-
Spicy Aioli: Serve with a homemade spicy aioli drizzled on top or as a dip. Mixing mayo with sriracha or garlic adds an extra level of flavor and creaminess.
-
Zesty Citrus: Squeeze fresh lime or lemon juice over the finished dish for a zesty brightness that cuts through the richness of the fried squid, adding depth to each bite.
-
Seasoning Play: Experiment with other spices in the batter, like smoked paprika or Cajun seasoning, for a flavor twist that teases the tastebuds with every crunchy bite.
-
Vegan Option: Substitute squid with marinated tofu or eggplant for a satisfying vegan twist, while still retaining the appeal of crispy, savory goodness.
Whether you choose to stick with the classic or venture into these variations, you’ll find this Salt and Pepper Squid embodies fun and flavor, perfect for elevating your dinner any night of the week! Looking for more delicious dishes? Try pairing it with Sausage Broccoli Orzo for a delightful meal.
Salt and Pepper Squid Recipe FAQs
How do I choose the right squid for my Salt and Pepper Squid?
Absolutely! When selecting squid, look for fresh, firm squid with a clean, ocean-like smell. Choose squid tubes that are pale to bright white with no dark spots or blemishes. Freshness is key; if you’re buying frozen squid, ensure it’s properly thawed before cooking.
What is the best way to store leftover Salt and Pepper Squid?
To maintain freshness, store any leftover Salt and Pepper Squid in an airtight container in the fridge, where it will last for up to 3 days. To reheat, place it in a hot skillet for a few minutes, which will help restore some of that delightful crispiness without making it soggy.
Can I freeze Salt and Pepper Squid?
Yes, you can freeze your Salt and Pepper Squid for future enjoyment! To freeze, first allow the cooked squid to cool completely. Arrange the squid in a single layer on a baking sheet and freeze until firm. Transfer the frozen squid to a freezer-safe bag or container. They can be frozen for up to 1 month. When ready to enjoy, bake at 375°F (190°C) for about 10-15 minutes to reheat and restore crispiness.
My squid turned out rubbery; what went wrong?
Very! A common issue with squid becoming rubbery is overcooking. Ideally, keep the frying time to just 2-3 minutes to avoid this. Additionally, ensure your oil is at the right temperature (350°F or 175°C) before frying, as lower temperatures can result in soggy textures. Cooking in small batches allows for more control and better results.
Are there any dietary considerations I should be aware of?
Definitely! While Salt and Pepper Squid is a delicious option, be mindful of potential shellfish allergies. If you’re serving those with dietary restrictions, consider substituting squid with shrimp or another seafood that suits their needs. Additionally, if you’re looking for a vegan alternative, replace the egg white in the batter with a suitable egg replacer and enjoy a plant-based version!
How can I make my batter extra crispy?
To achieve an extra crispy batter, mix cornstarch with your all-purpose flour and ensure the batter is thick enough to cling well to the squid. The baking soda helps lighten the batter, contributing to a crunchier texture. Also, ensure your oil is heated correctly and avoid overcrowding when frying to keep the temperature consistent throughout the cooking process.
Savory Salt and Pepper Squid Crispy Delight at Home
Ingredients
Equipment
Method
- Rinse the cleaned squid under cold running water to remove any excess debris, then pat dry and cut into rings about half an inch thick.
- In a mixing bowl, combine all-purpose flour, cornstarch, baking soda, and a pinch of salt. Whisk in egg white and water to achieve a smooth batter.
- Toss squid rings into the batter to ensure each piece is fully coated.
- In a large wok or frying pan, heat enough oil to reach 2-3 inches deep to 350°F (175°C).
- Drop battered squid rings into the hot oil in small batches and fry for about 2-3 minutes until golden brown.
- Remove squid using a slotted spoon and place on paper towels to drain excess oil.
- In a separate skillet, heat oil and sauté chopped scallions and red chilies for about 30 seconds.
- Combine fried squid with the stir-fried scallions, chilies, salt, and white pepper; serve immediately.
Leave a Reply