
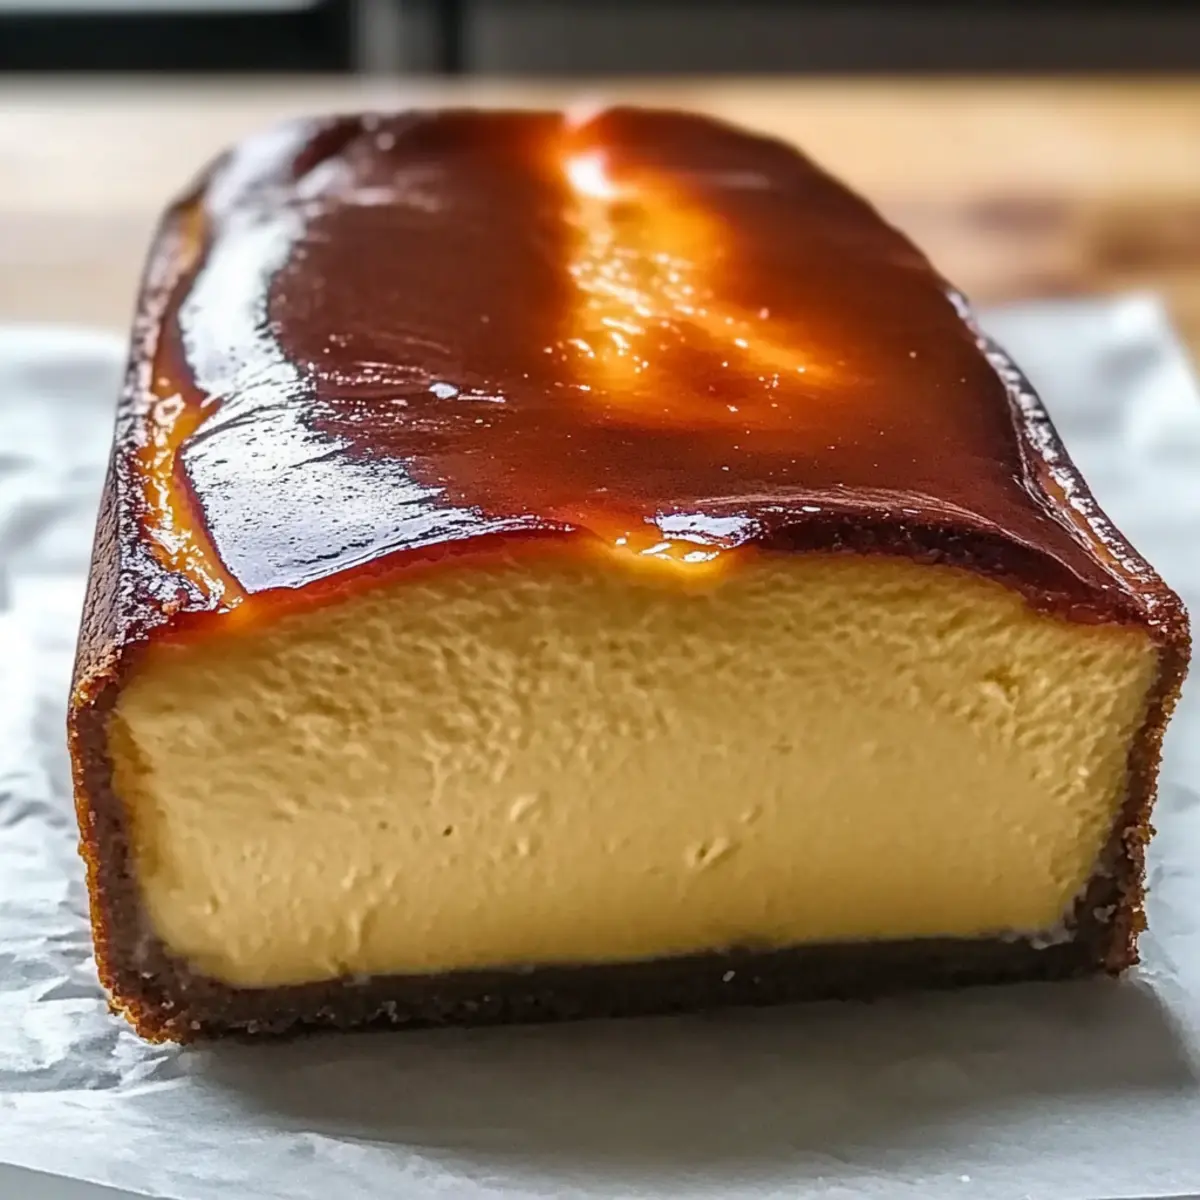
Every time I pull out my loaf pan, I’m reminded of the culinary magic that can happen in a compact space. This Easy Burnt Basque Cheesecake in a Loaf Pan transforms simple ingredients into a standout dessert that’s sure to impress. With its creamy custard-like center and beautifully caramelized top, this recipe is perfect for those who crave indulgence without the hassle. Whether it’s a cozy dinner for two or a gathering with friends, this small-batch cheesecake hits the mark on flavor and presentation. Plus, it’s incredibly versatile, inviting you to experiment with your favorite mix-ins. Ready to take a slice into this delightful world of flavor? Let’s get baking!
Why is Burnt Basque Cheesecake a Must-Try?
Creamy, Custard-Like Center: The texture of this cheesecake is irresistibly smooth, reminiscent of a rich custard that simply melts in your mouth. Effortless Preparation: With just a handful of ingredients and minimal steps, you’ll find that baking this showstopper is both quick and easy. Perfect for Any Occasion: Whether it’s a casual weeknight dessert or an elegant dinner party, this adaptable cheesecake makes a stunning centerpiece. Small-Batch Delight: Made in a loaf pan, it’s ideal for satisfying cravings without leftovers or the stress of a full-sized cheesecake. Pair it with a seasonal fruit compote or even the indulgent Bake Gingerbread Cheesecake for extra flair that keeps things exciting!
Burnt Basque Cheesecake Ingredients
For the Cheesecake
- Cream Cheese – Use softened cream cheese for a smoother batter with no lumps.
- Sugar – Sweetens the cheesecake and contributes to its light texture when beaten with cream cheese.
- Eggs (2) – Provide binding and give the cheesecake its luxurious custardy texture. Incorporate one at a time for perfect mixing.
- Heavy Cream (3/4 cup) – Adds richness, creating an indulgent, creamy filling.
- Vanilla Extract (1 teaspoon) – Enhances sweetness and adds a delightful depth of flavor to your Burnt Basque Cheesecake.
- Salt (1/8 teaspoon) – Balances the sweetness and enriches the overall flavor profile.
- Flour (1 tablespoon) – Helps the cheesecake set; remember to sift and fold in gently to maintain a light texture.
Step‑by‑Step Instructions for Easy Burnt Basque Cheesecake in a Loaf Pan
Step 1: Preheat the Oven
Begin by preheating your oven to 400°F (200°C). This high temperature is essential for creating that beautifully caramelized top that makes the Burnt Basque Cheesecake so remarkable. Make sure your oven is fully heated before you proceed to the next steps to ensure optimal baking results.
Step 2: Prepare the Loaf Pan
While the oven heats, line a loaf pan with parchment paper, ensuring it hangs over the edges for easy removal later. This simple step will prevent the cheesecake from sticking and allows for a clean release, ensuring your dessert maintains its lovely shape when served.
Step 3: Cream the Sugar and Cheese
In a spacious mixing bowl, beat the softened cream cheese and sugar together until the mixture becomes smooth and fluffy, approximately 2-3 minutes. Make sure there are no lumps in the batter; this creamy base is the heart of your Easy Burnt Basque Cheesecake, contributing to its decadent texture.
Step 4: Add the Eggs
Incorporate the eggs, one at a time, into the creamy mixture, blending thoroughly after each addition. This technique allows for even mixing and ensures the cheesecake’s custardy texture. You’ll notice your batter becoming more aerated and rich as you continue to mix in the eggs.
Step 5: Blend in the Cream and Flavor
Pour in the heavy cream, vanilla extract, and a pinch of salt. Mix until the batter is silky smooth, taking care not to over-mix as you want to keep the airiness. This step enhances the flavor and richness, adding to the overall lusciousness of your Burnt Basque Cheesecake.
Step 6: Fold in the Flour
Sift in the flour and gently fold it into the batter until just combined. This means no visible flour should remain, but be careful not to over-mix, as you want to preserve the lightness and creamy texture. The flour will help set the cheesecake as it bakes, ensuring a rich consistency.
Step 7: Pour and Tap
Carefully pour the cheesecake batter into the prepared loaf pan, smoothing the top using a spatula. Once filled, gently tap the pan against the countertop to release any air bubbles trapped inside the batter. This helps ensure an even baking result and a smooth texture.
Step 8: Bake the Cheesecake
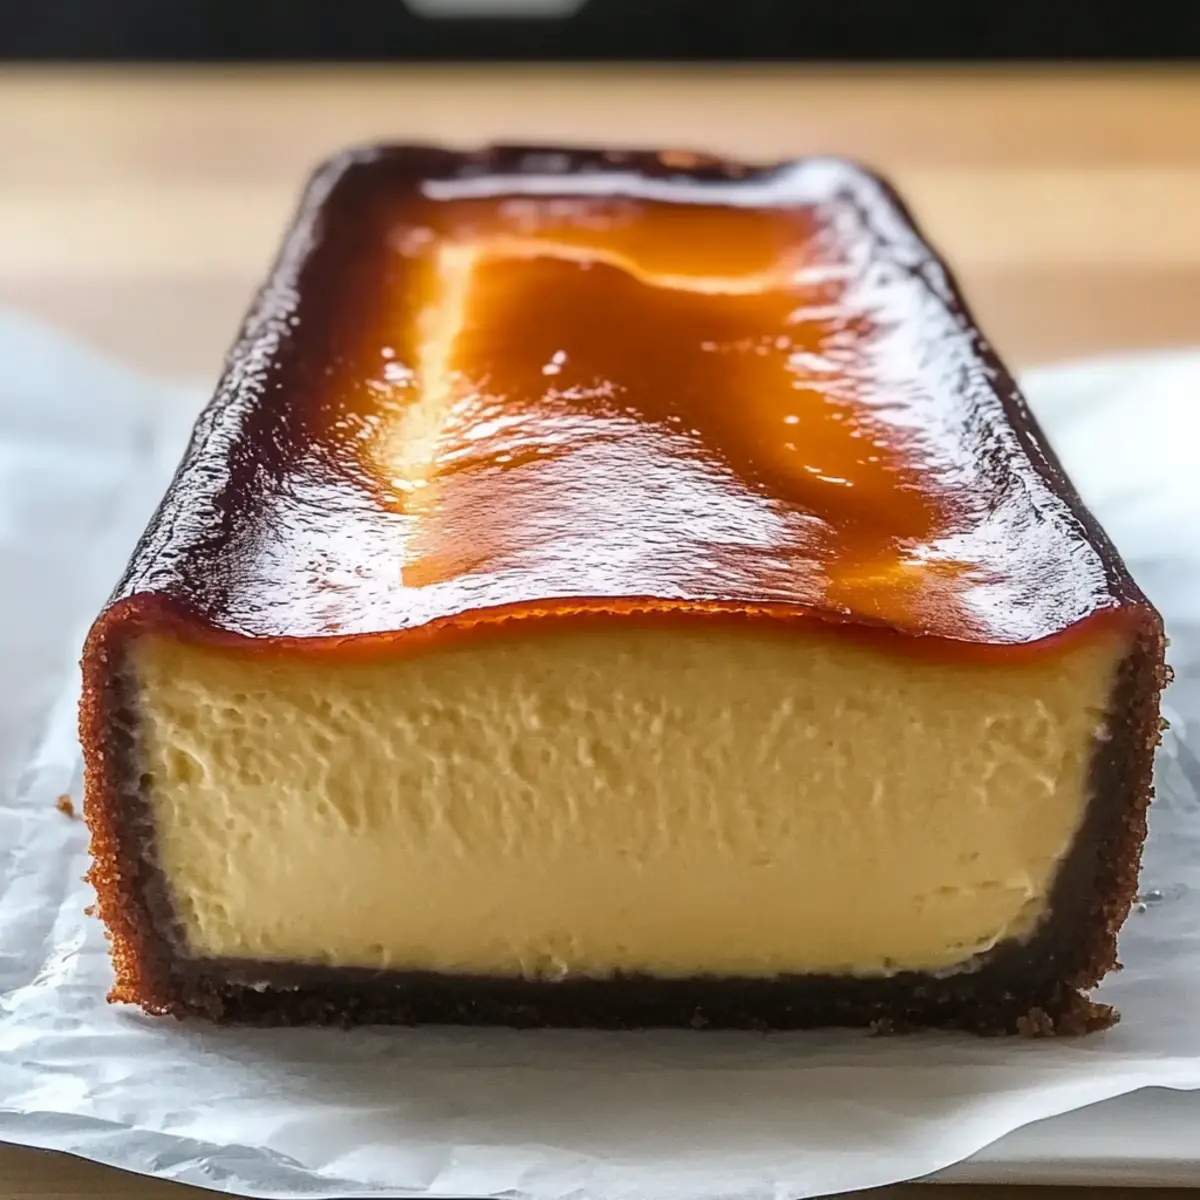
Place your loaf pan in the preheated oven and bake for 40–45 minutes. Keep an eye on the top of the cheesecake; it should be deeply golden and slightly burnt while the center remains jiggly. This contrast is the hallmark of the Burnt Basque Cheesecake, adding visual appeal and rich flavor.
Step 9: Cool and Chill
Once baked, remove the cheesecake from the oven and allow it to cool at room temperature. After it has cooled for about 30 minutes, transfer it to the refrigerator and chill for at least 4 hours, or preferably overnight. This chilling time is crucial for enhancing the flavor and facilitating easier slicing.

Expert Tips for Burnt Basque Cheesecake
-
Use Softened Cream Cheese: Ensure your cream cheese is at room temperature to avoid lumps and achieve a smooth, creamy batter.
-
Don’t Skip the Chill: Allow the cheesecake to rest and chill overnight. This enhances the flavor and ensures a firmer texture for easy slicing.
-
Watch the Baking Time: Ovens vary, so monitor your cheesecake closely. The top should be deeply golden, while the center remains slightly jiggly for that signature texture.
-
Properly Line Your Pan: Line your loaf pan with parchment paper, allowing it to overhang the sides for easy removal, preventing any sticking mishaps.
-
Experiment with Add-ins: Consider adding citrus zest or chocolate chips to personalize your Burnt Basque Cheesecake and elevate its flavor profile.
Make Ahead Options
Planning ahead makes this Easy Burnt Basque Cheesecake in a Loaf Pan a breeze for busy weeknights! You can prepare the cheesecake batter up to 24 hours in advance and store it in the refrigerator in an airtight container; this preserves its creamy texture and flavors. Just remember to fold in the flour right before baking to maintain its lightness. The baked cheesecake can also be made up to 3 days ahead; simply allow it to cool and then refrigerate, covered tightly. When you’re ready to serve, just slice and enjoy the smooth, custard-like interior and the rich, caramelized top—just as delicious as when it’s freshly made!
Storage Tips for Burnt Basque Cheesecake
- Fridge: Store your Burnt Basque Cheesecake in the refrigerator, covered tightly, for up to 1 week. This helps maintain its luscious texture and rich flavor.
- Freezer: If you want to keep it longer, wrap individual slices in plastic wrap and place them in an airtight container. It can be frozen for up to 2 months without losing its creamy essence.
- Thawing: To enjoy frozen slices, transfer them to the fridge for several hours or overnight to thaw gently before serving. This preserves the delightful consistency and taste.
- Reheating: If preferred, enjoy slightly warmed slices by placing them in a preheated oven at 300°F (150°C) for about 10 minutes, letting that famous custardy center shine through once more.
Burnt Basque Cheesecake Variations & Substitutions
Feel free to explore your creativity with this delightful cheesecake and make it your own with these flavorful twists!
- Dairy-Free: Substitute with vegan cream cheese and coconut cream for a luscious vegan-friendly version that’s just as creamy.
- Lower Sugar: Use a sugar substitute like erythritol or monk fruit sweetener for a reduced-sugar option that doesn’t compromise on taste.
- Citrus Zest: Fold in lemon or orange zest for a bright burst of flavor that elevates the cheesecake’s richness.
- Chocolate Lovers: Add chocolate chips to the batter for an extra decadent chocolate twist that complements the burnt flavor beautifully.
- Swirl It: Create lovely swirls by adding caramel or fruit sauces before baking for a delightful surprise in every slice.
- Nutty Crunch: Top with crushed nuts or a sprinkle of almond flour for added texture and a nutty flavor contrast.
- Seasonal Spices: Mix in a pinch of cinnamon or nutmeg for a cozy touch, perfect for the holiday season.
- Mini Cheesecakes: Divide the batter into muffin tins for individual servings that are just as indulgent and adorable!
If the Burnt Basque Cheesecake is calling for something extra, consider pairing it with a luscious Blueberry Cheesecake Protein dessert, or step into the cozy warmth of a seasonal Bake Gingerbread Cheesecake for festive gatherings. Happy baking!
What to Serve with Easy Burnt Basque Cheesecake in a Loaf Pan
Indulge in delightful pairings that elevate your cheesecake experience to new heights.
-
Whipped Coconut Cream: This light and fluffy topping adds a tropical twist that complements the cheesecake’s rich flavors perfectly.
-
Seasonal Fruit Compote: A vibrant mixture of fresh berries or stone fruits provides a refreshing contrast, balancing the creamy texture of the cheesecake.
-
Crisp Shortbread Cookies: The buttery crunch of shortbread offers a delightful textural contrast, making each bite a harmonious combination of flavors.
-
Espresso or Coffee: The bold notes of freshly brewed coffee create a perfect match with the cheesecake, enhancing its rich flavors and deep caramelization.
-
Chocolate Ganache Drizzle: A drizzle of silky chocolate ganache brings a decadent sweetness, adding layers of flavor to your dessert experience.
-
Ice Cream Scoop: Pairing with a scoop of vanilla or caramel ice cream introduces a delightful creaminess, making the indulgence even more satisfying!
These delicious accompaniments not only enhance your Easy Burnt Basque Cheesecake but also create a memorable dessert experience for any occasion.
Burnt Basque Cheesecake Recipe FAQs
What type of cream cheese should I use for the cheesecake?
Absolutely! For the best results, always use softened cream cheese. This will ensure a smoother batter without lumps, contributing to the rich, creamy texture that makes the Burnt Basque Cheesecake irresistible.
How should I store my cheesecake?
To keep your cheesecake fresh and delicious, store it in the refrigerator, covered tightly with plastic wrap or in an airtight container, for up to 1 week. This helps maintain its luscious texture and prevents it from absorbing any odors from the fridge.
Can I freeze Burnt Basque Cheesecake?
Very much so! If you want to keep it longer, wrap individual slices in plastic wrap and place them in an airtight container. It can be frozen for up to 3 months without losing its creamy essence. When you’re ready to enjoy, simply transfer the slices to the fridge to thaw overnight.
What should I do if my cheesecake doesn’t jiggle in the center after baking?
If your cheesecake is firm all the way through after baking, it may have been overcooked. For the perfect texture, aim for a slightly jiggly center when you take it out of the oven. Remember, it will set while cooling in the fridge!
Are there any dietary considerations I should keep in mind?
Yes! If you or any guests have lactose intolerance or dairy allergies, consider using lactose-free cream cheese and heavy cream as alternatives. While the texture and taste may vary slightly, it can still be an enjoyable dessert option for everyone.
Can I use a different type of flour for the cheesecake?
Definitely! If you’re looking to make a gluten-free version, you can substitute regular flour with a gluten-free all-purpose blend. Just make sure it contains a binding agent to help mimic the structure of regular flour in your Burnt Basque Cheesecake.
Irresistible Burnt Basque Cheesecake That's Easier Than You Think
Ingredients
Equipment
Method
- Preheat your oven to 400°F (200°C).
- Line a loaf pan with parchment paper, ensuring it hangs over the edges.
- Beat softened cream cheese and sugar until smooth and fluffy, about 2-3 minutes.
- Incorporate the eggs, one at a time, blending thoroughly after each addition.
- Mix in the heavy cream, vanilla extract, and salt until silky smooth.
- Sift in the flour and gently fold it into the batter until just combined.
- Pour the cheesecake batter into the prepared loaf pan and tap gently to release air bubbles.
- Bake for 40–45 minutes until golden on top and the center is jiggly.
- Allow to cool at room temperature, then refrigerate for at least 4 hours or overnight.
Leave a Reply