
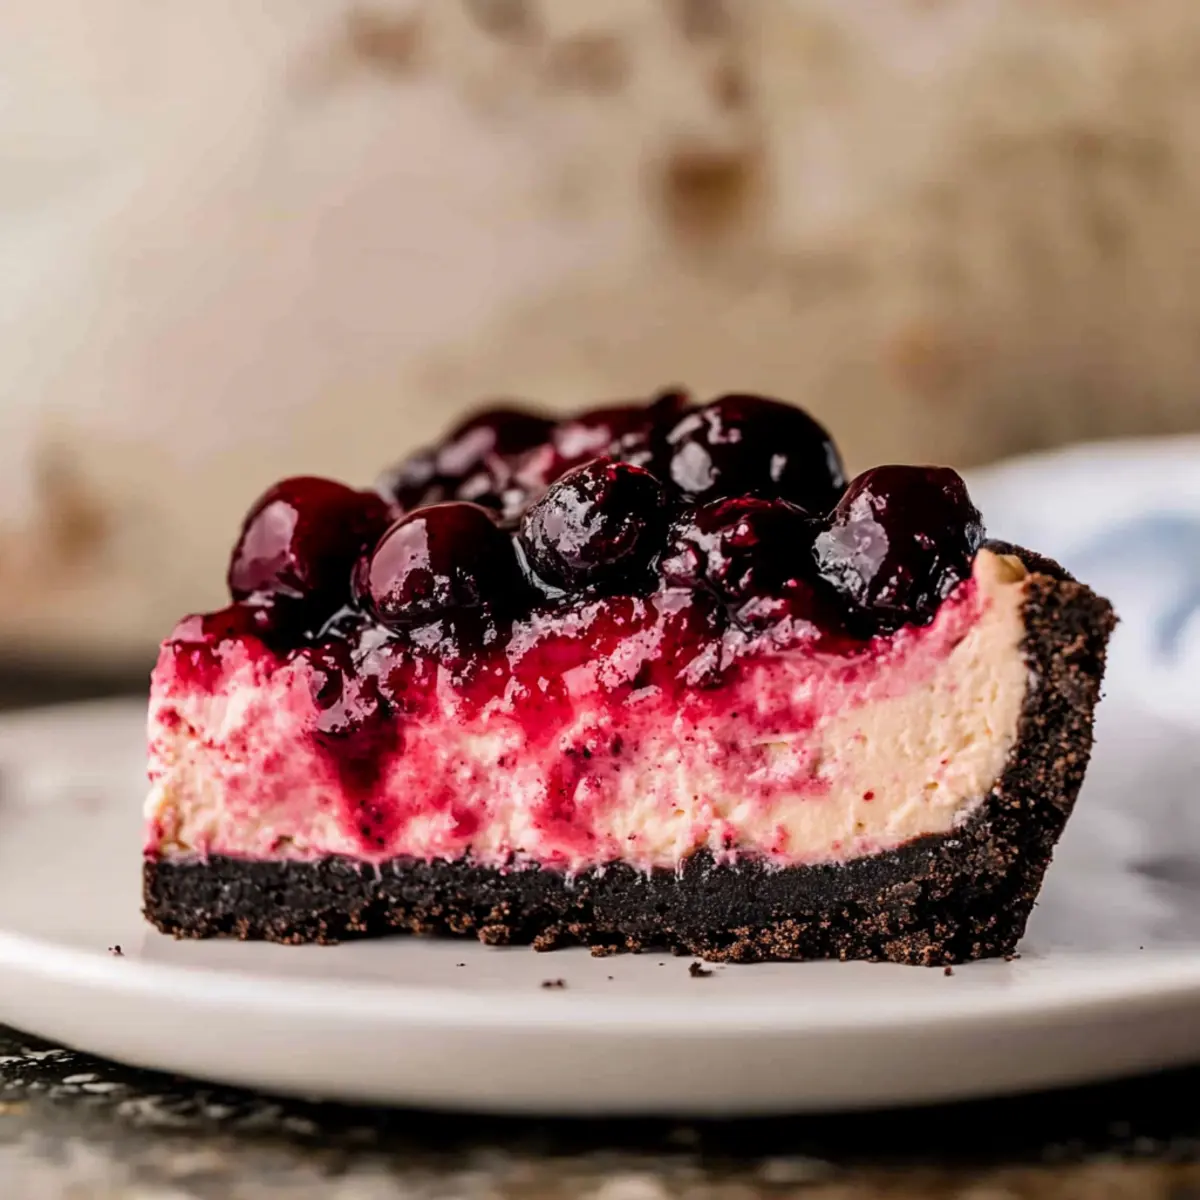
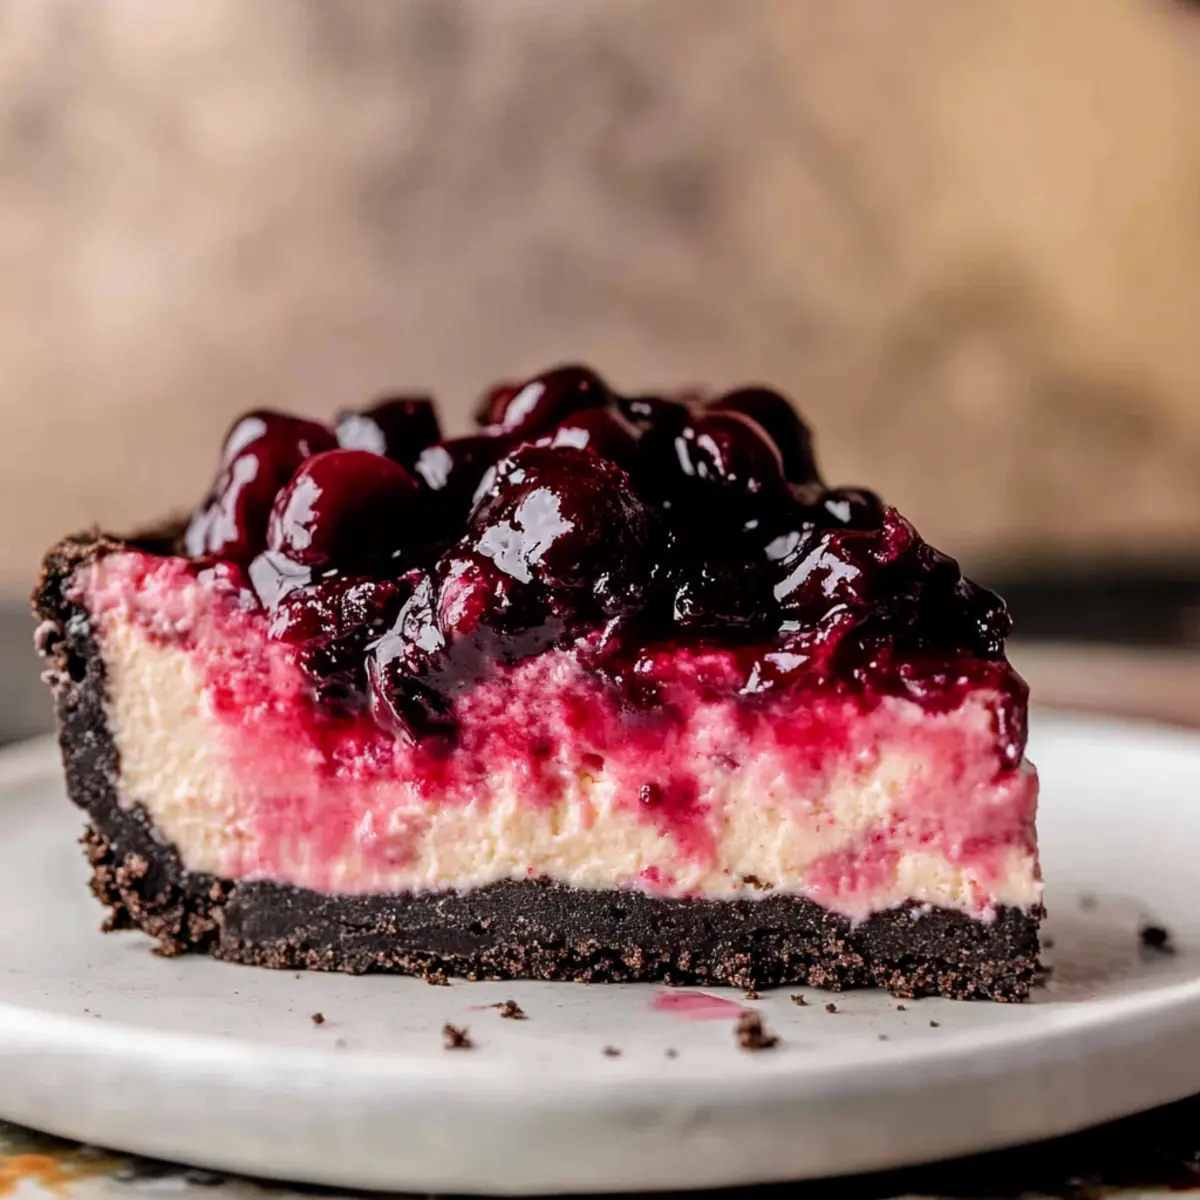
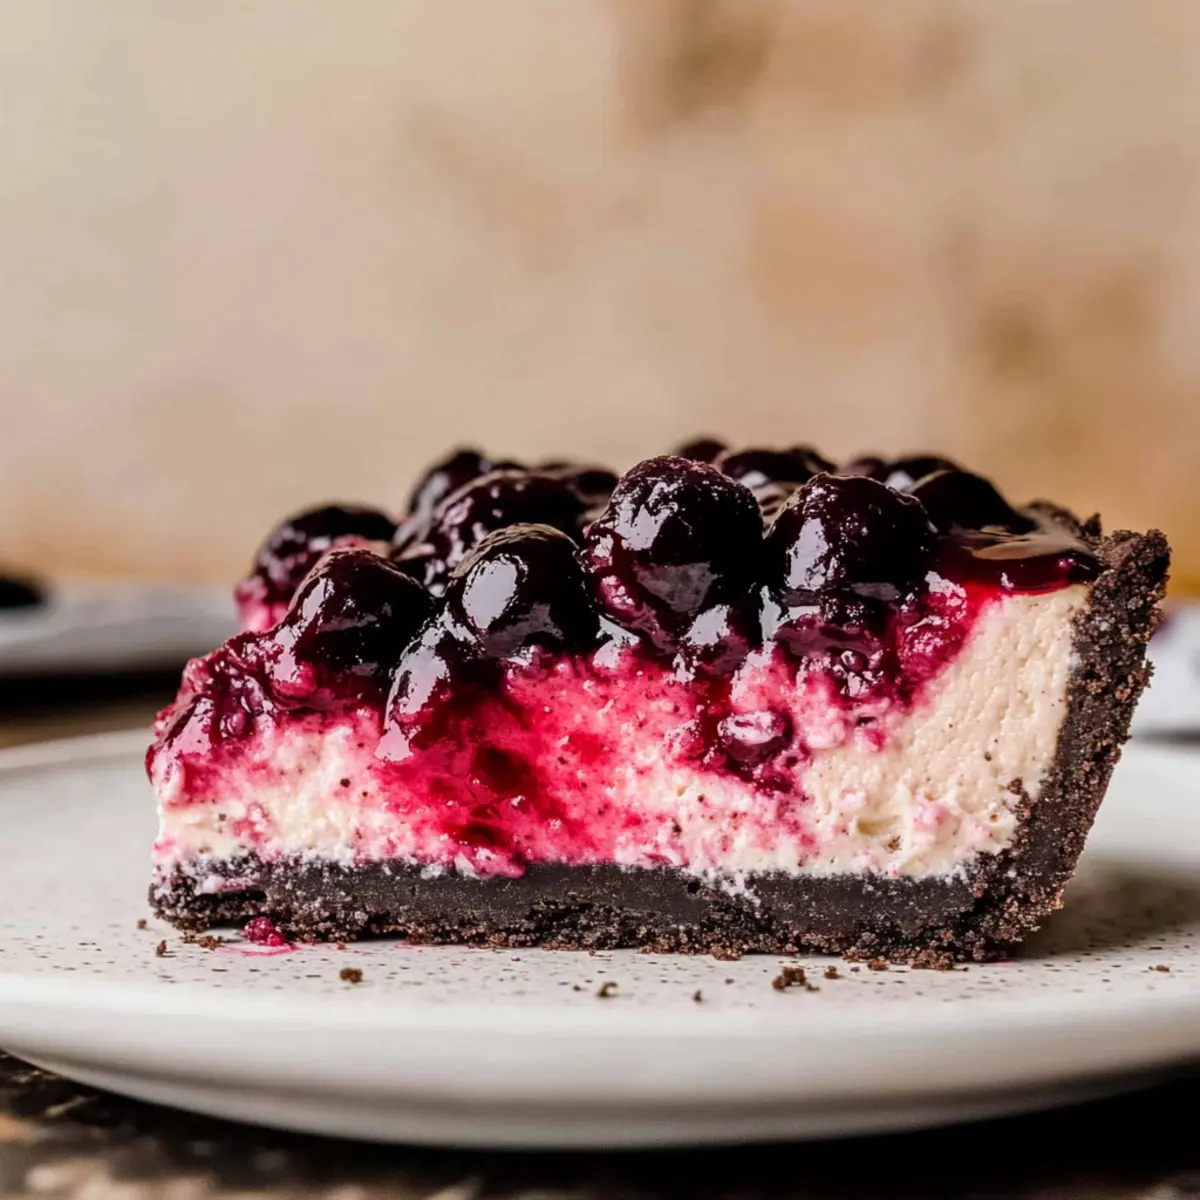
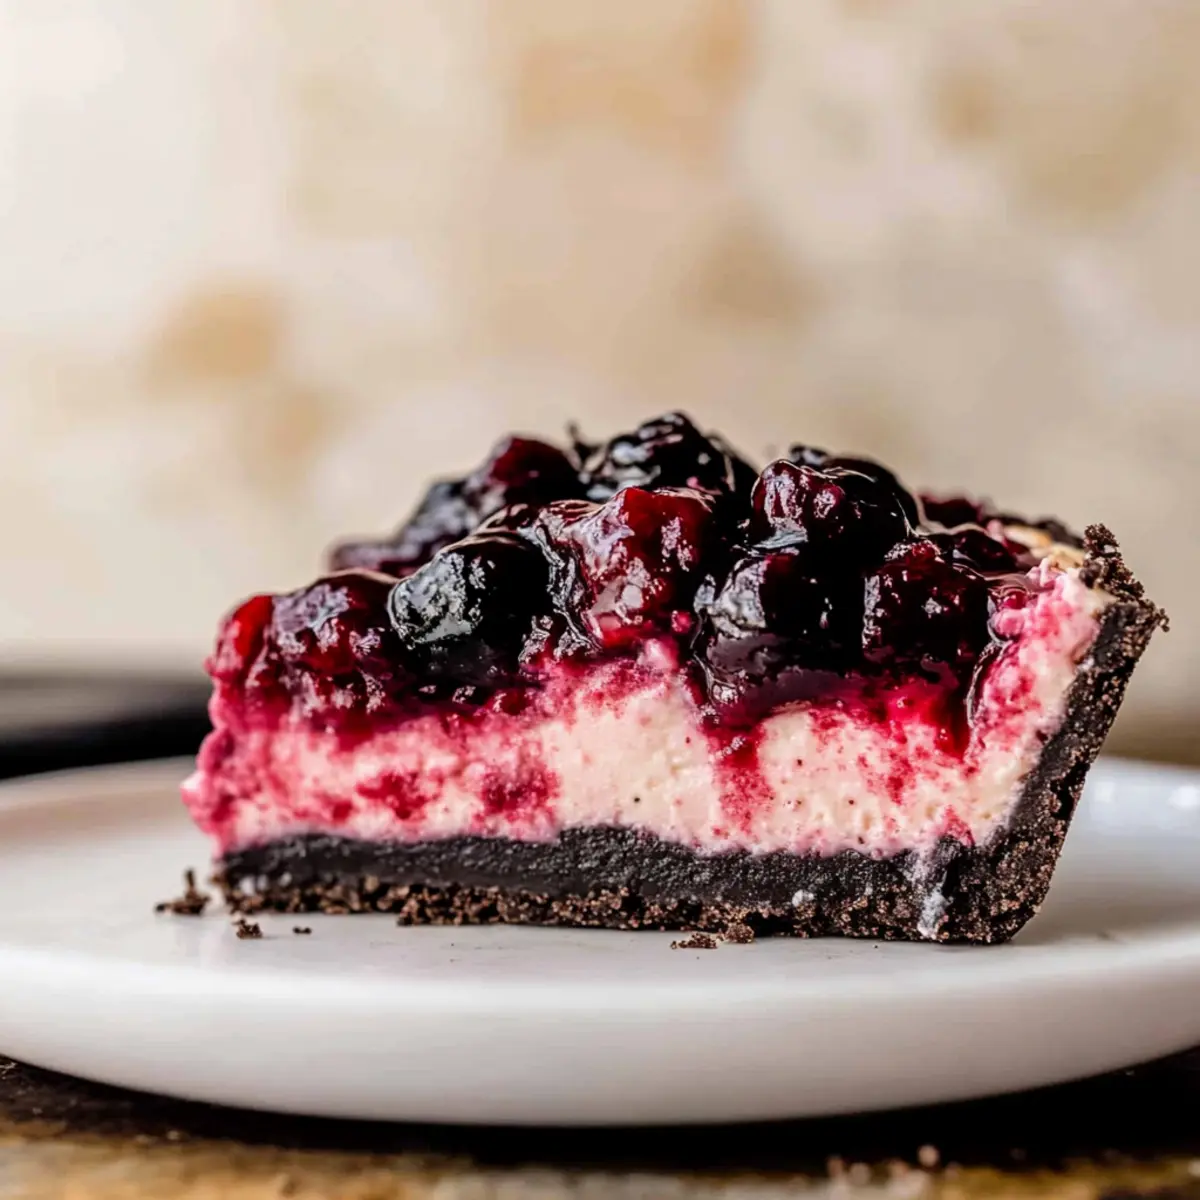
The aroma of freshly baked cheesecake wafts through my kitchen, bringing back cherished memories of family gatherings and summer parties. This Baked Cherry Cheesecake with Oreo Crust is not just a dessert; it’s a celebration in every creamy, luscious bite. With a delightful combination of sweet cherries and a rich, chocolatey crust, this classic dessert offers a show-stopping finish to any meal, making it the perfect treat for both casual family dinners and special occasions. Plus, it’s surprisingly easy to prepare, ensuring you spend less time in the kitchen and more time enjoying the company of loved ones. Have you ever tried a cheesecake that combines a nostalgic pie filling with the richness of a creamy dessert? You’re in for a delightful surprise!
Why is this cheesecake so special?
Luscious, Creamy Texture: This cherry cheesecake boasts an incredibly smooth filling that melts in your mouth, offering a rich experience that will leave your taste buds dancing.
Irresistible Oreo Crust: The contrasting crunch of the Oreo base provides a delightful surprise with every bite, taking this classic dessert to a new level.
Versatile Delight: Enjoy it using fresh or frozen cherries, making it a year-round favorite. Plus, it can easily be transformed into mini cheesecakes for delightful treats that everyone can enjoy!
Easy to Make: Perfect for everyone from novice bakers to seasoned chefs, this cheesecake allows you to whip up a show-stopper without all the fuss.
Crowd-Pleasing Appeal: Whether it’s a family gathering or a potluck, this dessert is sure to be a hit, satisfying both cheesecake lovers and cherry enthusiasts alike!
Storage-Friendly: With a convenient fridge life, you can prep in advance and savor the joy of homemade cheesecake throughout the week.
Cherry Cheesecake Ingredients
For the Oreo Crust
• Oreo Cookies – Crush until fine; this creates a rich and chocolatey base.
• Unsalted Butter – Melted to combine with oreos for a perfect crust texture.
For the Cheesecake Filling
• Cream Cheese – Make sure it’s softened to room temperature for easy mixing.
• White Granulated Sugar – Adds sweetness to balance the tartness of the cherries.
• Sour Cream – Provides tang and creaminess; Greek yogurt is a good substitute.
• Pure Vanilla Extract – Use high-quality extract for a deeper flavor.
• Large Eggs – Ensure they are at room temperature to incorporate smoothly.
For the Cherry Topping
• Fresh or Frozen Cherries – The star flavor of the cheesecake; use either for delightful results.
• Cornstarch – Acts as a thickener for your cherry topping.
• White Granulated Sugar – Sweetens the cherries to enhance their natural flavors.
• Cherry Filling Pureed – Elevates the cherry flavor in the cheesecake batter.
This Baked Cherry Cheesecake is designed to impress with its vibrant cherry flavor, rich creaminess, and that irresistible Oreo crust!
Step‑by‑Step Instructions for Baked Cherry Cheesecake with Oreo Crust
Step 1: Make the Cherry Topping
In a medium saucepan over medium heat, combine pitted cherries, white granulated sugar, and cornstarch. Stir everything together as the mixture begins to bubble, thickening after about 5-7 minutes. Mash half of the cherries with a fork for a chunky texture while reserving the other half for puréeing. Once thickened, let it cool slightly before moving to the next step.
Step 2: Prepare the Crust
Preheat your oven to 325°F (163°C). Crush the Oreo cookies into fine crumbs using a food processor or a zip-top bag and rolling pin. Next, mix the crumbs with the melted unsalted butter until fully combined. Press this mixture firmly into the bottom of a 9-inch springform pan, ensuring an even layer. Bake for 10-12 minutes until set and fragrant, then allow to cool.
Step 3: Make the Cheesecake Filling
In a large mixing bowl, beat the softened cream cheese and white granulated sugar with an electric mixer on medium speed until smooth and creamy, about 2-3 minutes. Then, add in the sour cream, cherry filling purée, and pure vanilla extract, mixing until combined. Incorporate the large eggs one at a time, mixing on low speed just until fully blended, taking care not to overmix.
Step 4: Bake the Cheesecake
Carefully pour the cheesecake filling over the cooled Oreo crust in the springform pan. To achieve a perfectly baked cherry cheesecake, prepare a water bath by placing the springform pan into a larger baking dish and filling it with hot water to halfway up the sides. Bake in the preheated oven for 70-80 minutes until the edges are set but the center has a slight jiggle.
Step 5: Cool the Cheesecake
Once baking is complete, turn off the oven and crack open its door, letting the cheesecake cool in the oven for 30 minutes. This gradual cooling helps prevent cracks. Afterward, transfer the cheesecake to a wire rack and allow it to cool completely to room temperature before refrigerating it for at least 6 hours or preferably overnight to enhance the flavors.
Step 6: Serve
When you’re ready, carefully remove the cheesecake from the springform pan. Top it with the reserved cherry mixture for a beautiful, delicious finish. Slice the Baked Cherry Cheesecake into portions and serve each slice chilled, perhaps with a dollop of whipped cream for extra indulgence.
Expert Tips for Cherry Cheesecake
-
Room Temperature Ingredients: Always let the cream cheese, eggs, and sour cream sit at room temperature. This ensures a smooth batter and helps prevent cracks in your cherry cheesecake.
-
Avoid Overbaking: Keep an eye on the cheesecake while it bakes. A center that jiggles slightly is perfect; overbaking can lead to dryness.
-
Water Bath Magic: Using a water bath while baking helps maintain moisture and creates a creamy texture. Ensure your springform pan is sealed well to avoid water seepage into the crust.
-
Chill Time is Key: Allow your cheesecake to cool completely in the oven with the door cracked, then refrigerate for at least 6 hours. This resting time melds the flavors beautifully.
-
Oreo Cookie Substitution: If you prefer a gluten-free version of the cherry cheesecake, use gluten-free oreos or skip the crust entirely and bake in a greased pan.
-
Taste-Test Your Cherries: Fresh or frozen cherries can affect the sweetness; adjust the sugar in the cherry topping according to your cherry brand to enhance the overall flavor.
Cherry Cheesecake Variations & Substitutions
Feel free to put your personal twist on this delectable cherry cheesecake for a unique take!
-
Gluten-Free Crust: Swap out regular Oreo cookies for gluten-free Oreos, ensuring everyone can enjoy this dessert.
-
Less Sugar: Replace white sugar with coconut sugar or honey for a less refined sweetness that still satisfies.
-
Berry Medley: Mix half cherries with strawberries or raspberries for a vibrant and fruity twist that brightens the flavor.
-
Cheesecake Cupcakes: Bake in muffin tins for individual servings; adjust the baking time to about 18-20 minutes for perfect mini cheesecakes. They’re great for gatherings!
-
Extra Creamy: For a richer cheesecake, try adding an extra brick of cream cheese or a bit of mascarpone cheese to the filling.
-
Vanilla-Bourbon Infusion: Incorporate a splash of bourbon into the cherry topping for a warm, sophisticated flavor that’s perfect for an adult gathering.
-
Marbled Effect: Pour half of the cheesecake batter in, add a layer of cherry topping, then swirl in the remaining batter before baking for a beautiful marbled presentation.
-
Chilled Variations: For a cool treat, turn your cheesecake into no-bake cheesecake bites by skipping the baking step and letting them set in the fridge! Check out the delicious Blueberry Cheesecake Protein for another fun dessert option!
No matter how you choose to customize, your cherry cheesecake will shine as a delightful dessert that family and friends will rave about!
Storage Tips for Cherry Cheesecake
Fridge: Store your cherry cheesecake in an airtight container for up to 5 days. This helps maintain its creamy texture and prevents it from absorbing other flavors in the fridge.
Freezer: For longer storage, slice the cheesecake and wrap each piece tightly in plastic wrap, then place them in a freezer-safe container. It can be frozen for up to 30 days without losing flavor or texture.
Reheating: To enjoy your frozen cherry cheesecake, transfer slices to the fridge to thaw overnight. For a quick warm-up, heat in the microwave for about 10-15 seconds, just until slightly softened.
Serving Reminder: Always top with the reserved cherry topping just before serving to keep it fresh and vibrant in flavor!
What to Serve with Baked Cherry Cheesecake with Oreo Crust
Indulging in a slice of this creamy, luscious cheesecake is blissful, and pairing it with the right accompaniments elevates the experience.
- Whipped Cream: A dollop of fresh whipped cream adds airy texture and enhances the creamy nature, making every bite even more delightful.
- Vanilla Ice Cream: The combination of warm flavors and cold ice cream creates a comforting contrast that melts beautifully together.
- Chocolate Sauce: Drizzling chocolate sauce brings a luscious sweetness that complements the tart cherries, creating a dynamic flavor profile that excites the palate.
- Fresh Cherries: Adding more fresh cherries on top not only enhances visual appeal but amplifies fruitiness for a vibrant finish.
- Coffee or Espresso: The richness of coffee perfectly balances the sweetness of the cheesecake, making for a sophisticated after-dinner treat.
- Honey Almond Biscotti: Crunchy, lightly sweet biscotti provides a delightful texture contrast and a nutty flavor that complements the cherry filling.
- Mint Leaves: Garnish with fresh mint leaves for a refreshing burst that cleanses the palate and adds a pop of color.
- Sparkling Wine: A glass of bubbly enhances the celebratory feeling while its acidity balances the sweetness of the dessert beautifully.
- Lemon Sorbet: The tartness of sorbet cuts through the richness of the cheesecake and adds a refreshing twist to your dessert experience.
- Chocolate-Covered Strawberries: These decadent treats add a luxurious touch and pair wonderfully with the cherry flavor, perfect for sharing.
Make Ahead Options
Preparing this Baked Cherry Cheesecake in advance is a fantastic way to save time on busy days! You can make the cherry topping up to 3 days ahead of time; simply store it in an airtight container in the refrigerator to keep the vibrant flavors intact. The Oreo crust can also be prepared up to 24 hours in advance—just make sure to cool it completely before covering it with plastic wrap to maintain its crispiness. When you’re ready to serve, mix up the cheesecake filling and bake it as directed. The cooling process takes time, so be sure to refrigerate the cheesecake for at least 6 hours or, even better, overnight. This way, you’ll enjoy a creamy, flavor-packed dessert with minimal effort and maximum enjoyment!
Cherry Cheesecake Recipe FAQs
What type of cherries should I use for the cheesecake?
Absolutely! You can use either fresh or frozen pitted cherries. Fresh cherries will provide a vibrant taste and texture, while frozen cherries are just as delicious when thawed. If you’re in a pinch, canned cherry pie filling can be a convenient substitute as well!
How should I store leftover cherry cheesecake?
To keep your cherry cheesecake fresh, store it in an airtight container in the fridge for up to 5 days. This helps maintain its creamy texture and prevents it from absorbing other flavors. If you want to keep it longer, wrap each slice in plastic wrap and place them in a freezer-safe container — they can last up to 30 days in the freezer!
Can I freeze cherry cheesecake?
Yes! Freezing is a great way to enjoy your cheesecake later. After it has completely cooled, slice the cheesecake and tightly wrap each piece in plastic wrap, then place them in a freezer-safe container. When you’re ready to enjoy, transfer a slice to the fridge to thaw overnight or heat it briefly in the microwave for a few seconds if you prefer it warm.
What should I do if my cheesecake cracks while baking?
Oh no! Cracks can happen, but there are simple ways to prevent them. Make sure to bake your cheesecake in a water bath, which helps maintain moisture. Also, avoid overmixing the eggs, as incorporating too much air can cause cracks. If it does crack, just top with your cherry mixture — it will be just as delicious!
Are there any dietary considerations for this recipe?
Very! You can make a gluten-free version by substituting the Oreo crust with gluten-free cookies or omitting it altogether. If you or your guests have any dairy allergies, you can use dairy-free cream cheese options and swap sour cream for coconut yogurt. Always check your cherry topping for added sugars if necessary.
Delicious Cherry Cheesecake with Oreo Crust You'll Love
Ingredients
Equipment
Method
- In a medium saucepan over medium heat, combine pitted cherries, white granulated sugar, and cornstarch. Stir until bubbling and thickened, about 5-7 minutes. Mash half of the cherries for texture, let cool.
- Preheat your oven to 325°F (163°C). Crush Oreo cookies into fine crumbs and mix with melted butter. Press into a 9-inch springform pan and bake for 10-12 minutes. Allow to cool.
- In a large mixing bowl, beat softened cream cheese and white sugar with an electric mixer until smooth. Add sour cream, cherry purée, and vanilla extract, mixing until combined. Incorporate eggs one at a time on low speed.
- Pour cheesecake filling over the cooled Oreo crust. Prepare a water bath and bake for 70-80 minutes until edges set and center jiggles slightly.
- Turn off the oven and crack open the door, allowing the cheesecake to cool in the oven for 30 minutes. Move to a wire rack to cool completely before refrigerating for at least 6 hours.
- Remove cheesecake from the springform pan and top with reserved cherry mixture before serving. Slice and enjoy chilled.
Leave a Reply