
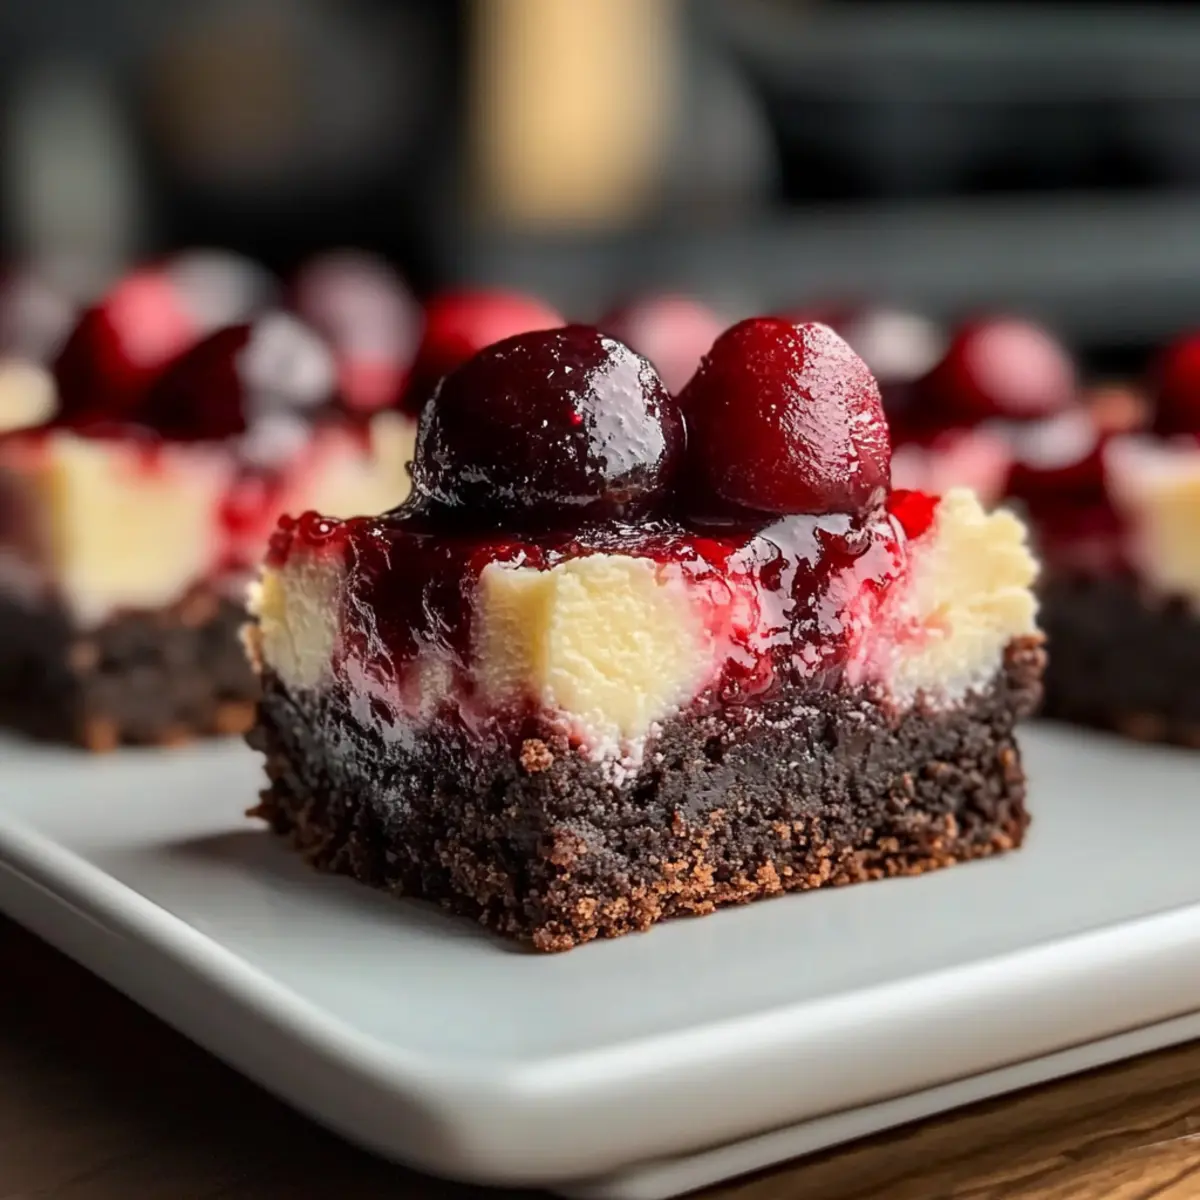
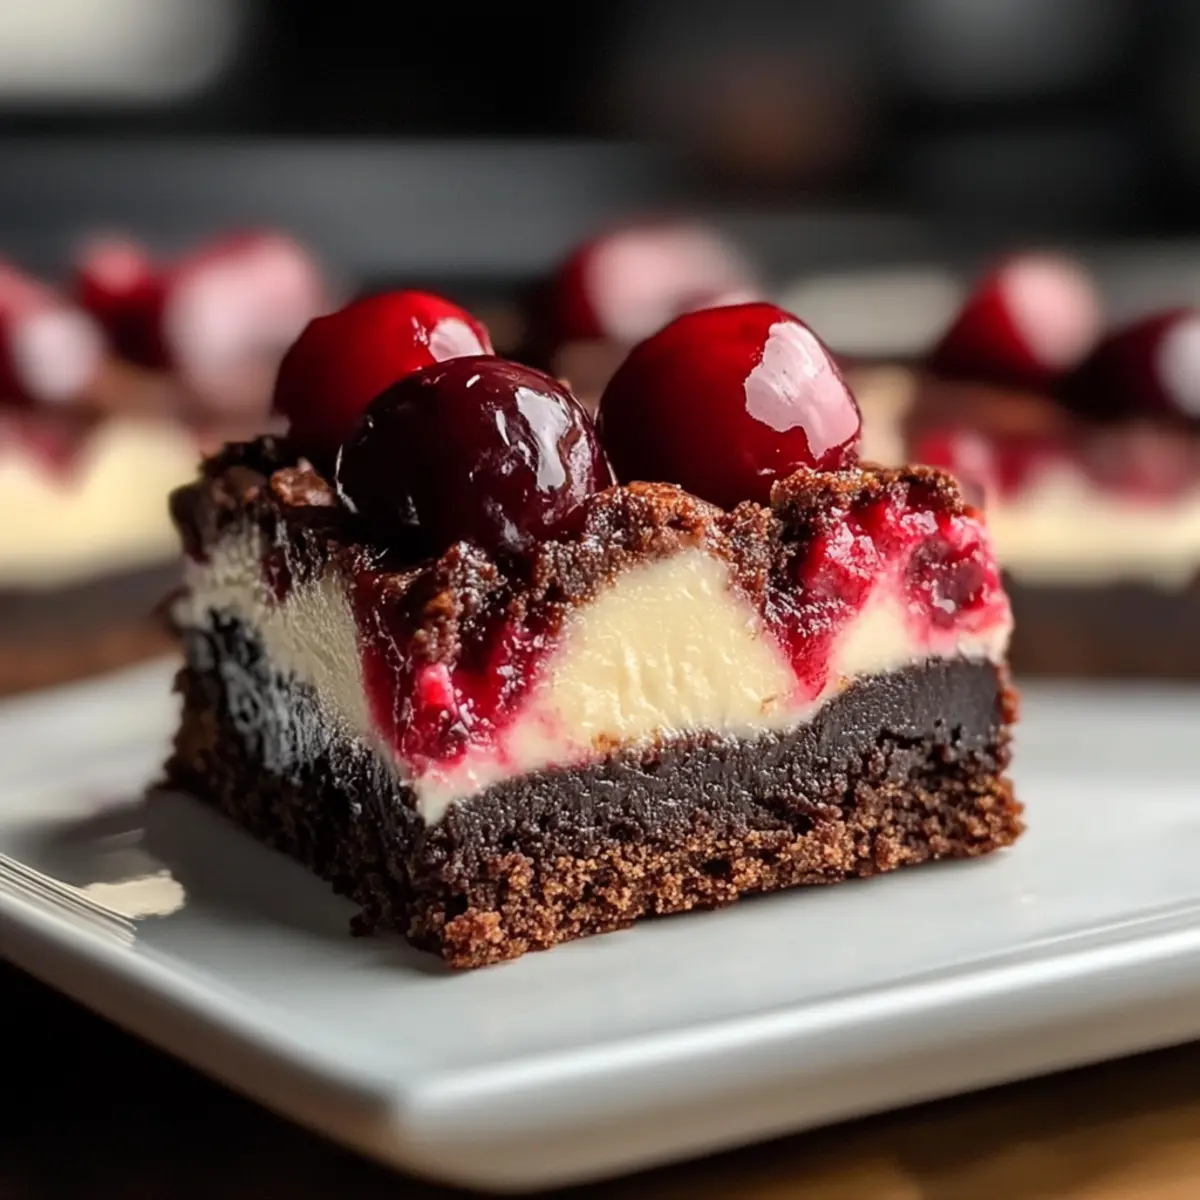
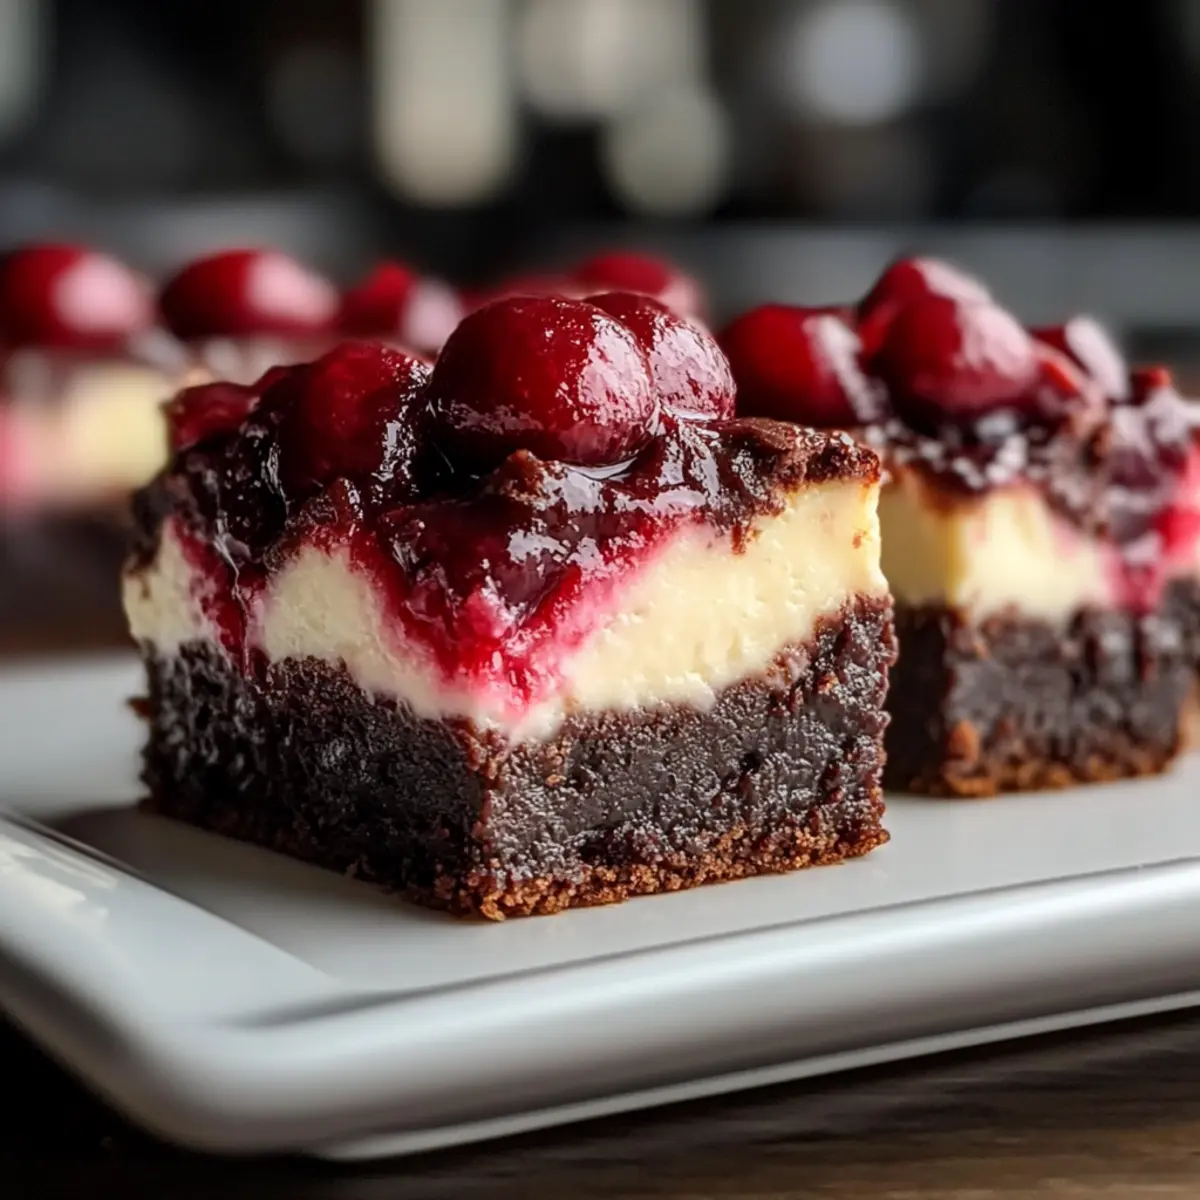
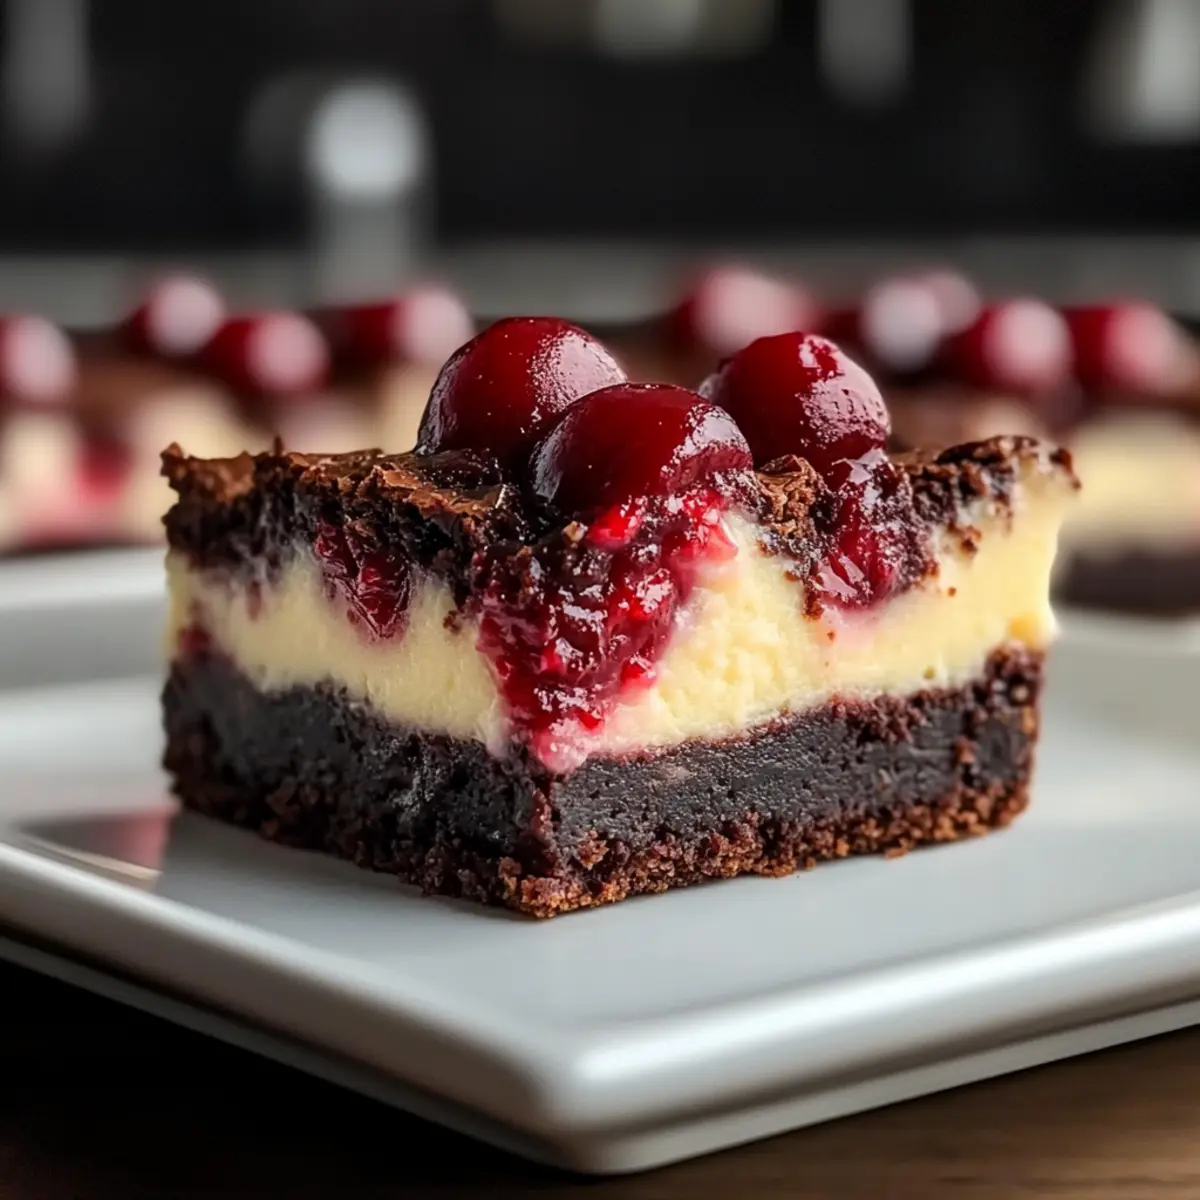
As I stood in my kitchen, the heavenly aroma of chocolate wafted through the air, reminding me of the joy that sweet indulgences can bring. Today, I’m excited to share my recipe for Cherry Cheesecake Brownie Bars—a delightful treat that combines rich, fudgy brownies with a luscious cheesecake swirl and vibrant cherry bursts. In just 30 minutes, you can whip up these irresistible bars, making them an absolute crowd-pleaser for any occasion. They’re not only simple to make but also open to personal twists—feel free to substitute in your favorite fruits or create a gluten-free version for those with dietary preferences. Ready to learn how to impress your family and friends with this delicious fusion of flavors? Let’s dive into this sweet adventure together!
What Makes These Bars So Special?
Irresistible Flavor: The combination of fudgy brownies and creamy cheesecake creates a decadent dessert experience that’s hard to resist.
Personalize Easily: You can swap in your favorite fruits or adapt the recipe for gluten-free diets, making it as flexible as it is delightful.
Quick Bake Time: Ready in just 30 minutes, these treats are perfect for those spontaneous cravings or last-minute gatherings.
Bakery-Worthy Appearance: The swirls of cherry pie filling not only taste amazing but also provide a stunning visual appeal, guaranteed to impress your loved ones.
New Twist Ideas: Want to get creative? Consider trying out my other recipes, like Blueberry Cheesecake Protein or Bake Gingerbread Cheesecake for different flavor adventures.
Get ready to enjoy the sweet satisfaction of making these Cherry Cheesecake Brownie Bars at home!
Cherry Cheesecake Brownie Bars Ingredients
• To ensure your sweet adventure is a success, here’s everything you’ll need to whip up these Cherry Cheesecake Brownie Bars!
For the Brownie Base
- Butter – Provides that rich flavor and moisture; always use melted butter for easy mixing.
- Sugar – Sweetens the batter while adding to the perfect texture; you can adjust to your liking.
- Eggs – Binds everything together; room-temperature eggs work best for smooth integration.
- Vanilla Extract – Boosts flavor depth; opt for pure extract for the ultimate taste.
- All-Purpose Flour – Gives structure to the brownies; substitute a gluten-free blend if needed.
- Cocoa Powder – Delivers that essential chocolate goodness; unsweetened cocoa is the way to go.
- Salt – Balances all the sweetness, enhancing the overall flavor profile of your bars.
For the Cheesecake Layer
- Cream Cheese – Key for that smooth, creamy texture; make sure it’s softened to avoid lumps.
- Sugar – Sweetens the cheesecake filling; feel free to adjust based on your preference.
- Egg – Adds structure to the cheesecake layer; use a room-temperature egg for better mixing.
- Vanilla Extract – Enhances the cheesecake’s flavor; your best bet is pure extract for richness.
For the Cherry Swirl
- Cherry Pie Filling – Adds a delightful fruity burst and visual delight; fresh or frozen cherries can easily be used instead.
Dive into making these delicious Cherry Cheesecake Brownie Bars and enjoy every sweet moment!
Step‑by‑Step Instructions for Cherry Cheesecake Brownie Bars
Step 1: Preheat the Oven
Begin by preheating your oven to 350°F (175°C). While the oven warms up, grease a 9×13-inch baking pan with butter or cooking spray. This will ensure your Cherry Cheesecake Brownie Bars release easily after baking.
Step 2: Prepare the Brownie Batter
In a large mixing bowl, combine the melted butter and sugar. Stir until thoroughly blended, then add in the eggs and vanilla extract, mixing until smooth. The mixture should look glossy and well-combined, a signal that you’re ready to move on to the dry ingredients.
Step 3: Combine Dry Ingredients
Gently incorporate the all-purpose flour, cocoa powder, and salt into the wet mixture. Stir until just combined, being careful not to overmix; the batter should be smooth and rich, with no visible flour streaks. Pour this fudgy brownie batter into the prepared baking pan, spreading it evenly to create a solid base.
Step 4: Make the Cheesecake Layer
In a separate bowl, beat the softened cream cheese and sugar together until the mixture is creamy and free of lumps. Add in an egg and vanilla extract, mixing until everything is well-blended and smooth. This luscious cream cheese mixture will serve as the delightful cheesecake layer on top of your brownie base.
Step 5: Assemble the Layers
Pour the cheesecake mixture over the brownie base, using a spatula to spread it evenly. Dollop spoonfuls of cherry pie filling over the top and use a knife or skewer to create swirls, allowing the cherries to sink slightly into the cheesecake layer. This will give your Cherry Cheesecake Brownie Bars a beautiful marbled look.
Step 6: Bake to Perfection
Place the assembled baking pan in the preheated oven and bake for 30 minutes. You’ll know the bars are ready when the edges are set and a toothpick inserted into the center comes out with a few moist crumbs. Be mindful not to overbake, as you want to preserve that fudgy brownie texture.
Step 7: Cool and Slice
Once baked, remove the pan from the oven and let it cool at room temperature for about 30 minutes. For cleaner slicing, it’s best to then refrigerate the bars for another hour. Once chilled, cut them into squares and serve these irresistible Cherry Cheesecake Brownie Bars to your delighted family and friends.
What to Serve with Cherry Cheesecake Brownie Bars
Treat your tastebuds by creating a memorable dessert experience that leaves a lasting impression on everyone around.
-
Whipped Cream:
A dollop of freshly whipped cream adds a cloud-like lightness that perfectly balances the dense, rich brownie and cheesecake layers. -
Fresh Berries:
Raspberries or strawberries offer a refreshing burst that cuts through the sweetness, enhancing the fruity notes of the cherry swirl. -
Vanilla Ice Cream:
The creamy, cool goodness of vanilla ice cream harmonizes beautifully with the indulgent layers, creating a delightful contrast.
Indulge in some lightly toasted almond slivers sprinkled on top for a nutty crunch. This added texture complements the creaminess of the cheesecake, elevating your dessert game to new heights.
-
Chocolate Sauce:
A drizzle of warm chocolate sauce brings an extra layer of indulgence, making each bite even more decadent and inviting. -
Mint Leaves:
A sprig of fresh mint not only adds a pop of color but also provides a refreshing herbal note that uplifts the dessert’s sweetness. -
Coffee or Espresso:
Pairing these bars with the rich flavors of coffee perfectly enhances the chocolate notes, creating a comforting and cozy dessert experience.
Make Ahead Options
These Cherry Cheesecake Brownie Bars are perfect for busy home cooks looking to save time during hectic weeknights! You can prepare the brownie base up to 24 hours in advance; simply allow it to cool completely, cover it tightly, and refrigerate. The cheesecake layer can also be made ahead; mix it and refrigerate for the same timeframe. When you’re ready to bake, simply spread the refrigerated cheesecake mixture over the brownie base, dollop the cherry pie filling, and swirl before popping them in the oven. This way, you can still enjoy freshly baked, delicious treats without the hassle, ensuring they’re just as indulgent and enticing when served!
How to Store and Freeze Cherry Cheesecake Brownie Bars
-
Fridge: Store your Cherry Cheesecake Brownie Bars in an airtight container for up to 5 days. Keeping them chilled will maintain their freshness and flavor.
-
Freezer: For longer storage, freeze individual bars wrapped tightly in plastic wrap, then placed in a freezer-safe bag. They’ll keep well for up to 3 months.
-
Thawing: To enjoy frozen bars, thaw overnight in the fridge. This preserves the texture and flavor for a delightful treat whenever you’re craving something sweet.
-
Reheating: If you prefer warm bars, heat in the microwave for about 10-15 seconds. This will awaken the chocolatey goodness and make each bite even more indulgent!
Cherry Cheesecake Brownie Bars Variations
Feel free to experiment with these variations and substitutions to create a version that’s uniquely yours!
-
Berry Blast: Swap the cherry pie filling with fresh or frozen blueberries or raspberries for a berry-infused delight. This twist not only adds vibrant color but also brings a refreshing tang to each bite.
-
Chocolate Chip Overload: Add a generous handful of chocolate chips to the brownie layer for an extra-rich experience. The melted chocolate chips create delightful pockets of gooeyness that make the brownies even more indulgent.
-
Nutty Crunch: Stir in some chopped nuts, like walnuts or pecans, into the brownie batter for added texture. The crunch from the nuts beautifully complements the creamy cheesecake and sweet cherries.
-
Gluten-Free Version: Substitute all-purpose flour with a gluten-free blend to make these bars suitable for gluten-sensitive friends and family. The delicious flavors remain intact, so everyone can enjoy the treat!
-
Zesty Lemon: Enhance the cheesecake layer by adding a teaspoon of lemon zest. This brightens the flavor profile, perfectly contrasting the sweetness of the cherries and adding a refreshing zing.
-
Spicy Touch: If you enjoy a kick, sprinkle in a pinch of cayenne pepper or a dash of cinnamon to the brownie batter. This subtle heat elevates the chocolate flavors, making each bite more intriguing.
-
Decadent Cream Cheese Swirl: For an extra smooth texture, consider mixing in a bit of sour cream along with the cream cheese in the cheesecake layer. It adds a tangy richness that makes these bars far more indulgent.
-
Cherry-Almond Magic: Replace the vanilla extract in the cheesecake layer with almond extract for a unique flavor twist. The nutty essence pairs wonderfully with the cherries, adding another layer of deliciousness.
And don’t forget, if you’re feeling adventurous, check out my other delightful desserts like my Blueberry Cheesecake Protein bites or the delicious Bake Gingerbread Cheesecake cups! Your taste buds will thank you for the journey!
Expert Tips for Cherry Cheesecake Brownie Bars
-
Room Temperature Ingredients: Ensure your cream cheese and eggs are at room temperature to avoid lumps in the cheesecake layer. Cold ingredients can prevent a smooth texture.
-
Don’t Overmix: When combining the brownie batter, mix gently until no flour streaks remain. Overmixing can lead to a tough texture, robbing your bars of their fudginess.
-
Chill for Clean Cuts: Allow your Cherry Cheesecake Brownie Bars to cool completely before slicing. Chilling them in the refrigerator for an hour helps achieve clean, beautiful pieces.
-
Flavor Variations: Feel free to experiment! Swap cherry pie filling with fresh or frozen fruit, or add chocolate chips to the brownie base for an extra indulgent treat.
-
Check for Doneness: Bake until the edges are set but the center is slightly soft. A toothpick inserted should come out with a few moist crumbs for that perfect gooey texture.
Cherry Cheesecake Brownie Bars Recipe FAQs
What kind of cherries should I use for the filling?
You can use cherry pie filling for convenience, which adds both flavor and a beautiful swirl. However, fresh or frozen cherries work wonderfully too! If using fresh cherries, slice them in half and remove the pits for an even juicier experience.
How should I store the Cherry Cheesecake Brownie Bars?
Store your Cherry Cheesecake Brownie Bars in an airtight container in the refrigerator for up to 5 days. This will keep them fresh and tasty! If you find yourself with leftovers, they’re still a delightful treat, perfect for snacking during the week.
Can I freeze the Cherry Cheesecake Brownie Bars?
Absolutely! After slicing, wrap each bar securely in plastic wrap, then place them in a freezer-safe bag or container. They can be frozen for up to 3 months. Just remember to thaw overnight in the fridge before enjoying to maintain their delicious texture.
What should I do if my cream cheese isn’t mixing smoothly?
If your cream cheese is too cold, it can lead to lumps. To prevent this, let cream cheese sit at room temperature for about 30 minutes before using it. If lumps do form while mixing, you can try blending it more vigorously or using an electric mixer for a smoother consistency.
Can I make this recipe gluten-free?
Yes, you can easily adapt this recipe for a gluten-free diet! Simply substitute the all-purpose flour with a gluten-free flour blend. Make sure the blend you choose is suitable for baking, as this will help give your Cherry Cheesecake Brownie Bars the right structure and texture.
What if I don’t have vanilla extract?
While vanilla adds depth to both brownie and cheesecake layers, you can substitute it with almond extract for a unique flavor twist! Use half the amount, as almond extract has a stronger flavor and can be quite potent.
Decadent Cherry Cheesecake Brownie Bars You’ll Crave Daily
Ingredients
Equipment
Method
- Preheat the oven to 350°F (175°C) and grease a 9×13-inch baking pan.
- In a large mixing bowl, combine the melted butter and sugar until blended, then add eggs and vanilla extract, mixing until smooth.
- Incorporate the all-purpose flour, cocoa powder, and salt into the wet mixture gently to avoid overmixing. Pour into the prepared baking pan.
- In another bowl, beat softened cream cheese and sugar until creamy. Add an egg and vanilla extract, mixing until smooth.
- Pour the cheesecake mixture over the brownie base and dollop cherry pie filling on top. Swirl with a knife or skewer.
- Bake for 30 minutes in the preheated oven. The edges should be set and a toothpick inserted should come out with a few moist crumbs.
- Allow to cool at room temperature for 30 minutes, then refrigerate for 1 hour before slicing into squares.
Leave a Reply