
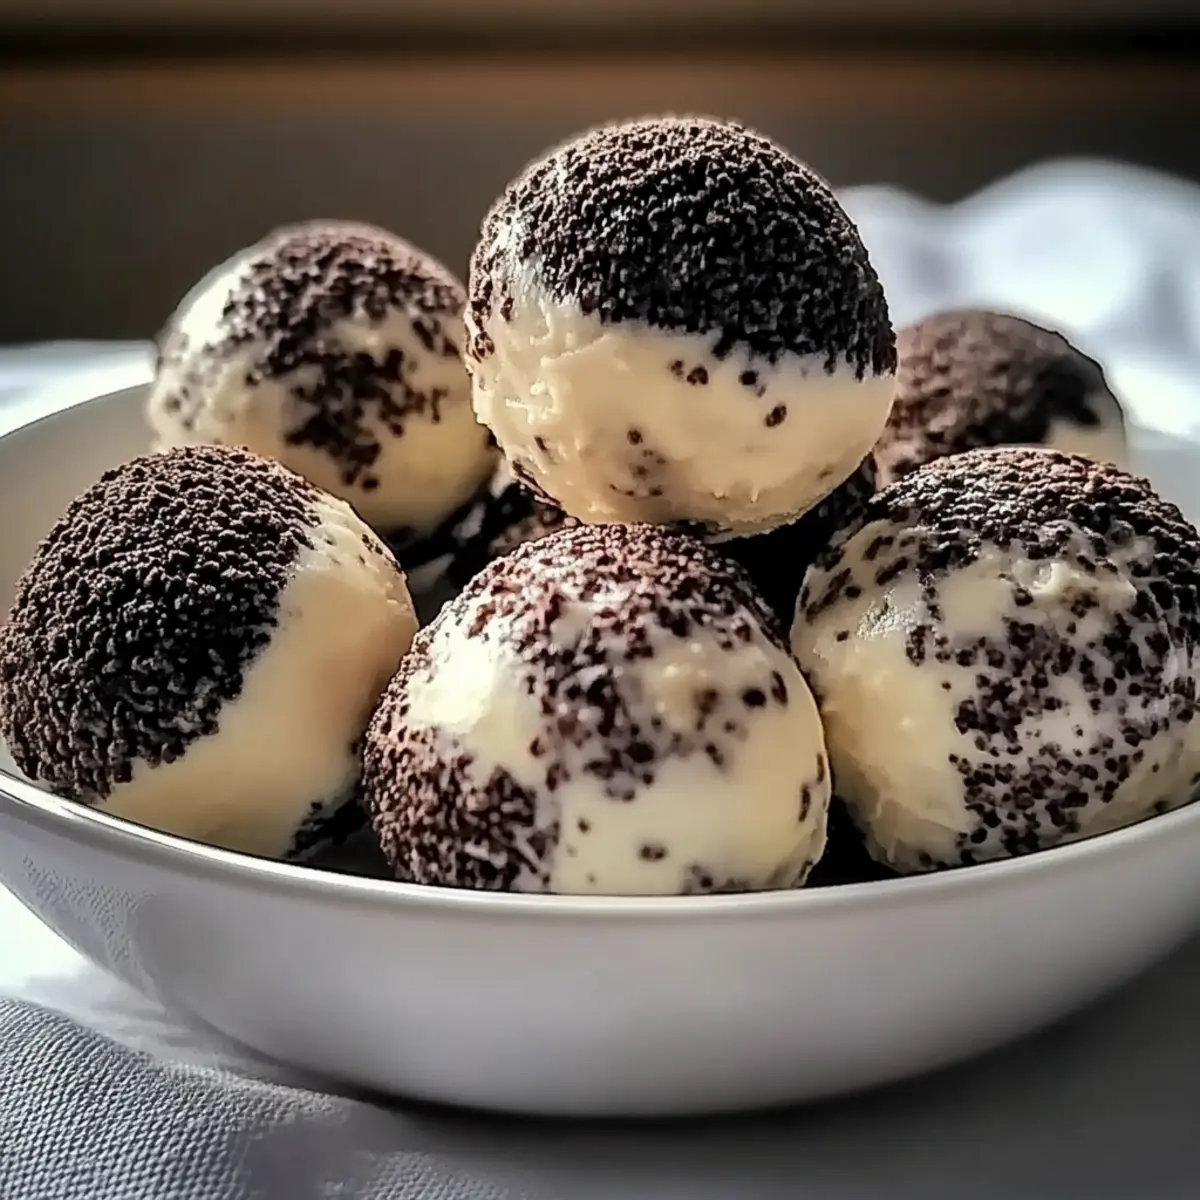
“Did you hear that?” I asked a friend one day while sneaking a bite of my latest creation. “These are protein balls, not dessert!” Yes, while they might look like indulgent treats, my Cream Cheese Oreo Protein Balls are a guilt-free, no-bake snack ready to save us from the fast-food frenzy. In just 15 minutes, these creamy bites blend nostalgia with nutrition, making them perfect for meal prep or a quick pick-me-up during busy afternoons. Not only do they satisfy that sweet tooth, but they pack a delectable protein punch, allowing you to indulge without the guilt. Ready to roll up your sleeves and whip up a batch? Let’s dive into how to make these irresistible snacks!
Why Are These Protein Balls So Irresistible?
Quick and Easy: With just 15 minutes needed for prep, these Cream Cheese Oreo Protein Balls are the ultimate no-bake snack for busy days.
Guilt-Free Indulgence: Enjoy a delightful balance of sweetness and creaminess without the typical dessert guilt—perfect for satisfying cravings the healthy way.
Versatile Variations: Enjoy experimenting with nut-free options, plant-based ingredients, or even a chocolate lovers’ twist; there’s something for everyone!
Meal Prep Friendly: Make a batch ahead of time and store them in the fridge for a quick snack anytime; they keep well for up to a week!
Crowd-Pleasing Treat: They’re a hit at gatherings, combining the nostalgic taste of Oreos with the benefits of protein; everyone will love them!
Ready for more inspiration? Pair these with a serving of Cottage Cheese Egg Salad for a nutritious meal!
Cream Cheese Oreo Protein Balls Ingredients
For the Base
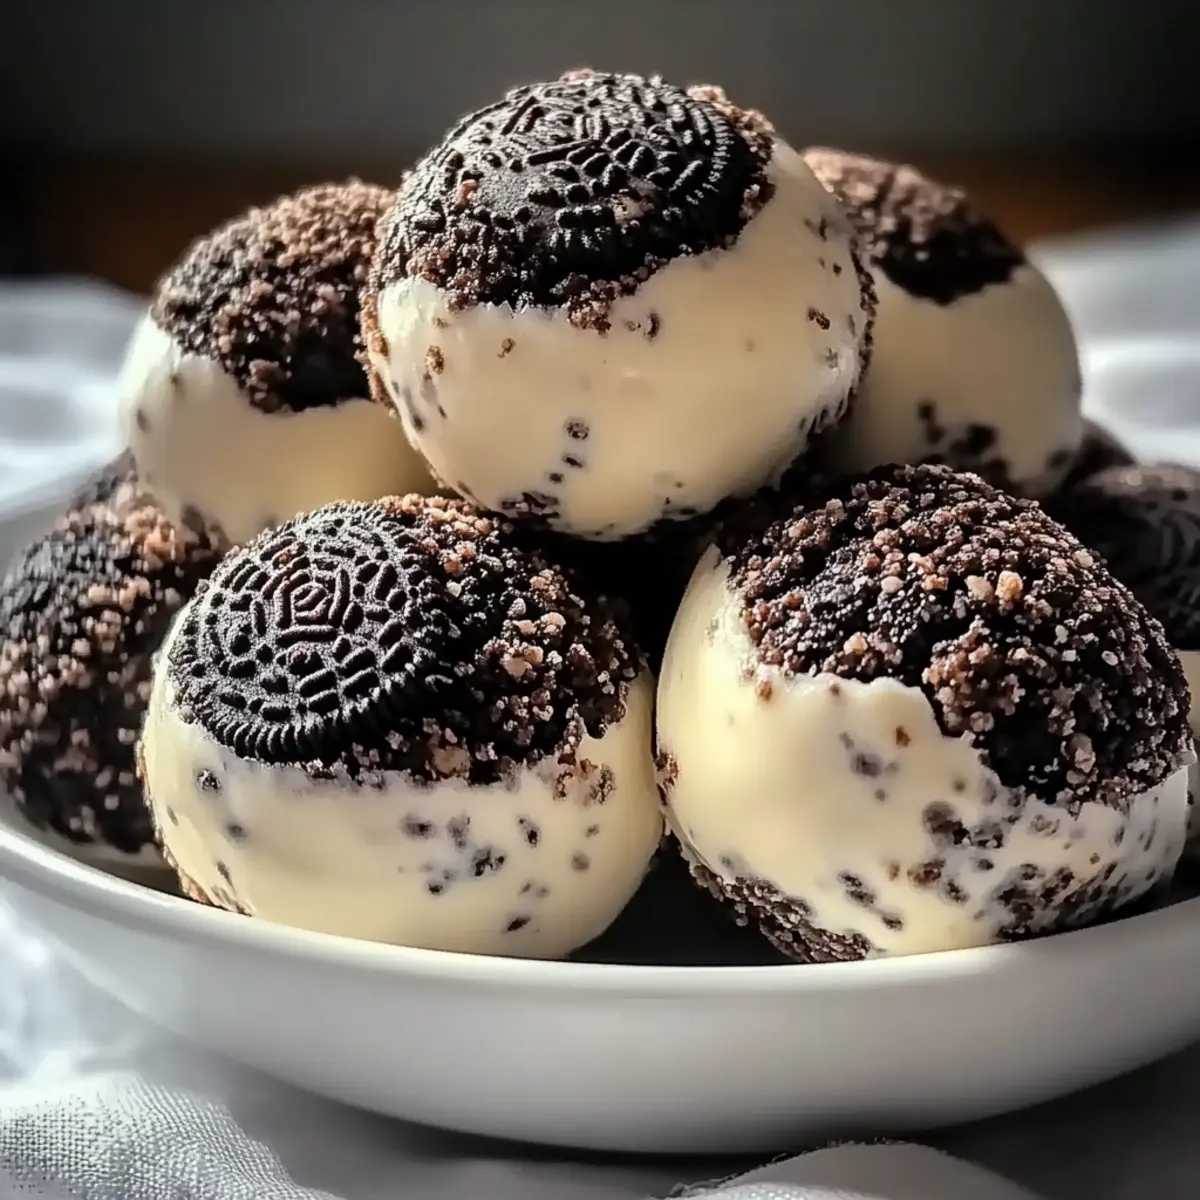
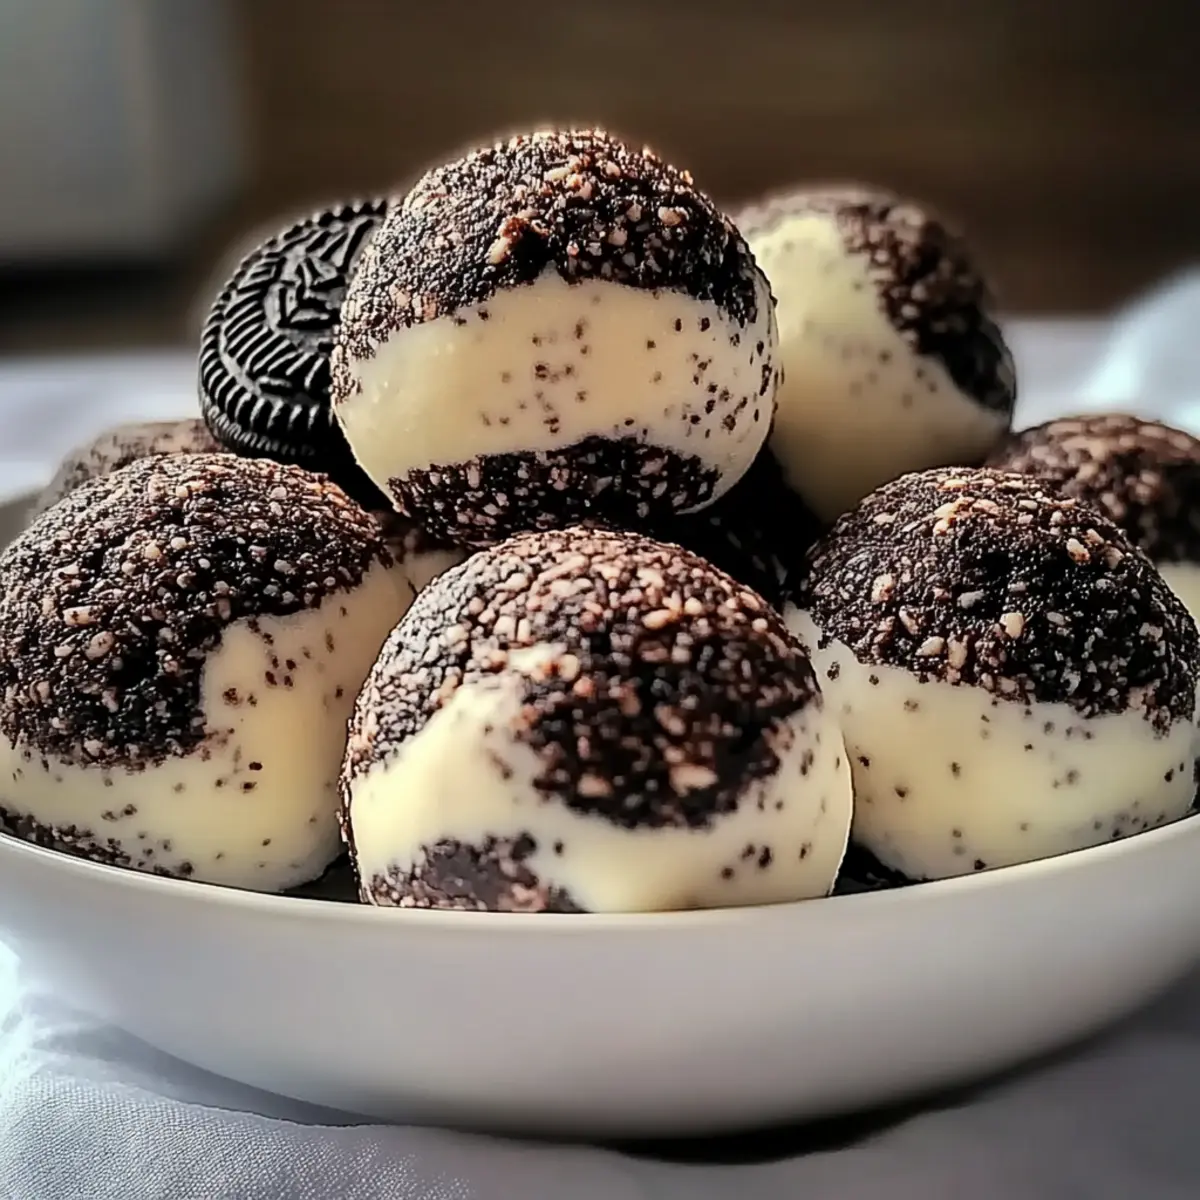
• Cream Cheese – Provides a rich and creamy base. Using full-fat cream cheese enhances flavor and texture.
• Oreo Cookie Crumbs – Adds sweetness and a crunchy texture. For a gluten-free option, swap with gluten-free cookies.
• Protein Powder – Boosts protein content for a nutritious snack. Use your favorite type (whey, plant-based, etc.).
• Milk – Adjusts the mixture’s consistency for easy rolling. Start with ¼ cup and add more as needed.
• Vanilla Extract – Enhances overall flavor. Optional, but recommended for a richer taste.
For Extra Flavor
• Mini Chocolate Chips – Add to enhance sweetness and texture. Perfect for chocolate lovers craving that extra indulgence.
• Dried Fruits – Mix in fruits like cranberries or blueberries for added flavor. These can boost nutrients while waking up the taste!
Get ready to enjoy your homemade Cream Cheese Oreo Protein Balls, a delicious guilt-free treat!
Step‑by‑Step Instructions for Cream Cheese Oreo Protein Balls
Step 1: Mix Base Ingredients
In a large mixing bowl, combine the cream cheese, crushed Oreo cookie crumbs, protein powder, milk, and vanilla extract. Using a spatula or a hand mixer, blend these ingredients together for about 2-3 minutes until the mixture is smooth and creamy. You want a homogeneous batter without lumps, making sure the sweet flavor of the Oreos is well-distributed.
Step 2: Adjust Consistency
After mixing, check the consistency of your mixture. If it feels too dry and crumbly, gradually add more milk—one tablespoon at a time—until you achieve a dough-like texture that’s firm yet pliable. Aim for a consistency that allows you to easily roll the mixture into balls without it falling apart, ensuring your Cream Cheese Oreo Protein Balls hold their shape.
Step 3: Shape Balls
Scoop out portions of the mixture—each about one inch in diameter—and roll them into smooth balls by gently rolling them between your palms. This step is crucial to create those perfectly round, bite-sized treats. As you shape the balls, place them on a clean countertop or plate, ensuring they are spaced out to allow for easy handling later.
Step 4: Prepare for Chilling
Line a baking sheet with parchment paper, as this will prevent the Cream Cheese Oreo Protein Balls from sticking. Carefully transfer each shaped ball onto the lined sheet, making sure they aren’t touching each other. Spacing is key, as it allows for even chilling and prevents them from merging together while they firm up.
Step 5: Chill
Transfer the baking sheet with the oreo protein balls into the refrigerator. Allow them to chill for at least 30 minutes. This step is important for firming up the protein balls, giving them the right texture for that perfect bite. Visualize them becoming more cohesive as they chill, ready for you to enjoy!
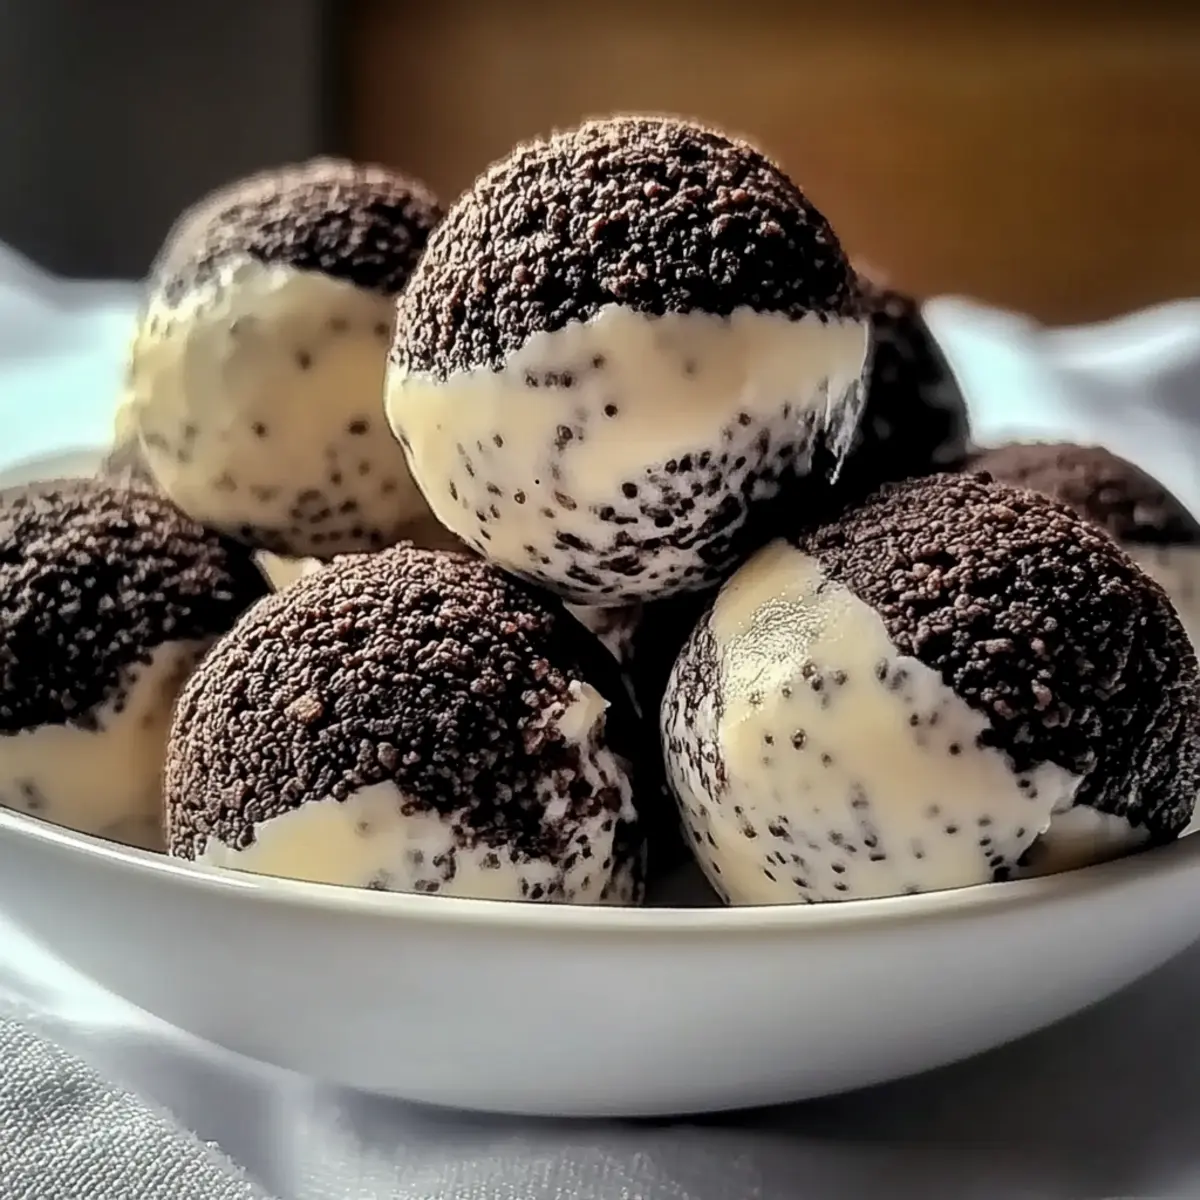
Step 6: Serve or Store
Once chilled and firm, these delightful Cream Cheese Oreo Protein Balls are ready for your enjoyment. You can eat them right away or store them in an airtight container in the fridge for up to a week. These guilt-free snacks make a great grab-and-go option, bringing you the perfect balance of taste and nutrition!
Expert Tips for Cream Cheese Oreo Protein Balls
- Avoid Overmixing: Be careful not to overmix the ingredients; this can lead to a runny consistency, making it hard to shape the protein balls.
- Uniform Size: Make sure the protein balls are uniform in size for even chilling and the best texture in each bite.
- Chill Time Matters: Don’t skimp on the chilling time; allowing at least 30 minutes ensures the Cream Cheese Oreo Protein Balls hold their shape and firm up perfectly.
- Sweetness Balance: Taste the mixture before shaping; if you like it sweeter, feel free to add a touch more milk or even sweetener to fit your palate.
- Get Creative: Don’t hesitate to experiment with variations! Try adding different mix-ins like dried fruits or nuts for added flavor and nutrition.
What to Serve with Cream Cheese Oreo Protein Balls
Elevate your snacking experience with delightful pairings that make these creamy bites irresistible in every way!
-
Fresh Berries: The tartness of strawberries or blueberries complements the sweetness of the protein balls, offering a refreshing contrast. Enjoy this delightful duo for a sweet and tangy balance.
-
Greek Yogurt Dip: A dollop of creamy Greek yogurt adds protein and a delicious tang. Play up the flavors with honey or vanilla extract for a silky accompaniment that elevates your snacks.
-
Nut Butter: Drizzling almond or peanut butter over these protein balls adds richness and depth. The creaminess of the nut butter enhances their indulgence, making each bite a heavenly experience.
-
Carrot Sticks: Crunchy carrot sticks provide a refreshing, crisp texture that contrasts beautifully with the creamy protein balls. This duo not only balances flavors but also adds a nutritious crunch to your snack.
-
Chocolate Milkshake: Pair these with a chocolate milkshake for a sweet treat that feels indulgent without the guilt. The rich chocolate flavor complements the Oreo essence perfectly.
-
Cookies & Cream Smoothie: Blend together a Cookies & Cream smoothie for a luscious, creamy drink. This pairing not only enhances the indulgent flavors but also makes a fantastically fun treat.
Indulging in these pairings along with your Cream Cheese Oreo Protein Balls will transform your snack time into a festive, flavorful experience!
How to Store and Freeze Cream Cheese Oreo Protein Balls
Fridge: Store your Cream Cheese Oreo Protein Balls in an airtight container for up to 1 week. This keeps them fresh and ready to satisfy your cravings anytime!
Freezer: For longer storage, freeze the protein balls in a single layer on a baking sheet, then transfer them to a freezer-safe bag or container for up to 3 months.
Reheating: When you’re ready to enjoy them, just let them sit at room temperature for 10-15 minutes. There’s no need to heat these delicious snacks; they’re best enjoyed chilled!
Make-Ahead Tip: For meal prep enthusiasts, roll these protein balls 24 hours in advance, refrigerating them for quick access to a nutritious snack!
Cream Cheese Oreo Protein Balls Variations
Feel free to get creative and make this recipe your own, exploring delightful options that will tantalize your taste buds!
-
Nut-Free: Swap out protein powder for oat flour to create a nut-free version that retains great flavor.
-
Plant-Based: Use vegan cream cheese and a plant-based protein powder to whip up a delicious dairy-free snack.
-
Chocolate Lovers: For an indulgent twist, add mini chocolate chips or drizzle melted dark chocolate over the finished balls.
-
Cookie Dough Twist: Fold in chunks of edible cookie dough into the mixture, bringing a playful texture and flavor to your bites.
-
Fruit Burst: Enhance your protein balls by mixing in dried fruit like cranberries, raisins, or blueberries for a fruity punch.
-
Coconut Dream: Rolling the protein balls in shredded coconut adds a tropical flair, giving them an appealing texture and flavor.
-
Spice It Up: Sprinkle a pinch of cinnamon or nutmeg in the mixture for a warm flavor profile, perfect for cozy afternoons.
-
Peanut Butter Addition: Mix in a spoonful of creamy peanut butter for a nutty twist that will enhance the creaminess and provide even more protein.
And if you’re looking for another delightful snack, try out my delicious Blueberry Cheesecake Protein Bites or the creamy goodness of Chicken Macaroni Cheese!
Make Ahead Options
These Cream Cheese Oreo Protein Balls are perfect for meal prep, making them a delightful snack to have on hand during your busy week! You can roll them up to 24 hours in advance; just assemble them as directed and store them in an airtight container in the fridge to keep them fresh. For even longer storage, these treats can be frozen for up to 3 months—simply thaw in the fridge overnight when you’re ready to enjoy. To maintain their quality, be sure to let them chill for at least 30 minutes before serving to ensure they hold their shape nicely. When it’s time to indulge, they’ll be just as delicious as the day you made them!
Cream Cheese Oreo Protein Balls Recipe FAQs
How do I choose ripe ingredients for my Cream Cheese Oreo Protein Balls?
Absolutely! When selecting your ingredients, ensure your cream cheese is fresh and smooth for the best texture. If you’re using Oreo cookies, check for a crispy texture without any dark spots, which indicate staleness. For milk, choose whole or low-fat varieties based on your preference, but make sure it’s not expired.
How should I store my Cream Cheese Oreo Protein Balls, and how long do they last?
You can store your Cream Cheese Oreo Protein Balls in an airtight container in the fridge for up to one week. Make sure to keep them properly sealed to maintain their freshness. If you find yourself with extra, you can easily freeze them!
What’s the best way to freeze Cream Cheese Oreo Protein Balls?
To freeze your Cream Cheese Oreo Protein Balls, first, place them in a single layer on a baking sheet lined with parchment paper, ensuring they don’t touch each other. Freeze them for about 1-2 hours until firm, then transfer the frozen balls to a freezer-safe bag or container. They can be stored for up to 3 months. When you want to enjoy them, let them sit at room temperature for about 10-15 minutes!
What if my mixture is too dry when making the protein balls?
If you find your mixture is too dry, don’t worry! Just gradually add more milk—one tablespoon at a time—until you achieve a dough-like consistency. You want it to be firm but pliable enough to easily shape into balls. I often find that adjusting the liquid slightly makes all the difference!
Can I make these protein balls nut-free or vegan?
Very much so! If you need a nut-free option, substitute the protein powder with oat flour or a nut-free protein blend. For a plant-based version, use vegan cream cheese and plant-based protein powder. The flexibility of this recipe allows these delicious protein balls to cater to various dietary needs!
Are there any allergy considerations I should be aware of?
Yes! Make sure to check for allergy triggers when making these delicious snacks. Oreos do contain gluten and dairy, so if someone has gluten intolerance or a dairy allergy, opt for gluten-free Oreos and dairy-free cream cheese alternatives. Always communicate with anyone you’re sharing these treats with to make sure it’s safe for them!
Cream Cheese Oreo Protein Balls: Your Guilt-Free Indulgence!
Ingredients
Equipment
Method
- Mix Base Ingredients: In a large mixing bowl, combine the cream cheese, crushed Oreo cookie crumbs, protein powder, milk, and vanilla extract. Blend these ingredients together for about 2-3 minutes until smooth and creamy.
- Adjust Consistency: Check the mixture's consistency. If it's too dry, gradually add more milk until you achieve a dough-like texture.
- Shape Balls: Scoop out portions of the mixture and roll them into smooth balls, placing them on a clean surface.
- Prepare for Chilling: Line a baking sheet with parchment paper and transfer the shaped balls onto the sheet, ensuring they are spaced.
- Chill: Place the baking sheet in the refrigerator and let them chill for at least 30 minutes.
- Serve or Store: Once chilled, enjoy the protein balls right away or store them in an airtight container in the fridge for up to a week.
Leave a Reply