
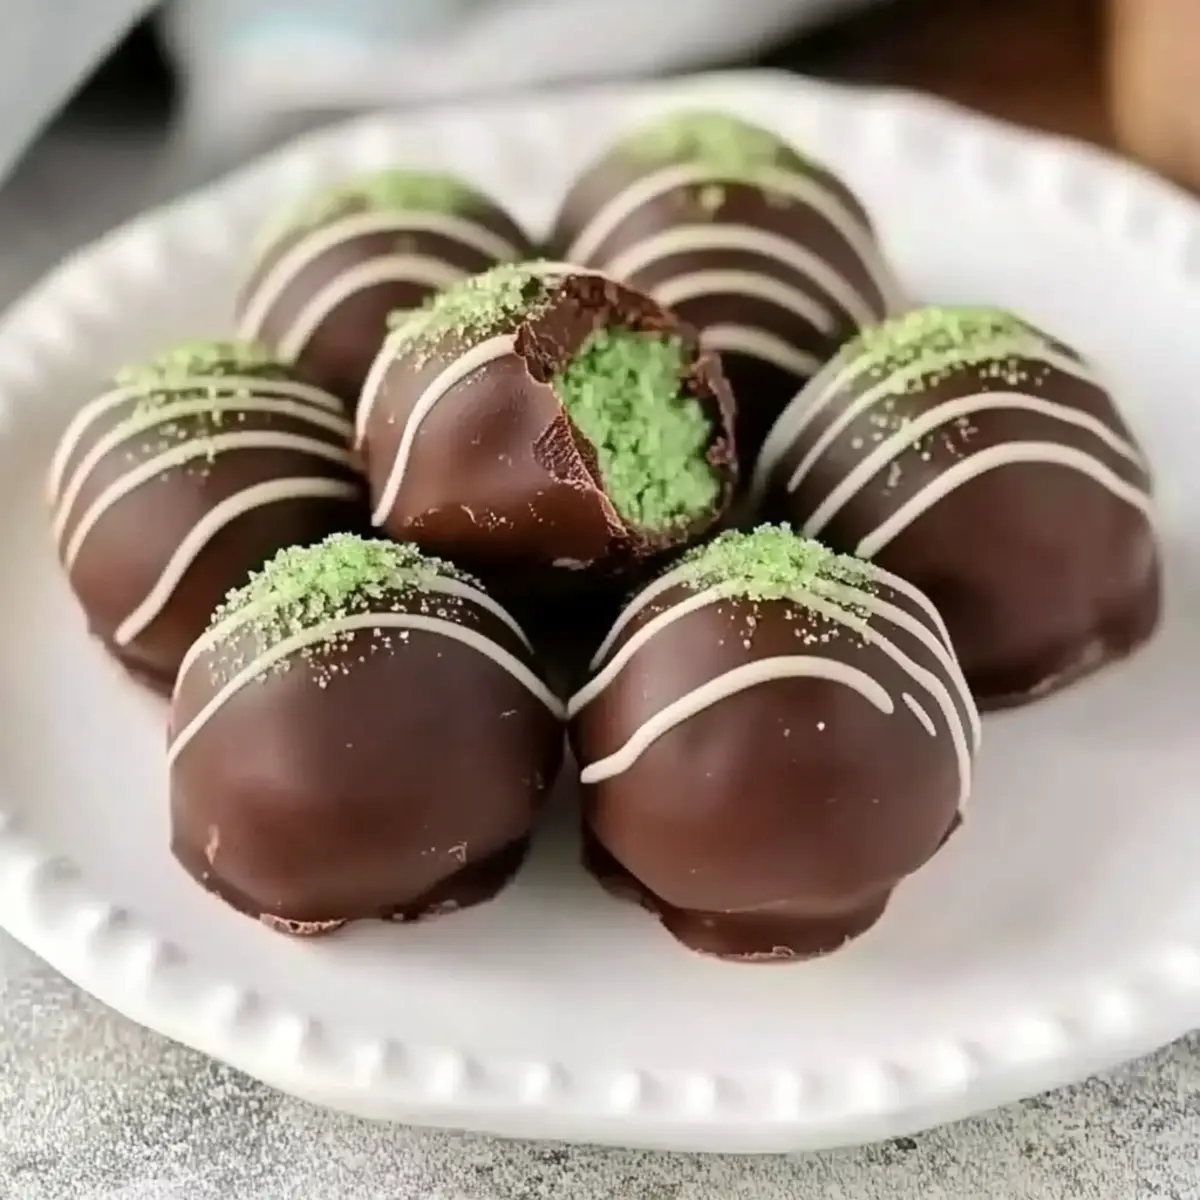
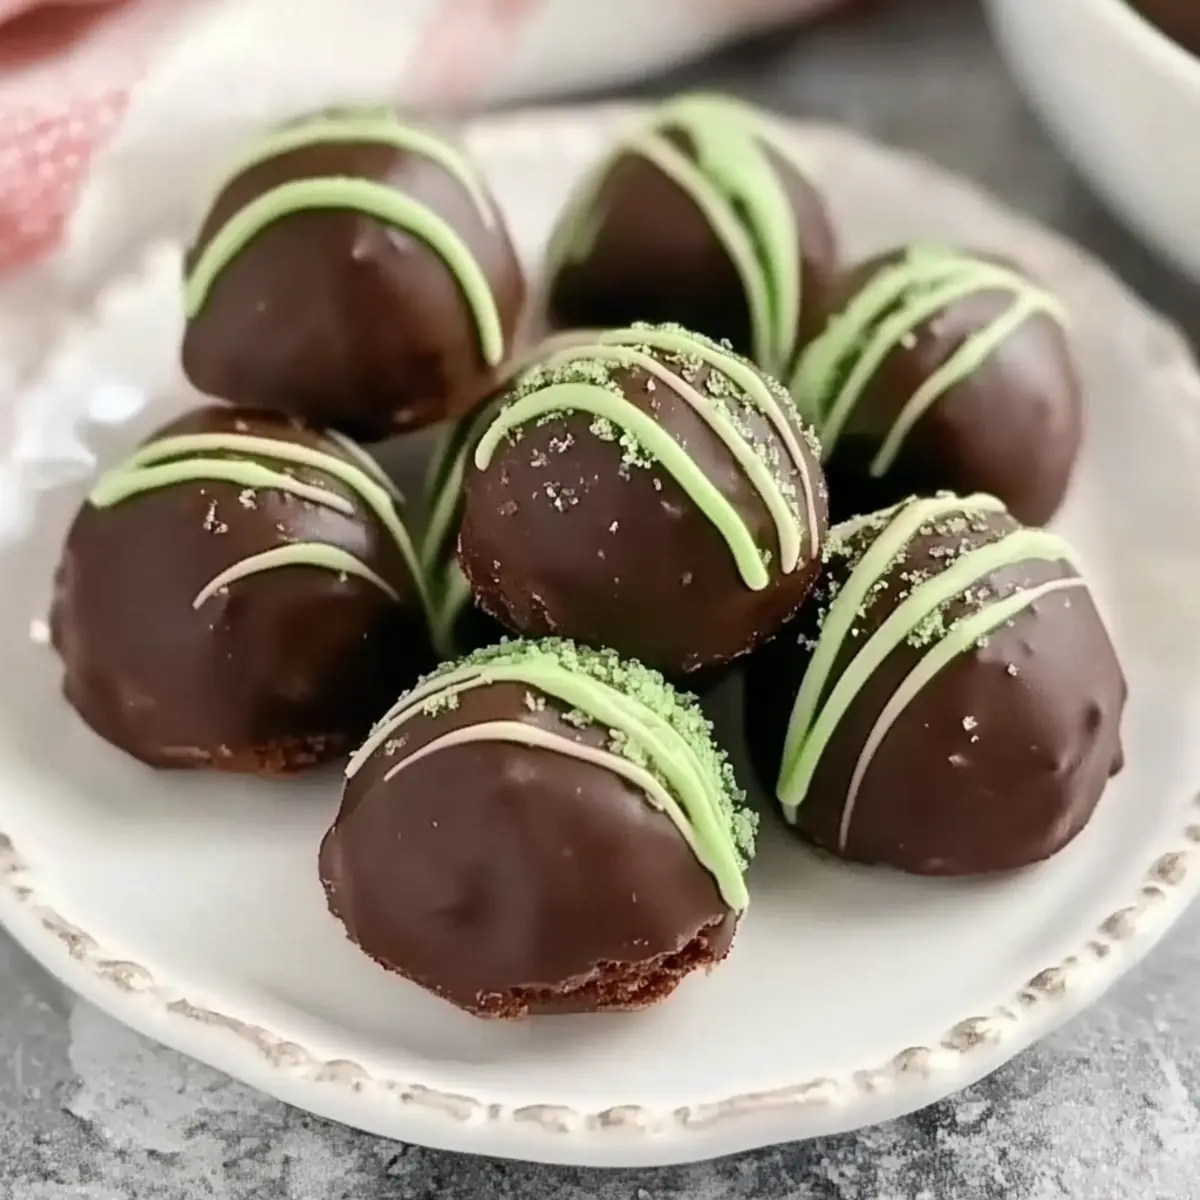
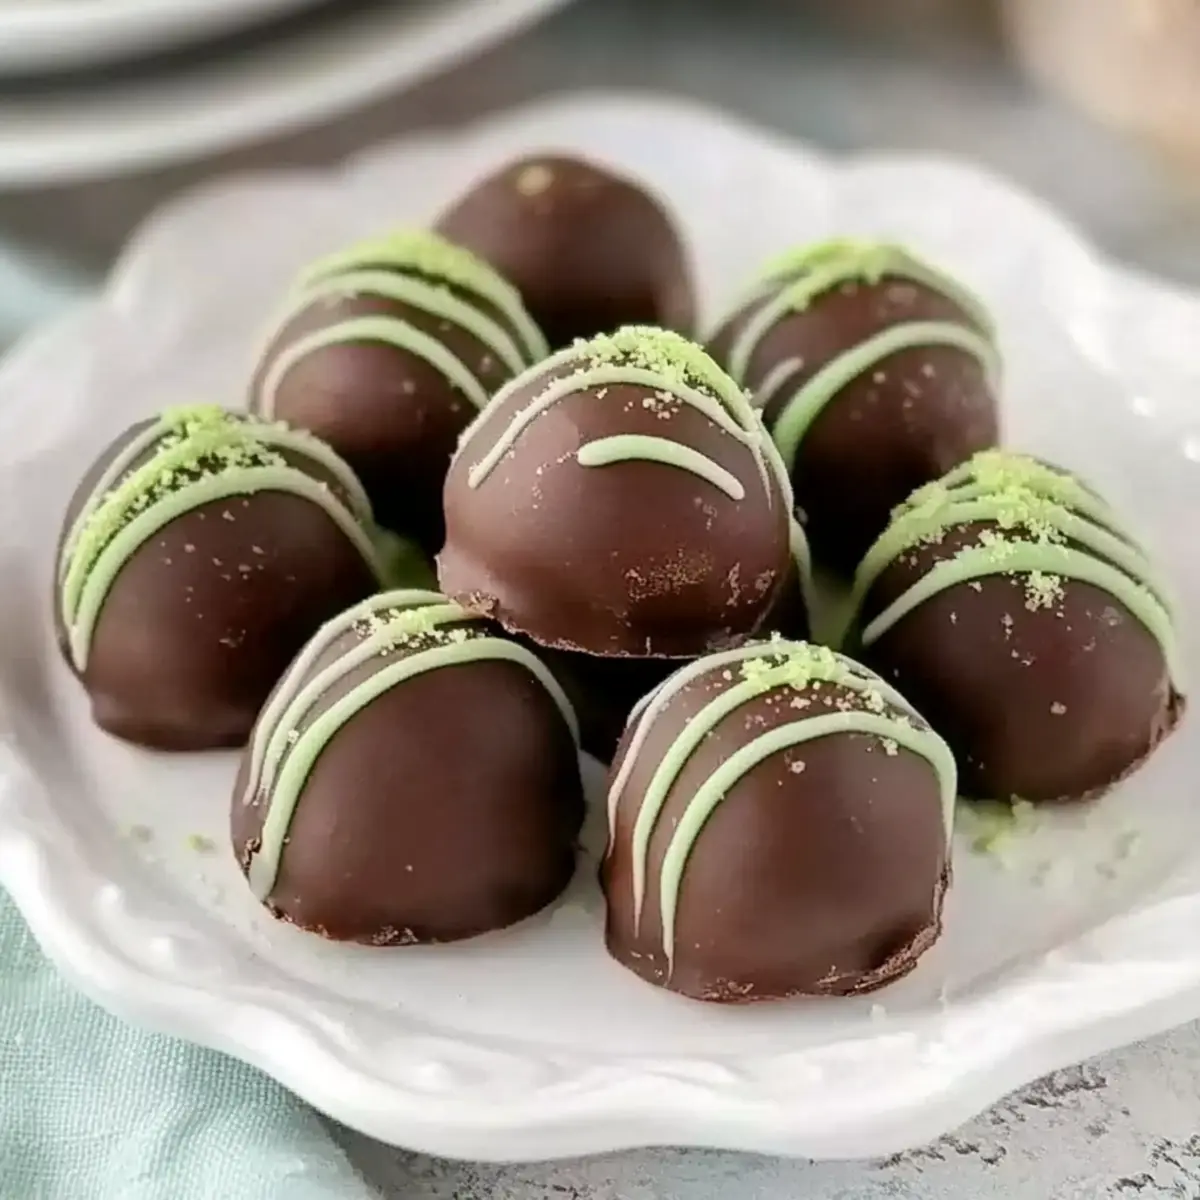
Strolling through the local farmer’s market last weekend, I stumbled upon a vibrant display of fresh mint that instantly transported me to a world of sweet indulgence. There’s something about the combination of creamy chocolate and refreshing mint that feels both luxurious and approachable, which is exactly what inspired me to create these Easy No-Bake Mint Chocolate Truffles. With just three simple ingredients, this fuss-free dessert is perfect for anyone looking to impress without the stress. Whether you’re celebrating St. Patrick’s Day or just craving a little sweetness, these truffles are a delightful way to satisfy your chocolate cravings. Plus, they’re a fantastic option for gifting, as they store well in the fridge and make for an impressive homemade treat. Curious about how to whip up these tasty bites in no time? Let’s dive in!
Why Are Mint Chocolate Truffles So Irresistible?
Simplicity at its finest: With just three ingredients, creating these truffles is a breeze, making them perfect for busy days. Rich chocolate flavor is enhanced by refreshing mint, ensuring each bite is a delight. No-bake convenience means you can whip these up without turning on the oven, making them ideal for last-minute gatherings. Perfect for gifting, these truffles can impress friends and family without any fuss. Also, if you’re in the mood for something different, check out my Chocolate Chip Banana recipe for another sweet treat!
Mint Chocolate Truffles Ingredients
-
For the Truffle Filling
-
Semi-Sweet Chocolate (8 oz, chopped) – Provides the rich chocolate flavor and structure for the truffles; use high-quality chocolate for the best taste.
-
Heavy Whipping Cream (1/2 cup) – Adds creaminess and helps create a ganache for the truffle filling; do not allow cream to boil.
-
Peppermint Extract (1/2 tsp) – Infuses the truffles with refreshing mint flavor; adjust the amount based on desired mint intensity.
-
For the Coating
-
Semi-Sweet Chocolate, melted (6-8 oz) – Forms the outer layer of the truffles, adding a delicious chocolate coating; optional: for a richer flavor, use 70% dark chocolate.
Step‑by‑Step Instructions for Mint Chocolate Truffles
Step 1: Prepare the Chocolate
Begin by placing 8 ounces of chopped semi-sweet chocolate into a heatproof bowl. This will serve as the foundation for your rich Mint Chocolate Truffles. Make sure the bowl is dry to prevent any water from seizing the chocolate.
Step 2: Heat the Cream
In a microwave-safe container, heat ½ cup of heavy whipping cream until it’s warm but not boiling, about 45 to 60 seconds. Watch for steam rising, which indicates it’s hot enough. This warm cream will melt the chocolate, creating a luscious ganache.
Step 3: Create the Ganache
Once the cream is warm, stir in ½ teaspoon of peppermint extract for that refreshing mint flavor. Carefully pour the warm cream over the chopped chocolate and allow it to sit undisturbed for 4 to 5 minutes. This step ensures the chocolate melts smoothly, creating a velvety mixture.
Step 4: Mix Until Smooth
After the resting time, gently stir the mixture with a spatula until fully combined and silky. This is the beginning of your Mint Chocolate Truffles’ filling. If any lumps remain, give it a few more gentle stirs until everything is perfectly smooth.
Step 5: Chill the Mixture
Cover the bowl with plastic wrap and refrigerate the ganache for about 3 hours. It should be firm enough to scoop into balls. The chilling process is crucial for shaping your truffles, so be patient; it will be worth it!
Step 6: Shape the Truffles
Once the ganache is firm, use a small cookie scoop or your hands to roll the mixture into 1-inch balls. Place each truffle on a parchment-lined baking sheet. This is where the fun begins as your Mint Chocolate Truffles start to take shape!
Step 7: Prepare the Coating
In a microwave-safe bowl, melt another 6 to 8 ounces of semi-sweet chocolate, using 20 to 30 second intervals. Stir after each interval until the chocolate is smooth. This melted chocolate will create the decadent outer layer for your truffles.
Step 8: Coat the Truffles
Using a fork or dipping tool, dip each truffle into the melted chocolate, making sure it’s completely covered. Let any excess chocolate drip off before placing them back on the parchment paper. This coating will give your Mint Chocolate Truffles a beautiful finish.
Step 9: Set the Coating
Refrigerate the coated truffles once more until the chocolate is fully set, typically about 30 minutes. This final chilling step ensures the truffles maintain their shape and texture, ready to impress your family and friends.
Expert Tips for Mint Chocolate Truffles
-
Chill Time Matters: Refrigerate the ganache for at least 3 hours before shaping. This step is crucial for easy rolling and maintaining truffle structure.
-
Use Quality Chocolate: Opt for high-quality semi-sweet chocolate for the truffles and coating. It makes a notable difference in flavor and texture.
-
Avoid Boiling Cream: Heat the heavy cream until it’s warm but not boiling. Boiling can cause the cream to separate, affecting the ganache’s smooth consistency.
-
Coat Creatively: Experiment with different coatings; try using crushed candy canes or colorful sprinkles before the chocolate sets to give your Mint Chocolate Truffles a festive touch.
-
Keep Them Fresh: Store truffles in an airtight container in the refrigerator for up to 2 weeks. Proper storage helps maintain that delectable texture and taste.
What to Serve with Easy No-Bake Mint Chocolate Truffles
Create the perfect indulgent experience by pairing your sweet truffles with delicious accompaniments.
- Rich Coffee: A robust cup of coffee enhances the chocolate’s flavor, providing a warm, inviting contrast to the minty freshness.
- Creamy Vanilla Ice Cream: The silky texture of vanilla ice cream complements the truffles, creating a luxurious, creamy treat that’s hard to resist.
- Fresh Berries: Juicy strawberries or raspberries add a burst of acidity to balance the sweetness of the truffles, making each bite refreshing.
- Chocolate-Dipped Strawberries: A delightful combination, these pairing treats enhance the chocolate experience while adding a vibrant touch to the dessert platter.
- Peppermint Tea: Brewed peppermint tea echoes the flavors of the truffles, creating a harmonious taste experience that feels soothing and elegant.
- Wine Pairing: A sweet dessert wine, like a late-harvest Riesling, enhances the rich flavors while adding a touch of sophistication to your dessert experience.
- Dark Chocolate Covered Almonds: The crunchy texture of almonds coated in dark chocolate provides a satisfying crunch against the smooth truffles.
Mint Chocolate Truffles Variations
Invite your taste buds on a delightful journey by customizing these luscious Mint Chocolate Truffles to suit your cravings!
- Andes Twist: Mix in chopped Andes candies for an extra layer of minty flavor and a fun crunch.
- Candy Cane Crunch: Top the truffles with crushed candy canes for a festive, crunchy finish during the holiday season.
- Creamy White Chocolate: For a sweeter contrast, coat the truffles with melted white chocolate instead of semi-sweet chocolate.
- Nutty Delight: Incorporate finely chopped nuts like almonds or walnuts into the filling for added texture and flavor.
- Spicy Kick: Add a pinch of cayenne pepper to the chocolate coating for a surprising heat that beautifully complements the mint.
- Cocoa Dusted: For a classic touch, roll the finished truffles in unsweetened cocoa powder instead of chocolate for a velvety exterior.
- Flavor Fusion: Combine mint with a teaspoon of orange or coffee extract for an exciting twist on flavors.
- Nut Butter Bliss: Add a tablespoon of peanut butter or almond butter to the filling for a creamy, nutty surprise in every bite.
Feeling adventurous? Explore even more tasty delights, like my Dark Chocolate Quinoa for an enchanting crunch! Your Mint Chocolate Truffles will never be the same again!
How to Store and Freeze Mint Chocolate Truffles
Fridge: Store your Mint Chocolate Truffles in an airtight container for up to 2 weeks. This keeps them fresh and maintains their delightful texture.
Freezer: If you want to save some for later, freeze the truffles for up to 3 months. Just place them in a single layer on a baking sheet before transferring to a freezer-safe container.
Thawing: When ready to enjoy, simply transfer the truffles to the fridge for a few hours or let them sit at room temperature for 30 minutes before serving to get the best texture.
Make Ahead Options
These Mint Chocolate Truffles are perfect for meal prep enthusiasts! You can make the truffle filling up to 24 hours in advance, simply prepare the ganache as directed, cover it tightly with plastic wrap, and refrigerate. This helps the flavors meld beautifully while keeping the truffles just as delicious. If you wish, you can also roll the truffles into balls and store them in the fridge for up to 3 days before coating them. When ready to serve, melt the chocolate and coat the chilled truffles, then refrigerate them again until set. This simple makes-ahead approach saves you time and delivers a delightful treat on demand!
Mint Chocolate Truffles Recipe FAQs
How do I know if my chocolate is good quality?
Absolutely! High-quality chocolate will have a rich aroma and a smooth texture. Look for chocolate with a higher cocoa content and fewer ingredients. If it feels glossy and melts evenly, you’re on the right track!
What’s the best way to store leftover truffles?
I recommend placing your Mint Chocolate Truffles in an airtight container, layering them with parchment paper if necessary, and refrigerating them for up to 2 weeks. This keeps them fresh and helps maintain their delightful texture.
Can I freeze Mint Chocolate Truffles?
Yes, you can! To freeze, arrange the truffles in a single layer on a baking sheet and freeze for about an hour until firm. Then, transfer them to a freezer-safe container, where they can last for up to 3 months. Thaw them in the fridge for a few hours before serving for the best texture.
What if the ganache doesn’t set properly?
If your ganache remains too soft after chilling, it might be due to using cream that was too hot or not allowing enough chilling time. Don’t fret! Simply return the mixture to the fridge and chill for an additional hour. If needed, you can also add a bit more finely chopped chocolate to the mix to help it firm up.
Are Mint Chocolate Truffles safe for people with allergies?
While this recipe is straightforward, you should be cautious of allergies. The truffles contain dairy and may have cross-contamination with nuts or gluten, depending on the chocolate brand. Always check labels for allergies and consult with those you’re serving if they have dietary restrictions.

Decadent Mint Chocolate Truffles You Can Make in Minutes
Ingredients
Equipment
Method
- Begin by placing 8 ounces of chopped semi-sweet chocolate into a heatproof bowl. This will serve as the foundation for your rich Mint Chocolate Truffles.
- In a microwave-safe container, heat ½ cup of heavy whipping cream until it’s warm but not boiling, about 45 to 60 seconds.
- Once the cream is warm, stir in ½ teaspoon of peppermint extract for that refreshing mint flavor.
- Carefully pour the warm cream over the chopped chocolate and allow it to sit undisturbed for 4 to 5 minutes.
- After the resting time, gently stir the mixture with a spatula until fully combined and silky.
- Cover the bowl with plastic wrap and refrigerate the ganache for about 3 hours.
- Once the ganache is firm, use a small cookie scoop or your hands to roll the mixture into 1-inch balls.
- In a microwave-safe bowl, melt another 6 to 8 ounces of semi-sweet chocolate, using 20 to 30 second intervals.
- Using a fork or dipping tool, dip each truffle into the melted chocolate, making sure it’s completely covered.
- Refrigerate the coated truffles once more until the chocolate is fully set, typically about 30 minutes.
Leave a Reply