
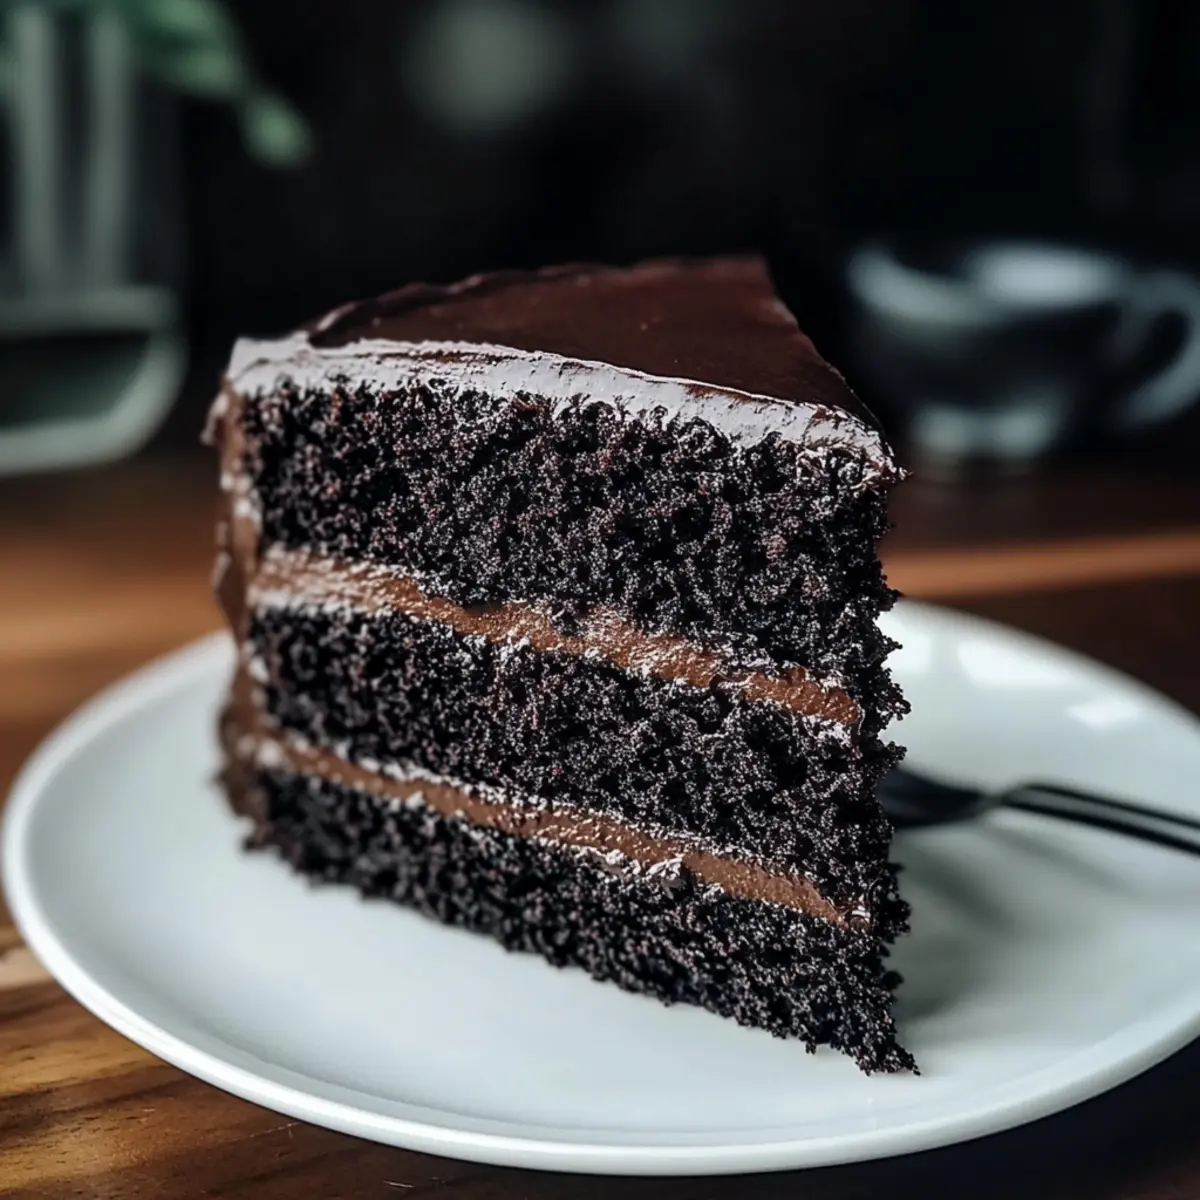
As the rich aroma of chocolate fills the air, I can’t help but feel a sense of joy in the kitchen. There’s something magical about baking a Black Velvet Cake, a dessert that transports you to a world of indulgence with its deep, dark flavors and impossibly soft texture. This easy-to-make cake is perfect for any festive occasion, whether it’s a birthday, an anniversary, or just a special treat for yourself. With minimal ingredients and a luscious cream cheese frosting that beautifully balances sweetness with a hint of tang, this cake only takes about an hour from start to finish. Are you ready to elevate your baking game and impress your loved ones with this stunning showstopper? Let’s dive in!
Why Is Black Velvet Cake So Irresistible?
Decadent indulgence: Each bite of this Black Velvet Cake envelops your taste buds in rich chocolate bliss, making it an unforgettable treat.
Easy preparation: With straightforward steps, even novice bakers can create this showstopper without feeling overwhelmed.
Festive appeal: Perfect for celebrations, this cake adds a touch of elegance to any gathering, ensuring that it shines as the centerpiece.
Versatile frosting: The tangy cream cheese frosting complements the chocolate flawlessly; try pairing it with a drizzle of warm chocolate sauce for an extra indulgent twist!
Crowd-pleaser: Its irresistible flavors make it a hit with both kids and adults alike, guaranteeing smiles all around.
For more delightful dessert options, consider trying these Apple Cinnamon Pancakes or Cinnamon Buttermilk Pancakes!
Black Velvet Cake Ingredients
For the Cake
- All-purpose flour – Provides structure; use cake flour for an even lighter texture.
- Granulated sugar – Adds sweetness; brown sugar can lend a deeper flavor profile.
- Unsweetened cocoa powder – Welcomes rich chocolate flavor; dark cocoa powder enhances both color and taste.
- Baking soda – Acts as a leavening agent; ensure it’s fresh for the best rise.
- Salt – Enhances flavor; optional if using salted butter.
- Vegetable oil – Adds moisture; substitute with melted butter for a richer flavor.
- Buttermilk – Contributes to tenderness; substitute with milk and vinegar (1 cup milk + 1 tsp vinegar) if needed.
- Large eggs – Provides structure and moisture; using room temperature eggs makes for better mixing.
- Vanilla extract – Adds depth of flavor; opt for pure vanilla for the best results.
- Boiling water – Ensures a moist cake; don’t skip this step as it enriches the batter.
For the Frosting
- Cream cheese frosting – Complements with tangy sweetness; make your own or grab store-bought for convenience.
Elevate your baking experience with this delicious Black Velvet Cake that will not only grace your table but also delight your guests!
Step‑by‑Step Instructions for Black Velvet Cake
Step 1: Preheat and Prepare
Begin by preheating your oven to 350°F (175°C). While the oven warms up, take two 9-inch round cake pans and grease them generously with butter or cooking spray, then dust them with flour to prevent sticking. Alternatively, you can line the bottoms with parchment paper for extra assurance. This preparation sets the stage for your Black Velvet Cake to bake beautifully.
Step 2: Combine Dry Ingredients
In a large mixing bowl, whisk together 2 cups of all-purpose flour, 2 cups of granulated sugar, ¾ cup of unsweetened cocoa powder, 1 ½ teaspoons of baking soda, and 1 teaspoon of salt. Make sure there are no lumps and everything is well combined for even flavor. This dry mixture is the foundation of your rich and delectable Black Velvet Cake, building that beloved chocolate goodness.
Step 3: Mix Wet Ingredients
Next, add 1 cup of vegetable oil, 1 cup of buttermilk, 2 large room temperature eggs, and 2 teaspoons of vanilla extract to the dry ingredients. Using a hand mixer or a whisk, beat the mixture until it forms a smooth, cohesive batter. This step ensures that every bite of your cake will be moist and flavorful, so take your time to blend everything thoroughly.
Step 4: Add Boiling Water
Carefully stir in 1 cup of boiling water into the batter. This hot water will help to dissolve the cocoa powder and create a velvety texture. The batter will be thin, which is perfectly fine; it allows the Black Velvet Cake to bake up moist and flavorful. Stir gently to combine all ingredients while being careful not to splash.
Step 5: Bake the Cakes
Divide the velvety batter evenly between the prepared cake pans. Place them in the preheated oven and bake for 30-35 minutes, or until a toothpick comes out clean when inserted in the center. You’ll know your Black Velvet Cake is ready when it springs back slightly to the touch and has a beautiful dark sheen.
Step 6: Cool the Cakes
Once baked, remove the cake pans from the oven and let them cool in the pans for about 10 minutes. After that, gently transfer the cakes to a wire rack to cool completely. Allowing them to cool thoroughly is essential before frosting, as it ensures that the cream cheese frosting will not melt.
Step 7: Frost and Enjoy
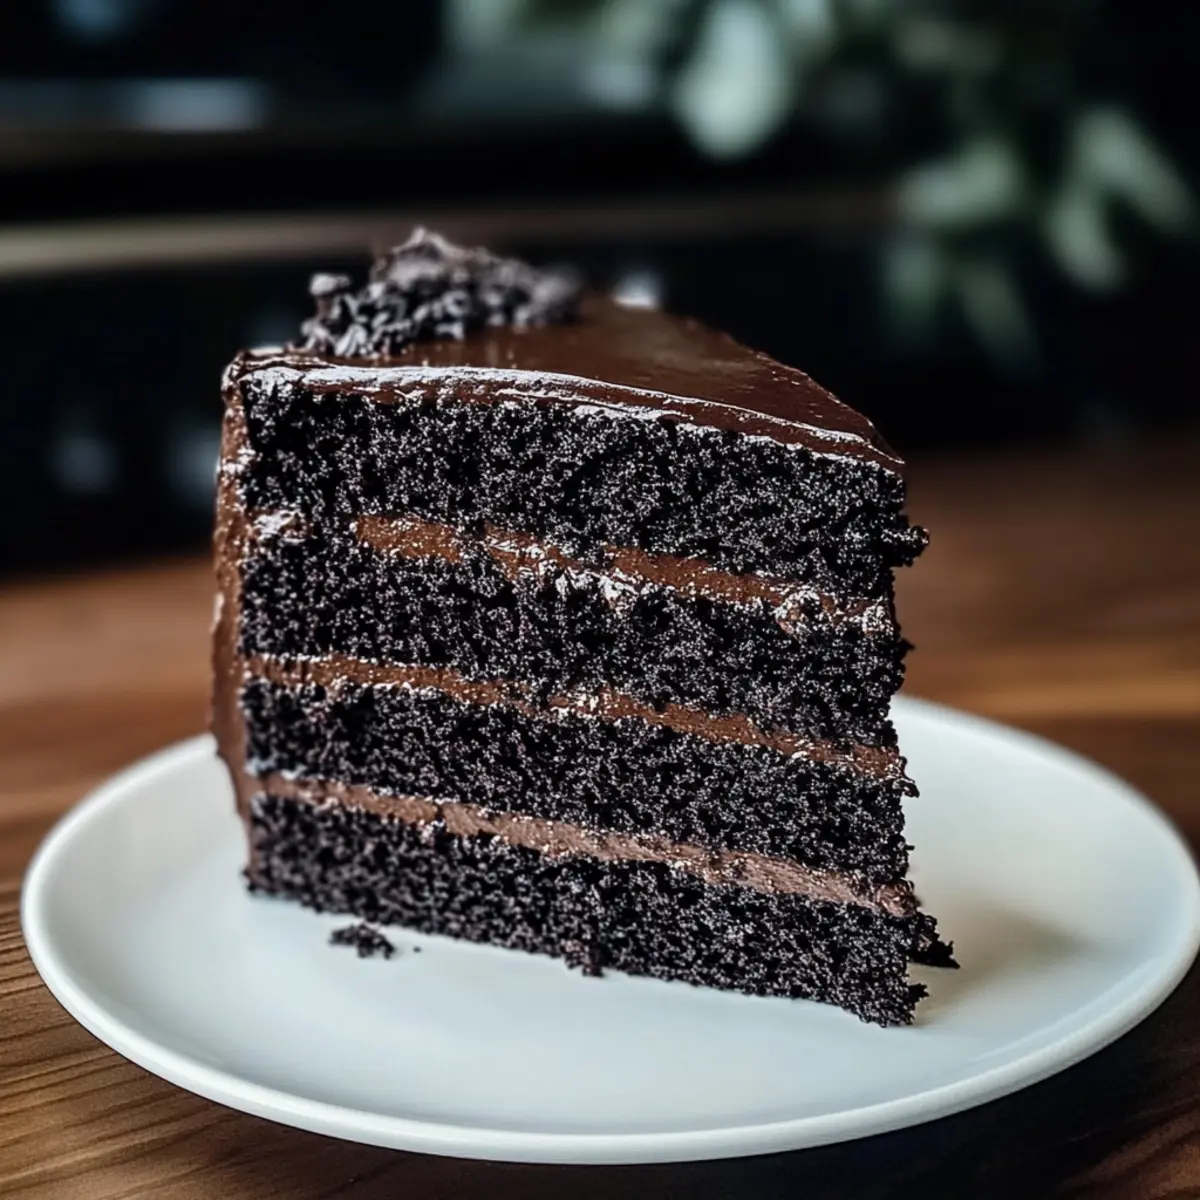
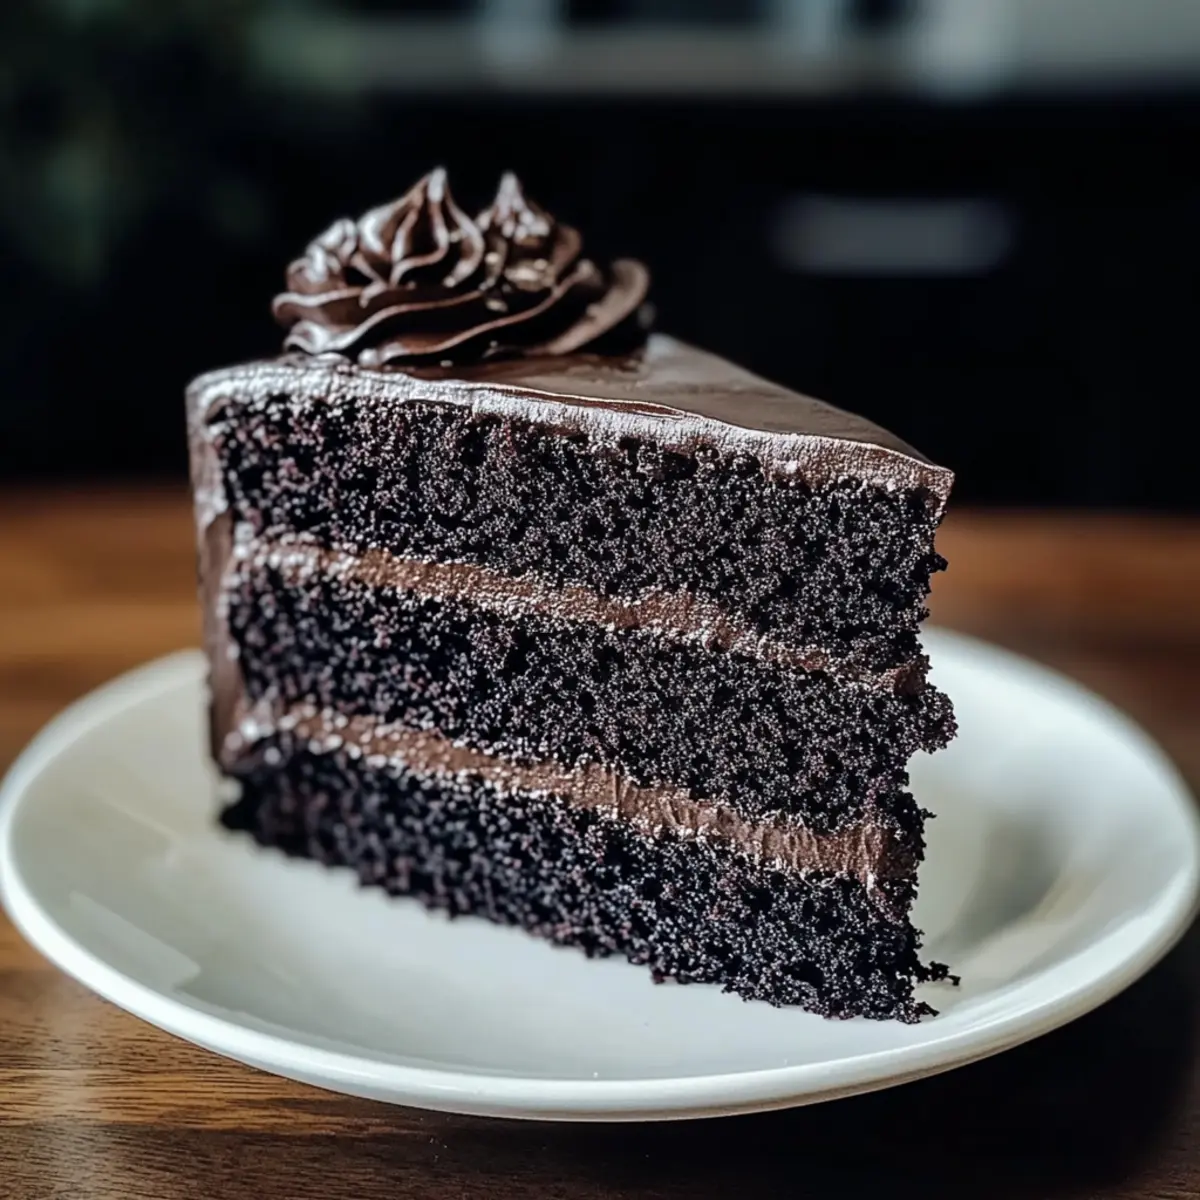
Once your Black Velvet Cake layers are completely cooled, it’s time to frost! Spread a generous layer of cream cheese frosting on the top of one cake layer, then gently place the second layer on top and frost the top and sides of the cake. The tangy sweetness of the frosting pairs magically with the rich chocolate cake, creating a sophisticated dessert.
What to Serve with Black Velvet Cake
The perfect meal isn’t complete without delightful accompaniments that elevate its indulgence and flavor.
-
Creamy Vanilla Ice Cream: A classic pairing that contrasts the rich chocolate with its smooth, creamy texture, making each bite a heavenly experience. Together, they create a balance that delights the senses.
-
Fresh Berries: Juicy raspberries or strawberries add a refreshing tartness that cuts through the cake’s sweetness, making it an elegant touch that enhances presentation and flavor.
-
Chocolate Sauce Drizzle: A warm drizzle of decadent chocolate sauce amplifies the cake’s richness, creating a chocolate lover’s dream dessert in every bite. This decadent addition invites pure indulgence.
-
Whipped Cream: Light and airy whipped cream provides a soft texture that perfectly balances the dense, chocolatey cake. It’s a delightful way to bring a lighter note to your dessert plate.
-
Espresso or Coffee: A rich coffee or shot of espresso complements the chocolate flavors beautifully, enhancing the cake’s richness and making it a perfect accompaniment for an after-dinner treat.
-
Caramel Sauce: Drizzling some warm caramel sauce elevates both sweetness and texture, providing a savory contrast to the chocolate cake’s flavor profile that will have everyone reaching for seconds.
-
Chocolate-Covered Strawberries: These decadent bites serve as both decoration and a tasty treat, pairing the tartness of fresh fruit with rich chocolate that echoes the cake’s flavors.
How to Store and Freeze Black Velvet Cake
- Room Temperature: Keep the unfrosted Black Velvet Cake layers at room temperature for up to 1 day, covered with plastic wrap to preserve moisture.
- Fridge: Refrigerate the frosted cake for up to 3-4 days; be sure to cover it loosely with plastic wrap to prevent the frosting from drying out.
- Freezer: You can freeze unfrosted cake layers for up to three months. Wrap them tightly in plastic wrap and place in an airtight container to prevent freezer burn.
- Reheating: If enjoying a chilled slice, allow it to reach room temperature before serving or warm it in the microwave for a few seconds for a delightful melt-in-your-mouth experience.
Expert Tips for Black Velvet Cake
-
Room Temperature Ingredients: Ensure all ingredients are at room temperature to promote better mixing and a perfect rise for your Black Velvet Cake.
-
Mixing Precautions: Be careful not to overmix your batter; mixing until just combined helps maintain a tender crumb and prevents a tough cake.
-
Check Your Baking Soda: Always verify that your baking soda is fresh. Using expired baking soda can lead to poor rising and a denser cake.
-
Frosting Technique: Reserve some of the cream cheese frosting for decorative swirls on top; it adds a beautiful touch and enhances your cake’s presentation.
-
Cooling Time: Allow your cakes to cool completely on a wire rack before frosting to ensure the frosting doesn’t melt, keeping the layers intact.
-
Boiling Water is Key: Don’t skip the boiling water; it enhances the moisture and texture of the Black Velvet Cake, giving it that signature luscious feel.
Black Velvet Cake Variations & Substitutions
Unleash your creativity in the kitchen and elevate this Black Velvet Cake into something uniquely yours—each twist is a new delight!
-
Chocolate Chips: Add dark or semi-sweet chocolate chips to the batter for bursts of chocolatey goodness that enhance every bite. They’ll melt beautifully, adding an extra layer of indulgence to your cake.
-
Buttercream Frosting: Swap out the cream cheese frosting for luscious buttercream for a sweeter, more traditional frosting. This change offers a vibrant sweetness that pairs perfectly with the rich chocolate base.
-
Add Spices: Sprinkle in a dash of cinnamon or a hint of espresso powder to amplify the rich flavors of the cake. The spices will create a warm, cozy undertone that enhances the chocolate wonderfully.
-
Nutty Crunch: Toss in some chopped nuts, like walnuts or pecans, to the batter for an added texture twist. The crunch not only enhances the taste but also gives you a delightful surprise in every bite.
-
Dairy-Free Option: Substitute the buttermilk with a mix of almond milk and lemon juice (1 cup almond milk + 1 tsp lemon juice) for a delicious dairy-free version that doesn’t skimp on moisture or flavor.
-
Fruit Infusion: For a fruity twist, add raspberry puree between the layers and on top of the frosting for a stunning visual and a fresh, tangy contrasting flavor.
-
Spicy Kick: Introduce a pinch of cayenne pepper into your batter for a surprising yet delightful spicy undertone that complements the chocolate beautifully. Just a touch will elevate this dessert to a whole new level.
-
Elegant Garnish: Top your frosted cake with fresh berries or a drizzle of caramel sauce to elevate the presentation and add a delightful contrast of flavors. This simple addition not only makes it look stunning but enhances overall enjoyment.
For more delightful ideas, you might like exploring these Apple Cinnamon Pancakes or indulging in some rich Cinnamon Buttermilk Pancakes that pair wonderfully with the flavors of chocolate!
Make Ahead Options
These Black Velvet Cake layers are a fantastic option for meal prep lovers! You can bake the cake layers up to 3 days in advance and store them tightly wrapped in plastic wrap at room temperature. If you’re looking to prep even further ahead, unfrosted layers can be frozen for up to 3 months; just be sure to wrap them well to prevent freezer burn. When you’re ready to serve, let the cakes thaw completely, then frost with your desired cream cheese frosting for a stunning and delicious finish. This way, you can have your decadent dessert ready with minimal effort on special occasions, saving you precious time!
Black Velvet Cake Recipe FAQs
What type of cocoa powder should I use for the best flavor?
For the richest chocolate flavor in your Black Velvet Cake, I recommend using unsweetened cocoa powder or dark cocoa powder. Dark cocoa powder not only enhances the cake’s color but also intensifies the chocolate taste. You’ll love how it elevates your baking!
How should I store my Black Velvet Cake?
If you have any leftovers, you can refrigerate the frosted Black Velvet Cake for up to 3-4 days. Just loosely cover it with plastic wrap to prevent the frosting from drying out. If you’re keeping the cake unfrosted, it can be stored at room temperature for 1 day wrapped in plastic.
Can I freeze the Black Velvet Cake?
Absolutely! To freeze unfrosted Black Velvet Cake layers, wrap them tightly in plastic wrap and place them in an airtight container or a resealable freezer bag. This way, they’ll keep for up to three months! When you’re ready to enjoy, simply thaw in the fridge overnight.
What should I do if my cake is dry?
If you find your cake turned out dry, it might be due to overbaking or the ingredients not being at room temperature. Always check for doneness a few minutes before the suggested baking time and use room temperature ingredients to achieve a moist texture! Consider enjoying the cake with a scoop of ice cream or additional frosting to enhance moisture.
Can I use a different frosting for the Black Velvet Cake?
Yes, you can absolutely switch up the frosting! While the cream cheese frosting pairs perfectly with the rich chocolate flavor, feel free to use buttercream or whipped cream instead. Each frosting brings a different experience; buttercream will be sweeter, while whipped cream adds a lightness that beautifully contrasts the cake’s richness.
Are there any dietary considerations for my Black Velvet Cake?
When considering allergies, keep in mind that this cake contains gluten (from flour), eggs, and dairy (from buttermilk and cream cheese frosting). For gluten-free options, you can substitute a gluten-free flour blend; for dairy-free, alternatives like almond milk and a dairy-free frosting can work beautifully. Always ensure your substitutions maintain a balance in texture and flavor!

Decadent Black Velvet Cake That Will Wow Your Guests
Ingredients
Equipment
Method
- Preheat your oven to 350°F (175°C) and grease two 9-inch round cake pans with butter or cooking spray, dusting with flour.
- In a large mixing bowl, whisk together 2 cups of all-purpose flour, 2 cups of granulated sugar, ¾ cup of cocoa powder, 1 ½ teaspoons of baking soda, and 1 teaspoon of salt until well combined.
- Add 1 cup of vegetable oil, 1 cup of buttermilk, 2 large eggs, and 2 teaspoons of vanilla extract to the dry ingredients and mix until smooth.
- Carefully stir in 1 cup of boiling water into the batter, combining gently.
- Divide the batter between the prepared pans and bake for 30-35 minutes or until a toothpick inserted comes out clean.
- Let the cakes cool in the pans for 10 minutes, then transfer to a wire rack to cool completely.
- Frost the cooled cake layers with cream cheese frosting, spread evenly on top and sides.
Leave a Reply