
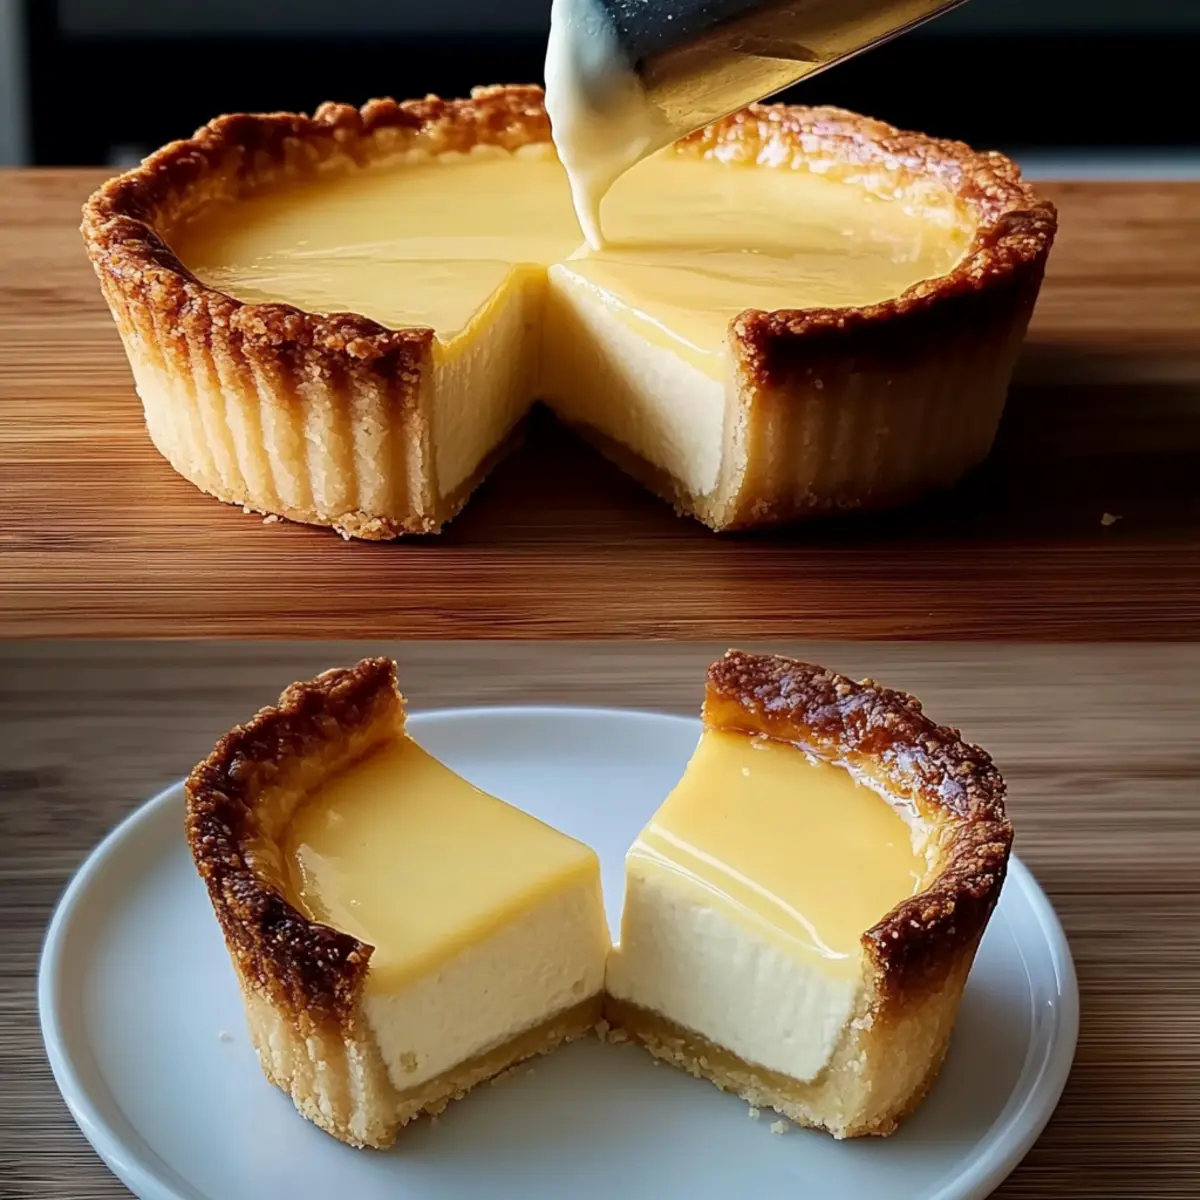
As the aroma of baking crust wafts through my kitchen, I can’t help but feel a rush of excitement. Today, I’m bringing you my ultimate Cheesecake Tart Recipe, a creamy delight nestled in a perfectly flaky crust that’s bound to impress. Not only does this dessert offer a stunning presentation for your gatherings, but it also comes together easily, making it a fantastic choice for both beginners and seasoned bakers alike. Whether you prefer it garnished with fresh fruit or swirled with chocolate drizzle, this cheesecake tart is a versatile indulgence that’s sure to please any palate. Have you ever had a dessert that feels like a warm hug? Let’s dive into this recipe and discover how to create that comforting experience right at home.
Why is this cheesecake tart irresistible?
Creamy Texture: The luscious cream cheese filling creates a melt-in-your-mouth experience that leaves you craving more.
Flaky Crust: Made from scratch, the buttery crust contrasts beautifully with the soft filling, adding an element of crunch.
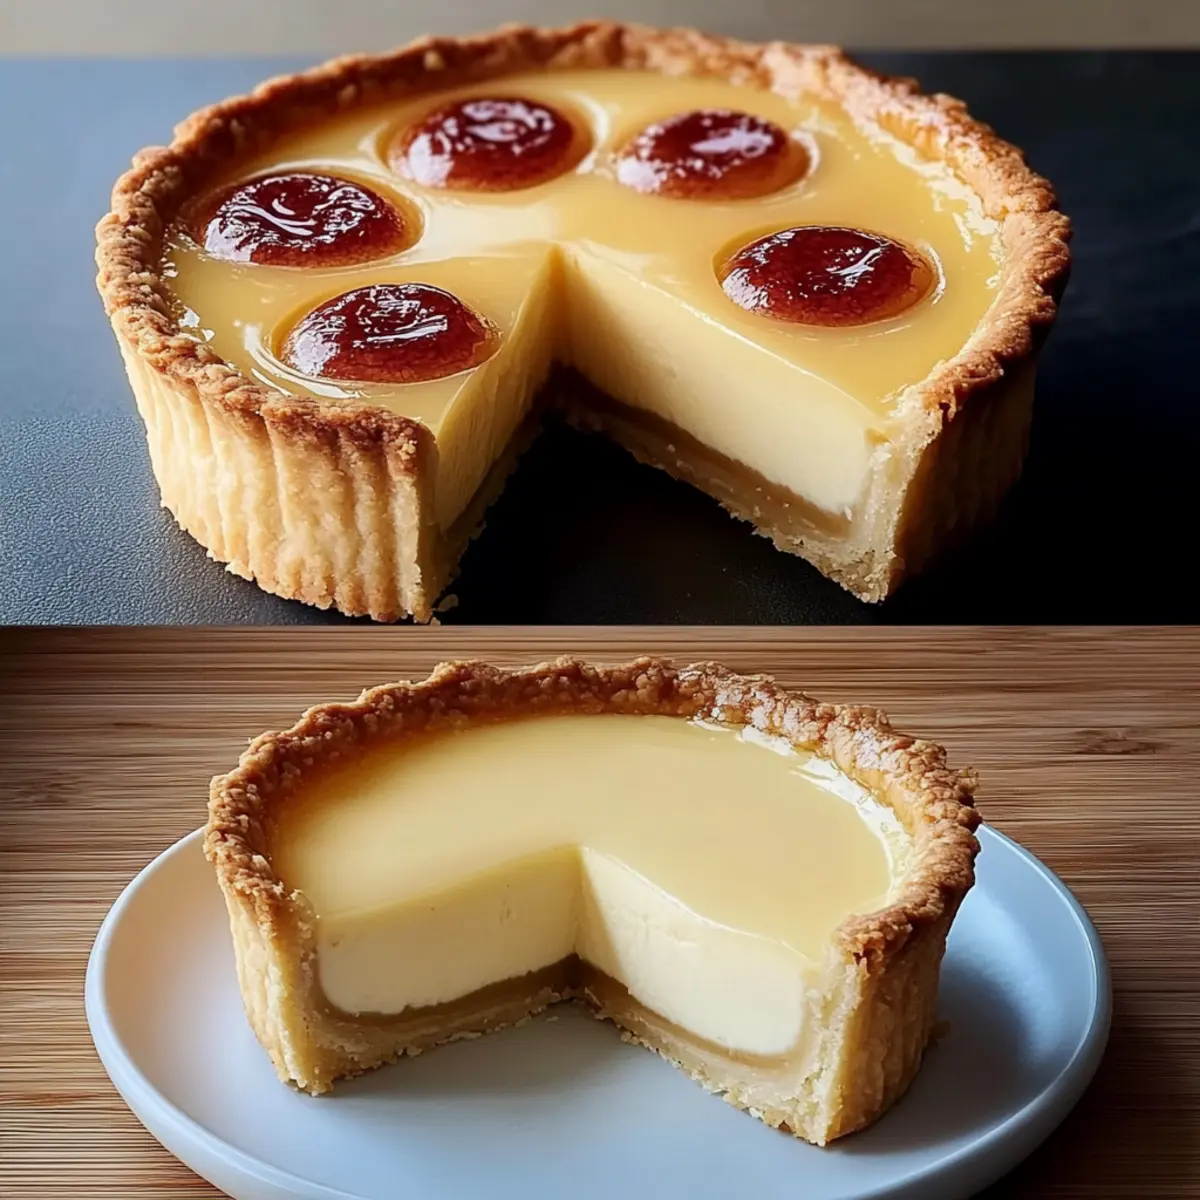
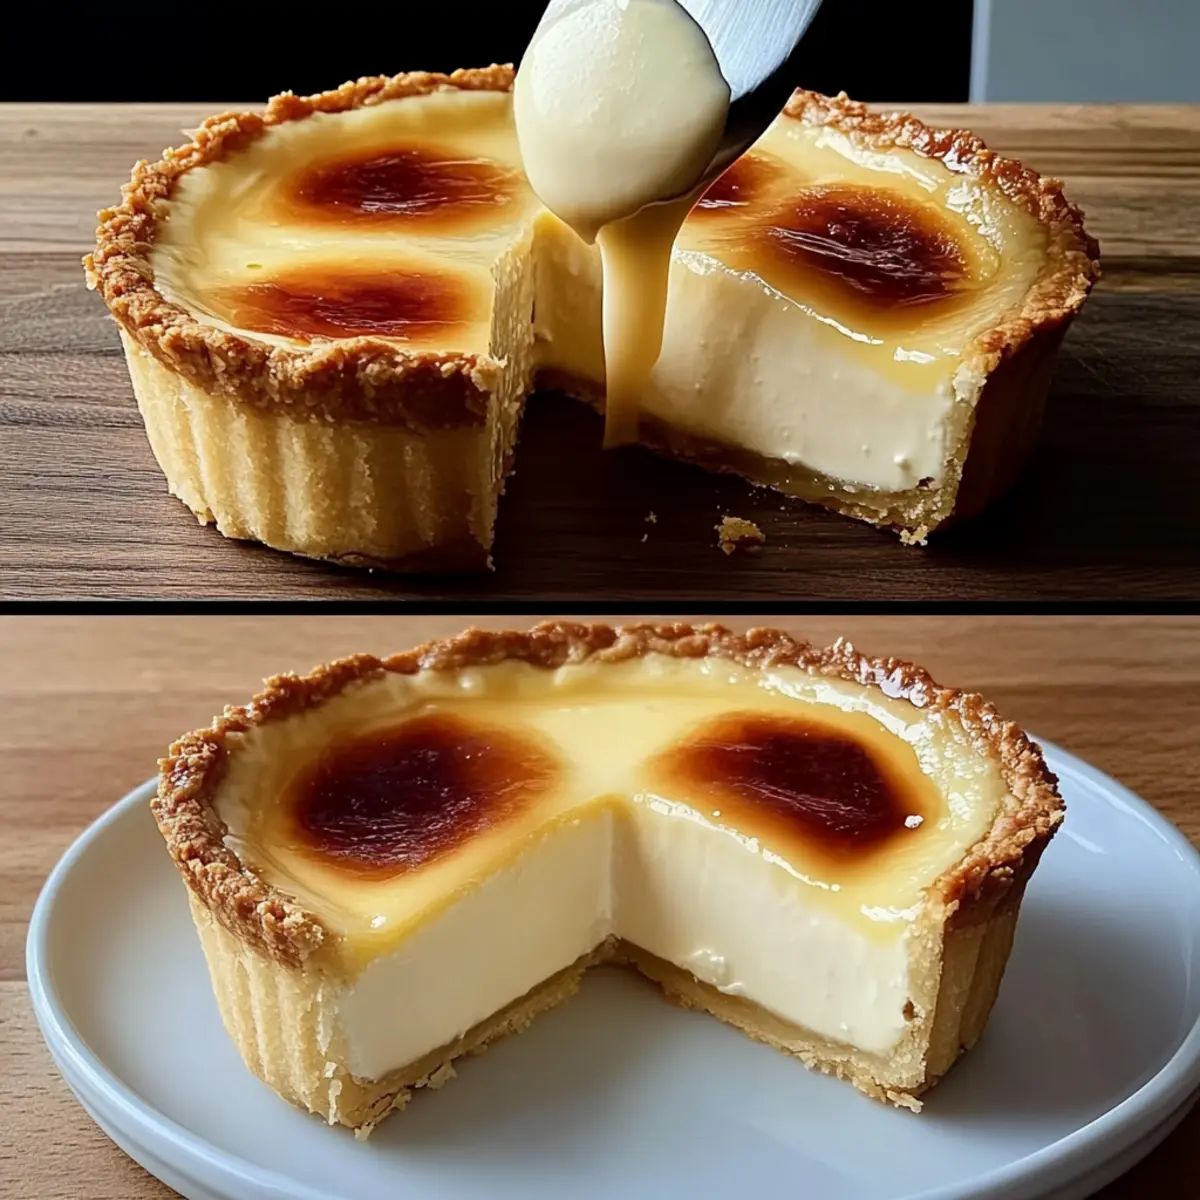
Endless Versatility: Dress it up with fruits, chocolate, or even a drizzle of caramel; this tart adapts to every taste!
Easy to Make: With simple ingredients and straightforward steps, it’s perfect for both beginners and seasoned bakers.
Perfect for Any Occasion: Whether it’s a festive celebration or a cozy night in, this cheesecake tart fits the bill!
For more delightful desserts, don’t forget to check out my recipe for Blueberry Cheesecake Protein bites or indulge in some Bake Gingerbread Cheesecake cups.
Cheesecake Tart Recipe Ingredients
For the Tart Crust
- Cake Flour – This adds structure; a gluten-free blend can be used as a substitute.
- Butter – Essential for a flaky crust; margarine can work if needed.
- Salt – Just a pinch enhances flavor in the crust.
For the Cheesecake Filling
- Cream Cheese – Provides that rich, creamy texture; Philadelphia cream cheese is recommended for best results.
- Sugar – Sweetens and balances the cream cheese tang; adjust to taste.
- Eggs – Binds the filling, so beat them well for a smooth mix.
- Vanilla Extract – Enhances the overall flavor profile beautifully.
- Lemon Zest (Optional) – Adds a light, citrusy brightness to complement the cheesecake.
Dive into making this delightful cheesecake tart recipe that’s perfect for any occasion!
Step‑by‑Step Instructions for Cheesecake Tart Recipe
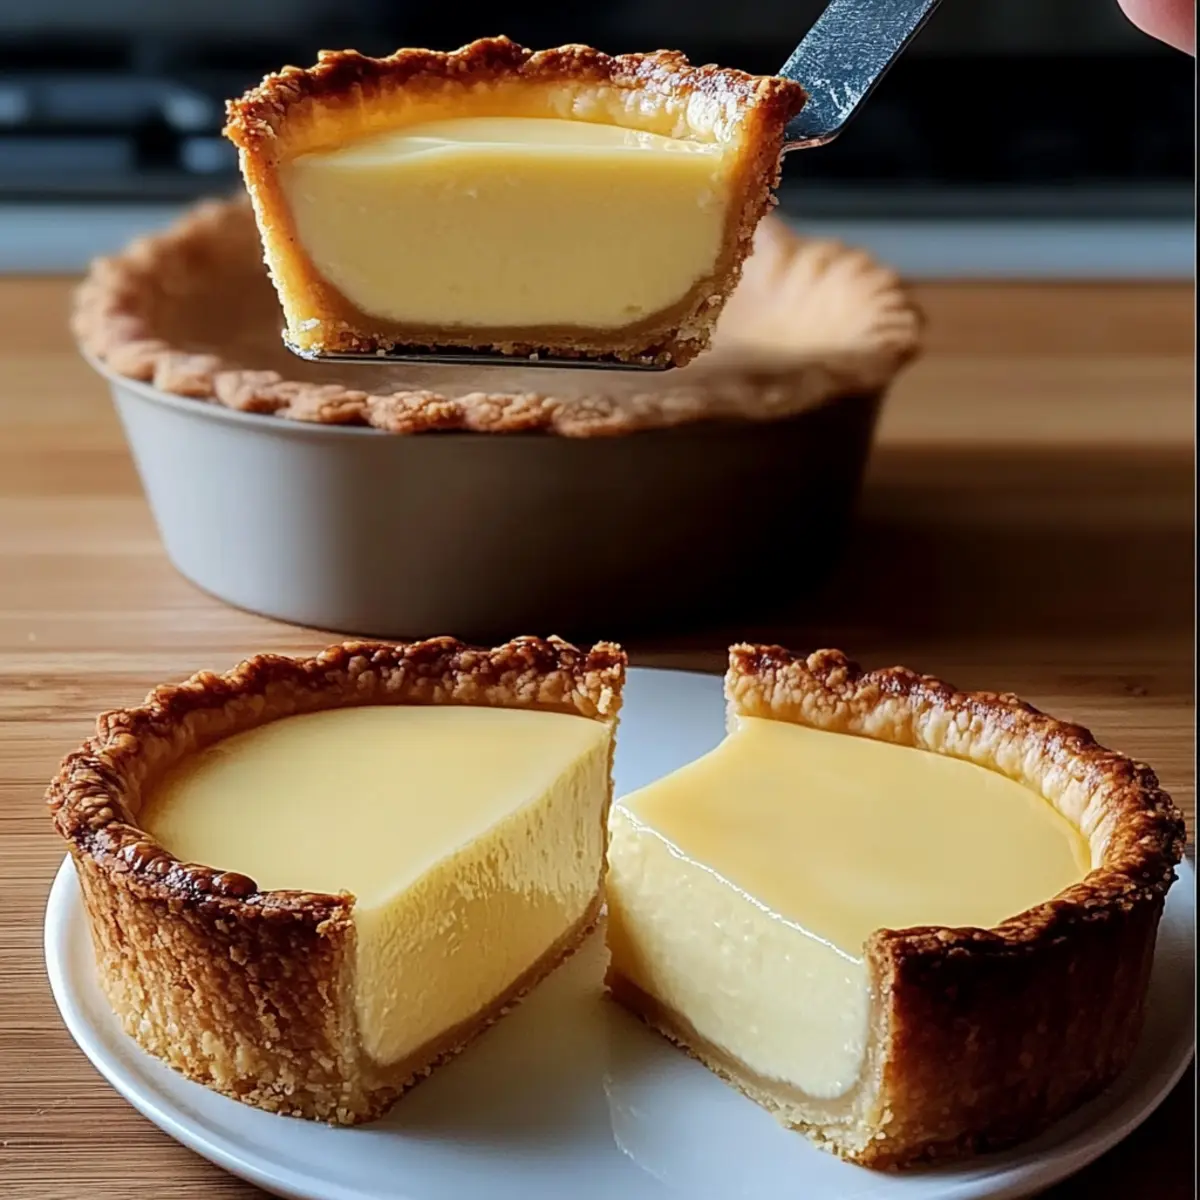
Step 1: Prepare the Tart Shell
In a mixing bowl, combine the cake flour, cold butter, and a pinch of salt using a pastry cutter or your fingertips until the mixture resembles coarse crumbs. Press the crumbly dough evenly into the bottom and up the sides of a tart pan, ensuring it’s compact. Chill the tart shell in the refrigerator for at least 30 minutes while you preheat your oven to 350°F (175°C).
Step 2: Make the Filling
In a separate mixing bowl, beat the cream cheese and sugar together with an electric mixer until smooth and creamy, about 3–4 minutes. Add the eggs one at a time, mixing well after each addition until fully incorporated. Finally, stir in the vanilla extract and lemon zest, if using, ensuring a well-blended filling that’s airy and light—a key feature of this cheesecake tart recipe.
Step 3: Bake
Remove the chilled tart shell from the refrigerator and pour in the cheesecake filling, smoothing the top with a spatula. Place the tart in the preheated oven and bake for 45 minutes, or until the edges are set, while the center remains slightly jiggly. Keep an eye on it to avoid overbaking, as the ideal filling will firm up as it cools.
Step 4: Cool
Once baked, carefully remove the cheesecake tart from the oven and allow it to cool at room temperature for about 30 minutes. Next, place the tart in the refrigerator to chill for at least 2 hours; this will help the flavors meld and develop a smooth texture, enhancing your enjoyment of this creamy cheesecake tart.
Step 5: Serve
When ready to serve, gently remove the cheesecake tart from the pan and slice it into wedges. You can enjoy it plain or elevate its charm with fresh fruit on top, a dollop of whipped cream, or a drizzle of chocolate. This flexibility makes the cheesecake tart recipe a perfect dessert for any occasion!
How to Store and Freeze Cheesecake Tart
Refrigerator: Store the cheesecake tart in the fridge, covered with plastic wrap or in an airtight container, for up to 3-4 days to maintain freshness and creaminess.
Freezer: If you have leftover slices, wrap them tightly in plastic wrap and foil before placing them in the freezer. They can be stored for up to 1 month.
Thawing: To enjoy frozen portions, simply transfer them to the refrigerator overnight before serving, allowing the tart to gradually relax back to its creamy texture.
Serving Tip: For the best flavor experience, serve your cheesecake tart at room temperature. Just let it sit out for about 30 minutes before indulging!
What to Serve with Creamy Cheesecake Tart?
Indulging in a decadent dessert is only half the fun—let’s make your meal complete with the perfect pairs!
-
Fresh Berries: Add a burst of flavor and vibrant color; the tartness of strawberries or raspberries complements the sweetness of the cheesecake beautifully. They create a lovely balance that enhances each bite.
-
Whipped Cream: A dollop of light, fluffy whipped cream brings a dreamy texture that elevates the cheesecake tart experience, making each slice even more indulgent.
-
Coffee or Espresso: The rich, bold flavors of coffee provide a pleasing contrast to the creamy tart, turning your dessert into a delightful coffee break moment.
-
Chocolate Ganache: Drizzling warm chocolate ganache adds a luxurious touch; its silky texture enveloping the creamy filling creates a symphony of flavors that chocolate lovers will adore.
-
Lemon Sorbet: A scoop of zesty lemon sorbet serves as a refreshing palate cleanser, enhancing the flavors of the cheesecake while adding a light, tangy contrast.
-
Vanilla Ice Cream: Creamy vanilla ice cream mingles perfectly with the cheesecake tart’s richness, bringing a classic combination that feels comforting and familiar.
-
Caramel Sauce: A drizzle of salted caramel lends a sweet and savory note, deepening the richness of the cheesecake while adding an enjoyable gooeyness to the experience.
Each pairing invites a delightful harmony, ensuring that your cheesecake tart becomes the star of your dessert table!
Make Ahead Options
These creamy cheesecake tarts are perfect for busy cooks looking to save time! You can prepare the tart shell up to 24 hours in advance; simply press the dough into the tart pan, wrap it tightly in plastic wrap, and refrigerate until ready to fill. The cheesecake filling can be made ahead and stored in the refrigerator for up to 3 days; just cover it in an airtight container to keep it fresh. When you’re ready to serve, pour the filling into the cooled tart shell and bake as directed. You’ll have a beautifully baked cheesecake tart, ready with minimal effort and just as delicious!
Expert Tips for Cheesecake Tart Recipe
- Use Fresh Ingredients: Quality cream cheese and fresh eggs ensure a rich filling. Avoid using cream cheese that’s past its expiration date for best results.
- Chill Properly: After baking, allowing the tart to cool then refrigerating for at least 2 hours is crucial. This helps to set the filling and achieve that creamy texture.
- Avoid Overbaking: The edges should be set while the center remains slightly jiggly, as it will firm up while cooling. Overbaking can lead to a dry cheesecake tart.
- Perfect Slicing: For clean slices, dip your knife in hot water before cutting. Wipe the knife between slices for a beautifully presented cheesecake tart.
- Experiment with Flavors: Don’t hesitate to incorporate extract variations or unique toppings to personalize your cheesecake tart recipe!
Cheesecake Tart Recipe Variations
Feel free to add your personal touch to this delicious cheesecake tart and explore delightful twists that will elevate your baking experience!
-
Gluten-Free: Use a gluten-free flour blend in place of cake flour to enjoy a crust that everyone can savor.
For another exciting gluten-free option, try a nut-based crust made from almond flour. It will add a delightful flavor, too! -
Dairy-Free: Swap cream cheese for a dairy-free cream cheese alternative and use coconut oil in the crust for a creamy, rich texture.
While maintaining the essence of the tart, you’ll create a delectable dessert that no one can resist, regardless of dietary preferences. -
Flavor Boost: Add a splash of almond extract instead of vanilla for a uniquely nutty flavor that will have everyone guessing your secret ingredient.
The twist transforms the filling, making it an enticing surprise with each luscious bite. -
Chocolate Drizzle: Melt dark chocolate and drizzle it over the cooled tart for an indulgent chocolate kick that beautifully contrasts with the creamy filling.
Not only does this add visual appeal, but it also tantalizes taste buds, making every slice irresistible. -
Nutty Crust: Incorporate finely chopped nuts like walnuts or pecans into your crust for extra crunch and flavor that will elevate the entire dessert.
This textural variation can take your cheesecake tart from ordinary to extraordinary! -
Citrus Zing: Experiment with lime or orange zest in the filling to add a refreshing citrus layer that complements the creaminess of the cheesecake.
The bright flavors can help make the dessert feel lighter, perfect for warm weather occasions or celebrations. -
Caramel Swirl: Before baking, gently swirl in ribbons of caramel sauce into the cheesecake filling for a rich, sweet surprise that will delight caramel lovers.
This variation is sure to create a show-stopping dessert that stands out on any dessert table!
Embrace your inner chef and make this cheesecake tart recipe uniquely yours. Also, don’t forget to check out my delicious Char Siu Chicken recipe for a savory contrast that pairs wonderfully with any sweet dessert!
Cheesecake Tart Recipe FAQs
How do I choose the right cream cheese for my cheesecake tart?
Absolutely! For this cheesecake tart recipe, I highly recommend using Philadelphia cream cheese as it provides the richest and creamiest texture. If you’re in a pinch, other brands will work—just ensure they are full-fat and softened to room temperature for easy blending.
What’s the best way to store my cheesecake tart after baking?
To store your cheesecake tart, make sure to cover it tightly with plastic wrap or place it in an airtight container in the refrigerator. It will stay fresh and delicious for up to 3-4 days. If you expect leftovers, refrigerate promptly to maintain its creamy texture.
Can I freeze my cheesecake tart, and if so, how?
Certainly! To freeze your cheesecake tart, first, allow it to cool completely. Wrap each slice tightly in plastic wrap, then aluminium foil. You can freeze it for up to 1 month. When you’re ready to enjoy it, simply place the wrapped pieces in the refrigerator overnight to thaw gently; this preserves the tart’s rich texture and flavor.
What should I do if my cheesecake tart cracks while baking?
Very common! If you happen to see cracks form while baking, don’t worry; it happens to the best of us. The most important thing is to avoid overbaking. Keep baking until the edges are set but the center remains slightly jiggly. Once it’s cooled, toppings like whipped cream or fresh fruit can disguise any imperfections beautifully!
Is this cheesecake tart recipe suitable for people with dietary restrictions?
Yes! This cheesecake tart recipe is vegetarian-friendly. If you have guests with gluten sensitivities, you can substitute the cake flour with a gluten-free flour blend, ensuring everyone can enjoy this delightful dessert. If allergies to eggs or dairy are a concern, consider using egg replacers or dairy-free cream cheese alternatives, adjusting the recipe accordingly.
Creamy Cheesecake Tart Recipe for a Perfect Dessert Delight
Ingredients
Equipment
Method
- In a mixing bowl, combine the cake flour, cold butter, and a pinch of salt until the mixture resembles coarse crumbs. Press the crumbly dough into the tart pan and chill for at least 30 minutes.
- In a separate bowl, beat cream cheese and sugar together until smooth. Add eggs one at a time, mixing well after each. Stir in vanilla extract and lemon zest.
- Pour the cheesecake filling into the baked tart shell and smooth the top. Bake for 45 minutes or until the edges are set but the center is slightly jiggly.
- Allow the tart to cool for 30 minutes at room temperature, then refrigerate for at least 2 hours.
- Remove the tart from the pan, slice, and serve plain or with toppings like fresh fruit or whipped cream.
Leave a Reply