
The savory warmth of Chicken Enchiladas always brings me back to my childhood kitchen, where the irresistible aroma would fill the air long before they made their grand entrance at the dinner table. This Easy Chicken Enchiladas recipe is not just a quick meal for busy weeknights; it’s a canvas for creativity that everyone can enjoy. Whether you’re craving a spicy kick or a comforting vegetarian twist, these enchiladas can be tailored to fit any taste. With high protein and simple ingredients, they’ll impress both family and guests alike, leaving bellies full and hearts happy. Ready to learn how to transform everyday ingredients into a delightful feast? Let’s dig in!
Why Love Chicken Enchiladas?
Simplicity at Its Best: These enchiladas are incredibly easy to make, even for beginners! With a clear step-by-step process, they’ll be ready to serve in no time.
Customizable to Your Taste: Whether you prefer the classic chicken flavor, want to make a hearty vegetarian version, or add some spice, the options are endless!
High Protein Goodness: Packed with around 30 grams of protein per serving, these enchiladas make a nutritious meal for the whole family.
Perfect for Meal Prepping: Assemble them ahead of time and bake when you’re ready for a quick weeknight dish or serve at gatherings for a wow-worthy crowd-pleaser.
Comfort Food Delight: With gooey cheese and tender chicken, each bite offers a warm hug of flavors that everyone loves. Serve alongside a refreshing salad or a bowl of Easy Chicken Taco Soup for a balanced meal. Enjoy the warmth and joy these enchiladas bring to your table!
Chicken Enchiladas Ingredients
• Get ready to create tasty Chicken Enchiladas with these must-have ingredients!
For the Filling
- Cooked and shredded chicken – Use rotisserie chicken for convenience, or cook your own for a fresher taste.
- Onion, chopped – Adds sweetness and depth to the filling.
- Garlic, minced – Provides aroma and a burst of flavor.
- Cumin – Adds warmth and earthiness to the chicken mixture.
- Chili powder – Enhances flavor with a mild kick.
- Salt and pepper – Balances and boosts all flavors.
For the Tortillas
- Flour tortillas – Soft and pliable, essential for wrapping the filling.
For the Sauce and Topping
- Red enchilada sauce – Choose mild or spicy based on preference; adds a zesty kick.
- Shredded Monterey Jack cheese – Melts beautifully and enhances creaminess.
- Chopped cilantro (for garnish) – Adds freshness and color to the finished dish.
- Sour cream (for serving) – Introduces creaminess and tang to each bite.
Extra Tip
- Feel free to mix in diced jalapeños for a spicy twist or substitute chicken with black beans for a hearty vegetarian version!
Step‑by‑Step Instructions for Chicken Enchiladas
Step 1: Prepare the Chicken
Start by cooking your chicken until fully cooked and tender. You can boil it for about 20-25 minutes or bake it in the oven at 375°F (190°C) for 30-35 minutes. Once cooked, allow the chicken to cool slightly before shredding it with two forks. You’ll want about 3 cups of shredded chicken for your Chicken Enchiladas.
Step 2: Sauté the Aromatics
In a large skillet, heat 1 tablespoon of vegetable oil over medium heat. Add 1 cup of chopped onion and sauté for 3-4 minutes until translucent. Then, stir in 3 cloves of minced garlic and continue to sauté for an additional minute until fragrant. This aromatic mixture will give your Chicken Enchiladas a delicious base flavor.
Step 3: Mix the Filling
Add the shredded chicken to the skillet with the onion and garlic. Sprinkle in 1 teaspoon of cumin, 1 teaspoon of chili powder, and season with salt and pepper to taste. Cook everything together for about 3-5 minutes, stirring frequently, until the chicken is heated through and well coated with the spices.
Step 4: Assemble the Enchiladas
Preheat your oven to 375°F (190°C). In a 9×13 inch baking dish, spread a thin layer of red enchilada sauce to prevent sticking. Take a flour tortilla, add a generous scoop of the chicken filling along with a sprinkle of shredded Monterey Jack cheese, then roll it up tightly. Place each rolled tortilla seam-side down in the baking dish. Repeat until all tortillas are filled and arranged snugly.
Step 5: Top and Bake
Once all the enchiladas are assembled, pour the remaining enchilada sauce evenly over the top. Sprinkle the rest of the shredded cheese over the sauce. Cover the baking dish with foil and bake for 20-25 minutes until hot and bubbly. In the last 5-10 minutes, remove the foil to allow the cheese to become golden and slightly crispy on top.
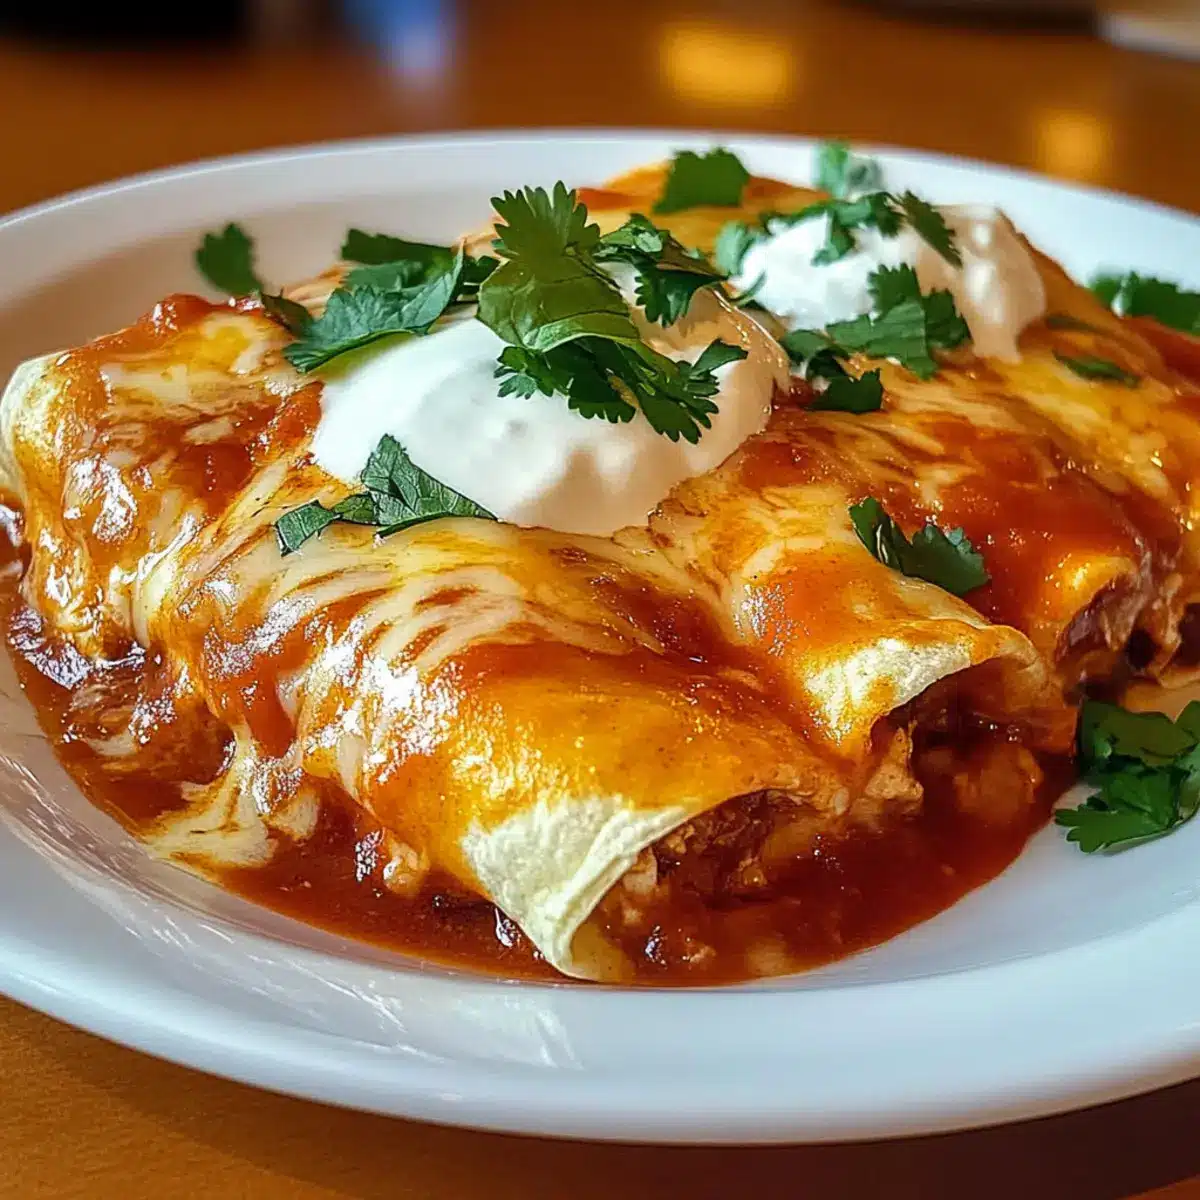
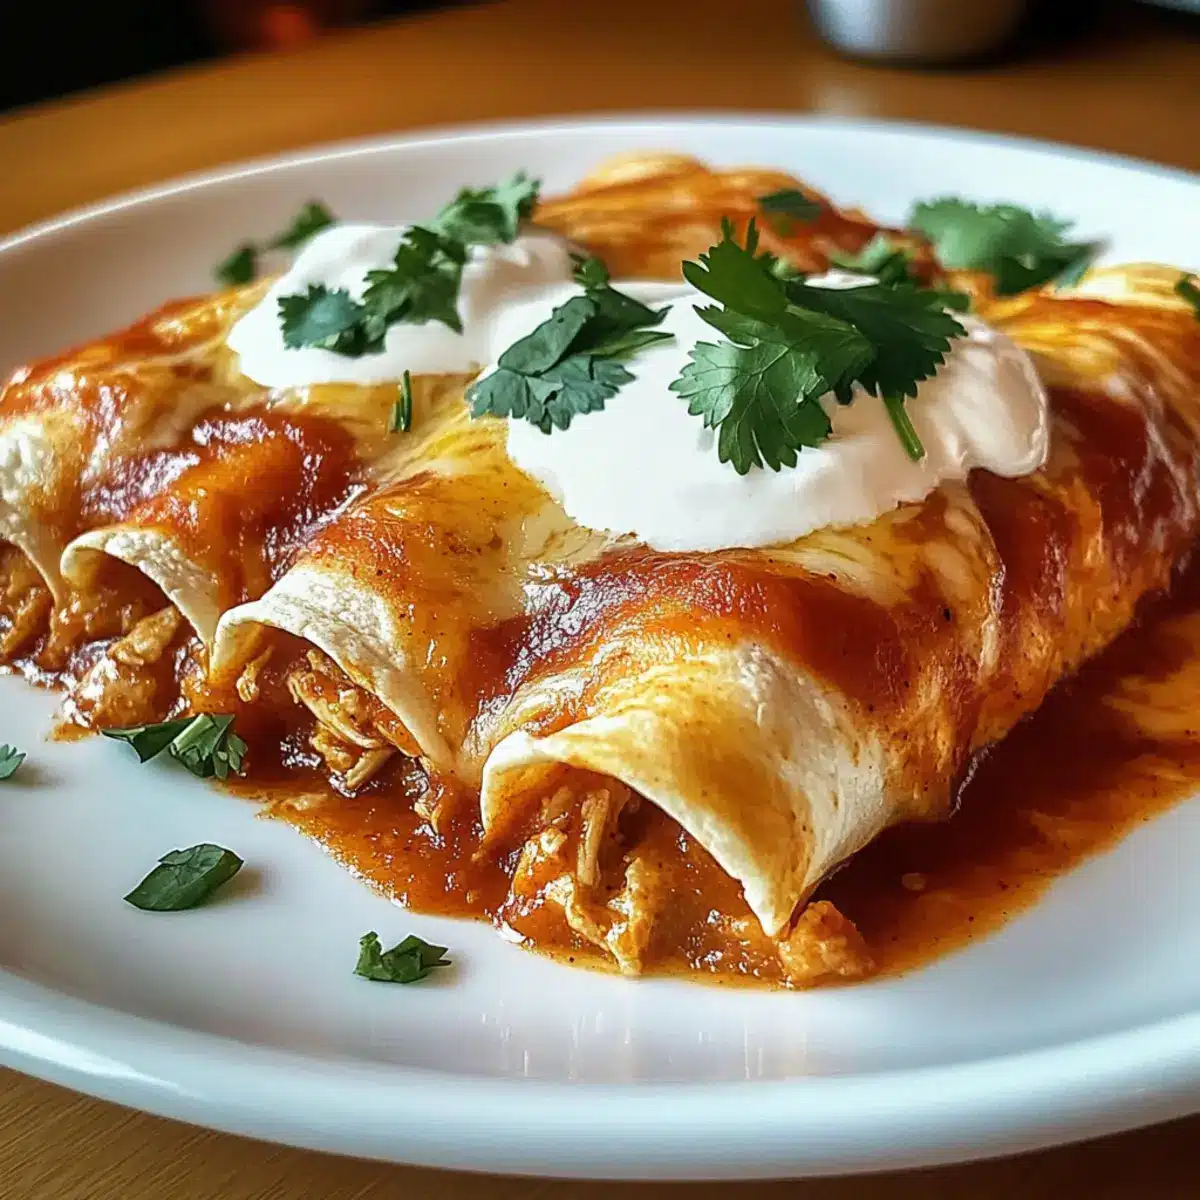
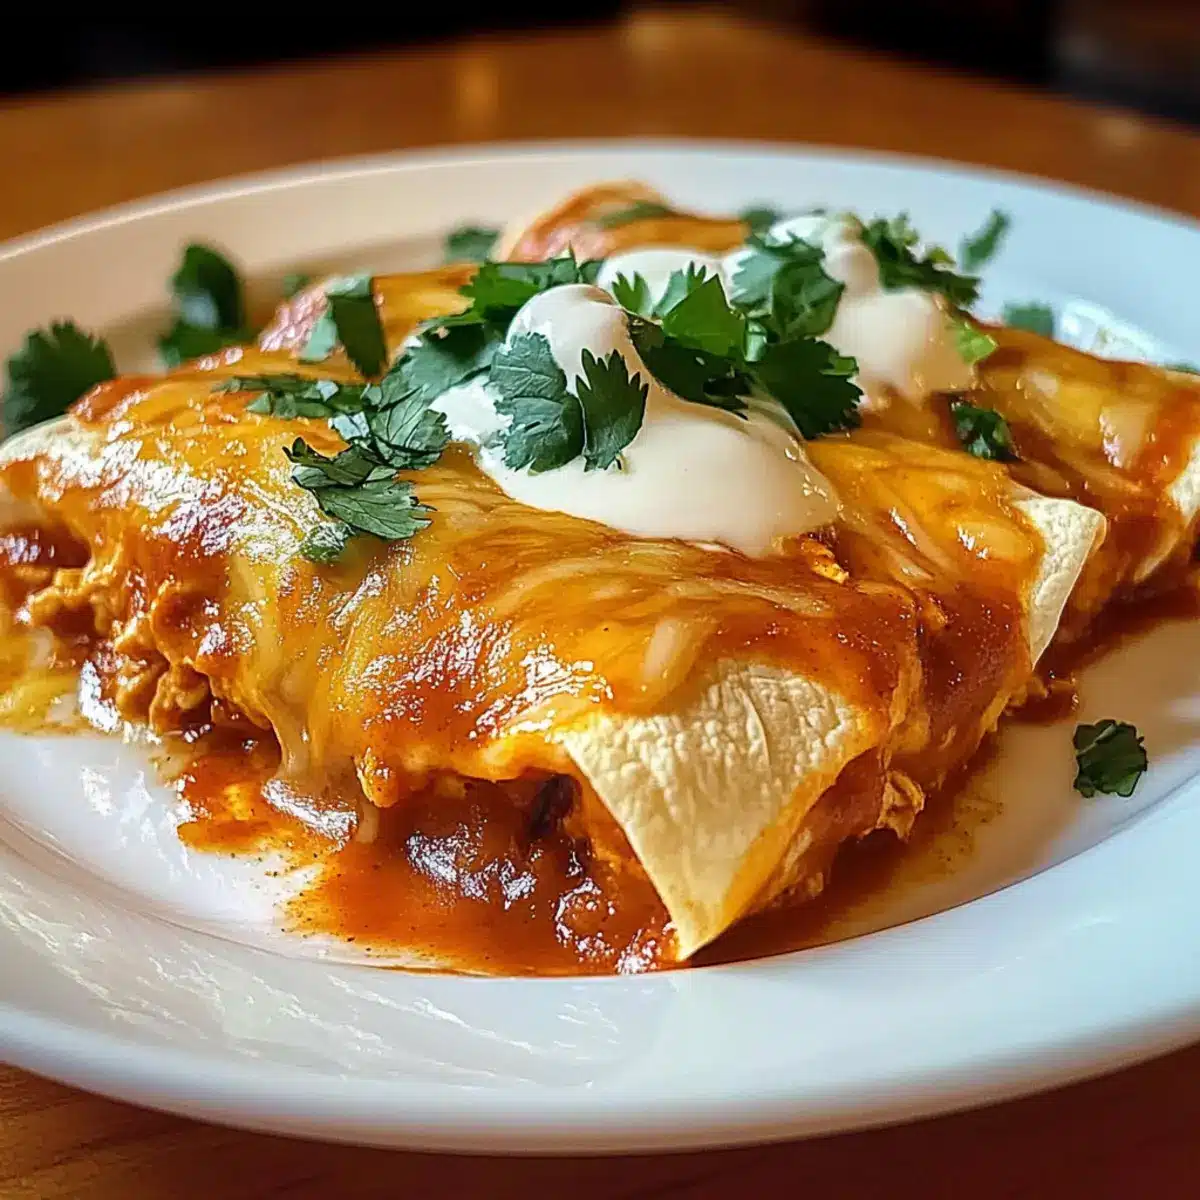
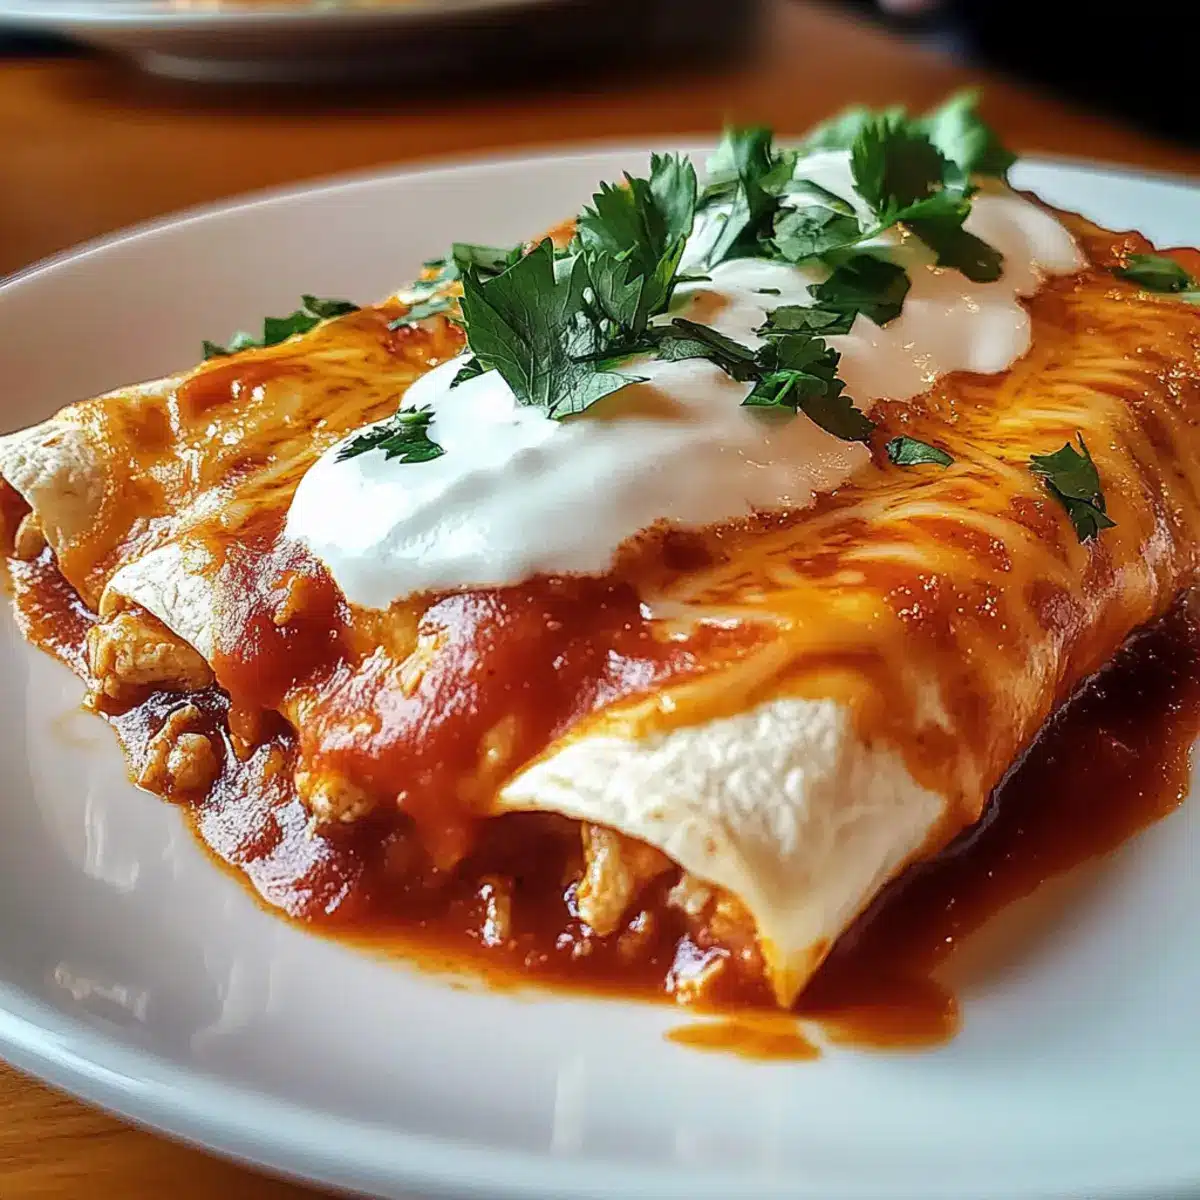
Step 6: Serve the Enchiladas
After baking, let the Chicken Enchiladas rest for about 5 minutes. This will help set the cheese and meld the flavors beautifully. Garnish with chopped cilantro for a fresh touch, and serve with a dollop of sour cream alongside. Enjoy the delightful warmth and flavors of your homemade Chicken Enchiladas!
Chicken Enchiladas Variations & Substitutions
Feel free to get creative with your Chicken Enchiladas! With a few simple tweaks, you can make this dish suit your taste buds perfectly.
-
Vegetarian: Substitute shredded chicken with a mix of black beans and sautéed bell peppers or zucchini for a hearty vegetarian delight. This version provides a satisfying texture and flavor that complements the enchilada sauce beautifully.
-
Spicy: Add diced jalapeños to the chicken filling or opt for a spicy enchilada sauce to amp up the heat. For an extra fiery kick, try drizzling hot sauce over the finished dish just before serving.
-
Cheese Swap: Experiment with different cheeses like Pepper Jack for a hint of spice or sharp Cheddar for a rich flavor. Mixing cheeses can create a delightful melty topping that everyone will love.
-
Gluten-Free: Use corn tortillas instead of flour to make this dish gluten-free while maintaining that delectable taste. They hold up beautifully and add a lovely corn flavor.
-
Extra Veggies: Toss in diced spinach or kale to the chicken mixture for added nutrients and a pop of color. These leafy greens not only boost vitamins but also enhance the overall texture.
-
Creamy Add-In: For a more luxurious filling, mix in a bit of cream cheese or sour cream with the chicken to create an even creamier texture. This variation is rich and satisfying, making each bite feel indulgent.
-
Herb Boost: Add fresh herbs like cilantro or parsley into the chicken filling for a refreshing twist on the classic flavor. They add brightness and can transform your dish into a garden-fresh experience.
-
Layered Enchiladas: For a different presentation, layer the tortillas, filling, and sauce like a lasagna for an eye-catching look. This method also allows for a greater cheese-to-filling ratio and makes serving a breeze.
These variations encourage you to personalize your Chicken Enchiladas experience! If you’re considering a lighter option, you might also enjoy pairing these with a side of Easy Chicken Taco Soup or a fresh salad to round out the meal. Let your imagination run wild in the kitchen!
How to Store and Freeze Chicken Enchiladas
Fridge: Store leftovers in an airtight container for up to 3-4 days. Reheat in the oven at 350°F (175°C) until heated through for the best texture.
Freezer: Freeze assembled, unbaked Chicken Enchiladas covered tightly with foil for up to 3 months. Thaw overnight in the fridge before baking.
Reheating: For refrigerated enchiladas, reheat in the oven at 350°F (175°C) for about 15-20 minutes or until hot. If frozen, bake directly from frozen for 30-40 minutes, covered with foil.
Make-Ahead: You can prepare your Chicken Enchiladas in advance, refrigerating them before baking until you’re ready to serve.
Expert Tips for Chicken Enchiladas
-
Use Fresh Ingredients: Fresh garlic and herbs enhance the overall flavor of your Chicken Enchiladas, creating a dish that’s truly alive with taste.
-
Warm Tortillas: Always warm tortillas before filling; this prevents tearing and helps them roll up smoothly without cracking.
-
Let Them Rest: Allow the enchiladas to sit for a few minutes after baking; this helps the cheese set and melds the flavors beautifully.
-
Customize Spices: Adjust the spice level to your liking by choosing a milder or spicier enchilada sauce, or adding fresh jalapeños to the filling as desired.
-
Cheese Choices: Experiment with different types of cheese, like Pepper Jack or Cheddar, for unique flavor variations in your Chicken Enchiladas.
What to Serve with Easy Chicken Enchiladas?
Treat your loved ones to a complete feast that harmonizes beautifully with your delicious enchiladas!
-
Creamy Guacamole: Smooth and rich, guacamole adds a fresh element that perfectly balances the savory enchiladas. Its creamy texture complements every bite for a delightful pairing.
-
Refried Beans: These hearty beans pack in protein and flavor, making them a comforting side dish. Their creamy consistency pairs wonderfully with the slightly crispy enchiladas.
-
Mexican Street Corn Salad: This refreshing salad, blended with lime, cotija cheese, and cilantro, offers vibrant color and flavor, elevating your meal beautifully. The sweetness of corn beautifully contrasts with the spicy enchiladas.
-
Cilantro Lime Rice: Fluffy rice tossed with zesty lime and fresh cilantro creates a light, refreshing complement to the richness of enchiladas. Plus, it helps soak up any delicious sauce!
-
Sour Cream and Salsa: A dollop of sour cream adds creaminess and coolness to the dish, while tangy salsa enhances the overall flavor profile. Together, they elevate each bite of your enchiladas.
-
Chilled Horchata: This sweet, refreshing rice drink adds a creamy sweetness that’s the perfect antidote to the spices in your enchiladas. It’s both delightful and a little indulgent!
-
Churros for Dessert: Crisp on the outside and soft inside, these sweet pastries coated in cinnamon sugar provide a lovely finish to your meal. They’re like a warm hug after your savory feast!
Make Ahead Options
These Chicken Enchiladas are perfect for busy home cooks looking to save time during the week! You can assemble the enchiladas up to 24 hours in advance. Simply prepare the filling, roll the tortillas, and place them in your baking dish with sauce and cheese on top. Cover the dish tightly with foil and refrigerate it until you’re ready to bake. When you’re ready to serve, just pop them in the oven straight from the fridge, allowing for an extra 5-10 minutes of baking time. This way, you’ll enjoy the same delicious, comforting flavors without the last-minute rush, making them a fantastic option for meal prep!
Chicken Enchiladas Recipe FAQs
What should I look for when selecting chicken for my enchiladas?
Absolutely! For the best flavor and texture, choose chicken that’s fresh or properly cooked. If using rotisserie chicken, ensure it’s not past its expiration date and is moist. If cooking from raw, look for chicken breasts or thighs that are pink without any dark spots for maximum tenderness.
How should I store leftover Chicken Enchiladas?
Store your leftover Chicken Enchiladas in an airtight container in the fridge for up to 3-4 days. To reheat, I recommend placing them in a preheated oven at 350°F (175°C) for about 15-20 minutes and covering with foil to maintain moisture.
Can I freeze Chicken Enchiladas?
Certainly! To freeze, assemble your Chicken Enchiladas but don’t bake them. Tightly cover the dish with foil or plastic wrap and freeze for up to 3 months. When you’re ready to enjoy, thaw overnight in the fridge and bake as directed, adding an extra 10-15 minutes to the cooking time if baking from cold.
What if my enchiladas turn out dry or tough?
Oh no! If your enchiladas are dry, it might be due to overbaking. Always keep an eye on them towards the end of baking time. Another tip is to ensure your tortillas are warm and pliable before rolling them; this prevents tearing and keeps moisture inside. If they seem dry after baking, try adding a little extra sauce on top when you serve.
Are Chicken Enchiladas suitable for those with dietary restrictions?
Very! For gluten-free options, you can use corn tortillas instead of flour. Additionally, for those avoiding meat, substitute chicken with a mixture of black beans and sautéed veggies for a delicious vegetarian enchilada. Just be mindful of spice levels if anyone has sensitivities; mild sauces and fresh ingredients help balance the heat!
How long can I keep my Chicken Enchiladas in the freezer?
Keep those Chicken Enchiladas frozen for up to 3 months for the best flavor and quality! After that, the texture and taste may start to decline. Remember to label them with the date so you can enjoy them at their best!
Mouthwatering Chicken Enchiladas You’ll Love to Make at Home
Ingredients
Equipment
Method
- Prepare the Chicken: Start by cooking your chicken until fully cooked and tender. Boil for 20-25 minutes or bake at 375°F (190°C) for 30-35 minutes. Allow to cool slightly before shredding with two forks. You’ll need about 3 cups of shredded chicken.
- Sauté the Aromatics: In a large skillet, heat 1 tablespoon of vegetable oil over medium heat. Add 1 cup of chopped onion and sauté for 3-4 minutes until translucent. Stir in 3 cloves of minced garlic and sauté for an additional minute until fragrant.
- Mix the Filling: Add the shredded chicken to the skillet with the onion and garlic. Sprinkle in 1 teaspoon of cumin, 1 teaspoon of chili powder, and season with salt and pepper to taste. Cook for 3-5 minutes until heated through and well coated with spices.
- Assemble the Enchiladas: Preheat oven to 375°F (190°C). Spread a thin layer of red enchilada sauce in a 9x13 inch baking dish. Place a flour tortilla, add chicken filling and shredded cheese, then roll it up tightly. Place seam-side down in the dish. Repeat until all tortillas are filled.
- Top and Bake: Pour remaining enchilada sauce over the top and sprinkle with the rest of the cheese. Cover with foil and bake for 20-25 minutes until hot and bubbly. Remove foil in the last 5-10 minutes to allow cheese to become golden.
- Serve the Enchiladas: Let the enchiladas rest for 5 minutes. Garnish with chopped cilantro and serve with sour cream. Enjoy!
Leave a Reply