
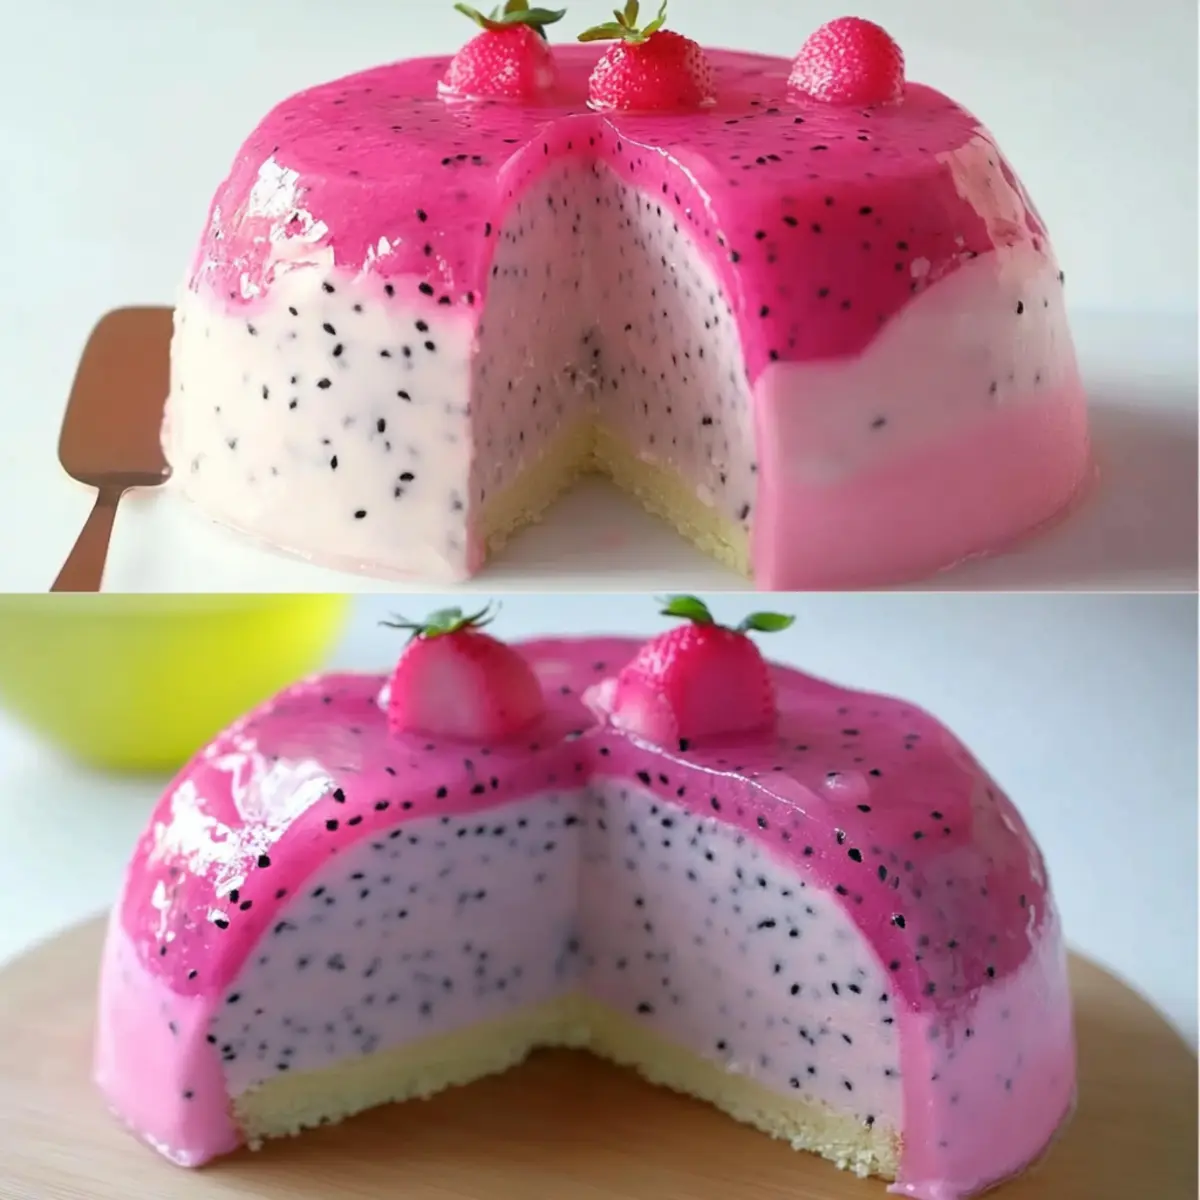
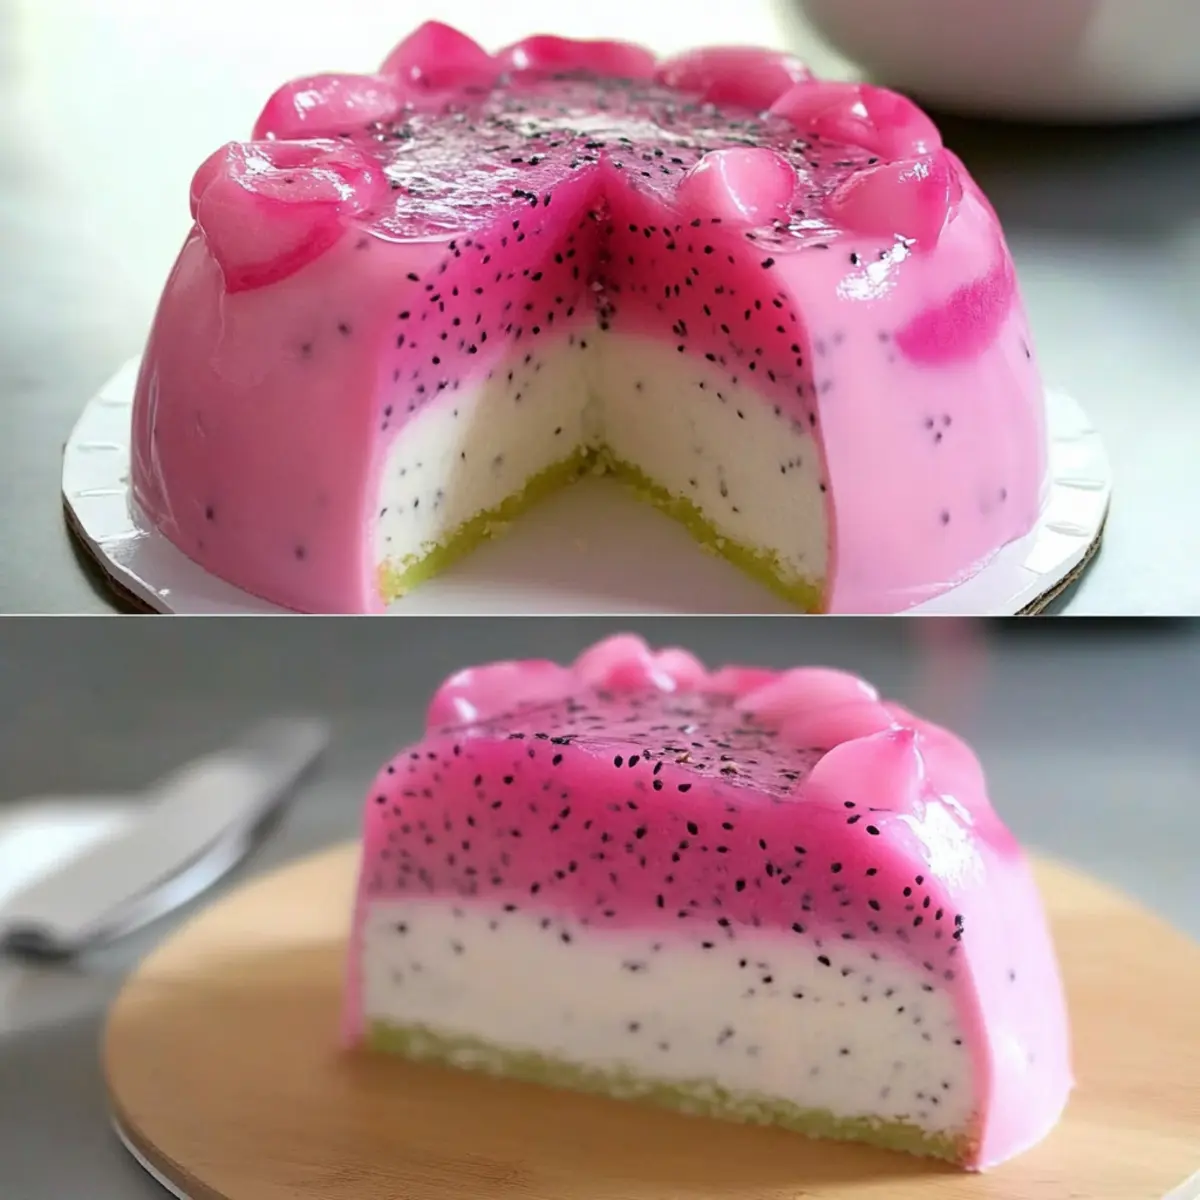
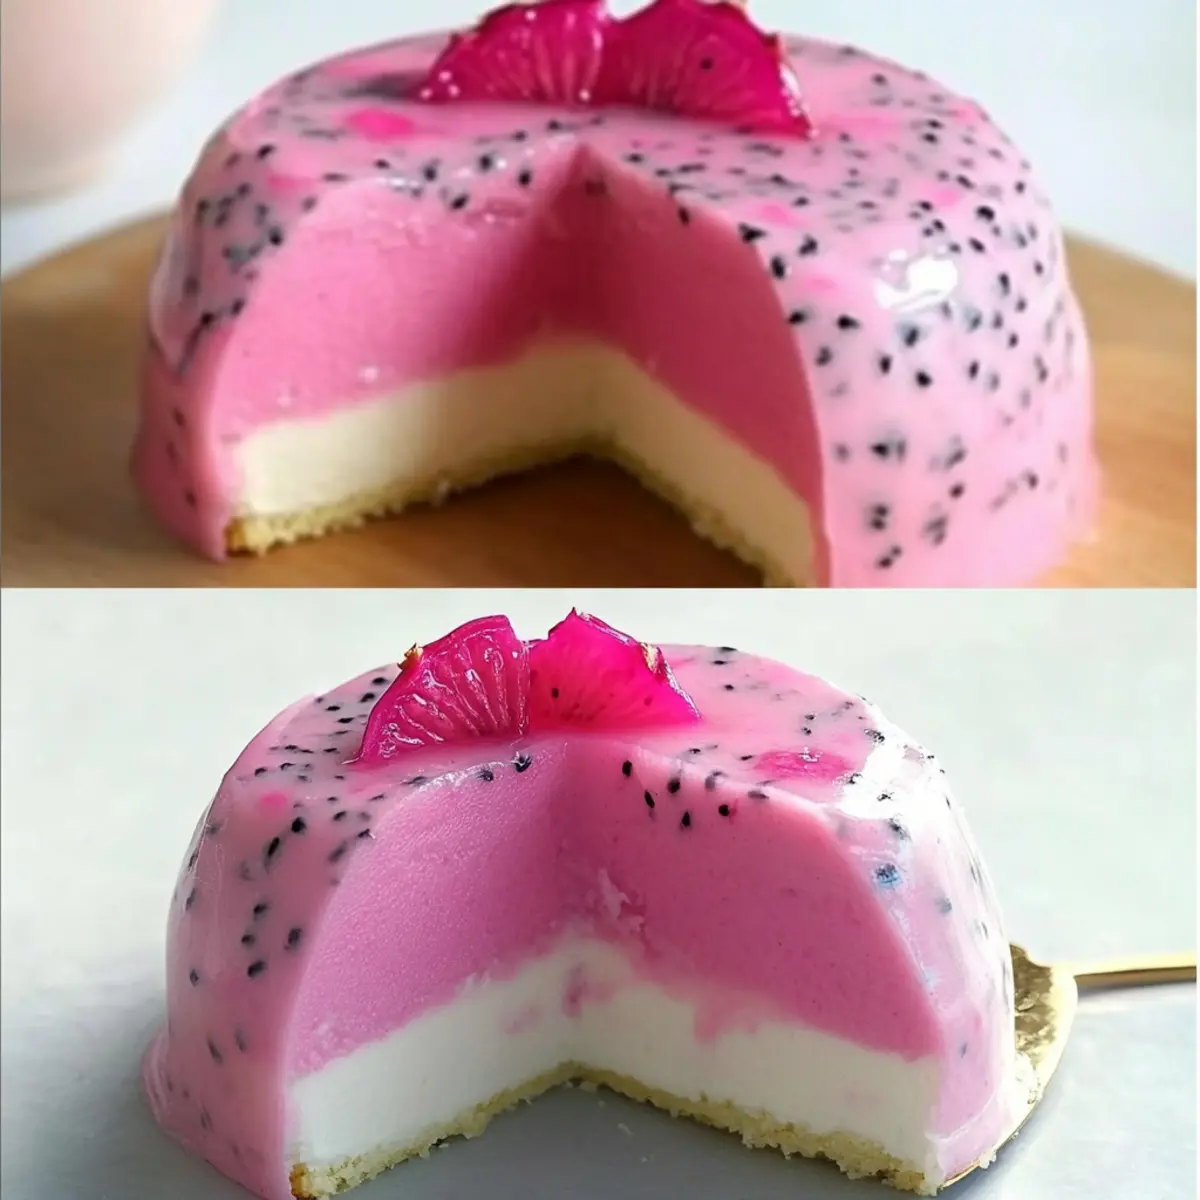
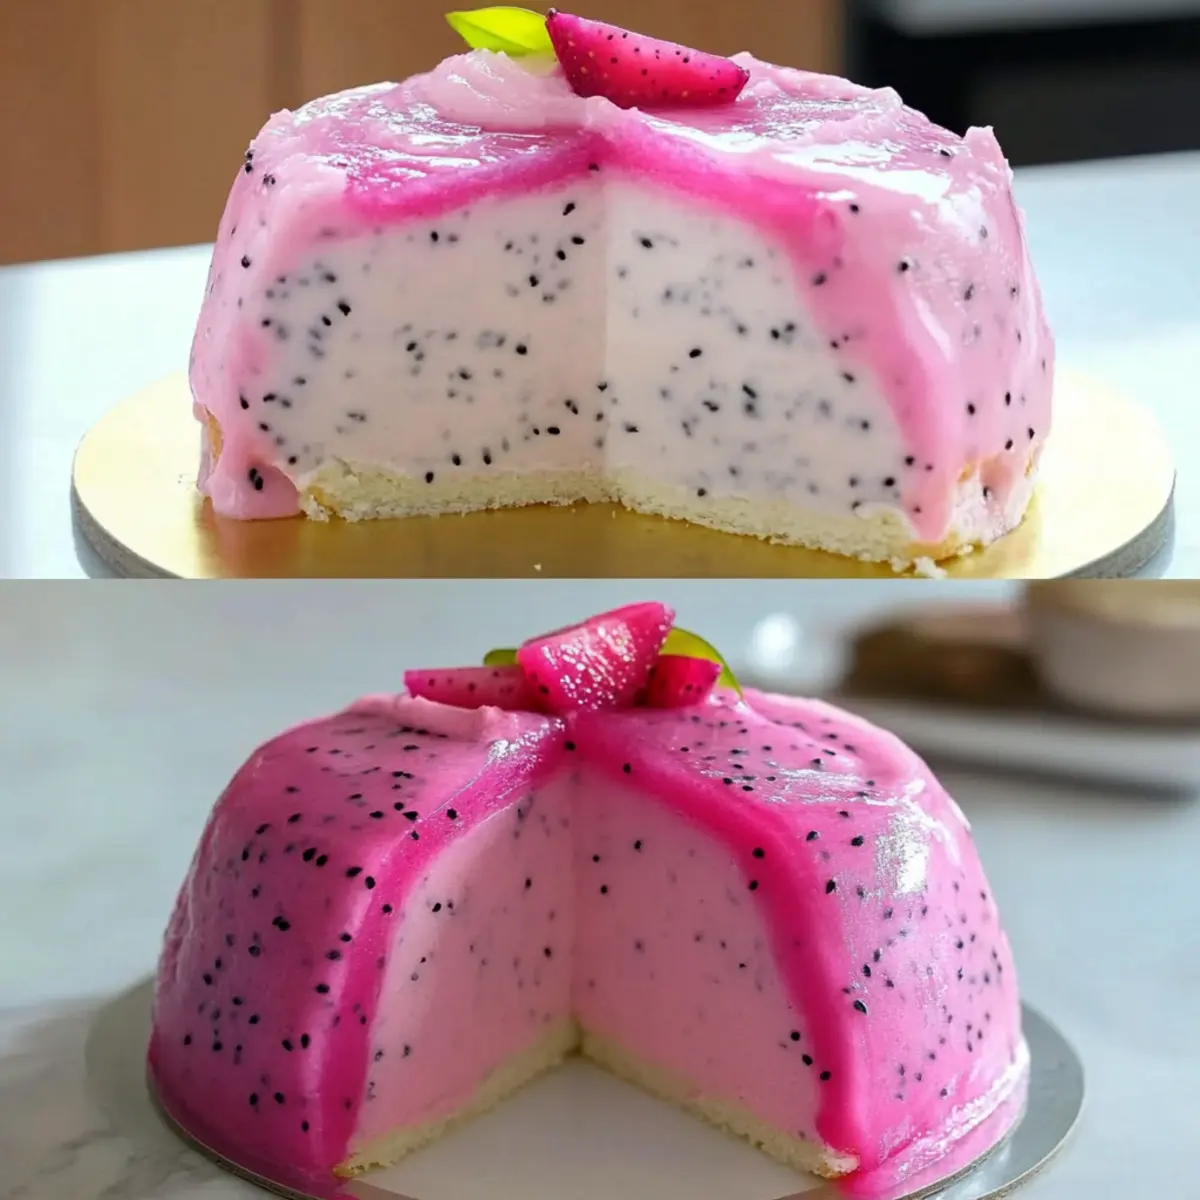
As I stood in my kitchen, the vibrant hues of dragon fruit caught my eye—a dazzling reminder that dessert doesn’t have to be just sweet, but also a feast for the senses. Enter the Dragon Fruit Mousse Cake, a no-bake treat that’s as visually stunning as it is simple to prepare. This recipe brings together a delicate almond base, airy dragon fruit mousse, and a luscious jelly layer, making it an ideal choice for those special occasions when you want to impress. Not only is it a healthier dessert option packed with antioxidants, but its light texture will leave your guests asking for more. If you’re ready to elevate your dessert game, how about diving into a world of flavors where good looks and great taste coexist?
Why is this dessert a showstopper?
Visually Striking: The vibrant pink of dragon fruit makes this cake a stunning centerpiece for any gathering.
Healthy Indulgence: With its low-calorie profile and rich nutritional benefits, it’s a guilt-free treat for health-conscious dessert lovers.
No-Bake Simplicity: Perfect for those kitchen novices, this recipe eliminates the need for baking—just mix, chill, and serve!
Versatile Flavor: While dragon fruit shines, feel free to experiment with other fruit purees for a fresh twist, such as in my Keto Pumpkin Mousse or Blueberry Cheesecake Protein Bites.
Crowd-Pleaser: Whether it’s a dinner party or a family gathering, this dessert is sure to wow guests and leave them wanting more!
Dragon Fruit Mousse Cake Ingredients
For the Almond Base
- Almond Flour – Provides structure and a subtle nutty flavor; substitute with gluten-free flour for a gluten-free version.
- Egg Whites – Acts as a binding agent; feel free to use aquafaba for a vegan alternative.
For the Dragon Fruit Mousse
- Dragon Fruit (Pureed) – The main flavor component and vibrant color; substitute with other fruit purees like mango or raspberry for variations.
- Whipping Cream – Adds lightness and creaminess to the mousse; for a plant-based option, use coconut cream.
- Gelatin – Sets the mousse and jelly layers; for vegan options, consider using agar-agar.
- Sugar – Sweetens the mousse and jelly; you can reduce the amount or use a sugar substitute for a healthier version.
For the Jelly Layer
- Dragon Fruit (Pureed) – Offers a refreshing flavor that complements the mousse; you can mix in other fruit purees for a twist.
- Gelatin – The key ingredient for a perfectly set jelly; ensure it’s fully dissolved in warm water before use.
For the Glaze
- Neutral Glaze – Enhances presentation with a glossy finish; can be omitted for a simpler look.
Step‑by‑Step Instructions for Dragon Fruit Mousse Cake
Step 1: Prepare the Almond Base
Preheat your oven to 350°F (175°C). In a mixing bowl, combine almond flour with egg whites until you achieve a thick, smooth paste. Spread this mixture evenly in a greased 8-inch cake pan and bake for 15-20 minutes, or until the edges begin to turn golden. Allow it to cool completely before adding the mousse layer.
Step 2: Make the Dragon Fruit Mousse
In a medium bowl, whip the cream until soft peaks form, taking care not to over-whip. In a separate bowl, combine the pureed dragon fruit and sugar, mixing until well incorporated. Gently fold the whipped cream into the dragon fruit mixture. In a small bowl, dissolve the gelatin in warm water, then carefully fold it into the mousse to create a light and airy consistency.
Step 3: Set the Mousse Layer
Pour the dragon fruit mousse evenly over the cooled almond base, smoothing the top with a spatula. Cover the cake with plastic wrap and refrigerate for 2-3 hours, or until fully set. Use this time to prepare the jelly layer, ensuring you have everything ready for the final touch.
Step 4: Prepare the Jelly Layer
In a saucepan, combine additional pureed dragon fruit with gelatin, following the same process as before—dissolving the gelatin in warm water. Allow the mixture to cool slightly but not set. Once cooled, gently pour the jelly over the set mousse layer. Return the cake to the refrigerator for another hour or until the jelly is firm, ensuring a beautiful glossy finish.
Step 5: Finish with a Neutral Glaze
After the jelly is set, prepare a neutral glaze if desired. Brush it evenly over the jelly layer to enhance the cake’s presentation. Chill the Dragon Fruit Mousse Cake once more for at least 30 minutes before serving. When ready, slice through the layers to reveal the vibrant pink color and serve chilled, delighting your guests with this stunning dessert!
Expert Tips for Dragon Fruit Mousse Cake
• Gelatin Mastery: Ensure that the gelatin is completely dissolved in warm water to prevent a grainy texture in the mousse.
• Proper Cooling Time: Allow at least 4-5 hours total for chilling to achieve the right texture in each layer of your Dragon Fruit Mousse Cake.
• Gentle Folding: Be careful when folding the whipped cream into the dragon fruit mixture; this step is crucial to maintain the airy lightness of the mousse.
• Pan Preparation: Make sure your cake pan is well-greased to easily remove the cake without breaking the layers apart.
• Flavor Experimentation: Feel free to mix in other fruit purees or zest for a personalized twist on the classic Dragon Fruit Mousse Cake!
How to Store and Freeze Dragon Fruit Mousse Cake
Fridge: Store your Dragon Fruit Mousse Cake in the refrigerator, covered lightly with plastic wrap, for up to 3 days to maintain its freshness and texture.
Freezer: If you want to keep it longer, freeze the mousse cake (without glaze) for up to 2 months. Wrap it tightly in plastic wrap and then in aluminum foil.
Reheating: For optimal taste, thaw the frozen cake in the refrigerator overnight before serving. Enjoy it cold for the best flavor experience.
Make-Ahead: This cake can be made a day in advance, making it a great option for dinner parties or special occasions without last-minute stress.
Make Ahead Options
These Dragon Fruit Mousse Cakes are perfect for meal prep and can simplify your entertaining! You can prepare the almond base up to 24 hours in advance and store it in an airtight container to keep it fresh. The mousse itself can be made ahead and refrigerated for up to 3 days; just ensure it’s tightly covered to prevent any odors from the fridge seeping in. When you’re ready to serve, gently prepare the jelly layer and pour it over the set mousse before chilling it for about an hour. With this make-ahead strategy, you’ll impress your guests with a delicious dessert while saving valuable time on the big day!
Dragon Fruit Mousse Cake Variations
Feel free to let your creativity shine by customizing this delicately layered cake with exciting twists that will tantalize your taste buds!
-
Fruit Swap: Replace dragon fruit with passion fruit or a mixed berry puree for a delightful new flavor.
-
Citrus Zest: Add a splash of lime or lemon zest to the mousse for an uplifting brightness that elevates each bite.
-
Chocolate Layer: For a decadent touch, layer a dark chocolate mousse beneath the dragon fruit mousse, creating a harmonious contrast.
-
Sweetness Adjustment: Experiment with sugar substitutes like honey or maple syrup to tailor the sweetness to your taste.
-
Nut Flour Variation: Swap almond flour for hazelnut or coconut flour for a unique nutty flavor while maintaining that gluten-free quality.
-
Plant-Based Touch: For a vegan version, use aquafaba in place of egg whites and coconut cream for the mousse’s luscious creaminess.
-
Herbal Infusion: Incorporate a fresh mint or basil infusion into the mousse for an unexpected herbaceous twist that enhances the fruity taste.
-
Layered Delight: Alternatively, create a trifle by layering the mousse and jelly with sponge cake or crumb topping for an intriguing presentation.
Feel inspired yet? If you’re seeking other fruity dessert ideas, don’t miss out on my refreshing No-Bake Gingerbread Cheesecake Cups or enjoy a lighter take with Cottage Cheese Pancakes. The possibilities are endless!
What to Serve with Dragon Fruit Mousse Cake
Imagine a delightful gathering where the colorful layers of your dessert not only impress but complement the meal in a harmonious balance.
-
Coconut Rice: The tropical notes of coconut rice enhance the fruity flavor of the mousse, creating a perfect harmony of flavors.
-
Fresh Berry Salad: A light, refreshing salad adds a lovely crunch and balances the creaminess with bursts of tartness.
-
Matcha Green Tea: The earthiness of matcha tea serves as a soothing contrast to the sweet, vibrant mousse, heightening your dessert experience.
-
Mango Sorbet: The bright, fruity notes of mango sorbet echo the tropical essence of the cake while providing an icy refreshment.
-
Almond Biscotti: These crunchy, nutty treats pair beautifully with the fluffy mousse, adding an inviting texture and a subtle sweetness.
-
Sparkling Water with Lime: Crisp and refreshing, this drink cleanses the palate and accentuates the cake’s fruity layers without overpowering them.
Consider the pairing options to elevate your dessert presentation and create a memorable dining experience for your guests. Each choice works beautifully to enhance the stunning Dragon Fruit Mousse Cake, welcoming a symphony of flavors to the table!
Dragon Fruit Mousse Cake Recipe FAQs
What should I look for when selecting dragon fruit?
Absolutely! When choosing dragon fruit, look for fruits that have bright, evenly colored skin without dark spots or blemishes. The skin should feel firm but give slightly when pressed. A ripe dragon fruit will have a luscious, fragrant aroma as well.
How should I store leftover Dragon Fruit Mousse Cake?
The Dragon Fruit Mousse Cake can be stored in the refrigerator, lightly covered with plastic wrap for up to 3 days. This will keep the cake fresh and moist. Just make sure it’s protected from strong odors in the fridge!
Can I freeze the Dragon Fruit Mousse Cake?
Yes, you can freeze the cake for up to 2 months! To do this, wrap it tightly in plastic wrap and then in aluminum foil to prevent freezer burn. When you’re ready to enjoy, thaw it in the refrigerator overnight for a gentle thaw, ensuring the texture remains delightful when served.
What if my mousse doesn’t set properly?
If your mousse doesn’t set well, it’s often due to gelatin not being fully dissolved. Make sure to dissolve the gelatin completely in warm water before adding it to the mixture. If you experience this issue, you can gently heat the mousse mixture and add additional dissolved gelatin to help it set. Remember, chilling for 4-5 hours is essential to achieve the right texture!
Is this dessert suitable for people with allergies?
Always a great question! This Dragon Fruit Mousse Cake contains almonds and dairy. If you have nut allergies, you can substitute almond flour with gluten-free flour and use aquafaba in place of egg whites for a plant-based option. Additionally, substitute whipped cream with coconut cream to keep this dessert vegan-friendly.
Delightful Dragon Fruit Mousse Cake for a Stunning Dessert
Ingredients
Equipment
Method
- Preheat your oven to 350°F (175°C). In a mixing bowl, combine almond flour with egg whites until you achieve a thick, smooth paste. Spread this mixture evenly in a greased 8-inch cake pan and bake for 15-20 minutes, or until the edges begin to turn golden. Allow it to cool completely before adding the mousse layer.
- In a medium bowl, whip the cream until soft peaks form. In a separate bowl, combine the pureed dragon fruit and sugar, mixing until well incorporated. Gently fold the whipped cream into the dragon fruit mixture. In a small bowl, dissolve the gelatin in warm water, then carefully fold it into the mousse.
- Pour the mousse evenly over the cooled almond base, smoothing the top with a spatula. Cover with plastic wrap and refrigerate for 2-3 hours, or until fully set.
- In a saucepan, combine additional pureed dragon fruit with gelatin, dissolving the gelatin in warm water. Cool slightly but do not allow to set. Pour over the set mousse layer and refrigerate for another hour until firm.
- Prepare a neutral glaze if desired, brushing it evenly over the jelly layer. Chill the cake for at least 30 minutes before serving.
Leave a Reply