
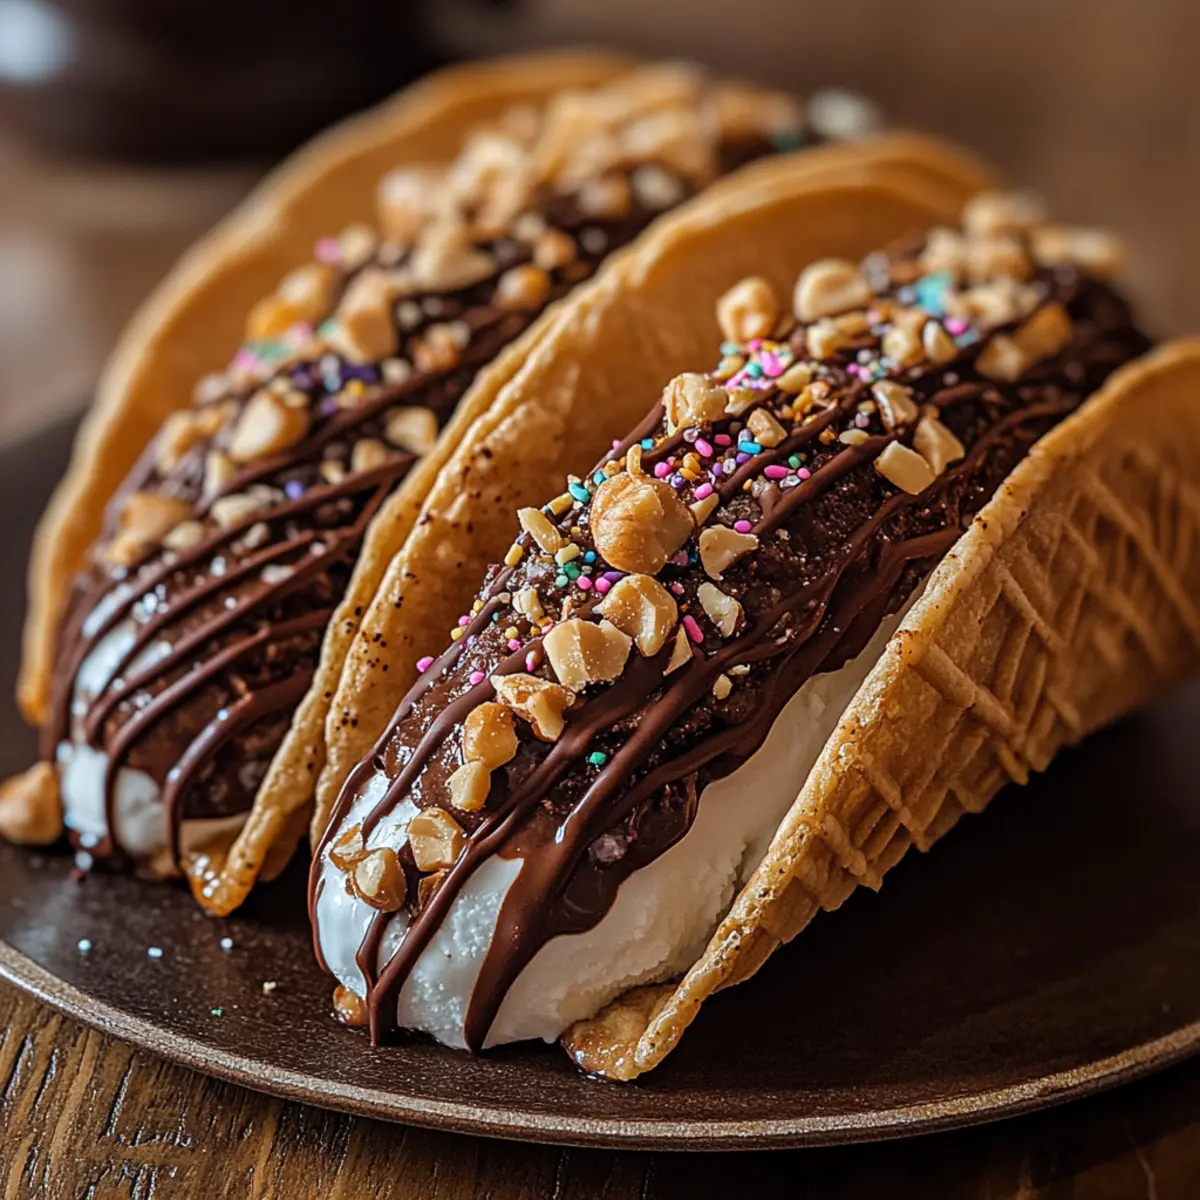
As I was rummaging through my recipe box, the idea of Homemade Choco Tacos suddenly whisked me back to carefree summer days, when pure joy came wrapped in a crispy shell. These delightful treats combine the best of both worlds: the satisfying crunch of taco shells and the creamy indulgence of ice cream. What sets this recipe apart is how effortlessly customizable it is—whether you adore classic vanilla or lean towards adventurous mint chocolate chip, you can create your perfect choco taco. Plus, with a few simple swaps, you can whip up a healthier alternative that still satisfies those sweet cravings. So, are you ready to dive into a dessert that not only delights the taste buds but also sparks a touch of nostalgia? Let’s get started!
Why Are Homemade Choco Tacos Amazing?
Endless Customization: You can tailor these choco tacos to fit your cravings, experimenting with various ice cream flavors and toppings for your unique twist.
Easy to Make: With simple ingredients and straightforward steps, you’ll be whipping up a batch in no time—perfect for those who want homemade indulgence without fuss.
Healthier Alternative: By swapping out certain ingredients, like milk for almond milk or sugar for a low-calorie sweetener, you can enjoy a guilt-free treat.
Crowd-Pleasing Fun: These whimsical desserts are sure to impress guests at summer gatherings or family events, bringing everyone together in delicious harmony.
If you’re looking for even more delightful recipes, check out my Chocolate Chip Banana bread for a sweet start or try the charming Dark Chocolate Quinoa crisps for a crunchy snack!
Homemade Choco Tacos Ingredients
For the Taco Shells
- All-Purpose Flour – Provides structure and texture for the taco shells; substitute with whole wheat or almond flour for a healthier alternative.
- Eggs – Bind the ingredients and contribute to the texture of the shells; no direct substitutions are recommended.
- Milk – Adds moisture to the batter; use almond milk or any non-dairy milk for a vegan option.
- Sugar – Sweetens the taco shells; it can be reduced or substituted with a zero-calorie sweetener.
- Salt – Enhances the flavors of the shells; use sparingly for best results.
- Vanilla Extract – Adds flavor to the shells; almond extract can be used for a different taste.
- Butter – Gives richness and moisture; coconut oil works as a dairy-free alternative.
For the Filling and Coating
- Vanilla Ice Cream – Traditional filling; you can customize with any favorite flavor or use dairy-free alternatives.
- Chocolate Chips – Coating that adds richness and a delicious crunch; dark chocolate provides a more sophisticated flavor option.
- Coconut Oil – Ensures smooth melting of chocolate and helps create a firm coating; no substitutes recommended.
Optional Toppings
- Chopped Nuts – Adds texture and flavor; use your favorite for a satisfying crunch.
- Sprinkles, Crushed Cookies, or Candy Bits – Optional for adding fun colors and tastes; perfect for kids or party themes.
Get ready to create these scrumptious Homemade Choco Tacos and delight those sweet cravings!
Step‑by‑Step Instructions for Homemade Choco Tacos
Step 1: Prepare the Taco Shells
In a mixing bowl, whisk together the all-purpose flour, eggs, milk, sugar, salt, vanilla extract, and melted butter until the mixture is smooth and well combined. This batter should be thick but pourable. Allow it to rest for about 10 minutes while you prepare your skillet, as this helps create a better texture for your taco shells.
Step 2: Cooking the Shells
Heat a nonstick skillet over medium-low heat. Once hot, pour in 1/4 cup of the batter and quickly spread it into a thin circle, about 6 inches in diameter. Cook for 1-2 minutes or until golden brown on one side, then carefully flip and cook for another minute until lightly browned. The shells should be slightly crispy at the edges.
Step 3: Shape the Shells
Immediately after cooking, use a spatula to gently lift the taco shell and drape it over a spoon handle or taco rack to create the taco shape. Allow the shells to cool completely in this position; they will harden and maintain their shape as they cool. This step is essential for getting the perfect shell for your Homemade Choco Tacos.
Step 4: Fill and Freeze
Once the taco shells have cooled and hardened, fill each shell with your choice of softened vanilla ice cream or any other flavor you love. Arrange the filled tacos on a tray and place them in the freezer for at least 1 hour, allowing them to firm up for the perfect filling texture in your homemade choco tacos.
Step 5: Chocolate Coating
In a microwave-safe bowl, melt the chocolate chips with the coconut oil, stirring every 30 seconds until you achieve a smooth consistency. Once melted, remove the tacos from the freezer. Dip the top edges of each taco into the chocolate mixture and immediately sprinkle your desired toppings, such as chopped nuts or sprinkles, before the chocolate sets.
Step 6: Final Freeze
After dipping your tacos, place them back on the tray, and return to the freezer for about 30 minutes or until the chocolate coating is firm. Make sure to serve these delightful Homemade Choco Tacos straight from the freezer for the best texture and taste, ensuring a satisfying crunch with every delicious bite.
Make Ahead Options
These Homemade Choco Tacos are perfect for busy weeknights or parties, as they can be prepped in advance to save you time. You can prepare the taco shells up to 3 days ahead; once they’ve completely cooled and hardened, store them in an airtight container at room temperature to keep their crispiness. To fill and coat the tacos, simply soften your chosen ice cream and stuff the shells just before serving. For the chocolate coating, melt the chocolate chips with coconut oil as directed, dip the tacos, and add toppings right after. By following these tips, you’ll ensure your Homemade Choco Tacos are just as delicious when you’re ready to enjoy them!
How to Store and Freeze Homemade Choco Tacos
Room Temperature: Keep any unfilled taco shells at room temperature for up to 2 days in an airtight container to maintain their crispiness.
Fridge: Filled homemade choco tacos are best stored in the freezer but can be kept in the fridge for up to 1 day; ensure they are covered tightly to prevent melting.
Freezer: Freeze filled choco tacos for up to 1 month, wrapping them individually in plastic wrap or placing them in a freezer-safe container to maintain texture.
Reheating: For a delightful crunch before serving, let the frozen tacos sit at room temperature for about 5 minutes; serve immediately for the best experience!
Expert Tips for Homemade Choco Tacos
-
Warm Shells Shape: Always shape your taco shells while they are warm to ensure they mold properly and retain their crispy texture.
-
Chill Before Dipping: Make sure to freeze the filled shells before dipping them in chocolate to avoid the ice cream melting during the process.
-
Use Coconut Oil: Adding coconut oil to your chocolate not only ensures a smooth melting process but also contributes to a crispier coating once set.
-
Extra Shells Storage: Consider making extra taco shells! Store them in an airtight container and fill on-the-fly whenever the craving for homemade choco tacos strikes.
-
Swapping Ingredients: For a healthier version, don’t hesitate to swap milk for almond milk or sugar for a zero-calorie sweetener in your homemade choco tacos.
Homemade Choco Tacos Variations
Feel free to get creative and customize your homemade choco tacos with these fun variations and substitutions!
-
Vegan-Friendly: Use almond milk and coconut oil in the shells, and fill with your favorite dairy-free ice cream for a wholesome delight.
While you indulge, you can enjoy guilt-free satisfaction with every bite! -
Sugar-Free Shells: Substitute sugar with a zero-calorie sweetener. This way, you can savor the sweetness without worrying about your sugar intake. Perfect for those watching their diet!
-
Whole Wheat Shells: For a healthier twist, replace all-purpose flour with whole wheat flour for a nuttier flavor and added nutrients. Every bite becomes a wholesome treat!
-
Chocolate-Coated Shells: Before filling, dip the taco shells into melted dark chocolate for an extra cocoa kick that enhances flavor. This simple step may become a delightful indulgence!
-
Ice Cream Swaps: Play around with different ice cream flavors like chocolate, salted caramel, or even coffee! The fun is in discovering your new favorite combo.
-
Tropical Twist: Fill the shells with coconut ice cream and top with crushed pineapple and toasted coconut for a sunny flavor experience. You’ll feel like you’re on a tropical vacation!
-
Nutty Delight: Add a layer of nut butter, like almond or peanut butter, to the soft ice cream filling for an added burst of flavor and creaminess. This nutty contrast may surprise your taste buds!
-
Spicy Kick: For the adventurous, mix a pinch of cayenne pepper with your chocolate coating for a surprising heat that perfectly contrasts the sweetness. It’s a flavorful adventure you won’t forget!
Explore these variations and see which ones resonate with you. And for more sweet inspirations, don’t forget to check out my delicious Chocolate Chip Banana bread or my crunchy Dark Chocolate Quinoa snacks!
What to Serve with Homemade Choco Tacos
Imagine a delightful spread that complements your crispy, chocolate-dipped treasures, creating a festive dessert table that radiates sweetness.
- Fresh Fruit Salad: Bright, juicy fruits provide a refreshing contrast to the rich choco tacos, adding vibrant colors and a touch of natural sweetness to your meal.
- Creamy Whipped Topping: With its light and airy texture, a dollop of whipped cream on the side balances the rich flavors perfectly and adds a heavenly touch.
- Iced Coffee: The smooth, robust flavors of iced coffee make for a delightful pairing, creating a harmonious blend with the dessert that awakens the senses.
- Chocolate Milk: A nostalgic favorite that amplifies the chocolatey elements of the choco tacos while delivering another layer of sweetness and nostalgia for all ages.
- Mini Cupcakes: These bite-sized sweets add flair and fun to your dessert table, allowing for a variety of flavors to complement the choco tacos beautifully.
- Caramel Sauce: Drizzling warm caramel over your tacos creates a decadent experience that’s perfect for indulging your sweet tooth and adds a luxurious texture.
Each of these pairings enhances the joy of enjoying your Homemade Choco Tacos, making every bite an unforgettable celebration of flavor and fun!
Homemade Choco Tacos Recipe FAQs
What type of flour should I use for the taco shells?
You can use all-purpose flour for the taco shells to achieve a crisp texture. If you’re looking for a healthier alternative, I recommend trying whole wheat flour or almond flour. Both options work well and can add a nice twist to the flavor!
How should I store unfilled taco shells?
Keep any unfilled taco shells at room temperature in an airtight container for up to 2 days. This helps maintain their crispiness, which is key for the perfect Homemade Choco Tacos.
Can I freeze filled Homemade Choco Tacos?
Absolutely! You can freeze filled choco tacos for up to 1 month. I suggest wrapping each taco individually in plastic wrap or placing them in a freezer-safe container. This will ensure they maintain their delightful texture and flavor. Just remember to let them thaw at room temperature for about 5 minutes before serving for the best crunch!
What should I do if my ice cream melts while filling the taco shells?
If your ice cream starts to melt, it’s best to work quickly or re-freeze the filled tacos before dipping them in chocolate. Don’t worry if it’s already melted—just pop the tacos back in the freezer until the ice cream firms up, then proceed with the chocolate coating.
Can my pets enjoy these Homemade Choco Tacos?
It’s best to avoid sharing these treats with pets. The chocolate and sugar can be harmful to dogs and cats, so keep these delicious desserts just for you and your family. If you’re looking for pet-friendly treats, consider making some special treats just for them using dog-safe ingredients instead!
How long can I keep filled Homemade Choco Tacos in the fridge?
Filled Homemade Choco Tacos should ideally be consumed within a day if stored in the fridge. Ensure they are tightly covered to prevent melting. However, for the best taste and texture, I highly recommend keeping them in the freezer until right before serving!
Homemade Choco Tacos: A Fun Twist on Ice Cream Bliss
Ingredients
Equipment
Method
- In a mixing bowl, whisk together the all-purpose flour, eggs, milk, sugar, salt, vanilla extract, and melted butter until smooth. Allow to rest for 10 minutes.
- Heat a nonstick skillet over medium-low heat. Pour in 1/4 cup of batter and spread into a thin 6-inch circle. Cook for 1-2 minutes or until golden brown, then flip and cook for another minute.
- Immediately drape the cooked taco shell over a spoon handle or taco rack to shape. Allow to cool completely.
- Fill each shell with softened vanilla ice cream, arrange them on a tray, and freeze for at least 1 hour.
- Melt chocolate chips with coconut oil in a microwave-safe bowl, stirring every 30 seconds. Dip the top edges of each taco in the mixture and sprinkle with toppings before the chocolate sets.
- Return the tacos to the tray and freeze for about 30 minutes or until the chocolate is firm. Serve straight from the freezer.
Leave a Reply