
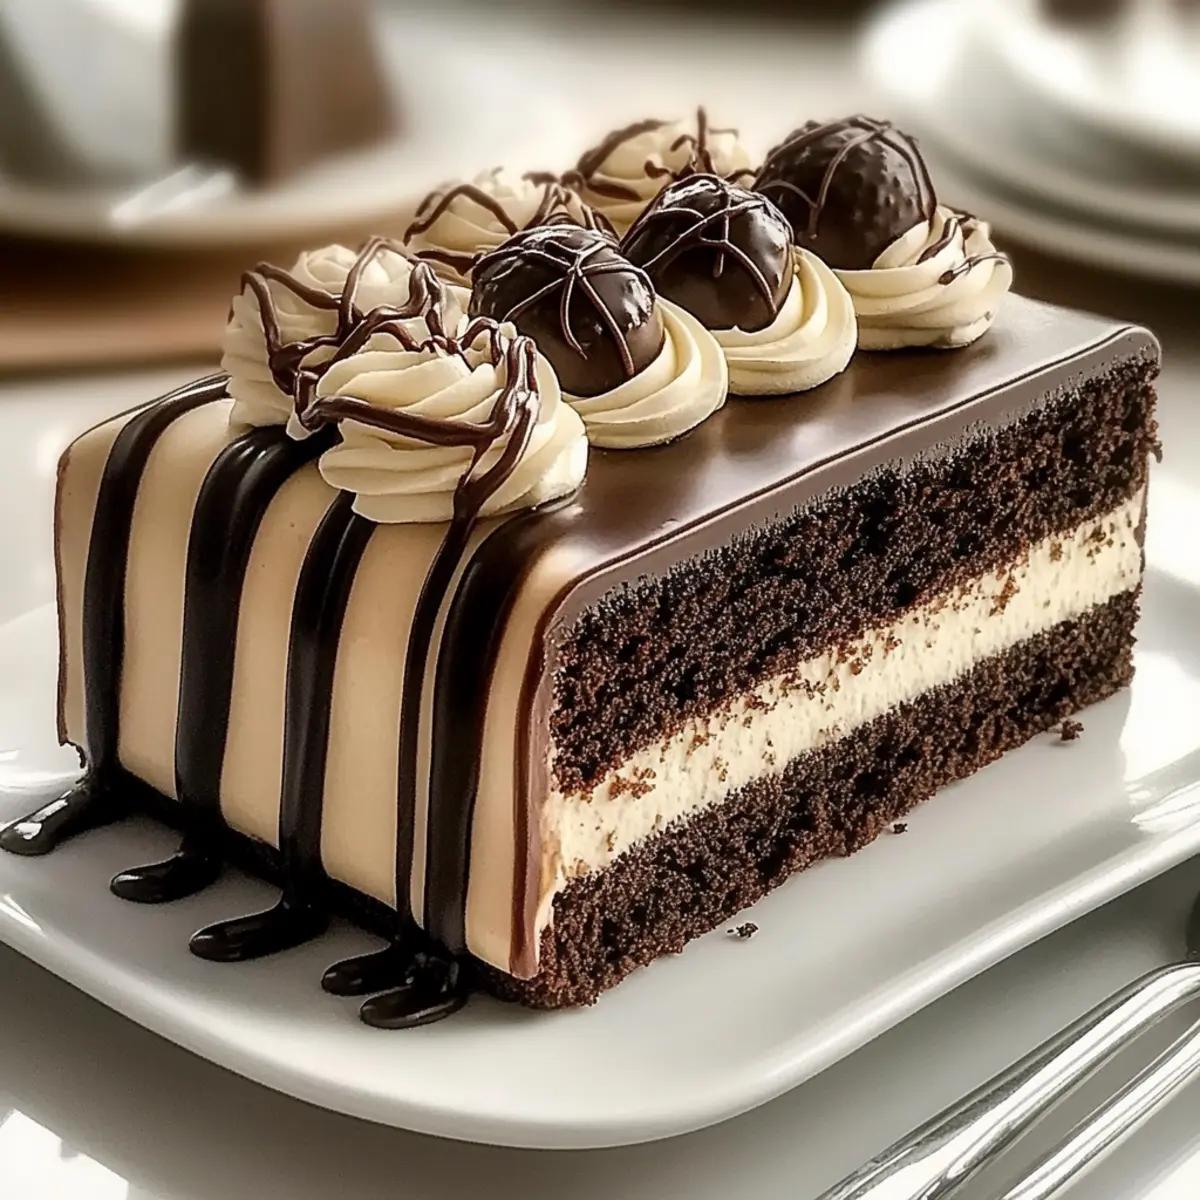
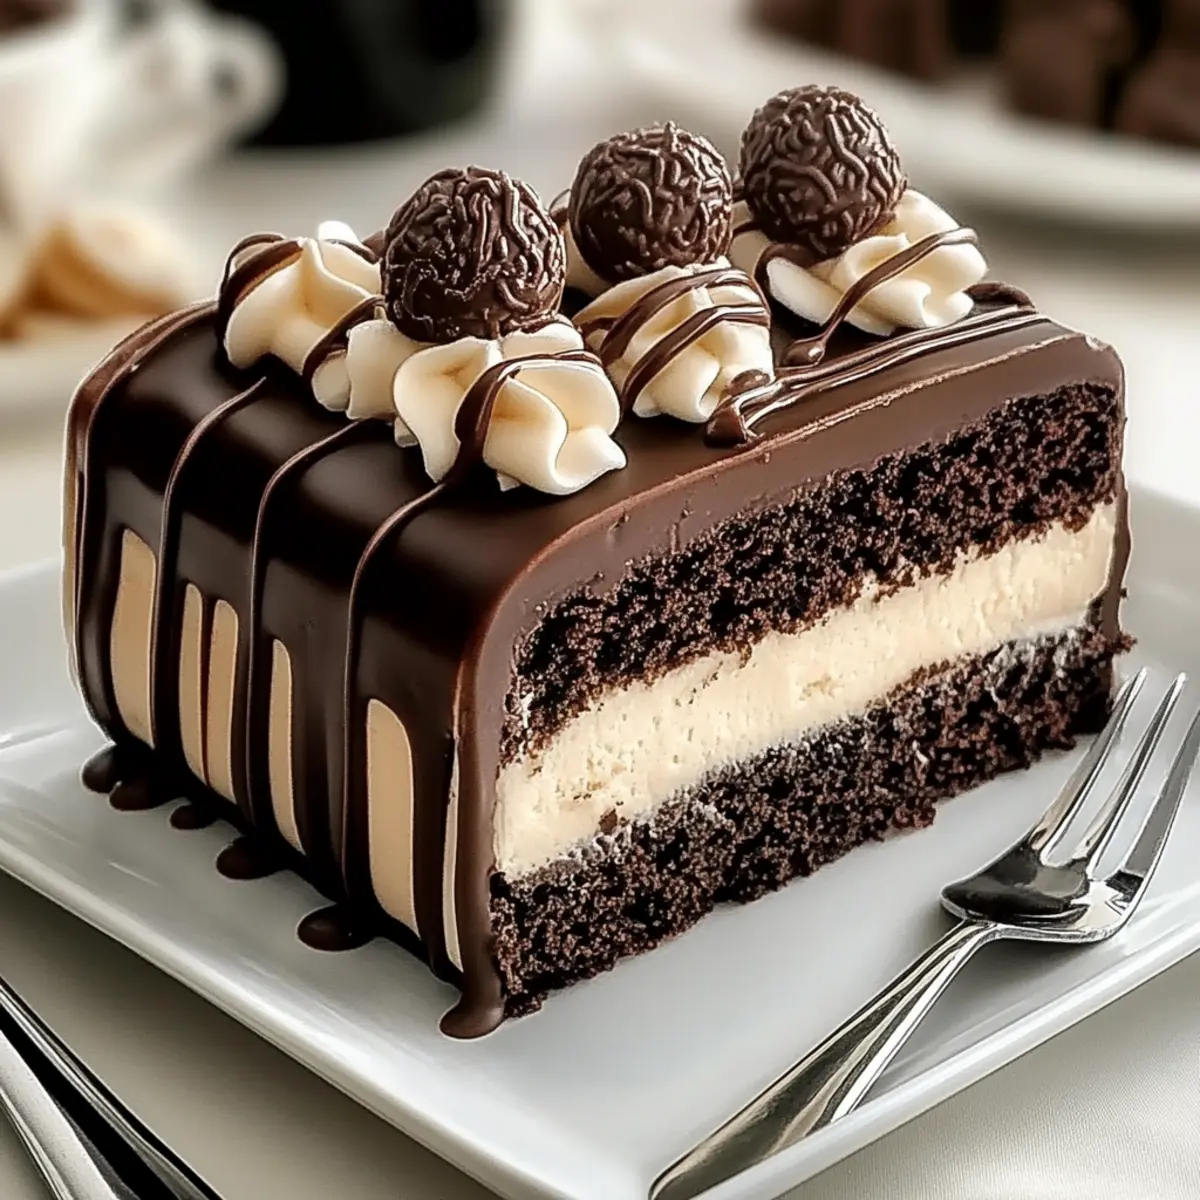
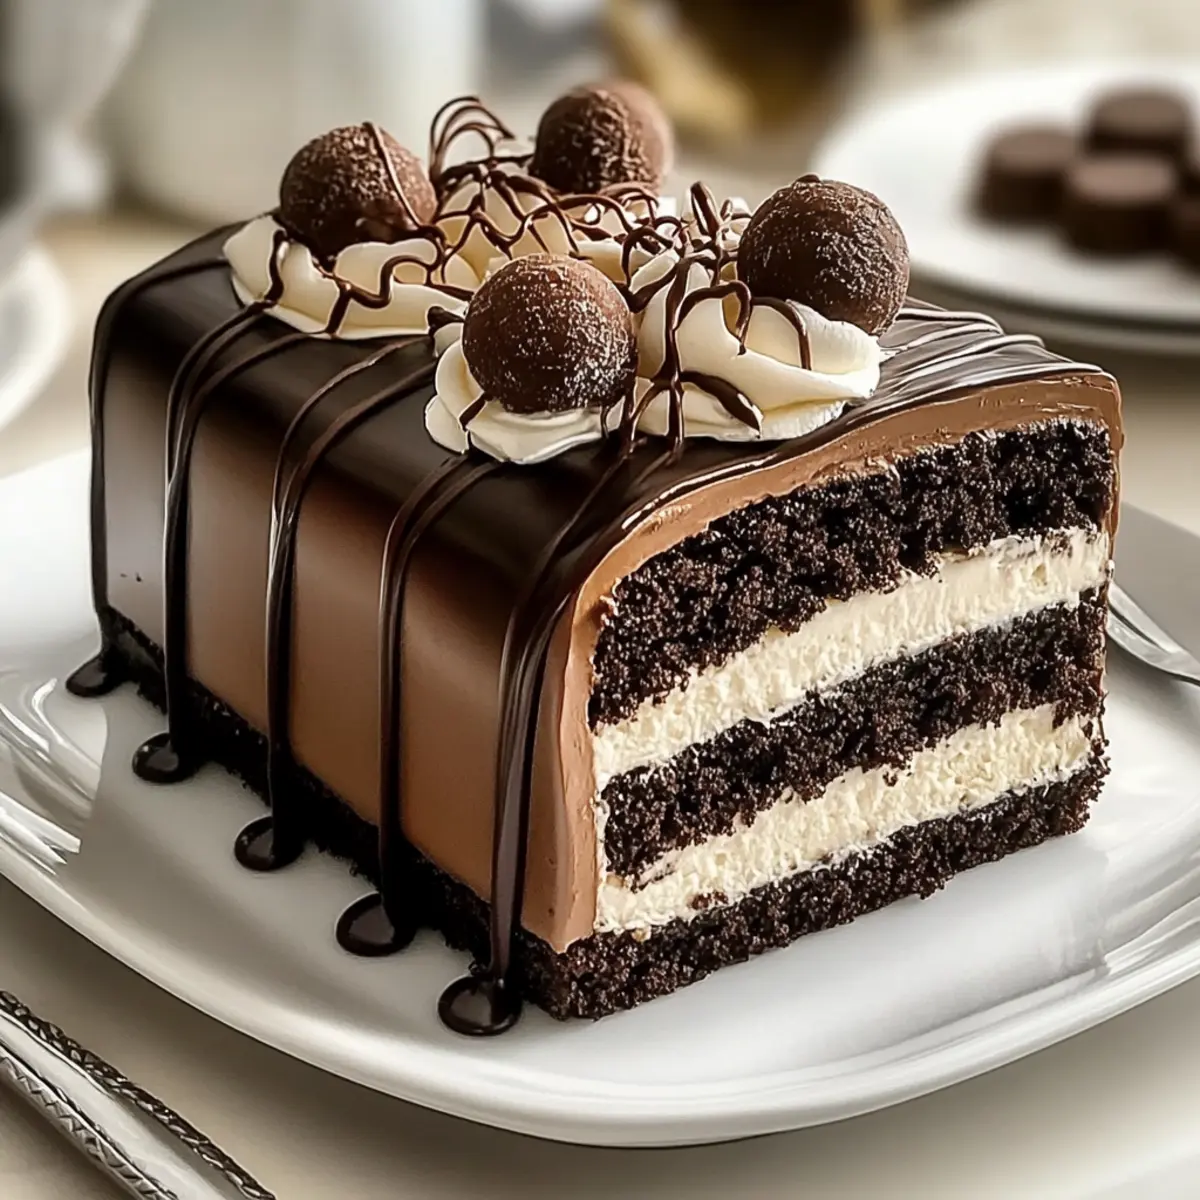
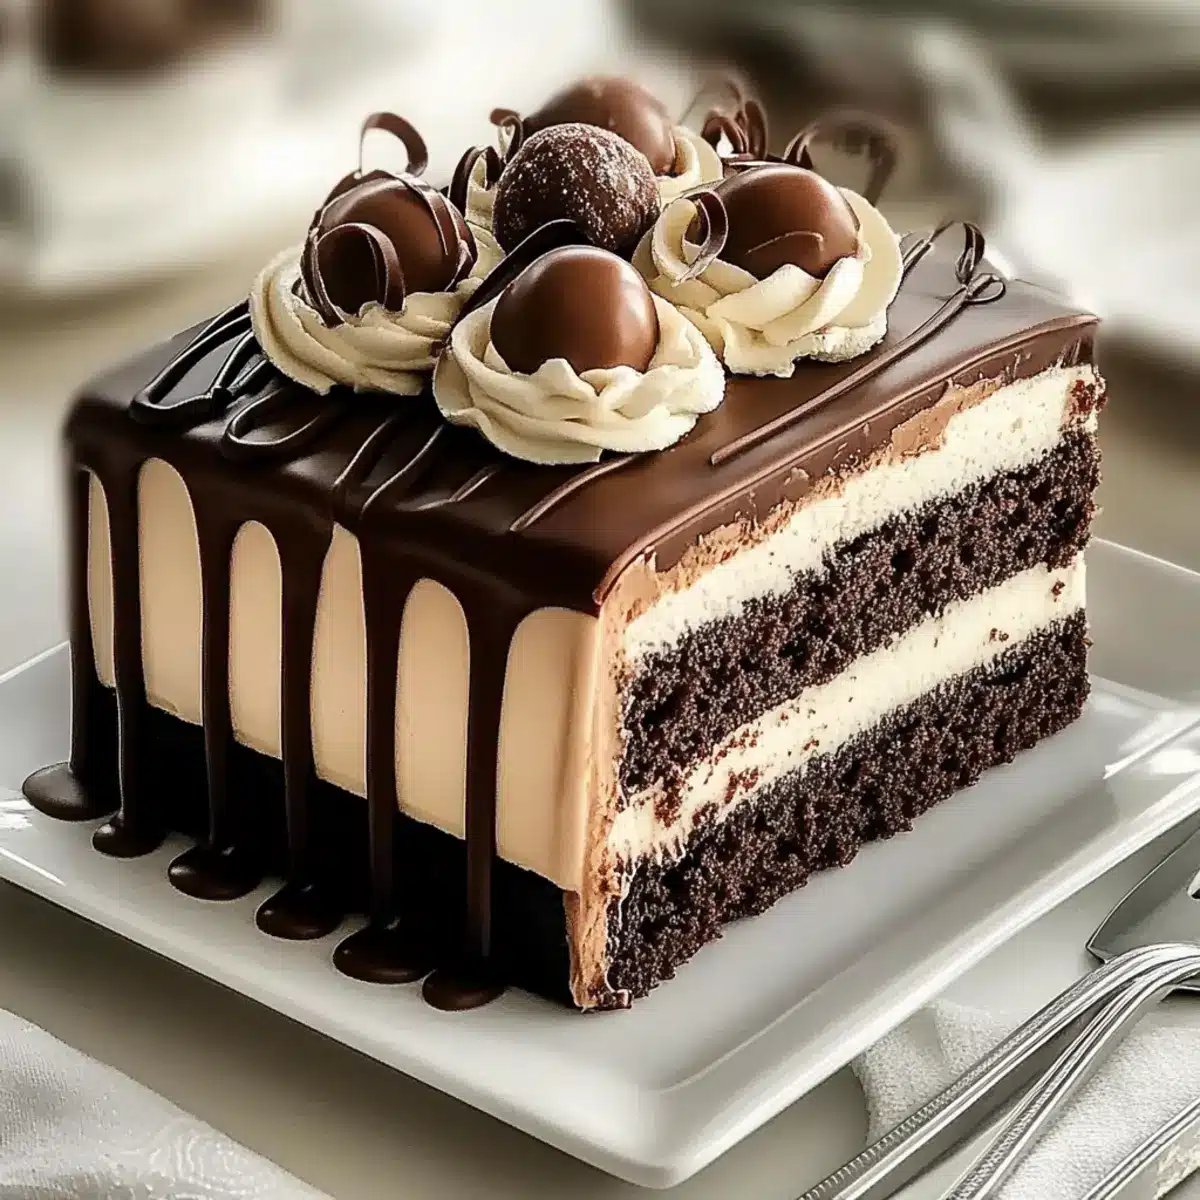
As I poured the glossy ganache over my freshly layered Tuxedo Bar Cake, the rich, chocolatey aroma took over my kitchen, wrapping me in a warm embrace. This decadent creation, featuring moist chocolate layers and airy mousse, is a showstopper that looks more complicated than it truly is. It’s perfect for any occasion, whether you’re celebrating a birthday or simply indulging in a sweet treat after dinner. What I love most is how it accommodates various dietary preferences—gluten-free and dairy-free adaptations make it accessible for everyone. So, if you’re ready to elevate your dessert game with an impressive yet surprisingly simple bake, let’s dive into crafting this delightful Tuxedo Bar Cake together! Could you imagine the joy on your loved ones’ faces when they see this stunning confection?
Why Choose Tuxedo Bar Cake?
Decadence Redefined: The Tuxedo Bar Cake combines rich chocolate and creamy layers, making every bite an indulgent experience.
Versatile Adaptations: With simple substitutes, you can easily create a gluten-free or dairy-free version, ensuring everyone can enjoy this dessert.
Effortless Elegance: Despite its show-stopping appearance, this cake is straightforward to make—perfect for novice bakers and seasoned chefs alike!
Crowd Pleaser: Your family and friends will be in awe, making it ideal for celebrations! Consider pairing it with Cinnamon Buttermilk Pancakes for a breakfast twist.
Visually Stunning: The glossy ganache and delicate layers create a picture-perfect centerpiece that will impress at any gathering. Embrace the joy of baking with this delightful Tuxedo Bar Cake!
Tuxedo Bar Cake Ingredients
• Get ready to create magic with this decadent dessert!
For the Cake
- Unsalted Butter – Provides rich moisture and flavor. Substitution: Use dairy-free butter for a lactose-free option.
- Water – Essential for melting the butter and cocoa together.
- Unsweet Dark Cocoa Powder – Delivers deep chocolate flavor for the ultimate Tuxedo Bar Cake.
- All-Purpose Flour – The foundation for the cake structure. Substitution: Use a gluten-free flour blend for a gluten-free cake.
- Light Brown Sugar – Adds sweetness and caramel flavor, enhancing the chocolate richness.
- Espresso Powder – Optional; enhances the chocolate flavor for true cocoa lovers.
- Baking Soda – Crucial for cake rise, ensuring a light texture.
- Fine Grain Sea Salt – Balances sweetness in the cake beautifully.
- Buttermilk – Tenderizes the cake for a melt-in-your-mouth experience. Substitution: Use a dairy-free alternative if needed.
- Large Eggs – Binds the ingredients together, giving structure to the cake.
- Vanilla Extract – Enhances depth of flavor, making it more aromatic.
For the Mousse and Filling
- Heavy Cream – Creates a light and airy mousse texture. Divided for different uses in the recipe.
- Semisweet Chocolate Chips – Main component of both the mousse and ganache layers.
- Cream Cheese – Adds a delightful tanginess to the filling.
- White Chocolate – Brings sweetness and depth to the cream cheese mixture.
- Confectioners’ Sugar – Sweetens the filling and frosting to perfection.
- Lemon Juice – Optional; brightens the flavor of the cream cheese layer.
For the Ganache and Decoration
- Sunflower Oil – Ensures a smooth consistency in the ganache.
- Rolled Cookie Wafer – For decoration; adds an elegant touch to your Tuxedo Bar Cake!
- Fancy Chocolate Truffles – A luxurious finishing touch for extra flair.
With these ingredients, you’re all set to bring the magic of the Tuxedo Bar Cake to your kitchen! Enjoy the journey, and let your creativity shine.
Step‑by‑Step Instructions for Tuxedo Bar Cake
Step 1: Preheat Oven and Prepare Pans
Preheat your oven to 350°F (175°C). While it heats, grease two 9-inch round cake pans or line them with parchment paper for effortless release. This preparation is crucial for uniform baking of your decadent Tuxedo Bar Cake, so be sure to cover the pans completely.
Step 2: Melt Butter and Cocoa
In a medium saucepan over medium heat, combine 1 cup of unsalted butter, 1 cup of water, and ¾ cup of unsweet dark cocoa powder. Stir continuously until the mixture is smooth and all components are melted together, about 5 minutes. This rich chocolate blend sets the foundation for your luscious cake.
Step 3: Mix Dry Ingredients
In a large mixing bowl, whisk together 2 ¾ cups of all-purpose flour, 2 cups of light brown sugar, 1 ½ teaspoons of baking soda, and 1 teaspoon of fine grain sea salt. If you’re using espresso powder, add that now as well. This dry mixture will provide structure and sweetness to your Tuxedo Bar Cake.
Step 4: Combine Wet and Dry Ingredients
Pour the melted butter and cocoa mixture into the bowl of dry ingredients. Stir gently until just combined. Avoid overmixing; you want a smooth batter without lumps, achieving a perfect consistency that will rise beautifully in the oven.
Step 5: Add Buttermilk and Eggs
Next, add 1 cup of buttermilk, 3 large eggs, and 2 teaspoons of vanilla extract to the batter. Beat the mixture until smooth, using a spatula or electric mixer. This will enrich the flavor and create a tender crumb for the Tuxedo Bar Cake.
Step 6: Bake the Cake Layers
Divide the batter evenly between the prepared cake pans. Bake in your preheated oven for 30-35 minutes, or until a toothpick inserted in the center comes out clean. The edges will start to pull away from the pan when perfectly baked, indicating it’s time to cool!
Step 7: Cool the Cake Layers
After baking, let the cakes cool in their pans for 10 minutes before transferring them to wire racks. Allow them to cool completely before assembling the Tuxedo Bar Cake. This step is crucial to avoid melting your mousse during assembly.
Step 8: Whip the Cream
In a mixing bowl, whip 2 cups of heavy cream until stiff peaks form. This should take about 3-4 minutes on medium speed. Gently fold in 1 cup of semisweet chocolate chips to create a light and airy mousse that will add delightful layers to your cake.
Step 9: Prepare Cream Cheese Layer
In another bowl, blend 8 ounces of cream cheese, 4 ounces of melted white chocolate, 1 cup of confectioners’ sugar, and 1 tablespoon of lemon juice until smooth. This creamy filling adds a delicious tanginess that balances the sweet layers of your Tuxedo Bar Cake.
Step 10: Assemble the Cake
On a serving platter, place one layer of chocolate cake and spread half of the chocolate mousse on top. Add the cream cheese layer next, followed by the second chocolate cake layer. Repeat the process with the remaining mousse for a towering Tuxedo Bar Cake.
Step 11: Make the Ganache
Heat 1 cup of semisweet chocolate chips, ½ cup of heavy cream, and 1 tablespoon of sunflower oil in a saucepan over low heat, stirring constantly until melted and smooth. Allow the ganache to cool slightly before pouring it over the assembled cake for a glossy finish.
Step 12: Decorate the Cake
Once the ganache has set, decorate the Tuxedo Bar Cake by piping chocolate buttercream around the base and on top. Finish it off with decorative rolled cookie wafers and fancy chocolate truffles. This final touch creates an irresistible presentation that will steal the show!
Expert Tips for Tuxedo Bar Cake
Use Room Temperature Ingredients: Start with room temperature butter, eggs, and buttermilk for easier mixing and a better cake texture.
Avoid Overmixing: Gently combine your ingredients to maintain a light and fluffy Tuxedo Bar Cake; overmixing can lead to dense layers.
Cool Completely: Ensure your cake layers are completely cooled before assembly to prevent the mousse from melting and losing its airy texture.
Stir Ganache Constantly: While making ganache, continuously stir over low heat to avoid burning and ensure a smooth consistency for a glossy finish.
Layer Creatively: Feel free to add extra layers of mousse or cream cheese mixture between cake layers for an even richer experience.
Consider Allergen Substitutes: Don’t forget you can easily adapt the recipe for gluten-free or dairy-free options, ensuring everyone can indulge in this delicious dessert!
How to Store and Freeze Tuxedo Bar Cake
Fridge: Store the Tuxedo Bar Cake in an airtight container in the fridge for up to 5 days. This keeps it moist and preserves the creamy layers.
Freezer: For longer storage, wrap the cake tightly in plastic wrap and then in aluminum foil. It can be frozen for up to 3 months, maintaining its delicious flavors.
Thawing: When ready to enjoy, thaw the cake in the refrigerator overnight before serving. This gentle method preserves the texture and richness of the cake.
Reheating: If desired, slice individual pieces and microwave for about 10-15 seconds to warm slightly—enjoy the decadent chocolatey goodness!
Make Ahead Options
Preparing the Tuxedo Bar Cake in advance is a fantastic way to save time on busy baking days! You can bake the cake layers up to 3 days ahead and store them in an airtight container to keep them moist. Additionally, the chocolate mousse can be whipped up to 24 hours in advance; simply cover it tightly with plastic wrap and refrigerate. For the cream cheese filling, you can prepare that mixture up to 2 days ahead as well. When you’re ready to assemble, just layer the cooled cakes with the mousse and cream cheese filling, and finish off with the ganache. This way, you can enjoy a show-stopping dessert with minimal last-minute effort—just as delightful as making it fresh!
Variations & Substitutions for Tuxedo Bar Cake
Embrace your creativity! This Tuxedo Bar Cake can be customized to suit your taste and dietary needs, making it even more delightful.
- Dairy-Free: Swap unsalted butter and buttermilk for dairy-free alternatives to make the cake accessible for lactose-intolerant guests.
- Gluten-Free: Use a gluten-free flour blend instead of all-purpose flour, ensuring everyone can savor this delicious treat.
- Dark Chocolate: Opt for dark chocolate chips in the mousse and ganache for a richer chocolate experience.
- Flavored Mousse: Elevate the mousse by adding flavored liqueurs such as orange or coffee for an exciting twist.
- Nutty Crunch: Layer in crushed nuts like pecans or walnuts for added texture and a lovely crunch amidst the creamy layers.
- Fruit Infusion: Introduce fresh berries between layers for a refreshing finish, cutting through the richness splendidly.
- Mini Cupcakes: Transform the cake into mini cupcakes for parties—perfect for sharing and adorable to serve!
- Layered Cream Cheese: Add extra cream cheese mixture between layers for an even creamier, richer flavor that dessert lovers will adore.
For more delightful dessert options that you can customize, consider trying these Apple Cinnamon Pancakes or Blueberry Cheesecake Protein Bites. Happy baking!
What to Serve with Tuxedo Bar Cake?
Indulging in the rich layers of Tuxedo Bar Cake is a delightful experience, and pairing it with the right accompaniments can elevate your dessert game even further.
- Fresh Strawberries: Bright, juicy berries add a refreshing contrast to the cake’s decadent chocolate layers, enhancing both flavor and presentation.
- Vanilla Ice Cream: The creaminess of vanilla ice cream provides a delightful temperature contrast, melting into the cake’s warm ganache for a heavenly bite.
- Whipped Cream: Light and airy, whipped cream balances the richness of the Tuxedo Bar Cake, offering a soft texture that complements the dense layers beautifully.
- Espresso or Coffee: A warm cup of espresso or coffee deepens your chocolate experience, enhancing the cake’s rich flavors and stimulating the palate.
- Chocolate Sauce Drizzle: For true chocolate lovers, an extra drizzle of chocolate sauce adds an indulgent layer, bringing out the cake’s deep cocoa notes.
- Chocolate-Covered Almonds: These crunchy snacks provide a delightful texture contrast, plus their nutty taste complements the sweetness of the cake.
- Mint Leaves Garnish: A sprig of fresh mint can brighten the presentation, adding a touch of freshness that cuts through the cake’s richness.
- Chilled Sparkling Water: Serve with sparkling water to cleanse the palate between bites, enhancing the overall dessert experience.
- Creamy Custard: A drizzle of vanilla or chocolate custard brings a luscious creaminess that pairs perfectly with the Tuxedo Bar Cake layers.
Tuxedo Bar Cake Recipe FAQs
How do I choose the right cocoa powder for my Tuxedo Bar Cake?
Absolutely! For the best flavor, I recommend using unsweetened dark cocoa powder. This type has a richer, more intense chocolate flavor that truly elevates your Tuxedo Bar Cake. Make sure it’s fresh—check the expiration date and avoid cocoa with dark spots, which may indicate staleness.
What is the best way to store my Tuxedo Bar Cake?
Very! The Tuxedo Bar Cake can be stored in an airtight container in the fridge for up to 5 days to keep it moist and delicious. If you want to keep it longer, wrap it tightly in plastic wrap and then in aluminum foil to freeze for up to 3 months. This will help maintain its flavor and texture while frozen.
Can I freeze the Tuxedo Bar Cake? How?
Of course you can! To freeze your Tuxedo Bar Cake, allow it to cool completely after baking and trimming. Wrap each layer individually in plastic wrap, then place them in an airtight container or a freezer bag to prevent freezer burn. When ready to enjoy, simply transfer the layers to the fridge overnight to thaw before assembling.
What should I do if my Tuxedo Bar Cake layers are too dense?
If your Tuxedo Bar Cake layers turn out dense, it might be due to overmixing or using cold ingredients. Make sure to mix just until combined and use room temperature ingredients for the best texture. If you prefer lighter layers, try separating and whisking the egg whites before folding them into the batter for added fluffiness!
Are there any dietary considerations for my Tuxedo Bar Cake?
Yes, indeed! For those with gluten sensitivities, you can easily swap out all-purpose flour for a gluten-free flour blend, ensuring everyone can enjoy this delightful dessert. Additionally, substitute the unsalted butter and buttermilk with dairy-free options for a lactose-friendly version. It’s all about accommodating different dietary needs and ensuring your Tuxedo Bar Cake remains delicious!
Tuxedo Bar Cake
Ingredients
Equipment
Method
- Preheat your oven to 350°F (175°C). Grease two 9-inch round cake pans or line them with parchment paper.
- In a medium saucepan, combine the unsalted butter, water, and unsweet dark cocoa powder over medium heat. Stir until smooth.
- In a large mixing bowl, whisk together the all-purpose flour, light brown sugar, baking soda, and fine grain sea salt. Add espresso powder if using.
- Pour the melted butter and cocoa mixture into the bowl of dry ingredients and stir gently until combined.
- Add buttermilk, eggs, and vanilla extract to the batter and beat until smooth.
- Divide the batter between prepared cake pans and bake for 30-35 minutes until a toothpick comes out clean.
- Let the cakes cool in their pans for 10 minutes before transferring them to wire racks to cool completely.
- Whip the heavy cream in a mixing bowl until stiff peaks form, then fold in semisweet chocolate chips.
- In another bowl, blend cream cheese, melted white chocolate, confectioners’ sugar, and lemon juice until smooth.
- Assemble the cake by layering the first cake, half the mousse, cream cheese layer, and second cake. Repeat with remaining mousse.
- Heat chocolate chips, heavy cream, and sunflower oil in a saucepan over low heat until melted. Pour over the assembled cake.
- Decorate the cake with chocolate buttercream, rolled wafers, and chocolate truffles.
Leave a Reply