
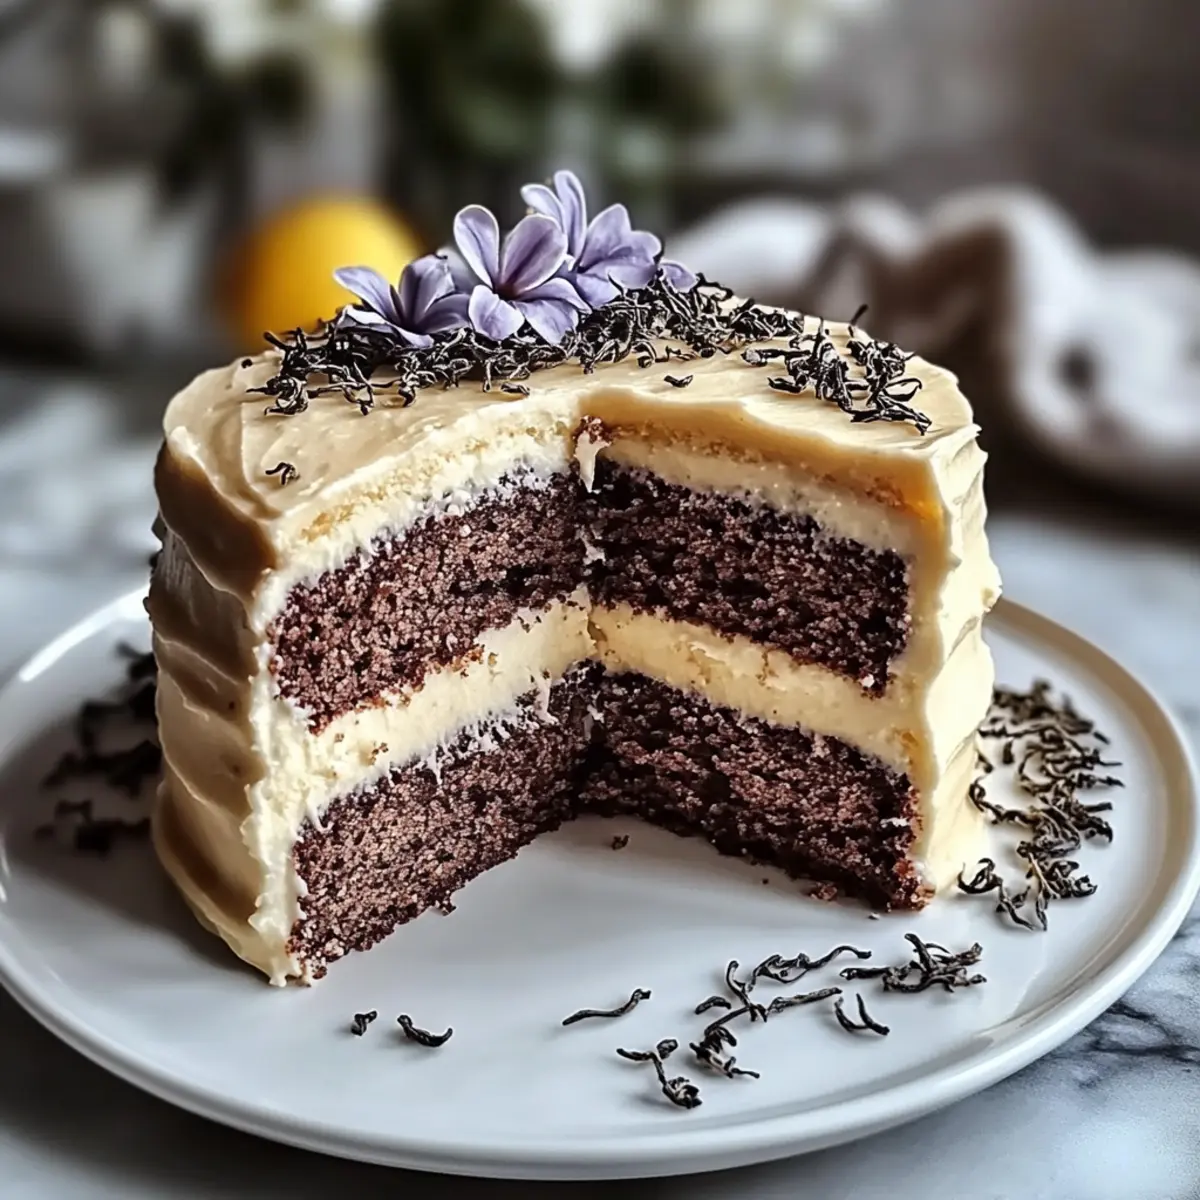
Amid the clinking of teacups and the delicate aroma of baked goods, my heart skipped a beat when I first tasted a Velvet Earl Grey Layer Cake. This stunning dessert captures the essence of afternoon tea, where the gentle floral notes of Earl Grey mingled effortlessly with zesty lemon frosting, creating a blissful experience in every bite. What makes this cake truly special is its versatility; it caters to various dietary needs with gluten-free and dairy-free options, ensuring everyone can indulge without compromise. Plus, it’s a showstopper at any gathering, effortlessly impressing both friends and family. Are you ready to elevate your dessert game with this elegant treat?
Why Is This Cake a Must-Try?
Luxurious Flavor: The unique blend of Earl Grey tea and lemon frosting creates an unforgettable taste experience that’s both refreshing and sophisticated.
Versatile Options: Whether you’re gluten-free or dairy-free, this recipe offers adaptations without sacrificing flavor.
Showstopper Presentation: Its vibrant colors and elegant layers make it a true centerpiece for any gathering, impressing your guests at tea time.
Easy to Customize: Feel free to experiment with different zests—like lime or orange—to add your personal touch.
Time-Saving Prep: Most of the steps can be done in advance, especially the frosting, making it easy to serve when you’re ready.
Perfect for Any Occasion: From casual gatherings to celebrations, this cake fits perfectly, making it a versatile dessert choice.
Velvet Earl Grey Layer Cake Ingredients
-
For the Cake
-
Whole Milk – Provides moisture and richness; substitute with almond milk for a dairy-free version.
-
Earl Grey Tea Leaves – Infuse the cake with aromatic floral notes; steep longer for a more robust flavor.
-
Unsalted Butter – Adds flavor and moisture; use coconut cream for a dairy-free alternative.
-
Granulated Sugar – Sweetens the cake and contributes to its structure; consider coconut sugar for a healthier option.
-
Large Eggs – Essential for binding and moisture; ensure they are at room temperature for best results.
-
Vanilla Extract – Enhances depth of flavor; optional but recommended for a richer taste.
-
All-Purpose Flour – Provides structure; a gluten-free blend works well for dietary needs.
-
Baking Powder – Acts as a leavening agent for a fluffy texture; always check for freshness.
-
Salt – Enhances flavor; a pinch goes a long way to balance sweetness.
-
For the Frosting
-
Powdered Sugar – Key for the frosting; sifting ensures a smooth texture.
-
Heavy Cream – Creates a rich, fluffy frosting; use full-fat coconut cream for a dairy-free option.
-
Lemon Zest – Adds brightness to the frosting; can also be folded into the cake batter for extra flavor.
With the right ingredients, your Velvet Earl Grey Layer Cake can become a delightful centerpiece that everyone can enjoy!
Step‑by‑Step Instructions for Velvet Earl Grey Layer Cake
Step 1: Steep the Tea
Begin by warming 1 cup of whole milk in a medium saucepan over low heat until steaming, but not boiling. Remove from heat, add 2 tablespoons of Earl Grey tea leaves, and steep for about 10 minutes. Once steeped, strain the tea leaves and let the milk cool to room temperature while you prepare the other ingredients.
Step 2: Cream Butter and Sugar
In a large mixing bowl, cream 1 cup of unsalted butter and 1 ¾ cups of granulated sugar together using an electric mixer on medium speed. Beat the mixture until it becomes light and fluffy, which should take about 3-4 minutes. This step is crucial for creating a tender texture in your Velvet Earl Grey Layer Cake.
Step 3: Mix Wet Ingredients
Add 3 large room-temperature eggs, the cooled Earl Grey-infused milk, and 1 teaspoon of vanilla extract to the creamed butter and sugar. Beat on low speed until all ingredients are well combined, and the mixture is smooth. This wet mixture infuses the cake with the delightful flavors that make the Velvet Earl Grey Layer Cake special.
Step 4: Combine Dry Ingredients
In a separate bowl, whisk together 2 ½ cups of all-purpose flour, 2 teaspoons of baking powder, and ½ teaspoon of salt. This mixture not only provides the structure of the cake but also ensures an even distribution of leavening agents. Sift these dry ingredients to aerate and remove any lumps, preparing for a light cake.
Step 5: Mix Together
Gradually add the dry flour mixture to the wet ingredients, folding gently with a spatula. Combine until just incorporated—avoid overmixing to keep the cake tender. The batter should be smooth and slightly thick, embodying the elegant texture of a Velvet Earl Grey Layer Cake.
Step 6: Bake the Cake
Preheat your oven to 350°F (175°C) and grease two 9-inch round cake pans. Divide the batter evenly between the pans and smooth the tops with a spatula. Bake in the preheated oven for 25-30 minutes, or until a toothpick inserted into the center comes out clean. The cakes should be lightly golden and spring back when touched.
Step 7: Cool the Layers
Once baked, remove the cake layers from the oven and let them cool in the pans for about 10 minutes. Carefully transfer the cakes to a wire rack to cool completely. This step is essential to ensure that your Velvet Earl Grey Layer Cake maintains its shape and texture when frosted.
Step 8: Prepare the Frosting
In a large bowl, beat together 2 cups of sifted powdered sugar, 1 cup of heavy cream, and the zest of 1 lemon using an electric mixer. Mix on medium speed until fluffy and smooth, approximately 2-4 minutes. The zesty lemon will enhance the flavors and add a brightness to your frosting, complementing the Earl Grey perfectly.
Step 9: Frost and Assemble
Once the cake layers are completely cool, place one layer on a serving platter. Spread a generous amount of frosting on top, then gently place the second layer on top. Frost the top and sides of the entire cake, using a spatula to create a smooth finish. Your Velvet Earl Grey Layer Cake is now beautifully assembled and ready for a stunning presentation!
Make Ahead Options
These Velvet Earl Grey Layer Cakes are perfect for busy home cooks looking to streamline their baking routine! You can prepare the unfrosted cake layers up to 2 days in advance; simply let them cool completely, then wrap them tightly in plastic wrap and store at room temperature. For an even longer option, freeze the layers for up to 1 month—just thaw them overnight in the refrigerator before use. Additionally, the zesty lemon frosting can be made up to 3 days ahead and refrigerated. When you’re ready to serve, frost the chilled layers and assemble them for a stunning presentation that’s just as delicious and fresh!
How to Store and Freeze Velvet Earl Grey Layer Cake
Room Temperature: Keep unfrosted layers at room temperature for up to 2 days in an airtight container to maintain freshness and prevent drying out.
Fridge: Store your frosted Velvet Earl Grey Layer Cake in the refrigerator for up to 5 days, loosely covered to retain moisture but allow air circulation.
Freezer: If you want to freeze the cake, wrap the unfrosted layers tightly in plastic wrap and foil; they can be stored in the freezer for up to 1 month.
Reheating: To enjoy cake after freezing, let it thaw in the fridge overnight and bring to room temperature before serving.
Expert Tips for Velvet Earl Grey Layer Cake
-
Quality Ingredients Matter: Use high-quality loose-leaf Earl Grey tea for the best flavor infusion in your Velvet Earl Grey Layer Cake.
-
Room Temperature Eggs: Ensure your eggs are at room temperature; this helps to create an evenly mixed batter for a perfect rise.
-
Gentle Mixing: Fold the dry ingredients gently into the wet mixture to avoid overmixing, which can result in a tough texture.
-
Check Baking Time: Ovens can vary; start checking the cake layers at 25 minutes to prevent overbaking. Use a toothpick to test for doneness.
-
Trimming Domed Tops: If your cake layers dome up during baking, use a serrated knife to level them for a beautiful, flat surface before frosting.
-
Storage for Freshness: Store the frosted Velvet Earl Grey Layer Cake loosely covered in the fridge to maintain moisture without sticking.
Velvet Earl Grey Layer Cake Variations
Feel free to tweak this beloved dessert to fit your taste and dietary needs, inviting endless creativity into your kitchen!
-
Gluten-Free: Use a gluten-free flour blend in equal amounts to create a cake that’s just as delightful for those avoiding gluten.
-
Dairy-Free: Substitute whole milk with almond milk and unsalted butter with coconut cream for a cake that everyone can enjoy without dairy.
-
Citrus Twist: Try orange or lime zest instead of lemon for a unique citrus flavor that adds a refreshing twist to the frosting.
-
Layer It Up: For a more decadent dessert, add a layer of fresh berries or lemon curd between the cake layers for an exciting burst of flavor.
-
Chai Spice: Consider adding a pinch of chai spices, like cinnamon or cardamom, to the batter for an aromatic twist that compliments the Earl Grey beautifully.
-
Light and Fluffy: For an ultra-light texture, separate the egg whites and whip them to stiff peaks before folding them into the batter gently at the last stage.
-
Nutty Addition: Fold in finely chopped almonds or walnuts into the batter before baking for a delightful nutty flavor and crunch that contrasts beautifully with the softness of the cake.
-
Chocolate Drizzle: Drizzle a simple chocolate ganache over the frosted cake for a sumptuous touch that elevates the overall flavor profile, melding beautifully with the Earl Grey notes.
Feel free to mix and match these ideas, and for a delightful breakfast option, consider whipping up some Cottage Cheese Pancakes alongside your cake to keep the indulgence going!
What to Serve with Velvet Earl Grey Layer Cake
Indulging in this delightful dessert creates the perfect opportunity to pair it with complementary flavors and textures, enriching your experience.
-
Fresh Berries: The tartness of raspberries or strawberries adds a refreshing contrast to the rich cake, enhancing every bite.
-
Light Whipped Cream: A dollop of freshly whipped cream brings a creamy texture that balances the cake’s sweetness and adds elegance to the serving.
-
Earl Grey Tea: Enjoying a warm cup of Earl Grey tea alongside your cake brings out the cake’s floral notes and deepens the comforting experience.
-
Lemon Sorbet: This icy treat provides a lovely citrus contrast, cleansing the palate between bites, making each taste of cake even more enjoyable.
-
Chocolate Ganache: A drizzle of silky chocolate ganache adds depth and a touch of decadence, offering a delightful blend with the cake’s flavors.
-
Edible Flowers: Use them as a garnish to add visual appeal. They create a quaint, charming touch that mirrors afternoon tea aesthetics.
-
Sparkling Lemonade: Refreshing and bubbly, this drink complements the zesty notes of the cake while adding a festive flair to your dessert serving.
Velvet Earl Grey Layer Cake Recipe FAQs
How should I select and prepare my Earl Grey tea leaves?
Absolutely! For the best flavor infusion, use high-quality loose-leaf Earl Grey tea. If using tea bags, adjust the steeping time to 5-7 minutes to ensure a robust floral note. Always check the expiration date on the tea to guarantee freshness.
How should I store my Velvet Earl Grey Layer Cake?
Your frosted cake can stay fresh in the refrigerator for up to 5 days. Store it loosely covered to maintain moisture but allow for air circulation. If it’s unfrosted, you can keep it at room temperature in an airtight container for up to 2 days without compromising texture.
Can I freeze Velvet Earl Grey Layer Cake for later?
Certainly! To freeze, wrap your unfrosted cake layers tightly in plastic wrap and then foil. This method helps prevent freezer burn. You can store them for up to 1 month. To enjoy later, thaw them in the fridge overnight, then let them reach room temperature before serving.
What should I do if my cake layers dome while baking?
If you notice that your cake layers dome up during baking, don’t worry! Simply take a serrated knife and trim the tops of the cakes for a level surface. This way, you’ll have a beautifully stacked cake that is easier to frost and less likely to slip.
Can I make this recipe dairy-free or gluten-free?
Very! To make a dairy-free version, substitute whole milk with almond milk and unsalted butter with coconut cream. For a gluten-free option, simply use a high-quality gluten-free flour blend. The flavors remain delightful, ensuring everyone can enjoy this delicious treat!
Is there a specific way to enjoy the leftover cake?
Of course! Leftover cake can be served with fresh berries or even a dusting of edible flowers for an elegant touch at your next tea gathering. It’s a lovely way to elevate the experience, making those last bites just as special as the first!
Velvet Earl Grey Layer Cake: A Luxurious Tea-Time Delight
Ingredients
Equipment
Method
- Begin by warming 1 cup of whole milk in a medium saucepan over low heat until steaming, but not boiling. Remove from heat, add 2 tablespoons of Earl Grey tea leaves, and steep for about 10 minutes.
- In a large mixing bowl, cream 1 cup of unsalted butter and 1 ¾ cups of granulated sugar together using an electric mixer on medium speed until light and fluffy, about 3-4 minutes.
- Add 3 large room-temperature eggs, the cooled Earl Grey-infused milk, and 1 teaspoon of vanilla extract to the creamed butter and sugar. Beat on low speed until well combined.
- In a separate bowl, whisk together 2 ½ cups of all-purpose flour, 2 teaspoons of baking powder, and ½ teaspoon of salt. Sift these dry ingredients to aerate.
- Gradually add the dry flour mixture to the wet ingredients, folding gently with a spatula until just incorporated.
- Preheat your oven to 350°F (175°C) and grease two 9-inch round cake pans. Divide the batter between the pans and bake for 25-30 minutes until a toothpick comes out clean.
- Once baked, let the cakes cool in the pans for about 10 minutes, then transfer to a wire rack to cool completely.
- In a large bowl, beat together 2 cups of sifted powdered sugar, 1 cup of heavy cream, and the zest of 1 lemon until fluffy and smooth.
- Once the cake layers are completely cool, place one layer on a platter, spread frosting, place the second layer on top, and frost the top and sides.
Leave a Reply