
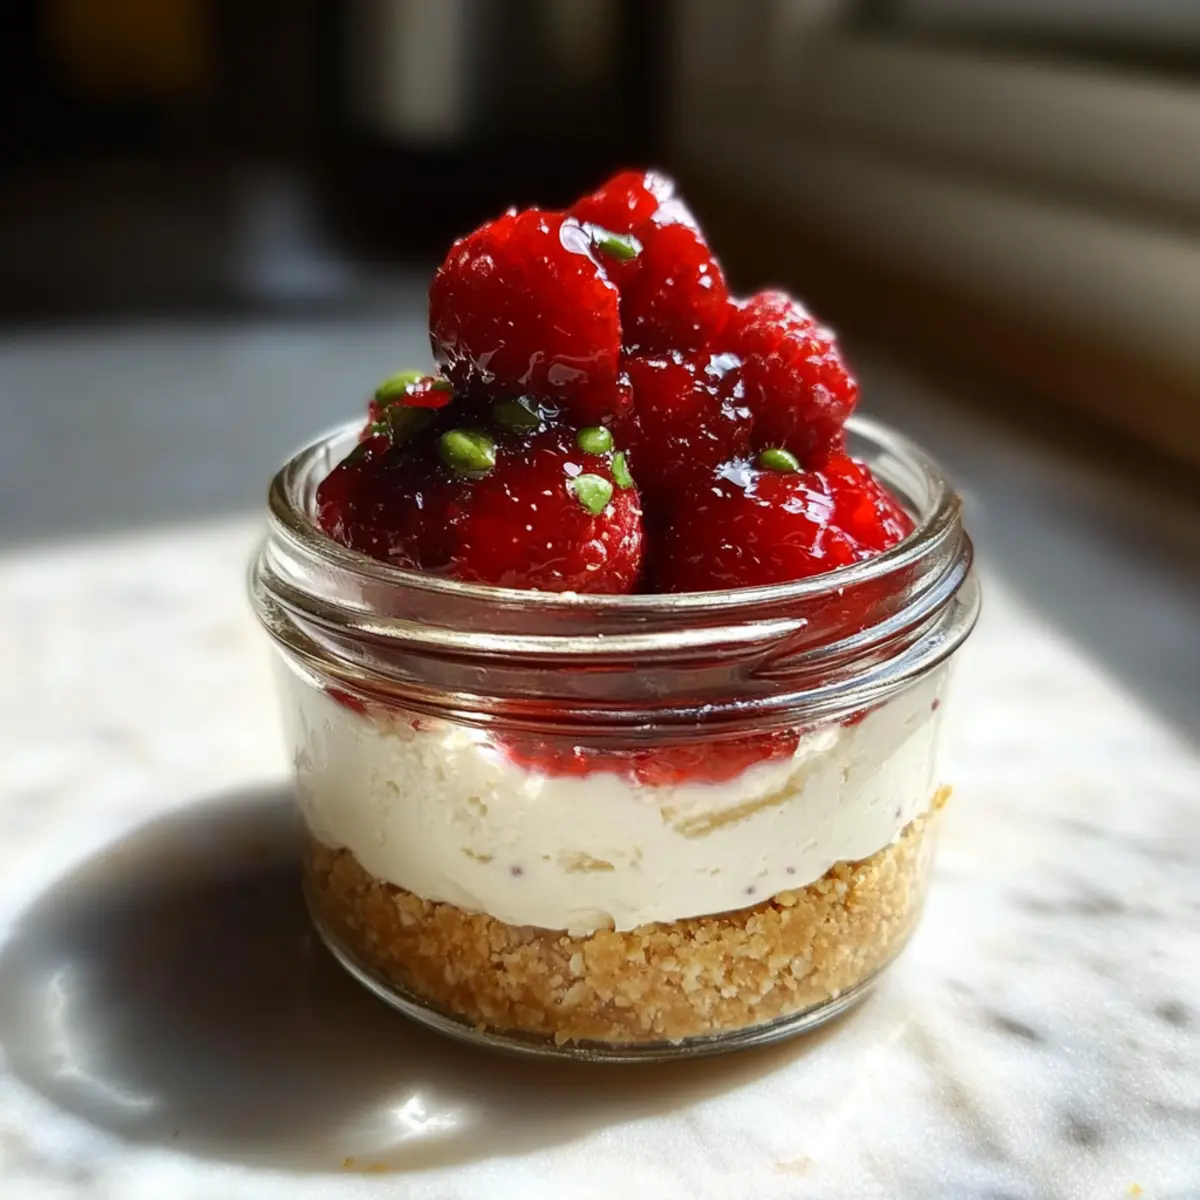
As I stood in the kitchen, the sun streaming through the window, the idea struck me—what if I could whip up a cheesecake that not only satisfies my sweet tooth but also boosts my protein intake? Enter these delightful High-Protein No-Bake Cheesecake Jars! Creamy and indulgent, this recipe makes it possible to enjoy a classic dessert without the guilt, packing a remarkable 28 grams of protein per serving. Not only are they super quick to prepare, making them a breeze for meal prep, but they also deliver that rich taste we all crave while keeping health goals in check. As I layered the smooth filling over the crumbly crust, my excitement grew—could a dessert be both nutritious and delicious? Stay with me to discover how these jars can transform your dessert experience!
Why are these cheesecake jars a game-changer?
Health-Conscious Indulgence: These High-Protein No-Bake Cheesecake Jars offer a delicious solution for those who crave sweets without compromising their diet. Macro-Friendly Delight: With 28 grams of protein per serving, they fit perfectly into any meal prep week. Quick and Simple: Whipping them up is a breeze, requiring no oven and minimal effort. Versatile Toppings: Top with fresh berries or sugar-free chocolate chips for added flair. Guilt-Free Satisfaction: Enjoy the rich, creamy texture you love, all while keeping calories in check—ideal for anyone looking to elevate their dessert game! If you’re also looking for more delicious yet healthy options, check out my silky Blueberry Cheesecake Protein or the delectable High Protein Bagel for your next meal prep!
High-Protein No-Bake Cheesecake Jars Ingredients
For the Filling
• Low-fat cottage cheese – Provides a creamy consistency and high protein content; substitute with cream cheese for a richer texture.
• Plain non-fat Greek yogurt – Adds tanginess and creaminess, boosting protein; no substitutions necessary.
• Vanilla protein powder – Enhances the protein level and flavor; choose a powder that fits your dietary preferences.
• Powdered erythritol (or preferred sweetener) – Adds sweetness without sugar; regular sugar can be used in moderation as a substitute.
• Vanilla extract – Enhances flavor; use pure vanilla extract for the best taste.
• Lemon juice – Provides the classic tang associated with cheesecake; freshly squeezed is ideal.
• Pinch of salt – Balances flavors.
For the Crust
• Almond flour – Serves as the base for the crust, providing structure; can substitute with oat flour for a different flavor.
• Melted butter or coconut oil – Binds the crust together; both can be used interchangeably based on dietary needs.
Topping (optional)
• Fresh berries – Adds flavor and visual appeal; can also use sugar-free chocolate chips or syrup for topping.
These High-Protein No-Bake Cheesecake Jars come together with these delightful ingredients, making your dessert both satisfying and nutritious!
Step‑by‑Step Instructions for High-Protein No-Bake Cheesecake Jars
Step 1: Prepare the crust
In a mixing bowl, combine almond flour, powdered erythritol, and melted butter, stirring until the mixture resembles wet sand. Use a fork to break up clumps and ensure it’s well integrated. This will be the delicious crust for the High-Protein No-Bake Cheesecake Jars, creating a sturdy base for your creamy filling.
Step 2: Chill the crust
Press the crust mixture evenly into the bottom of four jars or ramekins, ensuring a flat surface. Place them in the refrigerator for about 30 minutes to firm up. Chilling allows the crust to hold its shape when the filling is added, ensuring each scoop delivers that perfect bite of cheesecake.
Step 3: Prepare the filling
In a food processor, blend low-fat cottage cheese, plain Greek yogurt, vanilla protein powder, powdered erythritol, vanilla extract, lemon juice, and a pinch of salt. Process for about 1-2 minutes until the mixture is smooth and creamy. The key to those heavenly High-Protein No-Bake Cheesecake Jars is achieving a velvety texture, so be patient and blend well.
Step 4: Reconvene to taste
After blending, taste the cheesecake filling and adjust the sweetness as needed. If you desire a bit more sweetness, add an extra teaspoon of erythritol and blend again until it’s well incorporated. This personalized touch ensures your High-Protein No-Bake Cheesecake Jars will be tailored to your palate.
Step 5: Layer the cheesecake
Remove the jars from the refrigerator and spoon or pipe the creamy filling over the chilled crusts. Smooth the tops with a spatula, leveling it off to give an inviting finish. This layering creates the irresistible creamy texture that everyone loves in a cheesecake.
Step 6: Final chill
Cover each jar with a lid or plastic wrap and return them to the refrigerator. Let the jars chill for at least 4 hours, or until the filling is firm. This final chilling period allows the flavors to meld and the cheesecake to set, resulting in truly delightful High-Protein No-Bake Cheesecake Jars you won’t want to resist.
What to Serve with High-Protein No-Bake Cheesecake Jars
Elevate your dessert experience with delightful accompaniments that perfectly balance the flavors and textures of these guilt-free indulgences.
-
Fresh Berries: Bright and juicy, berries like strawberries or raspberries add a burst of flavor and color, enhancing the cheesecake jars beautifully.
-
Light Fruit Salad: Create a medley of seasonal fruits to serve alongside. The freshness complements the creamy texture for a refreshing bite.
-
Sugar-Free Chocolate Sauce: Drizzle over the cheesecake jars for chocolate lovers. This rich addition amplifies indulgence while keeping it low-sugar.
-
Nutty Granola: Add a sprinkle of crunchy granola on top for delightful texture contrast. The nuttiness pairs perfectly with the creamy filling.
-
Herbal Tea: A warm cup of chamomile or mint tea balances the sweetness while providing a soothing, gentle finish to your dessert.
-
Greek Yogurt Parfait: Layer your favorite Greek yogurt with poached fruits for a protein-packed side that complements the cheesecake flavors.
Let these delightful pairings transform your dining experience, making the most of those heavenly High-Protein No-Bake Cheesecake Jars!
How to Store and Freeze High-Protein No-Bake Cheesecake Jars
Fridge: Store the jars covered in the refrigerator for up to 4 days. The flavors deepen after a day, making them even more delightful!
Freezer: You can freeze the jars for up to 3 months. Just ensure they’re airtight to prevent freezer burn. Thaw in the fridge overnight before serving.
Layering Tip: If you add toppings, consider storing them separately to maintain their freshness and texture until ready to enjoy your High-Protein No-Bake Cheesecake Jars.
Reheating: These jars are best enjoyed chilled. There’s no need to heat them—just scoop straight from the fridge and savor!
Expert Tips for High-Protein No-Bake Cheesecake Jars
-
Blend Smoothly: Ensure the cottage cheese is blended thoroughly for a silky texture. If it’s watery, rinse and drain it before using to avoid lumps.
-
Taste Test: Don’t hesitate to taste the filling before layering it; adjusting sweetness can transform your High-Protein No-Bake Cheesecake Jars into your perfect dessert.
-
Chill Time: Be patient during the final chill—4 hours ensures the filling firms up nicely. Rushing this step can lead to a runny cheesecake.
-
Storage Savvy: These jars can stay fresh for up to 4 days in the fridge. The flavor becomes even better after the first day, so make them ahead!
-
Versatile Crust: If almond flour isn’t your favorite, try oat flour for a different flavor and texture in your crust while keeping it macro-friendly.
High-Protein No-Bake Cheesecake Jars Variations
Feel free to unleash your creativity with these delightful twists on the classic cheesecake jars!
-
Chocolate Indulgence: Add unsweetened cocoa powder to the filling for a rich, chocolatey flavor that delights the senses.
-
Creamy Swap: Replace low-fat cottage cheese with regular cream cheese for a denser and creamier texture, though this may lower the protein content.
-
Fruit-Infused: Blend in your favorite berries such as raspberries or strawberries directly into the filling for a fruity burst with every bite.
-
Nutty Crunch: Incorporate finely chopped nuts into the crust or sprinkle them on top for an irresistible crunch that adds texture and flavor.
-
Citrus Twist: Mix in some orange or lime zest to the filling for a refreshing citrus zing that enhances the cheesecake’s sweetness.
-
Spiced Delight: Add a pinch of cinnamon or nutmeg for a warm, cozy twist that complements the creamy filling beautifully.
-
Extra Protein: Enhance the filling with additional protein powder, creating an even more macro-friendly treat without sacrificing flavor.
Feeling inspired? For more delicious creations, explore my Blueberry Cheesecake Protein for a fruity twist or check out the High Protein Bagel to power up your meals!
Make Ahead Options
These High-Protein No-Bake Cheesecake Jars are perfect for meal prep enthusiasts! You can prepare the crust and filling up to 24 hours in advance, ensuring a quick assembly when you’re ready to serve. To prep ahead, simply mix and chill the crust, then blend the filling and store it separately in the fridge. This not only saves time but also allows flavors to deepen. When ready to enjoy, layer the filling over the crusts, smooth the tops, and let them chill for at least 4 hours, ensuring your cheesecakes are just as delicious as when freshly made. A little planning goes a long way for busy weeknights!
High-Protein No-Bake Cheesecake Jars Recipe FAQs
How do I select the best low-fat cottage cheese for this recipe?
Absolutely! Look for low-fat cottage cheese that’s creamy and free of excess water. The curds should be small and intact without any dark spots or sign of sourness. If your cheese appears watery, it’s a good idea to rinse and drain it before use.
What is the best way to store leftover High-Protein No-Bake Cheesecake Jars?
Very! Store your jars covered in the refrigerator for up to 4 days. They’ll not only stay fresh but the flavors will deepen, making them a delicious treat. Just be sure the lids fit well to keep them air-tight.
Can I freeze the High-Protein No-Bake Cheesecake Jars?
Yes, you can! To freeze, ensure the jars are airtight—wrap them well with plastic wrap or transfer the filling to freezer-safe containers. They can be frozen for up to 3 months. Thaw them in the refrigerator overnight before enjoying.
What if my filling isn’t blending smoothly?
No problem! If you find the filling lumpy, ensure you’re using a quality food processor and give it an extra minute of blending. Adding a splash of milk or Greek yogurt can help achieve a smoother consistency. Patience is key for that perfect creamy texture!
Are there any dietary considerations I should keep in mind for pets or allergies?
Definitely! This recipe includes dairy products and sweeteners that may not be suitable for pets. Always check for allergies related to dairy, and if anyone has issues with gluten, make sure to use certified gluten-free almond flour. It’s always best to confirm any dietary restrictions before serving!
Delicious High-Protein No-Bake Cheesecake Jars for Guilt-Free Indulgence
Ingredients
Equipment
Method
- In a mixing bowl, combine almond flour, powdered erythritol, and melted butter until it resembles wet sand.
- Press the crust mixture into the bottom of jars and chill for about 30 minutes.
- In a food processor, blend cottage cheese, Greek yogurt, protein powder, erythritol, vanilla extract, lemon juice, and salt until smooth.
- Taste the filling and adjust sweetness if needed, blending again.
- Layer the filling over the chilled crusts in the jars and smooth the tops.
- Cover each jar and chill for at least 4 hours until filling is firm.
Leave a Reply