
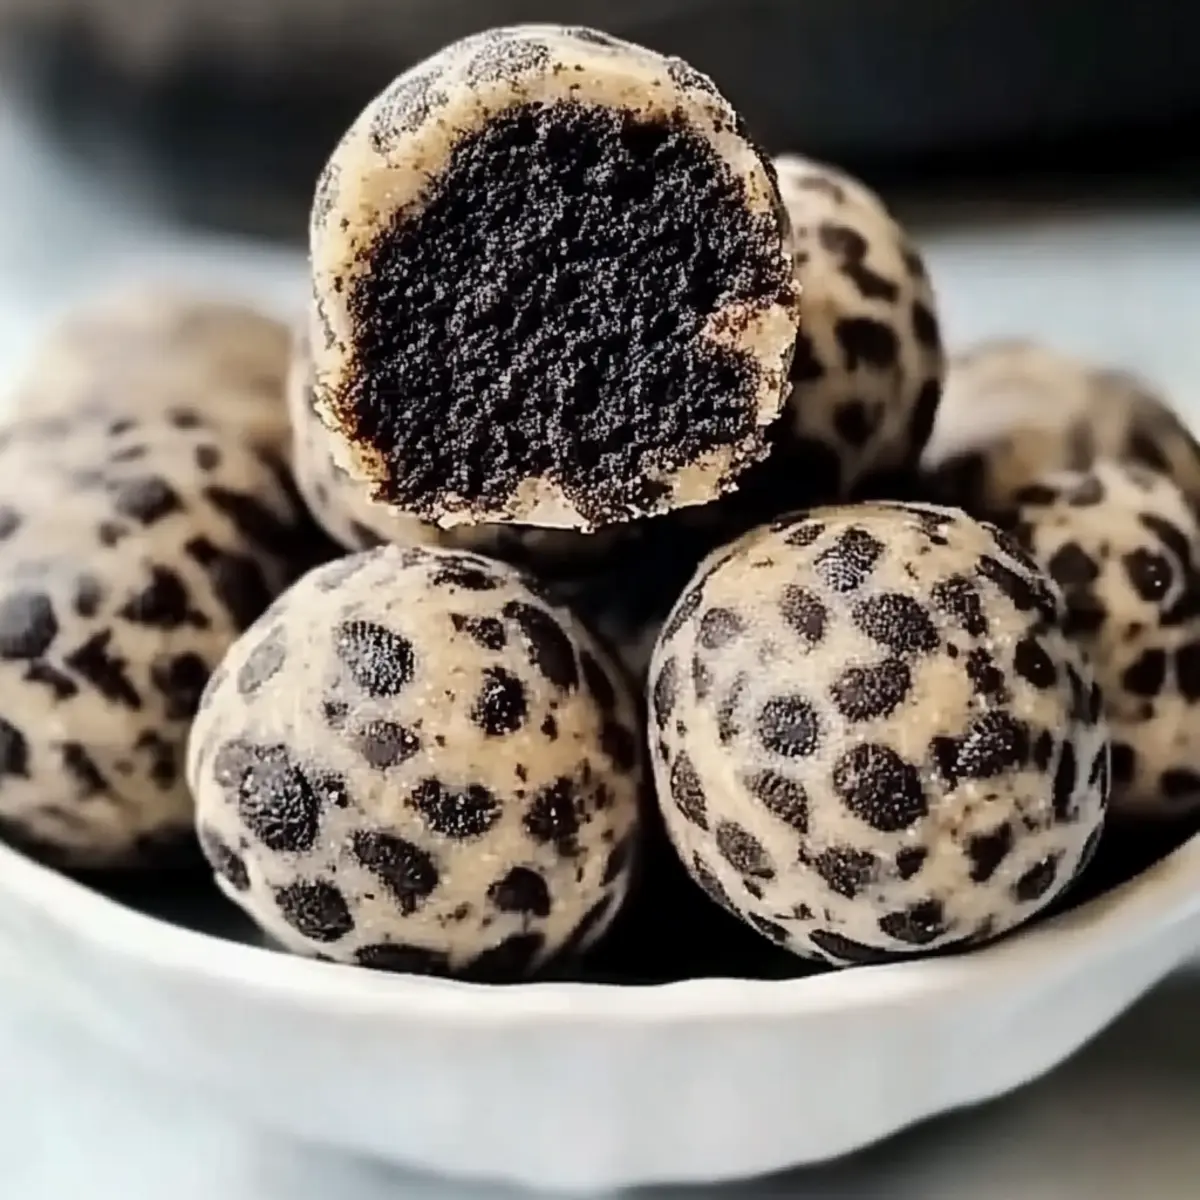
You know those moments when you’re hit with a craving for something sweet, yet you’re also trying to stay healthy? That’s where these Easy No-Bake Oreo Protein Balls come in. Perfectly combining the allure of chocolate with a hearty dose of protein, they’re a snack that fits effortlessly into busy lives. Not only are they a breeze to whip up—taking a mere 15 minutes from start to fridge—but they’re also a family-friendly treat that kids and adults alike will adore. Whether you need a quick energy boost post-workout or a sweet pick-me-up during the afternoon slump, these delightful bites are the answer. Curious how to transform your snack game? Let’s dive into this delicious adventure!
Why Are These Oreo Protein Balls Perfect?
Quick to Make: In just 15 minutes, you can whip up a batch of these delightful bites, making them ideal for busy lifestyles.
Kid-Approved Flavors: The irresistible chocolatey taste ensures that even the pickiest eaters will happily devour them!
No-Bake Convenience: There’s no need to heat up the oven; simply mix, roll, and chill for a guilt-free treat!
Protein-Packed Energy: Each ball is loaded with approximately 6g of protein, great for pre- or post-workout snacking.
Customizable Options: Swap almond butter for peanut butter or get creative with mix-ins like dried fruits and seeds to match your family’s preferences!
Make sure to try them alongside my Breakfast Protein Biscuits for a complete morning fuel-up!
No-Bake Oreo Protein Balls Ingredients
For the Base
- Crushed Oreo Cookies – Provides the sweet, chocolatey base; feel free to use any chocolate sandwich cookie as a substitute.
- Rolled Oats – Adds texture and fiber; instant oats can easily replace them if you’re in a rush.
- Vanilla Protein Powder – Boosts protein content; any flavor protein powder can work, though it may slightly alter the taste.
For Binding and Sweetness
- Almond Butter (or Nut Butter) – Binds ingredients and brings healthy fats; peanut butter is a wonderful alternative if you prefer.
- Honey or Maple Syrup – Acts as a natural sweetener and binder; agave syrup serves as a vegan option if needed.
Optional Enhancements
- Mini Chocolate Chips – Elevates the chocolate flavor; you can skip them or swap for dried fruit for a fresh twist.
- Vanilla Extract – Enhances overall flavor; almond extract can be a delightful non-vanilla substitute.
Dive into delightful flavors, and enjoy these No-Bake Oreo Protein Balls as quick snacks your whole family will love!
Step‑by‑Step Instructions for No-Bake Oreo Protein Balls
Step 1: Prepare Ingredients
Begin by gathering all your ingredients for these No-Bake Oreo Protein Balls. You’ll need crushed Oreo cookies, rolled oats, vanilla protein powder, almond butter, honey (or maple syrup), and optional mini chocolate chips. Ensure that you have measuring cups handy for accuracy, as this will help maintain the perfect balance of flavors and textures.
Step 2: Crush Oreos
Using a food processor, finely crush the Oreo cookies until you reach a crumb-like consistency. This should take around 10–15 seconds. If you don’t have a food processor, place the cookies in a zip-top bag and use a rolling pin to crush them carefully. The crushed Oreos provide the delicious, chocolatey base for your protein balls.
Step 3: Mix Dry Ingredients
In a large mixing bowl, combine the crushed Oreos, rolled oats, and vanilla protein powder. Use a spoon or spatula to mix the dry ingredients thoroughly, ensuring that everything is evenly distributed. This mixture will serve as the foundation for your No-Bake Oreo Protein Balls, so take your time to blend well.
Step 4: Add Wet Ingredients
Next, pour in the almond butter, honey (or maple syrup), and a splash of vanilla extract into the dry mixture. Stir gently until all the wet ingredients are well incorporated, creating a sticky, cohesive mixture. The almond butter will help bind everything together, making it easier to form the balls in the next step.
Step 5: Combine Mixture
Continue to mix until every bit of the dry ingredients is moistened and the mixture looks uniform. If you’re adding mini chocolate chips, fold them in gently now. The mixture should be sticky enough to hold together but not overly wet; if too dry, add a touch of almond butter or maple syrup to achieve the right consistency.
Step 6: Form Balls
With clean hands, scoop out small portions of the mixture and roll them into bite-sized balls, approximately 1 inch in diameter. Arrange the formed balls on a baking sheet lined with parchment paper. Make sure to keep a little space between them to prevent sticking; you should be able to make about 12 to 15 balls depending on the size.
Step 7: Chill
Once shaped, place the baking sheet in the refrigerator and chill for at least 30 minutes. This cooling period allows the No-Bake Oreo Protein Balls to firm up, making them easier to handle and enhancing their chewy texture. When they’re ready, they should feel firm to the touch and slightly cold.
Step 8: Store
After chilling, transfer the protein balls to an airtight container. They can be stored in the fridge for up to a week, perfect for snacking throughout the week. For longer freshness, consider freezing them; they will last for up to three months and be ready to enjoy anytime you crave a sweet energy boost!

How to Store and Freeze No-Bake Oreo Protein Balls
Fridge: Keep your protein balls in an airtight container; they’ll stay fresh for up to 1 week.
Freezer: For long-term storage, place them in a freezer-safe container or bag; they can last up to 3 months without losing their delicious flavor.
Reheating: Simply let the frozen protein balls thaw in the fridge overnight before enjoying them, or pop them in the microwave for just a few seconds for a quick treat.
Wrapping: If stacking in a container, separate layers with parchment paper to prevent them from sticking together.
Make Ahead Options
These Easy No-Bake Oreo Protein Balls are a fantastic recipe for those looking to streamline their meal prep! You can mix the dry ingredients (crushed Oreos, rolled oats, and protein powder) and store them in an airtight container for up to 3 days. If you’re ready to assemble, simply add the wet ingredients (almond butter, honey, and vanilla extract), roll into balls, and chill for at least 30 minutes before serving. To maintain the delicious taste and chewy texture, ensure they are tightly sealed in the fridge or freeze them for longer storage of up to 3 months. Just pop them in the fridge overnight before enjoying for a quick, guilt-free snack!
What to Serve with Easy Oreo Protein Balls
Get ready to elevate your snacking experience with the perfect pairings for these delightful energy bites!
- Fresh Fruit Platter: Bright, juicy fruits like strawberries and bananas provide a refreshing contrast to the sweet, chewy protein balls.
- Creamy Yogurt Dip: A dollop of Greek yogurt, blended with honey, makes a deliciously creamy companion to your treats. Swirl it in for added richness!
- Nutty Trail Mix: A crunchy blend of nuts and seeds adds an exciting texture that complements the soft, chewy bites beautifully. The contrast will surprise your taste buds!
- Smoothie Bowl: Serve with a vibrant smoothie bowl topped with granola and sliced fruits for a nutritious breakfast option; balance is key!
- Nut Butter Spread: Pair with a scoop of almond or peanut butter for extra protein—an energizing duo for anyone on the go.
- Cold Glass of Milk: Enjoy with a cold glass of milk—an iconic classic that makes every bite of the protein balls even more satisfying.
- Chocolate Milkshake: For those indulgent moments, a thick chocolate milkshake takes your snacking game up a notch; sweetness in every sip!
- Homemade Granola Bars: Pairing with granola bars brings a fulfilling crunch to your snack-time routine; a delicious mix of flavors and textures!
- Coconut Macaroons: These sweet, chewy bites can elevate your dessert game, balancing the richness of the Oreo flavors with a touch of coconut bliss.
- Chilled Herbal Tea: Refresh with a glass of iced herbal tea; it’s soothing and light, the perfect partner to your protein powerhouses.
Expert Tips for No-Bake Oreo Protein Balls
Crush Carefully: Use a food processor for the finest crumbs; uneven pieces can affect the texture of your no-bake Oreo protein balls.
Adjust Consistency: If your mixture feels too dry, try adding more almond butter or a splash of water. Conversely, if it’s too wet, incorporate more oats.
Chill Time Matters: Don’t skip the chilling step! It’s crucial for binding and achieving the perfect chewy texture in your protein balls.
Handy Helpers: Wet your hands slightly when rolling the balls. This makes handling the sticky mixture much easier!
Mix-In Variations: Experiment with different nut butters or mix-ins, like dried fruits or seeds, to make your no-bake Oreo protein balls uniquely yours.
No-Bake Oreo Protein Balls Variations
Feel free to get creative and personalize your No-Bake Oreo Protein Balls with these delightful variations!
-
Nut Butter Options: Swap almond butter for peanut butter or sun butter for a different flavor twist. Each nut butter brings its unique richness that can entirely change the taste profile!
-
Sweetener Alternatives: Use agave syrup instead of honey or maple syrup for a vegan-friendly option that’s seamlessly sweet.
-
Flavor Boost: Add a dash of cinnamon or a pinch of sea salt to enhance the overall flavor—these small changes can make a big difference in taste!
-
Dried Fruit Addition: Mix in chopped dried fruits like cranberries or apricots for added sweetness and texture. These additions make the protein balls even more satisfying and nutritious.
-
Chocolate Variations: Experiment with different types of chocolate chips—dark chocolate for a richer taste or white chocolate for creaminess. Each type can add a new layer of indulgence!
-
Protein Powder Swaps: Utilize flavored protein powder, like chocolate or cookies and cream, for an extra punch of flavor that complements the Oreo base.
-
Coconut Flakes: Stir in unsweetened coconut flakes for a tropical twist that adds both flavor and a delightful chewiness to your protein balls.
-
Miniature Twists: For a fun presentation, roll the protein balls in finely crushed Oreos or colorful sprinkles before chilling, adding a playful touch that’s perfect for kids and parties!
By incorporating these variations into your No-Bake Oreo Protein Balls, you’ll continue to enjoy new flavors and textures that keep snack time exciting! For another great way to add protein to your snacks, check out my Blueberry Cheesecake Protein. Enjoy your culinary adventure!
No-Bake Oreo Protein Balls Recipe FAQs
How do I choose ripe ingredients for this recipe?
When it comes to selecting your ingredients, focus on the freshness of your nut butter and sweeteners. Opt for almond butter with no added sugars, and look for honey or maple syrup that is pure. If using chocolate sandwich cookies, ensure they aren’t stale by checking for crispness and no visible spoilage.
How should I store No-Bake Oreo Protein Balls, and how long will they last?
Once your No-Bake Oreo Protein Balls are formed and chilled, transfer them to an airtight container. They can be kept in the fridge for up to a week, making them perfect for healthy snacking throughout the week. Just remember to keep them sealed tightly to maintain their freshness!
Can I freeze these protein balls, and how do I do it?
Absolutely! For long-term storage, place your protein balls in a freezer-safe container or a resealable plastic bag. Be sure to separate layers with parchment paper to prevent sticking. They can be frozen for up to three months! To enjoy, simply thaw them overnight in the refrigerator or heat them briefly in the microwave.
What should I do if my mixture seems too dry or too wet?
If your dough feels too dry, don’t worry! Just add a little more almond butter or a splash of water, stirring until you achieve the desired consistency. On the flip side, if your mixture is too wet, you can incorporate a bit more rolled oats until it holds together well. It’s all about finding that perfect balance!
Are there any allergies I should consider when making these protein balls?
It’s essential to be mindful of allergies when preparing these No-Bake Oreo Protein Balls. If you’re making them for kids or friends, check for nut allergies, as almond butter or peanut butter may not be suitable for everyone. You can easily substitute these nut butters with sunflower seed butter for a nut-free version!
Can I customize my protein balls to fit dietary needs?
Absolutely! The beauty of these No-Bake Oreo Protein Balls is their adaptability. You can swap in gluten-free oats, use a vegan protein powder, and replace honey with agave syrup for a completely vegan-friendly treat. Feel free to mix in your favorite seeds or dried fruits to enhance the nutritional profile further!
No-Bake Oreo Protein Balls for Guilt-Free Snacking Bliss
Ingredients
Equipment
Method
- Prepare Ingredients: Gather all ingredients including crushed Oreo cookies, rolled oats, protein powder, almond butter, honey (or maple syrup), and optional mini chocolate chips. Have measuring cups ready.
- Crush Oreos: Finely crush the Oreo cookies using a food processor or zip-top bag and rolling pin until you reach a crumb-like consistency.
- Mix Dry Ingredients: In a large mixing bowl, combine the crushed Oreos, rolled oats, and vanilla protein powder. Mix thoroughly.
- Add Wet Ingredients: Pour in almond butter, honey (or maple syrup), and vanilla extract. Stir gently until well mixed.
- Combine Mixture: Mix until all dry ingredients are moistened. Fold in mini chocolate chips if using.
- Form Balls: Roll the mixture into bite-sized balls, approximately 1 inch in diameter, and place on parchment-lined baking sheet.
- Chill: Refrigerate the baking sheet for at least 30 minutes to firm up the balls.
- Store: Transfer protein balls to an airtight container. They can be stored in the fridge for up to a week or frozen for up to three months.
Leave a Reply