
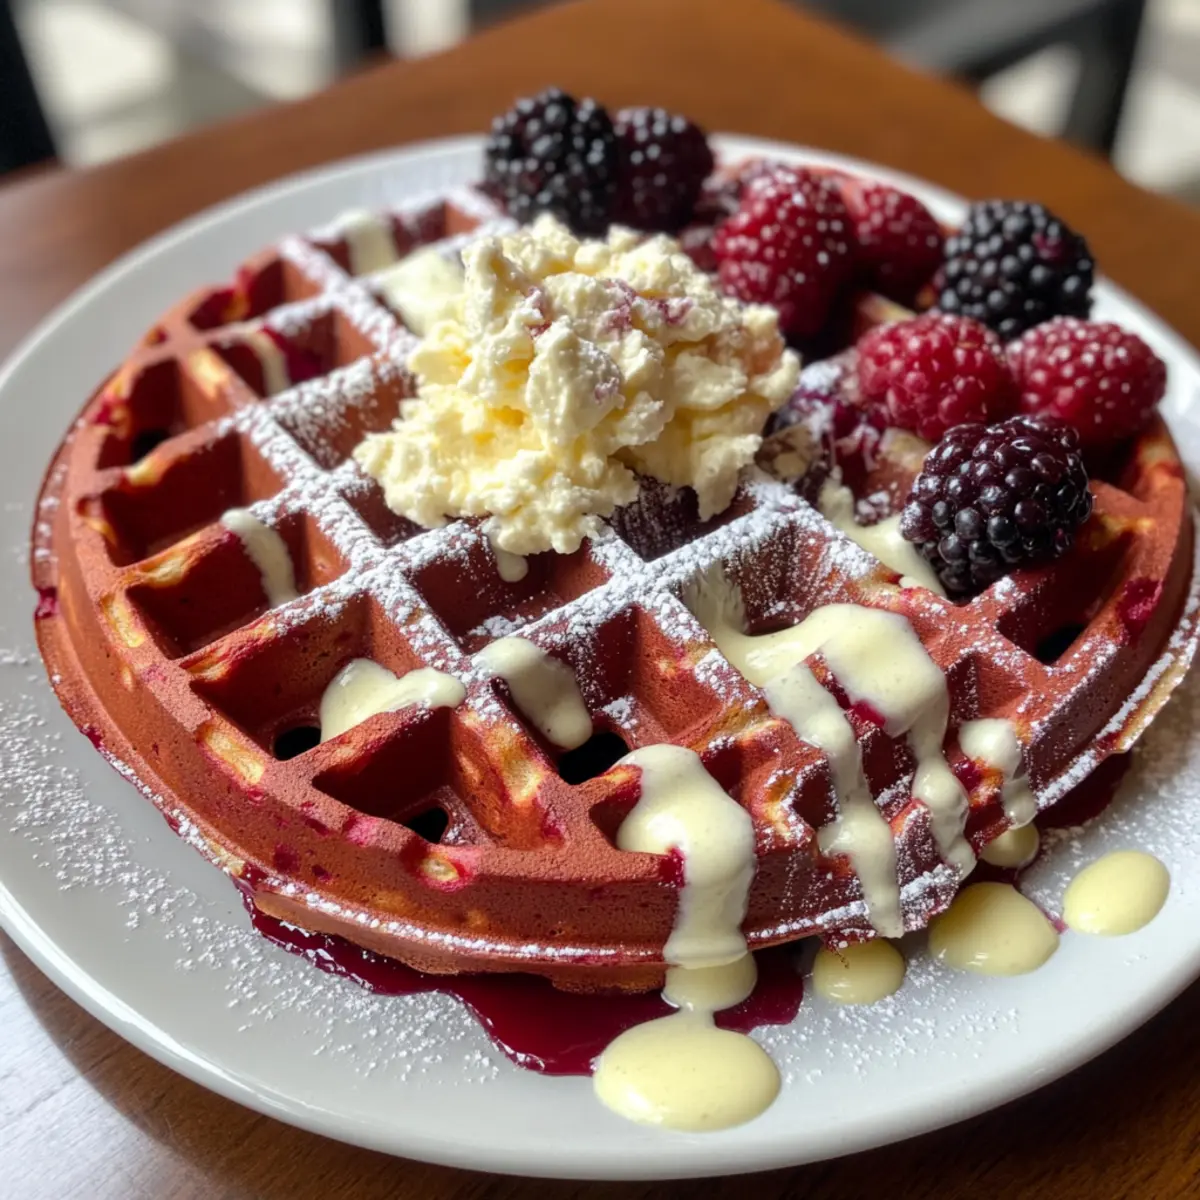
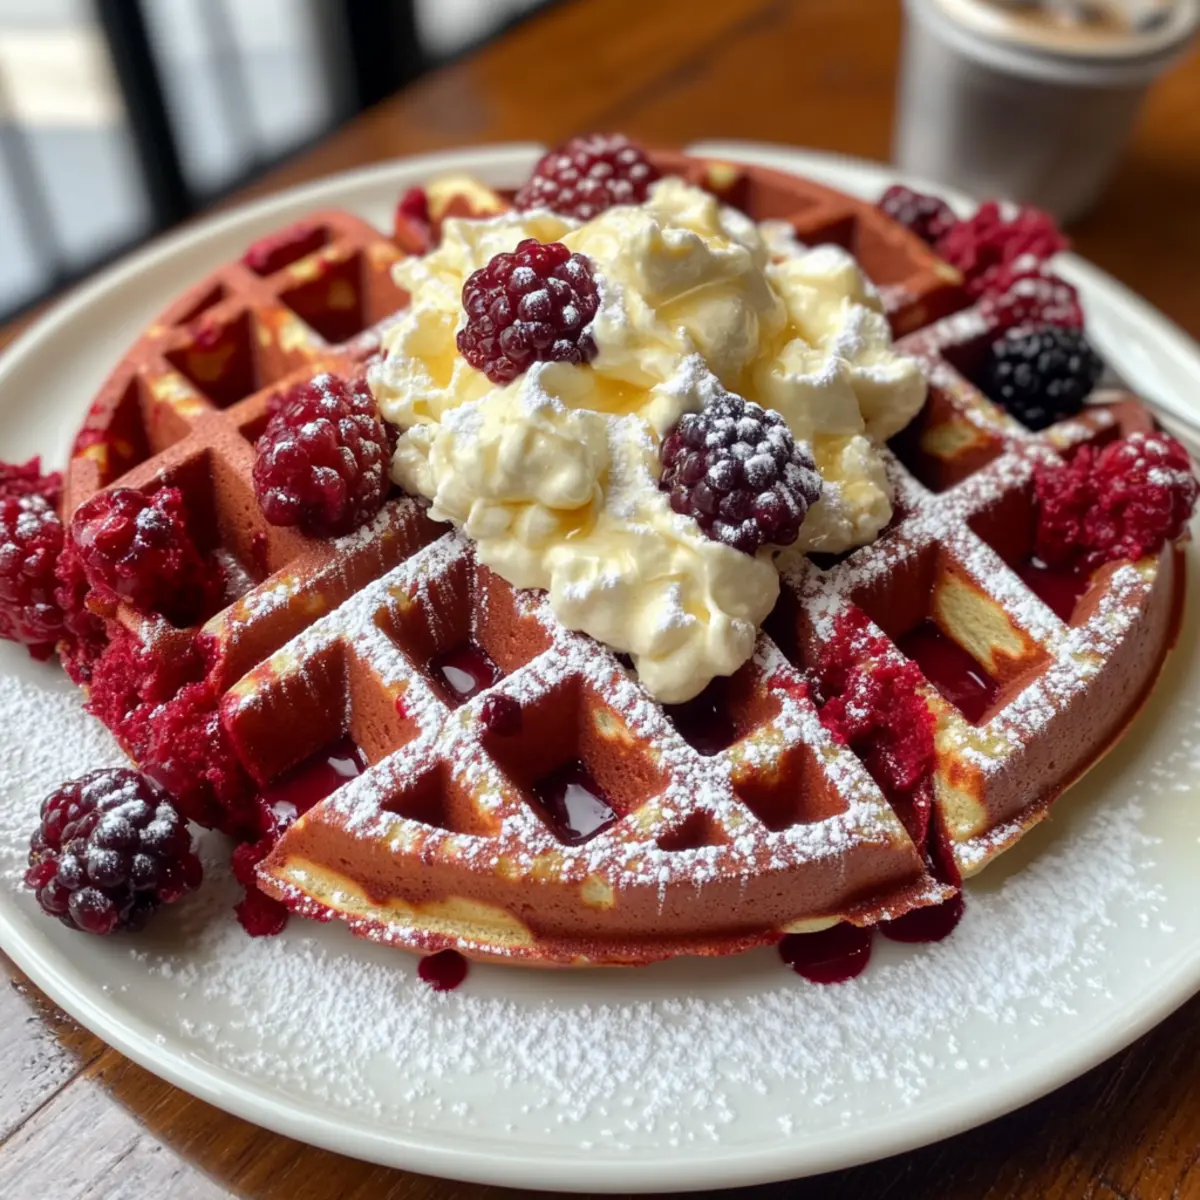
“What’s for brunch?” The simple question echoed in my kitchen as I stared at the usual spread of toast and fruit, feeling uninspired. Then inspiration struck: why not elevate our morning routine with something vibrant and indulgent? Enter the Decadent Red Velvet Waffles! Picture soft, fluffy waffles with a striking crimson hue, perfect for any brunch gathering or a romantic breakfast in bed. Not only do they provide a fun twist on the traditional waffle, but they also come together quickly, allowing you to serve up something special without the stress of a complex recipe. Drizzled with a creamy glaze, these delightful waffles are sure to impress anyone lucky enough to share the table. Ready to add a splash of color and joy to your brunch routine? Let’s dive in!
Why Red Velvet Waffles Stand Out?
Vibrant Color: These eye-catching crimson waffles will brighten up your brunch table and make for stunning Instagram photos.
Quick & Easy: With just a few simple steps, you can whip up these delightful treats in no time, making them perfect for busy mornings or last-minute brunch plans.
Rich Flavor: The combination of cocoa and vanilla creates a sweet, buttery flavor that transforms breakfast into a treat.
Creamy Drizzle: Topping with a luscious cream cheese glaze elevates the taste experience, ensuring every bite is superbly satisfying.
Versatile: Pair these waffles with fresh berries, powdered sugar, or even a scoop of ice cream for a fun dessert twist.
Perfect for Sharing: Great for brunch gatherings or a romantic breakfast in bed, these fluffy waffles are guaranteed to impress your family and friends! Want more brunch inspiration? Check out my fantastic brunch recipes.
Red Velvet Waffles Ingredients
For the Waffle Batter
• All-Purpose Flour – Provides structure and a tender bite; can be substituted with a 1:1 gluten-free flour blend.
• Whole Milk – Adds moisture and richness.
• Buttermilk – Contributes acidity for flavor and tenderness; substitute with a mix of yogurt and milk for a similar effect.
• Granulated Sugar – Sweetens the batter for that perfect hint of sweetness.
• Baking Powder – Acts as a leavening agent for fluffy waffles.
• Salt – Enhances and balances the overall flavor.
• Unsweetened Cocoa Powder – Infuses a subtle chocolate flavor into the batter.
• Large Eggs – Adds lift and moisture to keep the waffles fluffy.
• Melted Unsalted Butter – Provides richness and a moist crumb to each waffle.
• Vanilla Extract – Adds depth and enhances the flavor profile of the waffles.
For the Cream Cheese Glaze
• Cream Cheese – Basis for the glaze; creates creaminess and a delightful tang.
• Powdered Sugar – Sweetens the glaze, ensuring a smooth consistency.
• Heavy Cream – Adjusts the glaze’s consistency for easy drizzling over the waffles.
These Red Velvet Waffles are bound to be the star of your brunch, bringing joy to both your taste buds and your table!
Step‑by‑Step Instructions for Decadent Red Velvet Waffles
Step 1: Preheat the Waffle Iron
Begin by preheating your waffle iron to 375°F, ensuring it reaches the perfect temperature for cooking the waffles. This step is crucial for achieving that beautiful golden brown color and crisp texture on the outside. While the waffle iron heats up, gather your ingredients and prepare your mixing bowls for the batter.
Step 2: Combine Dry Ingredients
In a large mixing bowl, sift together 2 cups of all-purpose flour, 2 tablespoons of baking powder, 1 tablespoon of unsweetened cocoa powder, and a pinch of salt. This sifting process helps to aerate the flour, creating a lighter batter. Mix well until all dry ingredients are evenly combined, and set the bowl aside for the next step.
Step 3: Mix Wet Ingredients
In a separate bowl, whisk together 2 large eggs, 1 cup of whole milk, 1 cup of buttermilk, 1/2 cup of melted unsalted butter, and 2 teaspoons of vanilla extract until fully emulsified and uniform in texture. The mixture should appear creamy and smooth, which will ensure a rich flavor in your Decadent Red Velvet Waffles.
Step 4: Combine Wet and Dry Mixtures
Gently pour the wet ingredients into the bowl of dry ingredients. Stir with a spatula until just combined, being careful not to overmix—small lumps are perfectly fine. This gentle folding helps maintain the waffles’ fluffy texture, which is key to enjoying the richness of these red velvet delights.
Step 5: Cook the Waffles
Carefully ladle equal portions of the waffle batter into the preheated waffle iron. Close the lid and cook for approximately 2-3 minutes or until the waffles turn a vibrant red and form a crispy exterior. Keep an eye on them; they should release easily from the iron and be golden brown on the outside, ready to enjoy!
Step 6: Prepare the Cream Cheese Glaze
As the waffles cook, prepare your creamy glaze. In a mixing bowl, beat together 4 ounces of cream cheese, 1 cup of powdered sugar, and 2-3 tablespoons of heavy cream. Mix until the glaze is smooth and has a pourable consistency. If the mixture is too thick, add a little more heavy cream until you achieve your desired consistency for drizzling.
Step 7: Drizzle and Serve
Once the waffles are cooked, serve them immediately, drizzling the cream cheese glaze generously over the top. For an extra touch, consider topping your Decadent Red Velvet Waffles with fresh berries or a light dusting of powdered sugar. This delicious assembly not only enhances the flavor but also makes it a beautiful centerpiece for your brunch table.
Expert Tips for Red Velvet Waffles
-
Preheat Properly: Ensure your waffle iron is fully preheated to 375°F. This is vital for achieving that perfect golden brown, crispy exterior.
-
Don’t Overmix: When combining wet and dry ingredients, mix until just combined. A few lumps are fine; overmixing can lead to dense waffles.
-
Chill for Flavor: For a deeper flavor, chill your batter in the fridge for up to 8 hours before cooking. However, avoid exceeding 12 hours to prevent separation.
-
Check Doneness: Keep an eye on the cooking time; 2-3 minutes usually does the trick. The waffles should be easy to remove from the iron and golden brown.
-
Adjust Glaze Consistency: If your cream cheese glaze is too thick, add more heavy cream a teaspoon at a time until you reach a smooth, drizzle-friendly consistency.
-
Store Wisely: If you have leftover Red Velvet Waffles, store them in an airtight container at room temperature for up to 2 days to maintain their freshness.
Red Velvet Waffles Variations & Substitutions
Feel free to unleash your creativity and customize these delightful waffles to perfectly suit your taste preferences!
-
Gluten-Free: Substitute all-purpose flour with a 1:1 gluten-free flour blend for a gluten-friendly option. These fluffy treats can be enjoyed by everyone!
-
Dairy-Free: Use almond milk and a dairy-free butter replacement to create a decadent, dairy-free version. You won’t miss the milk one bit!
-
Nutty Delight: Stir in 1/2 cup of chopped pecans or walnuts to the batter for a delightful crunchy texture that pairs beautifully with the soft waffles.
-
Chocolate Lovers’ Twist: Add 1/2 cup of chocolate chips directly into the batter for an indulgent, triple-chocolate experience. Every bite will be a sweet surprise!
-
Zesty Glaze: Mix in 1 teaspoon of fresh lemon or orange zest into the cream cheese glaze to add a refreshing citrus note that brightens the flavor profile.
-
Spicy Option: For a kick, add a pinch of cayenne pepper or a dash of cinnamon to the batter to create a warm, spicy surprise.
-
Berry Boost: Top your waffles with fresh berries like strawberries or raspberries for an extra burst of flavor and a pop of color on your plate.
-
Whipped Cream: Swap the cream cheese glaze for homemade whipped cream for light and airy toppings that perfectly balances the richness of the waffles.
Feel free to explore these variations to make your Red Velvet Waffles a unique treat at every brunch! And if you’re looking for even more delicious ideas, check out my fabulous brunch recipes to spice up your mornings!
How to Store and Freeze Red Velvet Waffles
Room Temperature: Store leftover waffles in an airtight container at room temperature for up to 2 days to keep them fresh and delicious.
Fridge: If you want to extend their shelf life, refrigerate the waffles in an airtight container for up to 4 days. Just reheat them in a toaster or microwave before serving.
Freezer: For longer storage, freeze the waffles layered with parchment paper in between them. Seal in a freezer-safe bag or container, and they’ll keep well for up to 2 months.
Reheating: Whenever you’re ready to enjoy your Red Velvet Waffles, reheat from frozen in a toaster or oven until warmed through and crisp on the outside.
Make Ahead Options
These Decadent Red Velvet Waffles are perfect for busy home cooks looking to simplify their brunch routine! You can prepare the waffle batter up to 24 hours in advance—just mix all the dry ingredients and store them separately from the wet ingredients until you’re ready to cook. This keeps the batter fresh and fluffy. Additionally, you can whip up the cream cheese glaze and refrigerate it for up to 3 days. When you’re ready to serve, simply combine the wet and dry ingredients, cook the waffles in your preheated waffle iron, and drizzle the glaze on top right before serving. Following these make-ahead tips ensures you’ll have a vibrant and delicious brunch option without the last-minute rush!
What to Serve with Decadent Red Velvet Waffles
Indulge in a feast of flavors and colors that perfectly complement these charming crimson delights.
-
Fresh Berries: The natural sweetness and tartness of strawberries, raspberries, or blueberries enhance the waffles’ rich flavor while adding a vibrant pop of color.
-
Crispy Bacon: The salty crunch of bacon creates a delightful contrast, balancing the sweetness of the waffles for a harmonious brunch experience.
-
Whipped Cream: Light and airy, a dollop of homemade whipped cream on top adds a decadent touch that perfectly complements the cream cheese glaze.
-
Maple Syrup: Drizzle some warm maple syrup over the waffles for a classic flavor pairing that adds a sweet yet earthy note.
-
Butter Pecan Ice Cream: Transform brunch into dessert! A scoop of ice cream creates an indulgent twist that takes your waffles to the next level of decadence.
-
Mimosa: Toast to your special brunch with a refreshing mimosa, combining orange juice and champagne for a bubbly, citrusy treat that complements the sweetness of the waffles.

Red Velvet Waffles Recipe FAQs
What is the best way to select ripe ingredients for Red Velvet Waffles?
Absolutely! Choosing quality ingredients makes a world of difference. For the best results, select fresh eggs with uncracked shells, ideally from a local source. Look for buttermilk that has a creamy consistency without any lumps. Your cocoa powder should be fresh—check the expiration date—or use a high-quality brand for richer flavor. Also, opt for all-purpose flour that feels light and airy; avoid any that feels dense or clumpy.
How should I store leftover Red Velvet Waffles?
You can store your leftover waffles in an airtight container at room temperature for up to 2 days. If you want to keep them fresher for longer, transfer them to the refrigerator, and they’ll last up to 4 days. Just be sure to reheat them in a toaster or microwave before enjoying again for the best taste and texture!
Can I freeze Red Velvet Waffles, and how do I do it?
Yes, you can absolutely freeze them! To do this, first cool the waffles completely. Then layer them with parchment paper in between and place them in a freezer-safe bag or container. They will stay delicious for up to 2 months. When you’re ready to eat, just reheat them from frozen in a toaster or oven until they are warmed through and crispy.
What should I do if my waffle batter is too thick?
If your batter feels too thick and isn’t pouring easily into the waffle iron, don’t worry! Just add a bit more buttermilk or whole milk—start with a tablespoon at a time—until you reach your desired consistency. Remember, it’s okay if the batter is slightly lumpy; overmixing can lead to dense waffles.
Are Red Velvet Waffles suitable for those with allergies?
These delightful waffles are vegetarian-friendly, but if you or your guests have specific allergies, be sure to modify the recipe! For lactose intolerance, you can substitute the buttermilk with a non-dairy milk mixed with vinegar as a replacement. Be mindful of gluten if needed; a 1:1 gluten-free flour blend works wonderfully in place of all-purpose flour. Just ensure any substitutions are safe for the specific allergies you’re considering.
What can I use as a vegetarian-friendly alternative to eggs in the Red Velvet Waffles?
No problem! You can substitute each egg with a mixture of 1/4 cup of unsweetened applesauce or a “flax egg” (1 tablespoon ground flaxseed mixed with 2.5 tablespoons water, let sit for 5 minutes). Both options will contribute moisture and binding to the batter, ensuring your waffles remain fluffy and delicious.

Red Velvet Waffles for a Sweet Romantic Brunch Experience
Ingredients
Equipment
Method
- Preheat your waffle iron to 375°F.
- In a large bowl, sift together the dry ingredients: flour, baking powder, cocoa powder, and salt.
- In another bowl, whisk the wet ingredients: eggs, whole milk, buttermilk, melted butter, and vanilla until smooth.
- Combine the wet and dry mixtures gently until just combined.
- Ladle the batter into the preheated waffle iron and cook for 2-3 minutes until crispy and golden brown.
- Prepare the cream cheese glaze by mixing the cream cheese, powdered sugar, and heavy cream until smooth.
- Drizzle the glaze over the cooked waffles and serve immediately.
Leave a Reply