
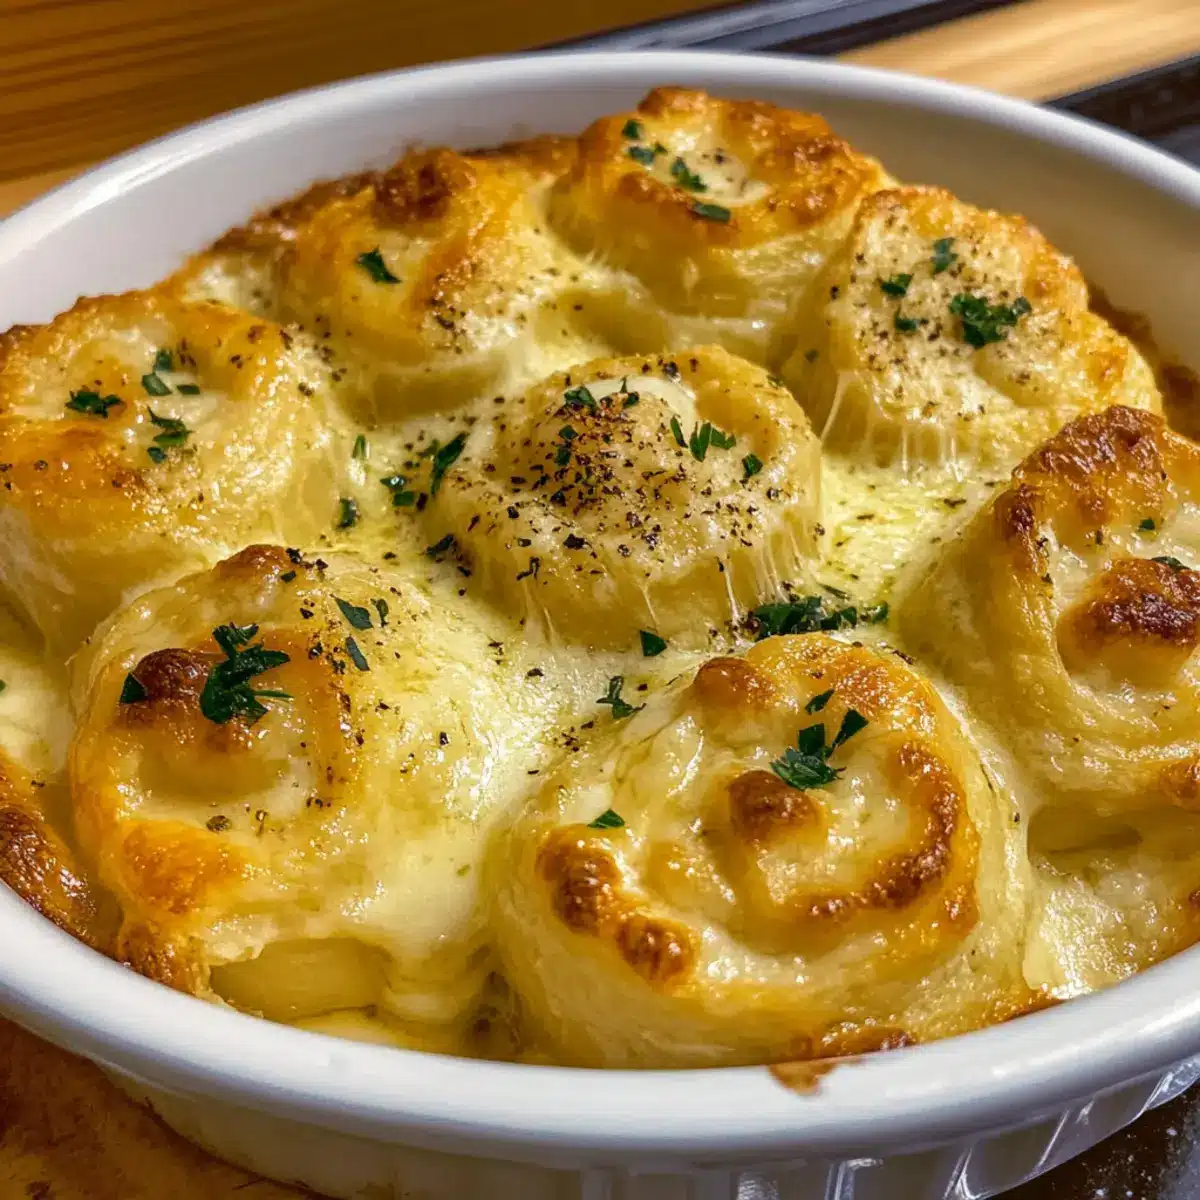
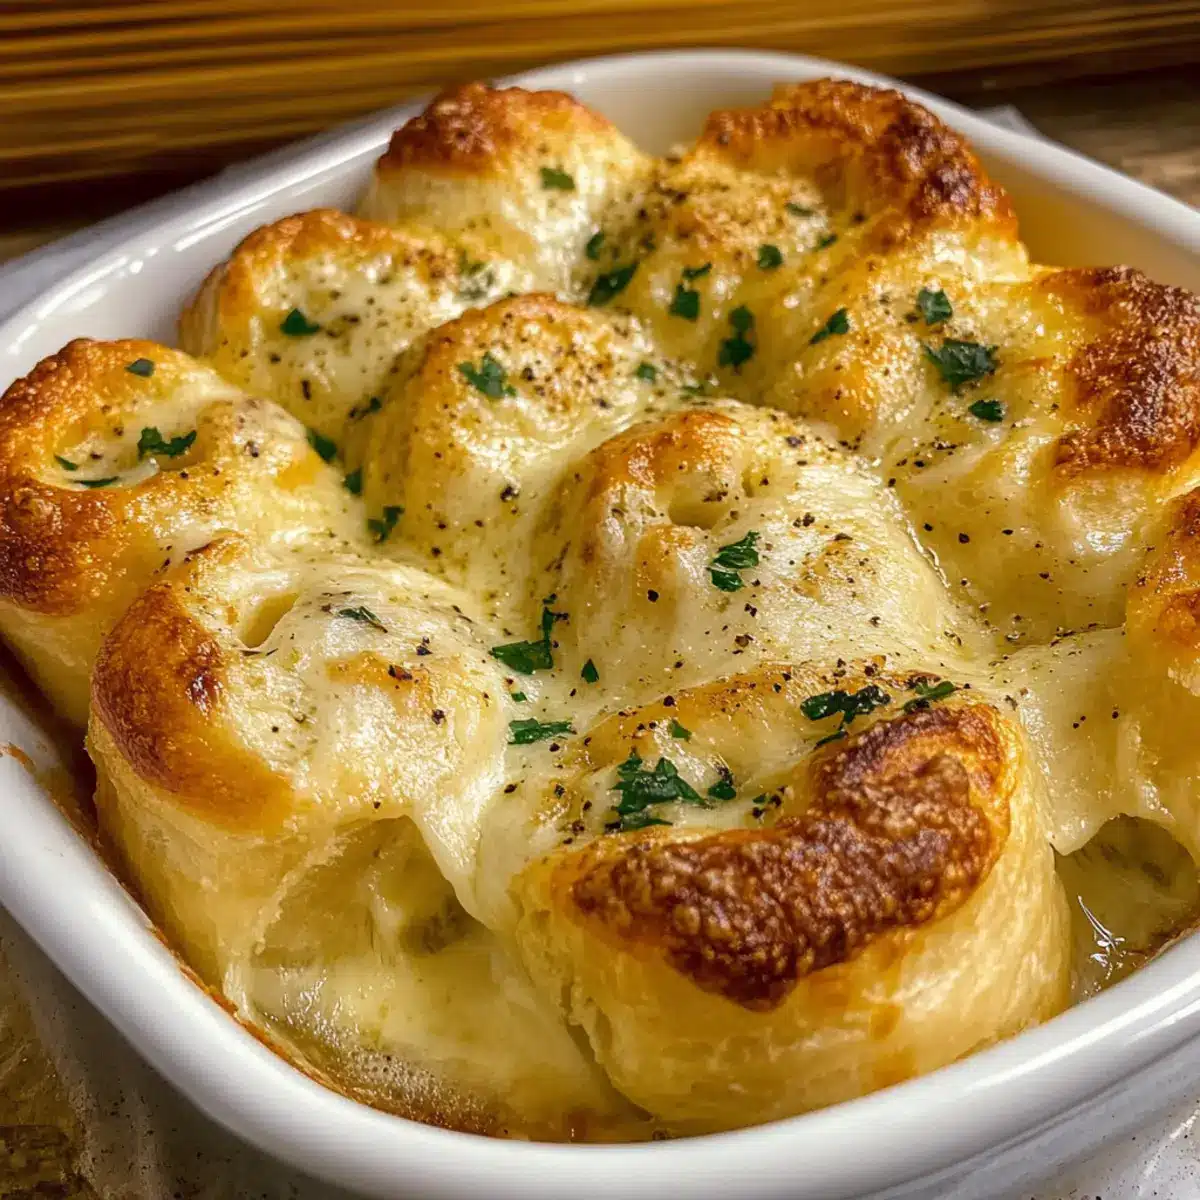
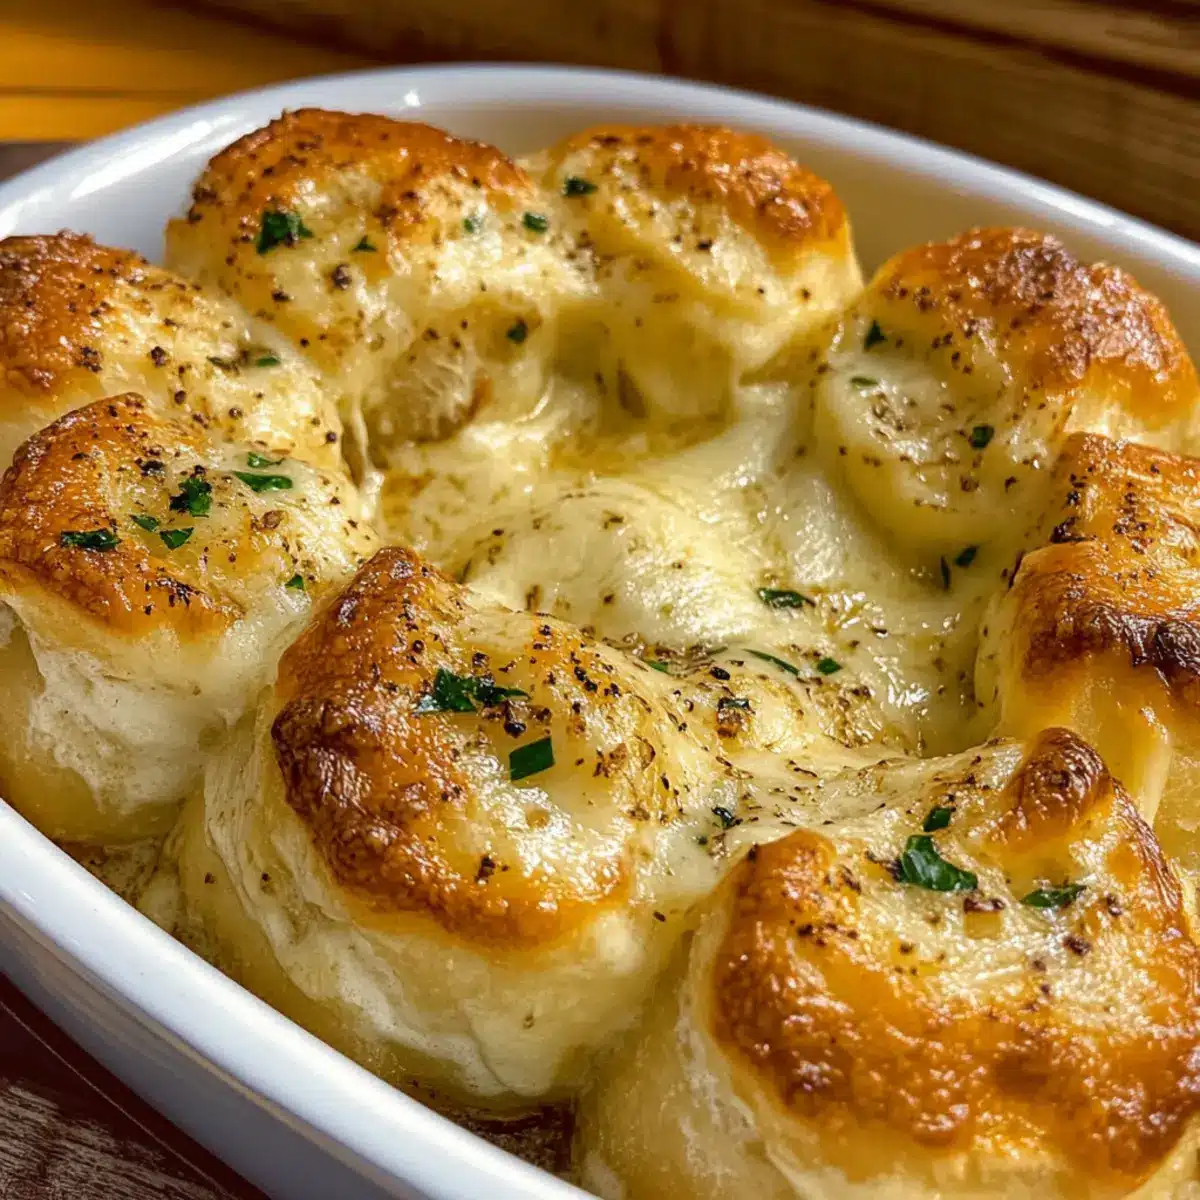
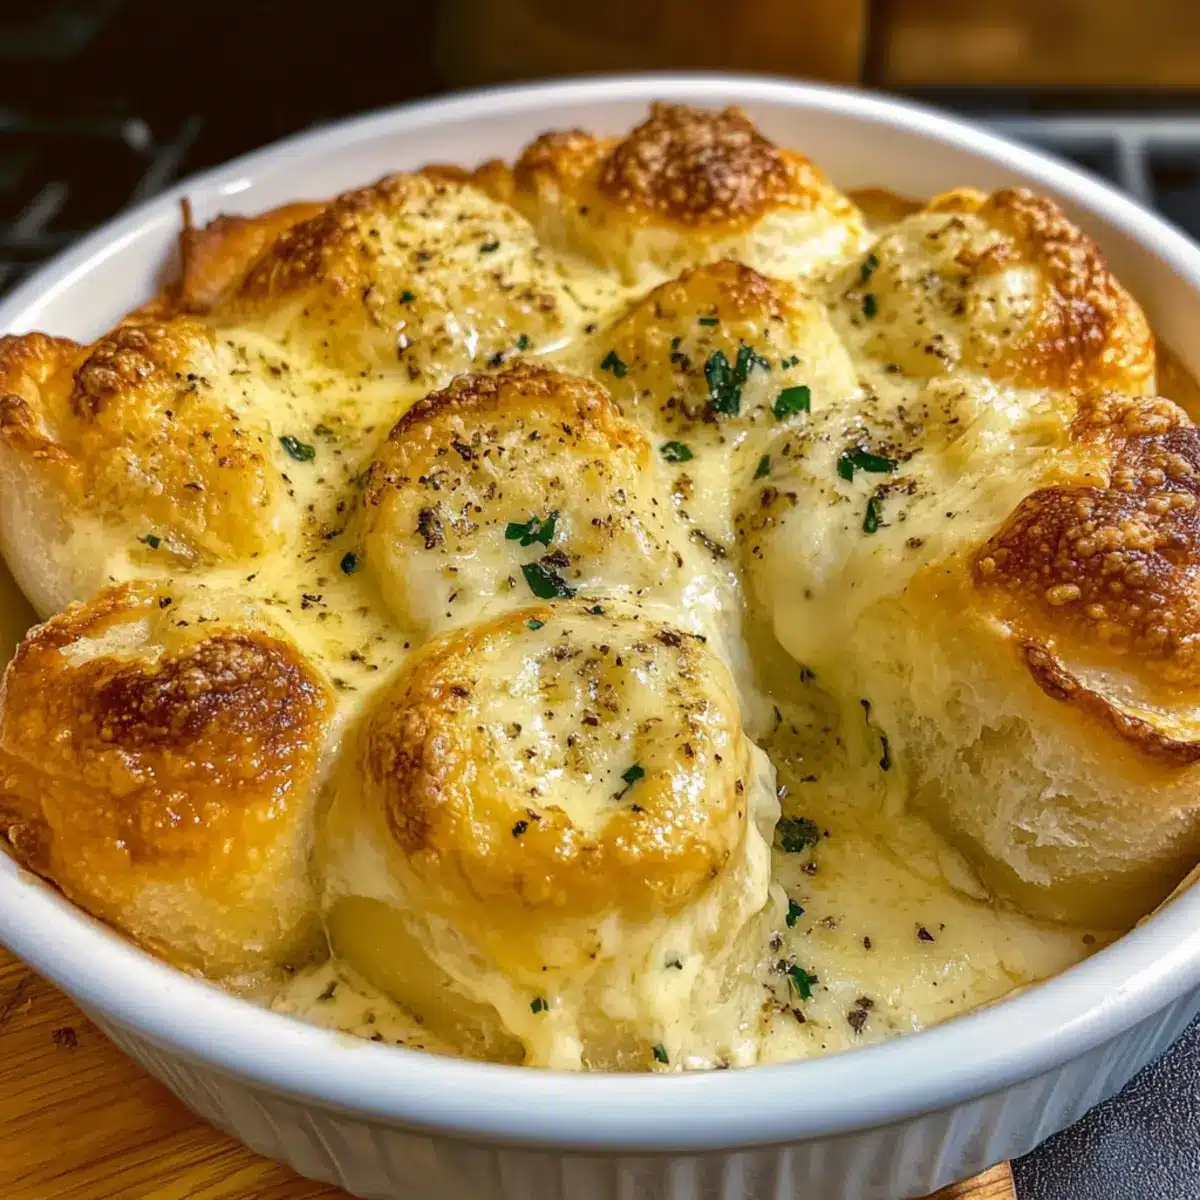
As the oven timer ticks down, the tantalizing aroma of garlic and melting cheese fills my kitchen, drawing everyone closer. It’s a moment I cherish, bringing family and friends together for a shared love of comfort food that wraps you in warmth. Today, I’m excited to share my recipe for Cheesy Garlic Butter Rollups—a delightful combination of crispy, golden dough and gooey, melted cheese, ideal for any occasion. These rollups are not only simple to prepare—perfect for busy weeknights—but they’re also incredibly versatile, allowing for endless customizations to suit your taste. From cheesy snacks to savory appetizers, these little bites will surely become a favorite. Curious to see just how easy it is to indulge in their cheesy goodness? Let’s dive into the recipe!
Why Are Cheesy Garlic Butter Rollups Irresistible?
Irresistible Comfort: These rollups combine crispy, golden dough with gooey, melted cheese, creating a comforting dish that is sure to satisfy any craving.
Easily Customizable: Feel free to add your favorite ingredients like sautéed spinach or spicy jalapeños for a personal twist!
Perfect for Sharing: Whether it’s game day or a family gathering, these tasty bites are a crowd-pleaser that everyone will love. Pair them with marinara sauce for an extra kick!
Quick & Simple: With only a handful of ingredients, this recipe is simple enough for even beginner cooks and busy weeknights.
Mouthwatering Aroma: As they bake, the rich scent of garlic and cheese will fill your home, making it hard to resist sneaking a taste before they’re even ready.
Make sure to save any leftovers, as these rollups can be stored and reheated easily—perfect for snacks throughout the week! For more cheesy variations, check out my recipes for Cheesy Garlic Cruffin or Garlic Parmesan Cheeseburger.
Cheesy Garlic Butter Rollups Ingredients
For the Rollups
• Refrigerated pizza dough or homemade dough – The base of the rollups; use what’s convenient for you!
• Butter (3 tablespoons, melted) – Adds richness and moisture; substitute with olive oil for a lighter option.
• Garlic (4 cloves, minced & 1 teaspoon garlic powder) – Provides a robust garlic flavor; adjust quantities for a milder taste.
• Italian seasoning (1 teaspoon) – Enhances flavor with herby notes; feel free to mix in dried basil, oregano, and thyme instead.
• Mozzarella cheese (2 cups, shredded) – Creates that gooey, stretchy center; swap for provolone for a different flavor profile.
• Cheddar cheese (½ cup, shredded) – Adds a sharp flavor; any preferred cheese can work here!
• Parmesan cheese (2 tablespoons, grated) – Offers a savory, nutty flavor for depth.
• Chopped parsley (2 tablespoons) – For a touch of freshness and color; optional, but it brightens up the rollups!
• Black pepper (¼ teaspoon) – Adds a hint of heat; increase for a bit of spiciness.
• Olive oil (1 tablespoon) – This enhances richness and flavor in the rollups.
This delightful recipe for Cheesy Garlic Butter Rollups is just a few ingredients away! Get ready to create a comforting dish that you’ll crave daily.
Step‑by‑Step Instructions for Cheesy Garlic Butter Rollups
Step 1: Preheat the Oven
Begin by preheating your oven to 375°F (190°C). While the oven warms up, line a baking sheet with parchment paper to ensure your Cheesy Garlic Butter Rollups bake evenly and don’t stick. This step is crucial for achieving that perfect golden crispiness!
Step 2: Prepare the Garlic Butter
In a medium mixing bowl, combine 3 tablespoons of melted butter, 4 minced garlic cloves, 1 teaspoon of garlic powder, 1 teaspoon of Italian seasoning, and ¼ teaspoon of black pepper. Stir in 1 tablespoon of olive oil to the mixture for extra richness. This garlicky blend will be brushed onto the dough, adding fantastic flavor to your rollups.
Step 3: Prepare the Dough
Flour a clean surface lightly and roll out your refrigerated pizza dough into a rectangle about ¼-inch thick. Use a rolling pin to ensure an even thickness; this will create a base that supports the cheesy fillings. Visualize the dough looking smooth and slightly elastic before you begin assembling your rollups.
Step 4: Assemble the Rollups
Once your dough is prepared, brush a generous amount of the garlic butter mixture over the surface. Then, layer 2 cups of shredded mozzarella cheese, ½ cup of shredded cheddar cheese, and 2 tablespoons of grated Parmesan cheese evenly across the dough. Optionally sprinkle 2 tablespoons of chopped parsley for a pop of color and flavor before rolling it tightly from one long side.
Step 5: Cut and Arrange
Carefully slice the roll into 8 equal pieces using a sharp knife or pizza cutter. This way, each Cheesy Garlic Butter Rollup will bake evenly. Place the slices cut-side up on your prepared baking sheet, making sure they’re spaced apart to allow for a little expansion while baking—this ensures a nice golden crust on each piece.
Step 6: Bake the Rollups
Slide the baking sheet into your preheated oven and bake the rollups for 18 to 20 minutes. You’ll know they’re ready when the tops are beautifully golden brown and the cheese is bubbling out. The enticing aroma of garlic and cheese will fill your kitchen, making it hard to wait!
Step 7: Cool and Serve
After baking, allow the Cheesy Garlic Butter Rollups to cool for a few minutes on the baking sheet. This resting time helps them set and makes them easier to handle. Serve them warm, and don’t forget to brush them with any leftover garlic butter for that extra dash of flavor before enjoying!
What to Serve with Cheesy Garlic Butter Rollups
Transform your rollups into a delightful meal by pairing them with flavors and textures that elevate the dining experience!
-
Marinara Sauce: A zesty dip that perfectly complements the cheesy richness, adding a burst of fresh tomato flavor. Ideal for a game-day snack!
-
Caesar Salad: Crisp romaine, tangy dressing, and crunchy croutons bring a refreshing contrast to the warm, gooey rollups. A classic pairing that balances flavors beautifully.
-
Creamy Alfredo Sauce: For a decadent option, drizzle this rich sauce over your rollups—imagine each bite enveloped in velvety creaminess!
-
Roasted Vegetables: Caramelized seasonal veggies add a sweet and earthy element, providing a delightful texture contrast and a healthier touch to your meal.
-
Garlic Aioli: This creamy, garlicky dip takes the flavor up a notch. Serve it on the side for an extra punch that pairs wonderfully with the rollups’ cheesy goodness!
-
French Onion Soup: For a comforting twist, enjoy your rollups alongside this warm soup—dipping them into the broth is exceedingly satisfying!
-
Dry White Wine: A chilled glass enhances the rollups’ flavors and helps cleanse the palate, making each cheesy bite feel even more indulgent!
-
Chocolate Chip Cookies: End your meal on a sweet note! The warm, gooey cookies provide a perfect dessert contrast to the savory rollups, creating a comforting finish.
How to Store and Freeze Cheesy Garlic Butter Rollups
Fridge: Store leftovers in an airtight container for up to 4 days to maintain freshness. They can be reheated easily to enjoy later!
Freezer: For longer storage, place unbaked rollups in a single layer on a baking sheet, freeze until solid, then transfer to a freezer bag for up to 2 months.
Reheating: To reheat, place cooled rollups in the oven at 325°F for about 8 minutes, ensuring they regain their crispness.
Wrap Carefully: If storing baked rollups, wrap them in foil or parchment paper to prevent them from drying out and to keep that delicious cheesy goodness intact.
Expert Tips for Cheesy Garlic Butter Rollups
-
Fresh Ingredients: Use freshly shredded cheese for the best melt and texture. Pre-shredded varieties often contain anti-caking agents that hinder stretching.
-
Avoid Overfilling: Don’t overload the dough with cheese and fillings to prevent spillage during baking. Keep the layers balanced for neat rollups!
-
Tight Rolls: Roll the dough tightly from one end to ensure even baking and beautiful, defined swirls. A loose roll may lead to uneven textures.
-
Extra Flavor Boost: Always brush with any reserved garlic butter after baking. This simple step intensifies the flavor of your Cheesy Garlic Butter Rollups.
-
Reheating Tips: To preserve texture when reheating, use the oven instead of the microwave. It keeps the rollups crispy on the outside and gooey inside!
Cheesy Garlic Butter Rollups Variations
Feel free to get creative with your Cheesy Garlic Butter Rollups—these delicious bites are perfect for any flavor twist you desire!
-
Spicy Kick: Add red pepper flakes or sliced jalapeños while assembling for a delightful heat that complements the rich cheese.
-
Veggie Delight: Incorporate sautéed spinach or diced bell peppers for a colorful, healthful twist that adds texture and nutritional value to your rollups.
-
Meat Lovers: Mix in turkey pepperoni or cooked crumbled sausage between the layers for a protein-packed version that meat enthusiasts will rave about.
-
Cheesy Swap: Experiment by substituting mozzarella with gouda or pepper jack for different flavor profiles—each cheese brings its unique character to these rollups.
-
Herb Infusion: Mix fresh basil, parsley, or thyme into the garlic butter before brushing for an aromatic lift; this adds dimension to the overall taste.
-
Breakfast Rollups: Fill with scrambled eggs, bacon crumbles, or cheese for a delightful dish that brings breakfast flavors to this cheesy treat!
-
Baked Crunch: Top the rollups with a sprinkle of breadcrumbs before baking for an extra crispy exterior that adds a delightful texture contrast.
For more cheesy creations, don’t miss my Cheesy Taco Potatoes or Brown Butter Cookie recipes—they’re sure to inspire your next culinary adventure!
Make Ahead Options
These Cheesy Garlic Butter Rollups are a lifesaver for busy home cooks looking to save time without sacrificing flavor! You can prepare the rollups up to 24 hours in advance by assembling them fully, then covering tightly and refrigerating until you’re ready to bake. This way, they’ll be perfectly fresh when you pop them in the oven. To maintain their delicious quality, ensure you wrap them well to prevent drying out. When it’s time to serve, no need to thaw—just bake them directly from the fridge, adding an extra couple of minutes to the baking time for optimal results. Enjoy the convenience of homemade comfort food with minimal effort!
Cheesy Garlic Butter Rollups Recipe FAQs
What kind of dough should I use for Cheesy Garlic Butter Rollups?
You can use refrigerated pizza dough for convenience or make your own for added flavor. If you’re looking for a lighter option, feel free to try whole wheat or gluten-free dough. The key is to roll it out to about a ¼-inch thickness for the perfect texture!
How long do Cheesy Garlic Butter Rollups last in the fridge?
Leftovers can be stored in an airtight container for up to 4 days. Just make sure they are completely cool before sealing them to preserve their texture and flavor. Reheat them in the oven at 325°F for about 8 minutes for best results!
Can I freeze Cheesy Garlic Butter Rollups?
Absolutely! To freeze unbaked rollups, arrange them in a single layer on a baking sheet and freeze until firm. Then, transfer to a freezer bag and store for up to 2 months. When you’re ready to enjoy, bake from frozen at 375°F, adding a few extra minutes to your baking time.
What should I do if my rollups spill cheese while baking?
Don’t worry! If they spill over, it’s usually because they were overfilled. For next time, ensure you’re spreading only a thin layer of cheese, and roll them tightly to keep everything in place. If spillage occurs, just keep an eye on them while baking; they’ll still taste delicious!
Are Cheesy Garlic Butter Rollups suitable for guests with dietary restrictions?
While this recipe is vegetarian, it can be adjusted for various dietary needs. You can easily swap out cheeses based on dietary restrictions, such as using lactose-free cheese or omitting cheese entirely for a vegan version using olive oil and herbs instead.
How do I reheat leftover rollups to maintain their crispiness?
To keep them crispy, place the rollups on a baking sheet and reheat in the oven at 325°F for about 8 minutes. This method helps prevent them from getting soggy, making them delightful as ever!
Cheesy Garlic Butter Rollups: Comfort Food You'll Crave Daily
Ingredients
Equipment
Method
- Preheat your oven to 375°F (190°C) and line a baking sheet with parchment paper.
- In a medium mixing bowl, combine melted butter, minced garlic, garlic powder, Italian seasoning, and black pepper. Stir in olive oil for extra richness.
- Flour a clean surface lightly and roll out your pizza dough into a rectangle about ¼-inch thick.
- Brush the garlic butter mixture over the dough, then layer mozzarella, cheddar, and Parmesan cheese evenly before rolling it tightly.
- Carefully slice the roll into 8 equal pieces and place them cut-side up on the prepared baking sheet.
- Bake the rollups for 18 to 20 minutes, until golden brown and the cheese is bubbling out.
- Allow to cool for a few minutes before serving warm, optionally brushing with leftover garlic butter.
Leave a Reply