
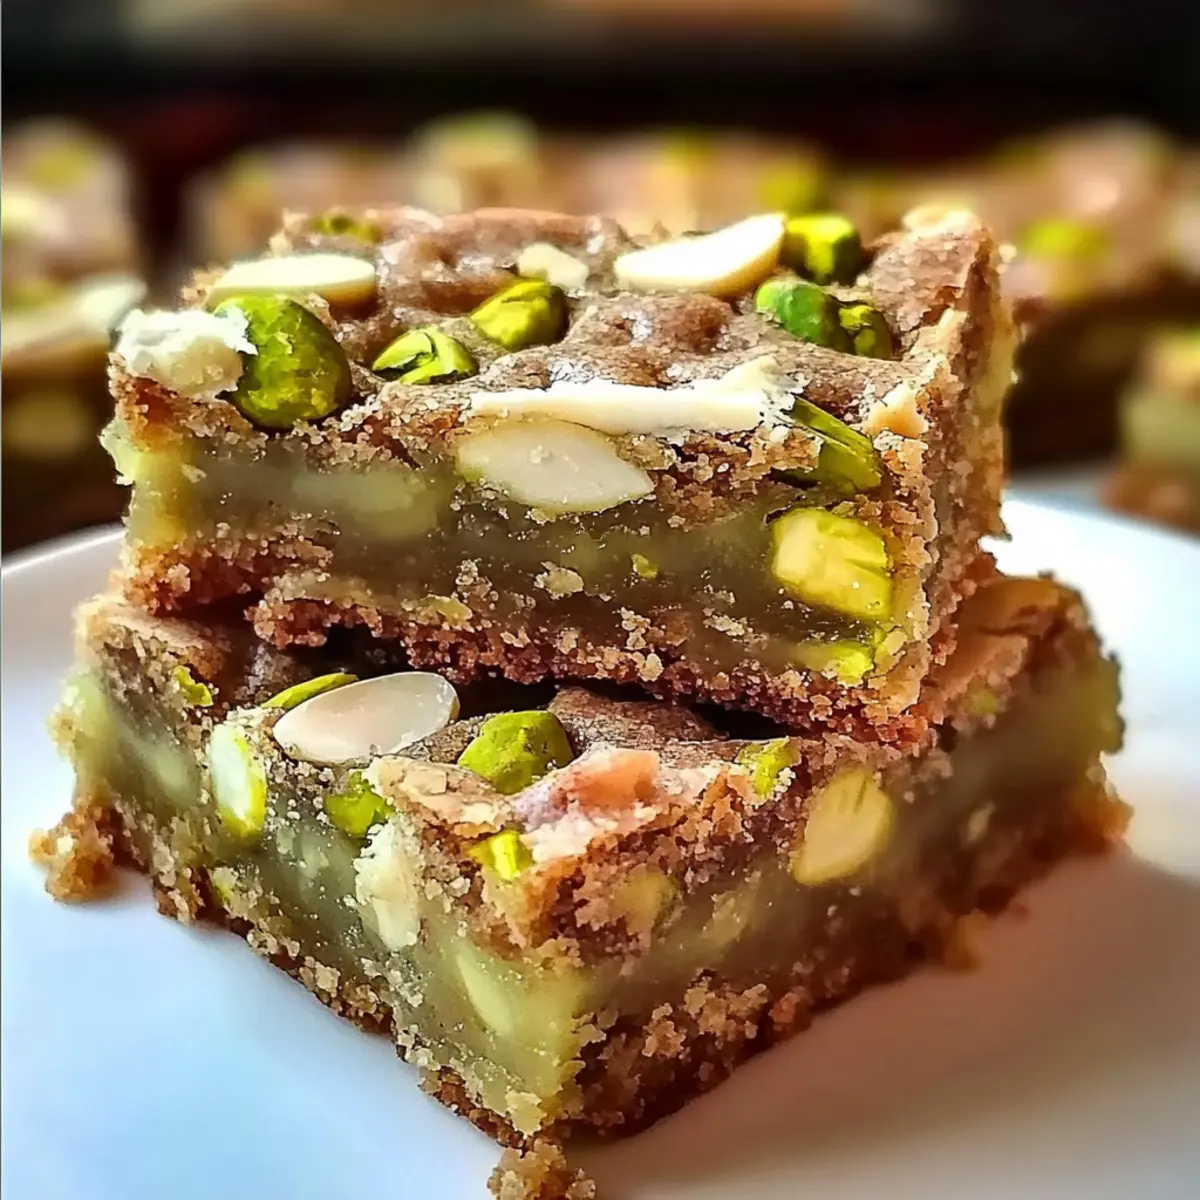
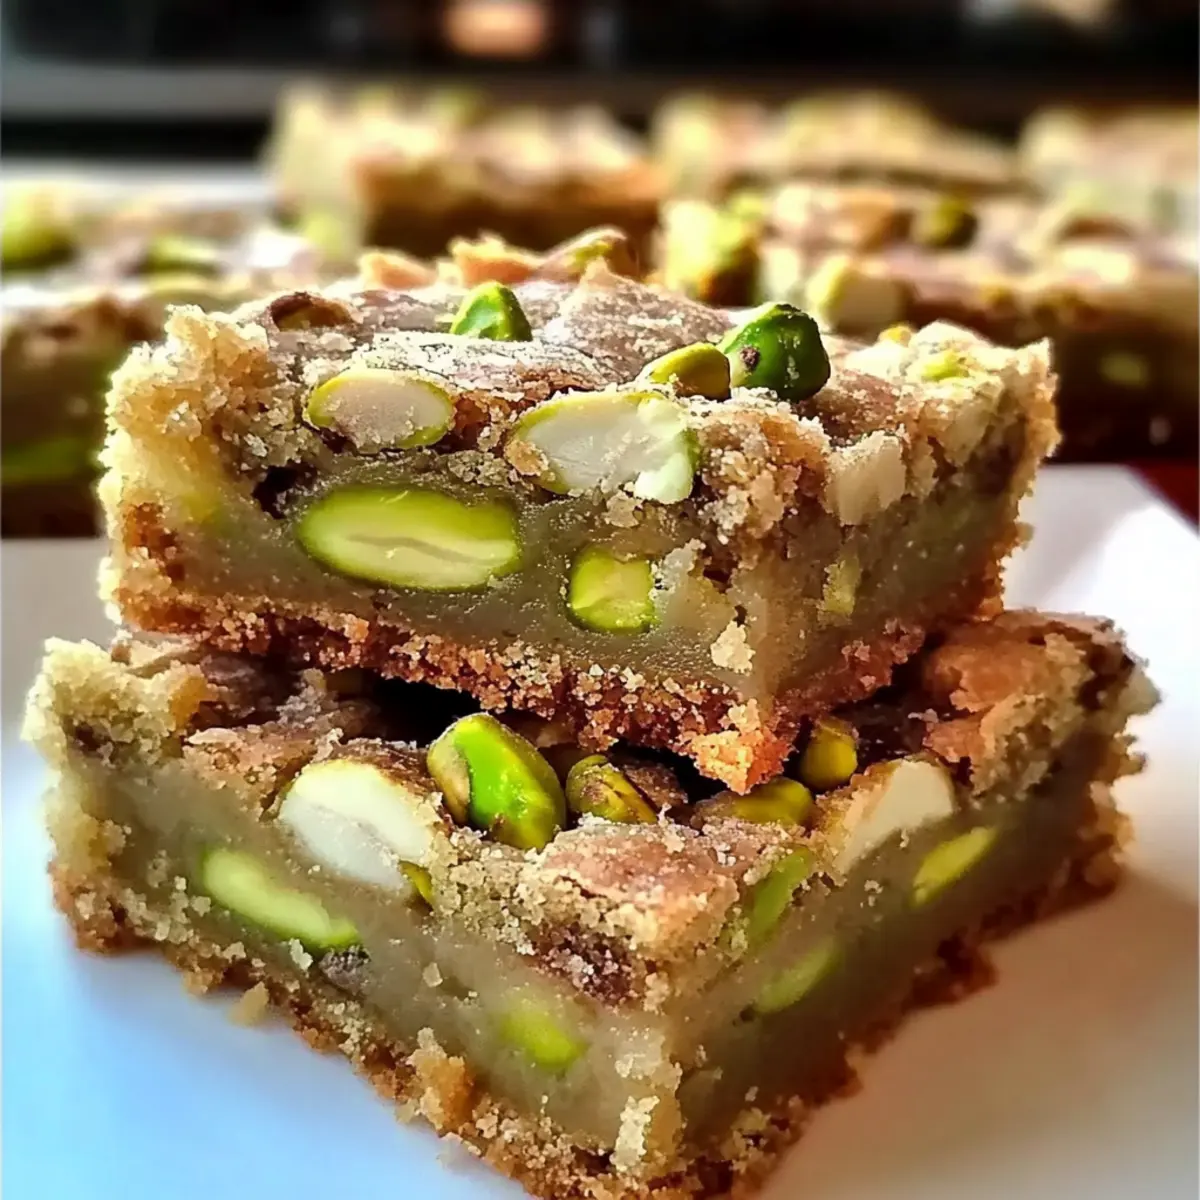
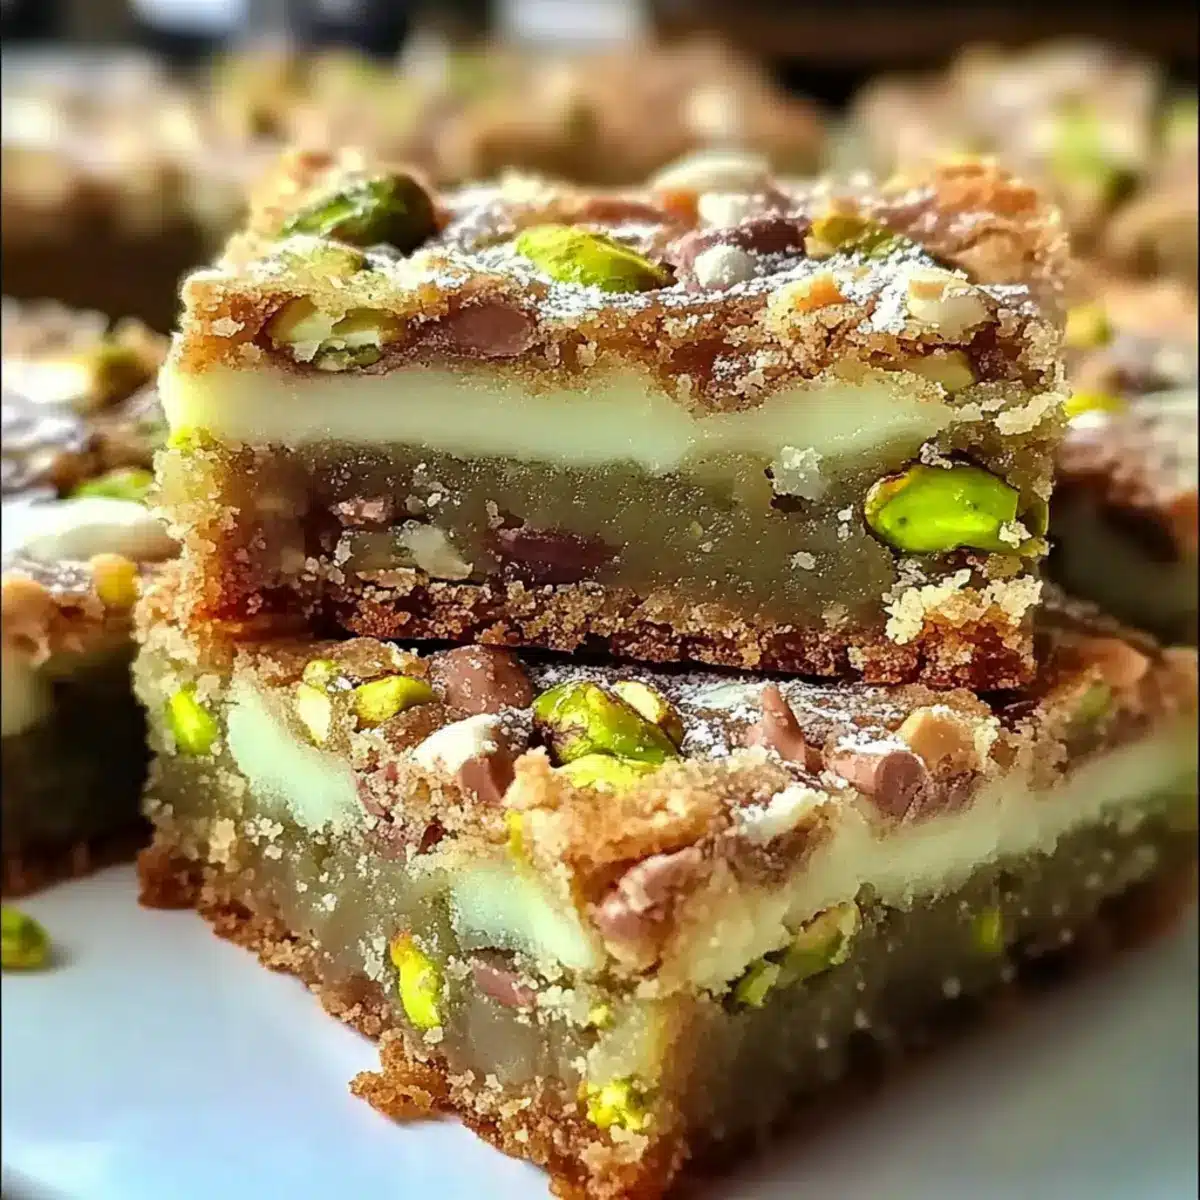
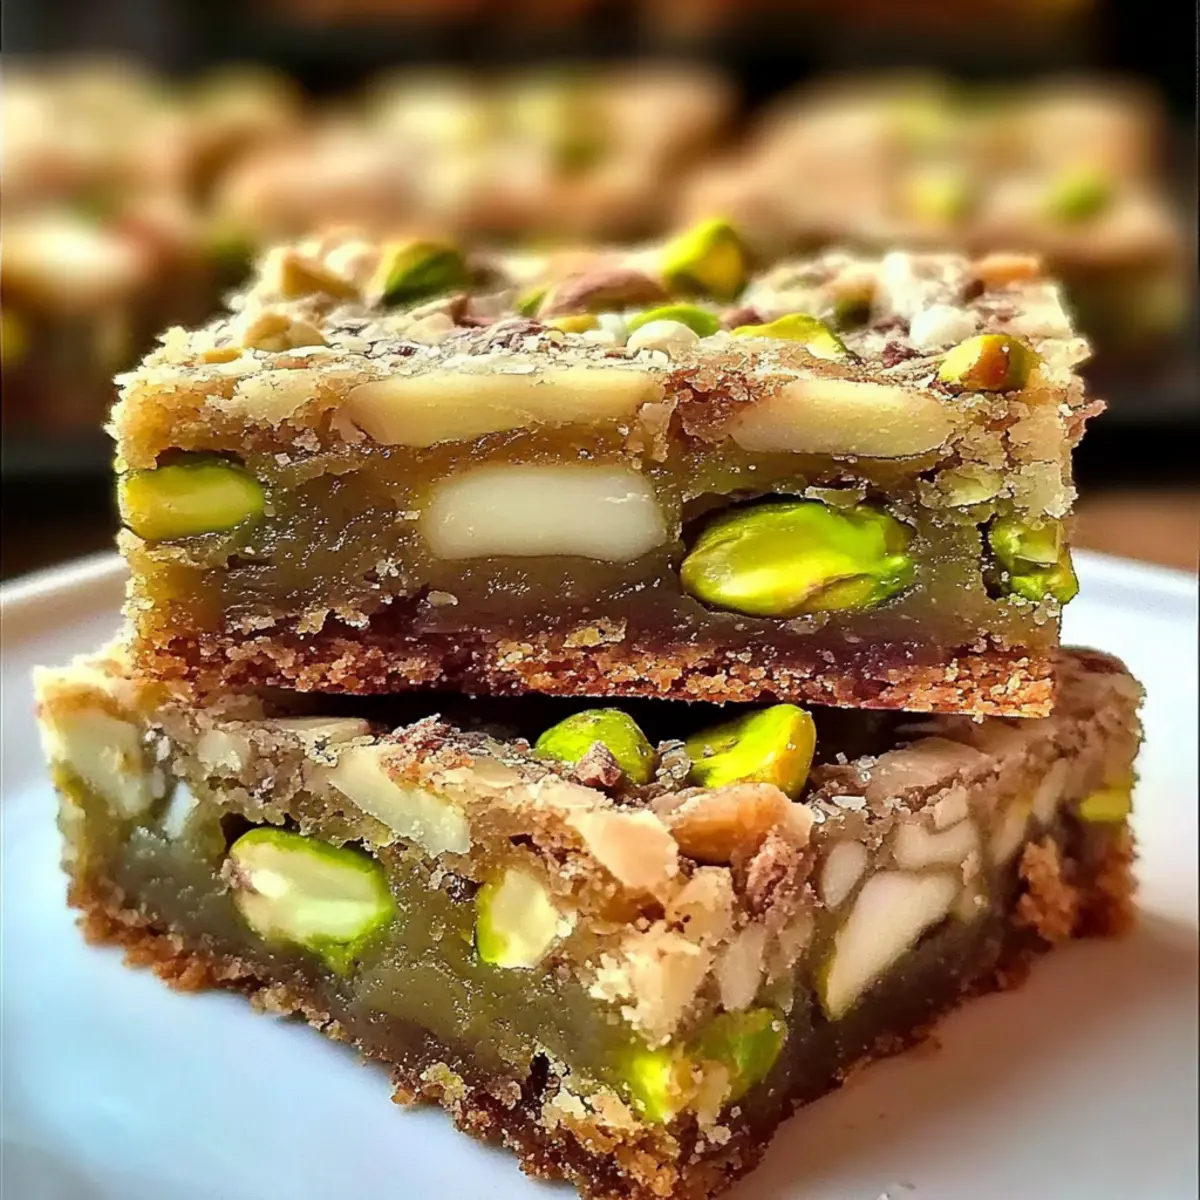
With a simple mix of flour, butter, and those vibrant green gems called pistachios, I’m thrilled to share my latest obsession: Pistachio Dream Cookie Bars. These bars strike the perfect balance between chewy and crunchy, offering a delightful escape from your usual dessert routine. They’re not just easy to whip up, even for novice bakers, but they also provide that comforting indulgence we all crave. Plus, with the option to make them gluten-free, these cookie bars can cater to everyone, whether it’s a cozy night at home or an exciting gathering with friends. So, ready to treat yourself to something both unique and delicious? Let’s dive into these nutty delights together!
Why Are Pistachio Dream Cookie Bars Irresistible?
Unique Flavor Profile: The nutty richness of pistachios combined with the sweetness of white chocolate chips offers a taste experience like no other.
Chewy and Crunchy: These bars are the best of both worlds, delivering a satisfying texture that’ll keep you coming back for more.
Easy Baking: With simple ingredients and straightforward steps, even beginners can enjoy this delightful dessert—just like my Brown Butter Cookie.
Gluten-Free Option: You can easily swap in gluten-free flour to make these delicious bars accessible for everyone!
Perfect for Sharing: Ideal for gatherings, these bars are a crowd-pleaser that pairs fabulously with coffee or tea, ensuring you’ll be the star of any event!
Explore more fun variations by adding dried cranberries or switching nuts to personalize your treat even more. Enjoy every chewy, nutty bite!
Pistachio Dream Cookie Bars Ingredients
For the Base
- All-purpose flour – The foundation of the bars; can be substituted with a gluten-free flour blend for a gluten-free option.
- Baking powder – Key for giving the bars a light and airy structure.
- Salt – A pinch enhances the overall flavors beautifully.
For the Cookie Mixture
- Unsalted butter – Provides a rich, buttery taste; ensure it’s softened for the best texture.
- Brown sugar – Adds a deep, caramel-like sweetness to the bars.
- Granulated sugar – Balances the overall sweetness, making every bite delightful.
- Eggs – Binds all the ingredients; they’re essential for structure.
- Vanilla extract – Adds a warm, inviting flavor note to the mixture.
The Star Ingredient
- Chopped pistachios – The vibrant green gems that offer a nutty crunch and are the highlight of the recipe.
Optional Addition
- White chocolate chips – If desired, these add a sweet contrast that perfectly complements the pistachios.
Enjoy the process, and let these Pistachio Dream Cookie Bars bring a touch of nutty bliss into your baking adventures!
Step‑by‑Step Instructions for Pistachio Dream Cookie Bars
Step 1: Preheat and Prepare the Baking Dish
Begin by preheating your oven to 350°F (175°C). While it warms, line a 9×13-inch baking dish with parchment paper, letting the edges hang over for easy removal later. This will ensure that your Pistachio Dream Cookie Bars come out perfectly without sticking, allowing for a smooth release after baking.
Step 2: Mix Dry Ingredients
In a medium-sized bowl, whisk together 1 ½ cups of all-purpose flour, 1 teaspoon of baking powder, and ½ teaspoon of salt until well combined. This step helps to evenly distribute the leavening agent and salt, which enhances the overall flavor of your cookie bars. Set aside this mixture as we move on to the wet ingredients.
Step 3: Cream the Butters and Sugars
In a large mixing bowl, beat together ½ cup of softened unsalted butter, ½ cup of brown sugar, and ½ cup of granulated sugar using an electric mixer. Mix on medium speed for about 2–3 minutes, until the mixture is light and fluffy. This creaming process helps create a tender texture in your Pistachio Dream Cookie Bars.
Step 4: Add Eggs and Vanilla
Add 2 large eggs, one at a time, along with 1 teaspoon of vanilla extract to the creamed mixture. Continue mixing on low speed until combined, scraping down the sides of the bowl as necessary. Ensure everything is well blended for a consistent batter, enhancing the rich flavors of your dessert bars.
Step 5: Combine Dry and Wet Ingredients
Gradually stir the dry ingredient mixture into the wet ingredients using a spatula or wooden spoon. Mix until just combined, taking care not to overmix, as this can make the bars tough. You’ll know it’s ready when no dry flour is visible, and the batter is somewhat thick and cohesive.
Step 6: Fold in Nuts and Chocolate
Gently fold in 1 cup of chopped pistachios and, if desired, ½ cup of white chocolate chips. The earthy flavor of the pistachios combined with the sweetness of the chocolate creates the delightful essence of the Pistachio Dream Cookie Bars. Make sure they’re evenly distributed throughout the batter for balanced bites.
Step 7: Transfer to Baking Dish
Pour the mixture into the prepared baking dish, spreading it evenly with a spatula to ensure a uniform thickness. Smooth out the top, making sure it’s level for even baking. This step is crucial to achieve perfectly baked cookie bars with a consistent texture throughout, so take your time.
Step 8: Bake to Perfection
Place the baking dish in the preheated oven and bake for 25–30 minutes. Keep an eye on the edges, which should be lightly browned, while a toothpick inserted in the center should come out with a few moist crumbs. This visual cue will help you avoid overbaking and maintain the chewy, delightful texture of your bars.
Step 9: Cool and Cut
Once baked, remove the cookie bars from the oven and allow them to cool in the pan for about 10 minutes. Using the parchment paper, gently lift them out and transfer to a cooling rack. Once completely cool, cut into squares and enjoy these luscious Pistachio Dream Cookie Bars, perfect for sharing or indulging!
How to Store and Freeze Pistachio Dream Cookie Bars
Room Temperature: Store in an airtight container at room temperature for up to 3 days to maintain their chewy texture and nutty flavor.
Refrigerator: For a chilled option, refrigerate in an airtight container, enjoying them cold and refreshing.
Freezer: Individually wrap the bars tightly in plastic wrap and then place them in a freezer-safe bag. They can be frozen for up to 3 months.
Reheating: To enjoy them warm, simply reheat in the microwave for about 10-15 seconds. This helps restore their delightful chewy texture!
What to Serve with Pistachio Dream Cookie Bars
Pairing delights with these decadent treats will elevate your dessert experience. Imagine the warmth and satisfaction of a complete meal featuring complementary flavors and textures.
- Vanilla Ice Cream: A scoop of creamy vanilla ice cream adds a refreshing contrast to the sweet, nutty bars, creating a heavenly match.
- Espresso or Coffee: The rich, bold flavor of a freshly brewed espresso cuts through the sweetness, enhancing the overall flavor profile with every sip.
- Fresh Berries: Juicy strawberries or raspberries offer a bright, tart balance that beautifully complements the richness of pistachio.
- Chocolate Drizzle: A warm drizzle of chocolate sauce takes the lushness of these bars to another level, providing a luxurious finish.
- Caramel Sauce: Drizzling warm caramel over the cookie bars adds a decadent touch, enhancing the rich flavors of brown sugar and butter.
- Nutty Trail Mix: For a crunch beyond the bars, serve alongside a mix of your favorite nuts and dried fruits to continue the nutty theme.
- Sparkling Water with Citrus: The refreshing bubbles and zesty notes of a citrus-infused sparkling water cleanse the palate perfectly between bites.
- Milk or Dairy Alternative: A tall glass of cold milk pairs flawlessly, enhancing the comforting experience of enjoying these chewy treats.
- Coconut Whipped Cream: Light and airy, coconut whipped cream brings a tropical twist and adds an inviting softness to each bite.
Make Ahead Options
These Pistachio Dream Cookie Bars are a fantastic choice for meal prep! You can bake them up to 3 days in advance and store them in an airtight container at room temperature. To save time, consider mixing the dry ingredients (flour, baking powder, and salt) and the wet ingredients (butter, sugar, eggs, and vanilla) separately and refrigerate them overnight. This ensures everything is ready to go when you’re prepared to bake. When you’re ready to serve, simply preheat your oven and follow the baking instructions. They’ll taste just as fresh and delicious, providing you with indulgent treats in a pinch!
Expert Tips for Pistachio Dream Cookie Bars
-
Room Temperature Butter: Ensure your butter is softened to room temperature for smooth mixing and a tender texture in your Pistachio Dream Cookie Bars.
-
Avoid Overmixing: Mix only until ingredients are just combined; overmixing can lead to tough bars instead of the intended chewy, soft texture.
-
Perfect Baking Time: Keep an eye on your bars as they bake. Check for doneness using a toothpick; it should come out with a few moist crumbs for the best texture.
-
Variations Welcome: Feel free to experiment with different nuts. Almonds or walnuts can substitute for pistachios, providing a unique twist while maintaining delicious flavors.
-
Serve Warm: For an extra indulgence, serve your bars warm topped with a scoop of vanilla ice cream and a drizzle of chocolate sauce. It’s a delightful pairing!
Pistachio Dream Cookie Bars Variations
Feel free to get creative with these delightful cookie bars and make them your own!
-
Gluten-Free: Substitute all-purpose flour with a gluten-free flour blend for a delicious treat anyone can enjoy.
It’s an easy way to share your baking joy with friends and family who are gluten-sensitive! -
Nutty Twist: Replace pistachios with almonds or walnuts for a different nutty flavor profile.
This simple swap can introduce a delightful taste while maintaining that satisfying crunch. -
Fruity Addition: Add 1 cup of dried cranberries for a fruity twist that complements the nutty base.
The sweet tartness can elevate the flavor and add a beautiful pop of color to your bars. -
Chocolate Lovers: Mix in dark chocolate chips instead of white chocolate for an indulgent twist.
This enhances the richness, balancing the sweetness with deep, satisfying chocolate notes. -
Coconut Infusion: Sprinkle in ½ cup of shredded coconut for a tropical touch.
The coconut adds a chewy texture that harmonizes wonderfully with the pistachios. -
Spicy Kick: Add a pinch of cayenne pepper to the batter for a surprising, zesty kick.
This provides a warm contrast to the sweetness, making each bite exciting and unique. -
Zesty Edge: Incorporate zest from one orange or lemon for a bright citrus note.
The citrus flavor beautifully complements the richness of the nuts, bringing freshness to each bite. -
Caramel Drizzle: Top baked bars with a drizzle of caramel sauce for an over-the-top indulgence.
It’s a sweet finishing touch that whimsical transforms these cookie bars into a standout dessert!
Experiment with these variations to find your favorite combination, and don’t forget to check out my French Toast Cookies or Flourless Fudge Cookies for more delicious ideas! Enjoy creating your perfect Pistachio Dream Cookie Bars!
Pistachio Dream Cookie Bars Recipe FAQs
What kind of pistachios should I use for the cookie bars?
Absolutely! I recommend using shelled, unsalted pistachios for these cookies to keep the flavors balanced. Look for vibrant green nuts that are fresh and free from dark spots to ensure the best taste and texture.
How should I store my Pistachio Dream Cookie Bars?
You can store them in an airtight container at room temperature for up to 3 days. If you prefer them chilled, simply refrigerate them in the same manner. This keeps them fresh and preserves their delightful chewy texture.
Can I freeze the Pistachio Dream Cookie Bars?
Very much so! To freeze, individually wrap the bars in plastic wrap, then place them in a freezer-safe bag or container. They can be stored in the freezer for up to 3 months. When you’re ready to enjoy, just reheat them in the microwave for about 10-15 seconds to bring back that lovely chewy texture.
What should I do if my cookie bars are too dry?
If they turn out dry, it might have been due to overbaking. Always check doneness by inserting a toothpick; it should come out with some moist crumbs. Also, make sure your butter isn’t too softened and that you’re measuring your flour correctly—spoon it into the measuring cup instead of scooping directly, which can compact it and lead to dry bars.
Are there any allergens in this recipe?
This recipe contains gluten (from all-purpose flour), dairy (from butter), and eggs. For a gluten-free option, you can substitute the flour with a gluten-free flour blend. If you have nut allergies, consider using seeds like sunflower seeds as a base instead of pistachios, keeping in mind that the flavor profile will change slightly.
Can I add other mix-ins to the cookie bars?
Absolutely! The more the merrier! You can introduce dried cranberries for a fruity twist or swap in chocolate chips for added sweetness. Mixing in different nuts like almonds or walnuts not only diversifies the flavor but also offers a delightful crunch!
Pistachio Dream Cookie Bars: Chewy Nutty Bliss Awaits
Ingredients
Equipment
Method
- Preheat your oven to 350°F (175°C) and line a 9x13-inch baking dish with parchment paper.
- In a medium-sized bowl, whisk together the flour, baking powder, and salt until well combined.
- In a large mixing bowl, beat together the softened butter, brown sugar, and granulated sugar until light and fluffy.
- Add the eggs one at a time along with the vanilla extract, mixing until combined.
- Gradually stir the dry ingredient mixture into the wet ingredients until just combined.
- Gently fold in the chopped pistachios and optional white chocolate chips.
- Pour the mixture into the prepared baking dish and spread it evenly.
- Bake for 25-30 minutes, until the edges are lightly browned and a toothpick comes out with a few moist crumbs.
- Cool in the pan for 10 minutes, then lift out and transfer to a cooling rack before cutting into squares.
Leave a Reply