
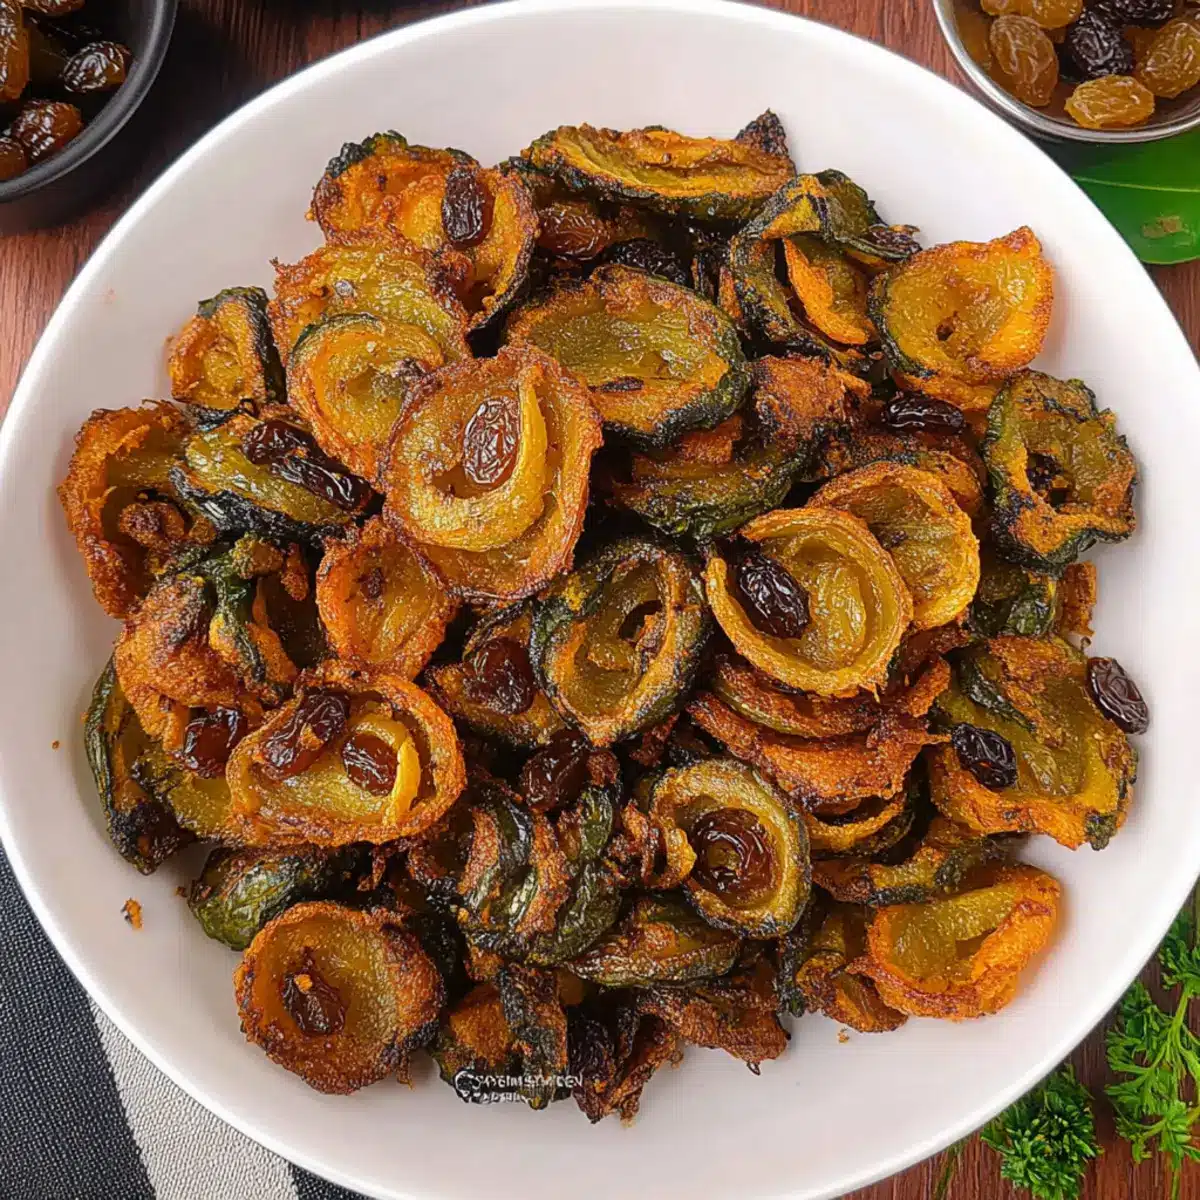
As I stood in my kitchen, the first whiff of sizzling mustard oil took me back to my grandmother’s vibrant cooking. She had a knack for transforming simple ingredients into memories, and that’s precisely what my Crispy Karela Fry achieves—a dish that surprises with its delightful balance of bitter and sweet. This gluten-free, vegan treat pairs crispy karela (bitter melon) with caramelized onions and a touch of plump raisins, resulting in a flavor sensation that will elevate any meal. Whether you’re looking for a quick and nutritious side dish or an exciting addition to your lunch spread, this recipe is a winner. Plus, it offers healthy benefits and can be made using both stovetop and air fryer methods! Curious about how to bring this delicious Indian classic to your table? Let’s dive in!
Why is Crispy Karela Fry a Must-Try?
Unique Flavor Profile: The contrast between bitter karela and sweet raisins combined with caramelized onions creates a taste that’s anything but ordinary.
Healthy Delight: This dish is not just gluten-free and vegan, but also packed with nutrients like vitamins A and C.
Versatile Serving: Perfect as a side for dal, flatbreads, or even standalone snacking!
Time-Saving Options: With both stovetop and air fryer methods, you can choose the quickest way to divine taste.
Crowd-Pleaser: Impress friends and family with a dish that blends tradition with innovation—everyone will be asking for seconds! For even more delightful recipes, check out my Sweet Air Fryer Churro Bites.
Crispy Karela Fry Ingredients
• Here’s everything you need to create this delightful Crispy Karela Fry that will leave your taste buds tingling!
For the Fry
- Karela (Bitter Melon) – Choose firm ones for the best texture and flavor; removing seeds will help with bitterness.
- Onions – Aim for a sweet and soft texture; let them sizzle until translucent for perfect caramelization.
- Raisins – This addition not only adds sweetness but surprises your palate with a burst of flavor.
- Mustard Oil – A classic for authentic flavor; feel free to swap with a neutral oil like sunflower if desired.
For the Spices
- Cumin Seeds – Essential for that earthy undertone that complements the bitterness.
- Coriander Powder – Adds warmth and depth, making every bite richer.
- Fennel Powder (Saunf) – Don’t skip it! It’s key to balancing the bitterness seamlessly.
- Red Chilli Powder – Adjust according to your spice preference; cayenne works well as a substitute.
- Amchur (Dried Mango Powder) – For a tangy twist; use lemon juice in its absence.
- Turmeric – Optional, but helps enhance color and offers additional health benefits.
With the wholesome goodness of Crispy Karela Fry, you’re sure to enjoy a scrumptious vegan dish that satisfies!
Step‑by‑Step Instructions for Crispy Karela Fry
Step 1: Prepare the Karela
Start by washing the karela thoroughly and slicing it into medium-thick rings. Sprinkle the slices generously with salt and turmeric, ensuring each piece is coated. Allow the karela to rest for 15-20 minutes; this process helps draw out bitterness and enhances its flavor. You’ll notice some water forming, indicating it’s ready for the next step!
Step 2: Sauté Karela
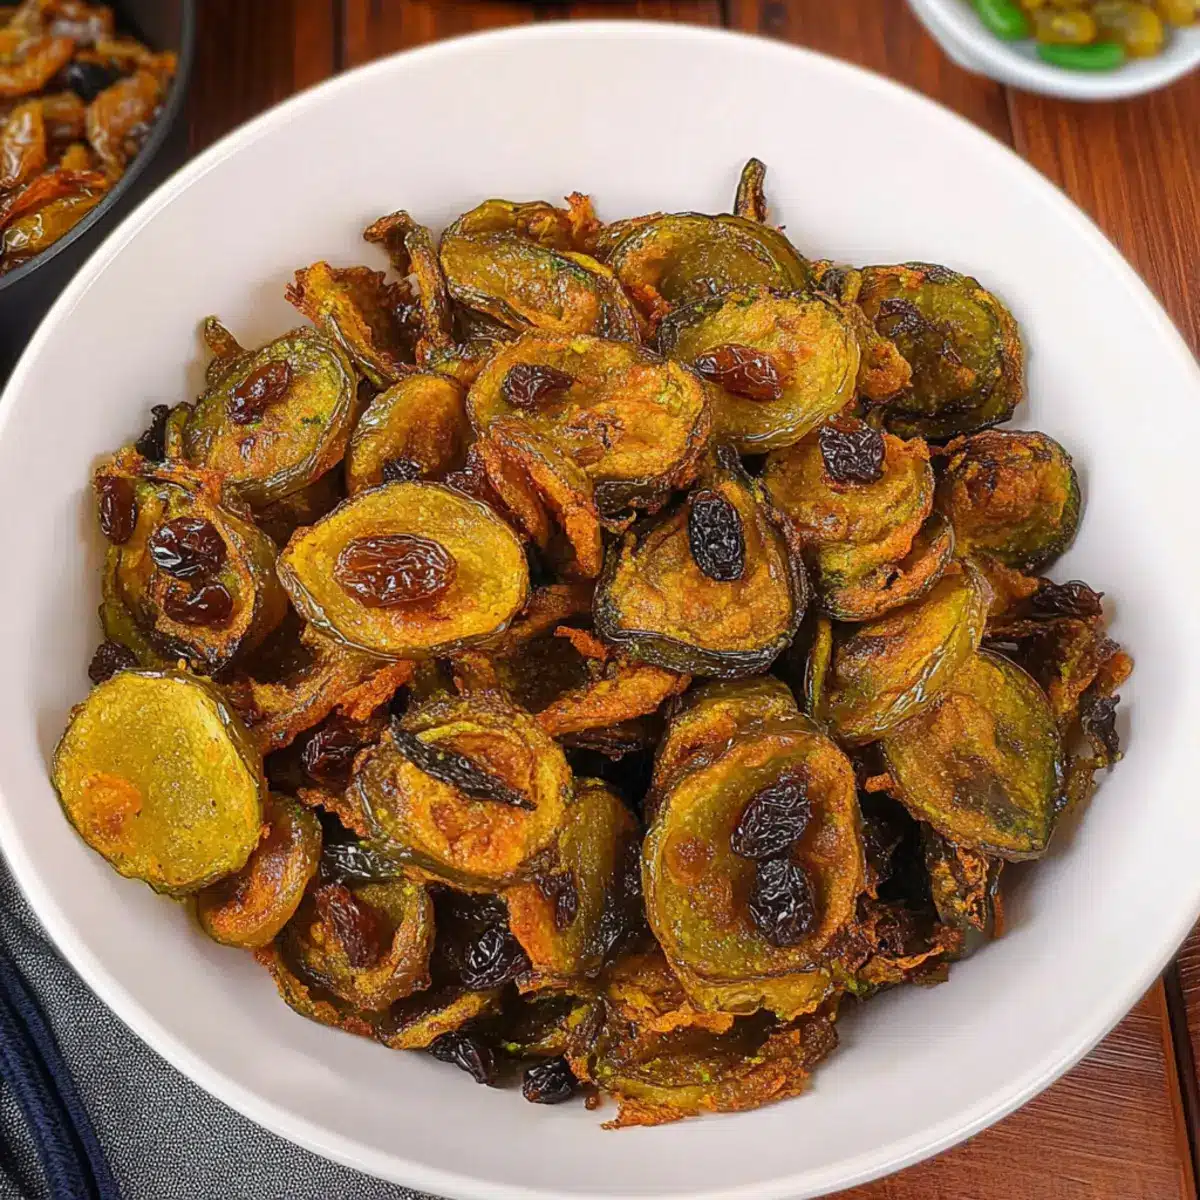
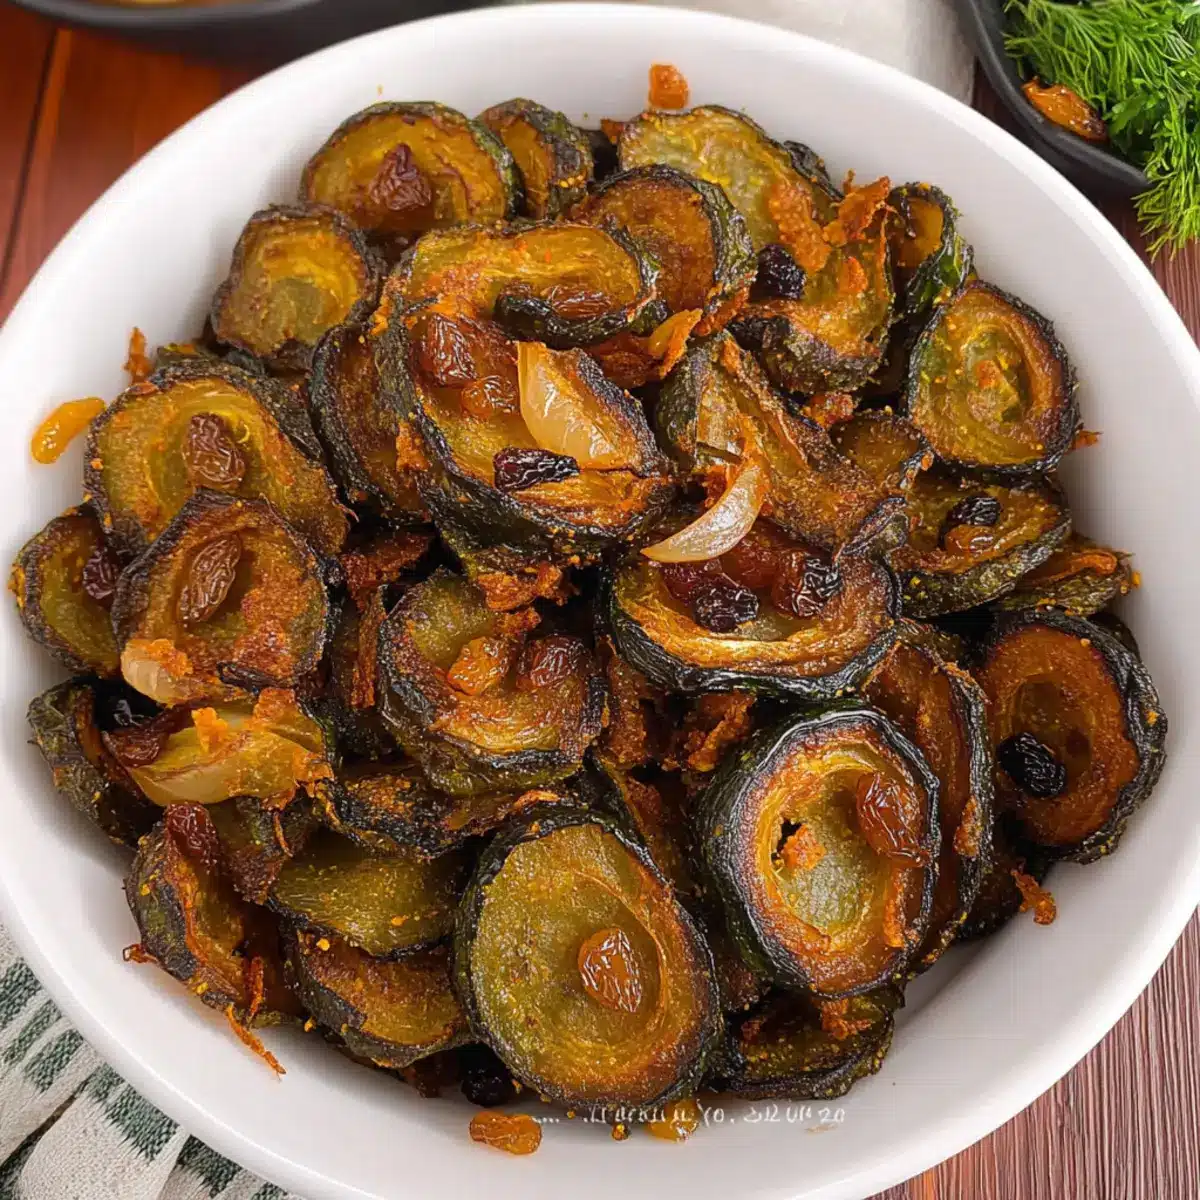
In a large, non-stick pan, heat about 2-3 tablespoons of mustard oil over medium heat. Once the oil shimmers, add the karela slices, spreading them out evenly. Sauté for 6-8 minutes, stirring occasionally, until the karela turns golden brown and crispy. This step is crucial for achieving that delightful texture in your Crispy Karela Fry.
Step 3: Cook the Onions
Remove the sautéed karela from the pan and set it aside. In the same pan, add a little more oil if needed, and toss in 1 teaspoon of cumin seeds. Once they crackle, add thinly sliced onions; cook for about 5-7 minutes until they turn translucent and slightly golden. This caramelization balances the bitterness of karela, enhancing the dish’s overall flavor.
Step 4: Combine and Spice it Up
Now, return the sautéed karela back to the pan with the onions. Sprinkle in cooked raisins, along with your desired amounts of coriander powder, fennel powder, red chili powder, and salt. Sauté this mixture for an additional 4-5 minutes, allowing the spices to meld together and the karela to crisp up further. The aroma will be irresistible!
Step 5: Final Touches
For an added tangy flavor, mix in a teaspoon of amchur powder or a splash of lemon juice right before serving. Stir well to combine and adjust salt and spices according to taste. The completed Crispy Karela Fry should have a beautiful golden color with a mix of crunchy karela and sweet onion, perfect for serving alongsideany meal!

Expert Tips for Crispy Karela Fry
- Reduce Bitterness: Rubbing karela with salt and turmeric is essential to lower its natural bitterness and enhance flavor. Don’t skip this step!
- Slice Thickness Matters: For extra crispiness, cut karela thinner; for a chewier texture, opt for thicker slices. Adjust according to your preference for the Crispy Karela Fry.
- Onion Goldness: Sauté onions until translucent, not dark brown. This will give a perfect sweet balance to the bitter karela without overpowering it.
- Storage Savvy: Keep leftover karela fry in an airtight container for up to 3-4 days. Reheat gently in the microwave for the best texture.
- Flavor Variations: Consider adding spices like garam masala or fresh herbs for a personal touch that highlights your unique taste in the Crispy Karela Fry.
What to Serve with Crispy Karela Fry
Elevate your dining experience by pairing this dish with complementary flavors and textures that create a memorable meal.
-
Warm Chapatis: Soft, warm chapatis provide a delightful contrast to the crunchiness of the karela, making every bite a blissful experience. They also soak up the spices for added flavor.
-
Cooling Raita: A refreshing yogurt-based raita with cucumber pairs beautifully, balancing the bitterness of karela and the spice complexity. This cooling side is a must for a well-rounded meal.
-
Lentil Dal: Rich and hearty lentil dal not only offers protein but also enhances your meal with its comforting warmth. This duo brings together the distinct flavors of Indian cuisine effortlessly.
-
Baingan Bharta: Smoky roasted eggplant mash adds a creamy element to your dinner, creating a beautiful contrast to the crispy texture of the karela. The combination is sure to be a family favorite!
-
Spicy Lemonade: A zesty, spicy lemonade with a hint of chili or ginger will awaken your taste buds and complement the karela’s flavors, providing a refreshing sip between bites.
-
Coconut Chutney: This sweet and creamy chutney rounds out the meal, offering a sweet relief to the karela’s bitterness. It’s delightful as a dip or spread alongside any Indian bread.
-
Pickled Vegetables: Tangy, pickled veggies add a flavorful punch to the plate, enhancing the overall taste experience while giving a crisp texture that contrasts perfectly with the karela.
-
Mango Lassi: Creamy mango lassi serves as a sweet finishing touch, while its fruity notes harmonize with the spices in the karela fry, offering a lovely end to your meal.
Crispy Karela Fry: Flavorful Twists
Feel free to put your own spin on this dish and make it your own with these delicious ideas!
-
Smashed Potatoes: Mix in cooked and lightly mashed potatoes for a heartier, creamier texture that balances the bitterness of karela.
-
Raw Mango: During mango season, add grated raw mango for a tangy sweetness that brightens the dish and adds a delightful crunch.
-
Spiced Up: Try adding a bit of garam masala for an aromatic twist that elevates the flavors to new heights.
-
Add Nuts: Toss in some roasted peanuts or cashews for a crunchy contrast that adds richness and extra nutrition to every bite.
-
Coconut Flakes: Incorporate some unsweetened coconut flakes for a unique tropical touch that complements the karela’s flavors beautifully.
-
Heat Level: Feel free to increase the heat with green chilies or red chili flakes to give your crispy karela fry a spicy kick.
-
Herb Burst: Experiment with fresh herbs like cilantro or mint for a fresh explosion of flavor that lightens the dish wonderfully.
-
Serve with Dip: Pair with a yogurt-based sauce or chutney for an exciting dipping experience that balances flavors and adds creaminess.
For more exciting recipes, check out my Chinese Chicken Wings and see how easy it is to bring delicious flavors to your table!
How to Store and Freeze Crispy Karela Fry
- Fridge: Store leftover Crispy Karela Fry in an airtight container for up to 3-4 days. Ensure it’s completely cooled before sealing to maintain its crispiness.
- Freezer: If you want to freeze chopped karela for later use, do so in an airtight bag for 1-2 months. Before cooking, there’s no need to thaw; just toss it in the pan or air fryer!
- Reheating: For best results, reheat in a skillet over medium heat or microwave with a splash of water to restore moisture, ensuring your crispy treat remains flavorful.
- Room Temperature: Avoid leaving crispy karela out for more than 2 hours to ensure its freshness and safety.
Make Ahead Options
These Crispy Karela Fry are perfect for busy home cooks looking to streamline meal prep! You can wash and slice the karela up to 24 hours in advance and refrigerate it, sprinkled with salt and turmeric to help reduce the bitterness. Similarly, you can caramelize the onions ahead of time and store them in an airtight container for up to 3 days. When you’re ready to serve, simply sauté the prepped karela in mustard oil, mix in the ready onions, raisins, and spices for a quick finish. This method not only saves you time but ensures your dish maintains its excellent flavor and texture, delivering delicious results with minimal effort!
Crispy Karela Fry Recipe FAQs
What should I look for when selecting karela?
When choosing karela, opt for firm and tender gourds. They should be free of dark spots, which can indicate overripeness. If there are too many seeds inside, it’s best to remove them as they can contribute to the bitterness.
How do I store leftover crispy karela fry?
You can store leftover crispy karela fry in an airtight container in the fridge for up to 3-4 days. Make sure the fry is completely cooled before sealing to help maintain its crispiness. Reheat gently in a microwave or skillet for the best texture.
Can I freeze karela before cooking?
Absolutely! To freeze chopped karela, spread it out on a baking sheet to freeze individually, then transfer it to an airtight bag for up to 1-2 months. There’s no need to thaw before cooking; just toss it directly in your pan or air fryer for a quick and easy meal prep.
What if my karela is too bitter?
If you find the karela too bitter even after the initial salting and resting with turmeric, try slicing it thinner, as this often results in a crisper texture and might help reduce bitterness. Also, pairing it with sweet ingredients like raisins or cooked potatoes can help balance the flavors.
Is crispy karela fry safe for pets and those with allergies?
While crispy karela fry is a nutritious vegan treat, it’s important to keep in mind that karela may not be suitable for certain pets, particularly cats and dogs, as it can cause digestive issues. Additionally, if you have allergies to specific spices or ingredients, please modify the recipe accordingly to ensure safety.
How can I make crispy karela fry spicier?
If you prefer a spicier version, you can increase the amount of red chili powder in the recipe. For an extra kick, consider adding a pinch of cayenne pepper or even some chopped green chilies during the sautéing process. Just remember to taste as you go to find your perfect spice level!
Delicious Crispy Karela Fry for a Healthy Vegan Treat
Ingredients
Equipment
Method
- Wash the karela thoroughly and slice it into medium-thick rings. Sprinkle with salt and turmeric, then let rest for 15-20 minutes.
- In a large, non-stick pan, heat mustard oil over medium heat. Add karela slices and sauté for 6-8 minutes until golden brown.
- Remove karela and set aside. In the same pan, add cumin seeds, then onion. Cook for 5-7 minutes until translucent.
- Return karela to the pan with onions. Sprinkle in raisins, coriander powder, fennel powder, red chili powder, and salt. Sauté for another 4-5 minutes.
- For added tanginess, mix in amchur powder or lemon juice before serving.
Leave a Reply