
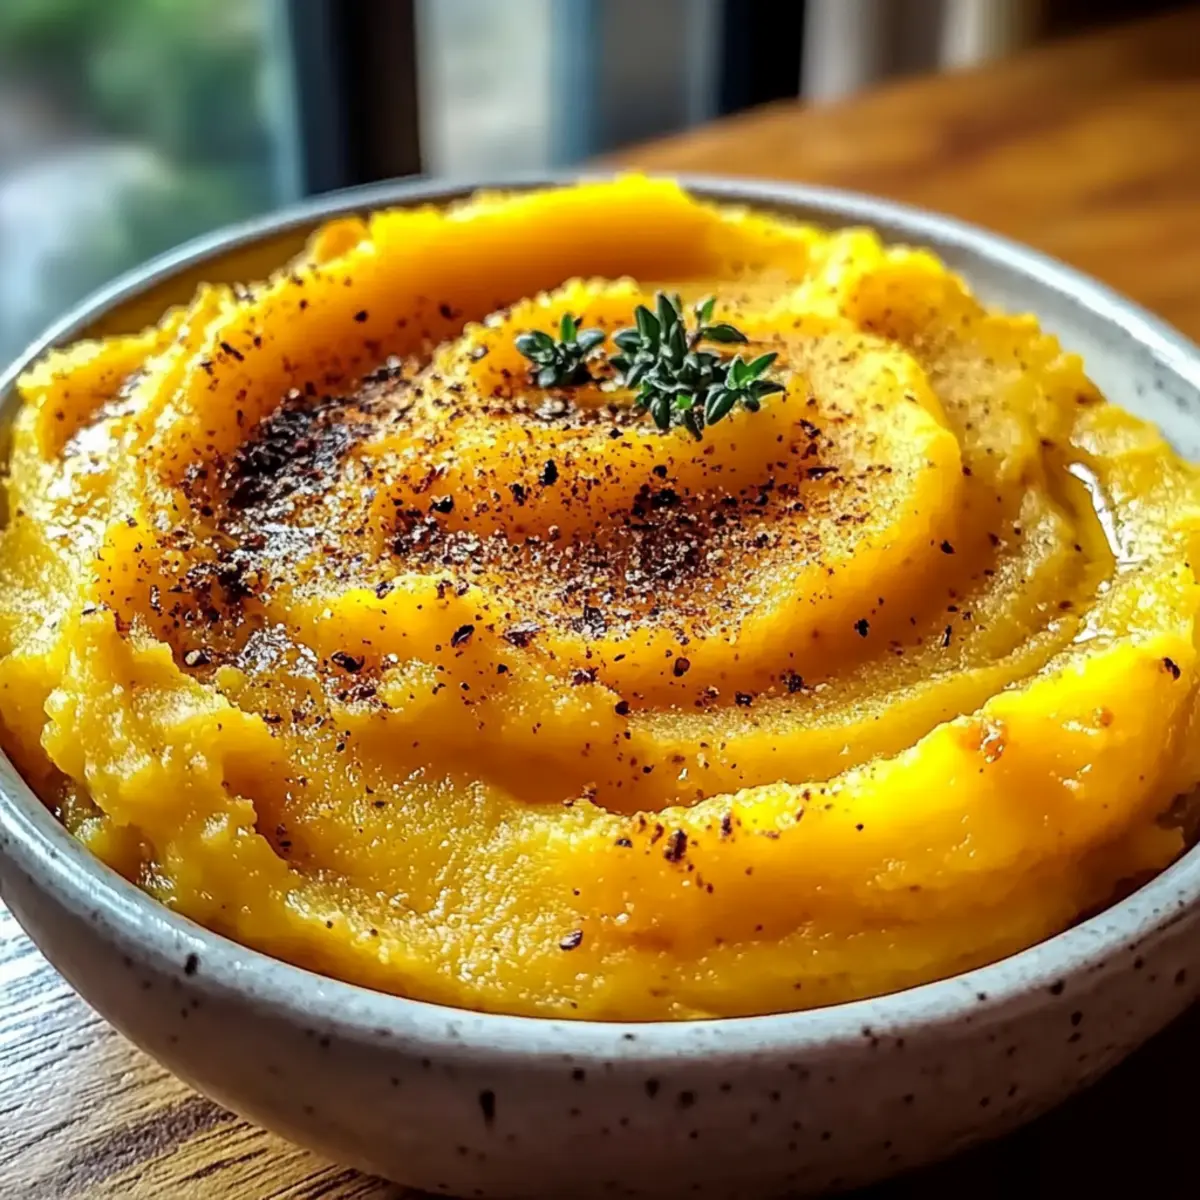
As I sliced into the butternut squash, the vibrant orange flesh eagerly revealed itself, promising warmth and comfort. This Roasted Garlic Butternut Mash is my go-to side dish when I want to bring a taste of cozy autumn into any meal. Its creamy texture and the mellow richness of roasted garlic create a delightful combination that feels like a warm hug on the plate. Plus, it’s not just delicious; this mash is gluten-free and easily adaptable for vegan diets, making it a crowd-pleaser for everyone at the table. With minimal fuss and maximum flavor, this easy side dish can effortlessly elevate your holiday gatherings or weeknight dinners. Isn’t it time to add a little comfort to your cooking repertoire? Let’s dive into the recipe and discover how to make this heavenly mash!
Why Is This Mash So Irresistible?
Creamy Texture: The silky smoothness of the Roasted Garlic Butternut Mash gives every bite a melt-in-your-mouth sensation that’s hard to resist.
Versatile Ingredients: Whether you’re entertaining guests or enjoying a quiet dinner, this dish adapts to your needs. You can easily swap spices or make it vegan!
Fall Flavor: With warm roasted garlic and a hint of smoked paprika, this mash delivers cozy autumn vibes, perfect for any season.
Quick Prep Time: Just a few steps and a little oven time transform basic ingredients into an impressive side dish that requires minimal effort—ideal for busy weeknights!
Crowd-Pleaser: It’s naturally gluten-free and friendly to vegan diets, so everyone can enjoy it at family gatherings—no one will feel left out!
For more comforting ideas, check out my Roasted Vegetable Pasta or the delicious Cheesy Garlic Cruffin for inspiration!
Roasted Garlic Butternut Mash Ingredients
For the Mash
• Butternut Squash – This is the heart of the dish, providing a creamy texture perfect for mashing; substitute with pumpkin or acorn squash if needed.
• Garlic – Adds a depth of flavor and richness; a whole bulb roasted until soft transforms its sharpness into mellow sweetness.
• Olive Oil – Used for roasting to enhance flavors; feel free to swap with another neutral oil if desired.
• Butter – Creates a luxuriously creamy finish; opt for vegan butter for a plant-based version.
• Black Pepper – Introduces a mild heat; adjust the amount to your personal taste preference.
• Smoked Paprika – Provides a wonderful smoky flavor; regular paprika or chili powder can be used as subs if you don’t have it.
• Herbs (optional) – Fresh herbs like thyme or sage elevate the taste; experiment with your favorites!
Indulging in this Roasted Garlic Butternut Mash is a wholesome way to enjoy comfort food any night of the week!
Step‑by‑Step Instructions for Roasted Garlic Butternut Mash
Step 1: Preheat the Oven
Begin by preheating your oven to 400°F (200°C). This temperature ensures a perfect roast for both the butternut squash and garlic. While waiting for the oven to heat up, gather a baking sheet, aluminum foil, and a mixing bowl for the subsequent steps.
Step 2: Prepare the Butternut Squash
Next, peel and cube the butternut squash into uniform pieces, about 1-inch each, to ensure even cooking. Toss the cubes with olive oil and a sprinkle of salt in a large bowl. Spread the squash in a single layer on the prepared baking sheet for optimal roasting.
Step 3: Roast the Butternut Squash
Place the baking sheet in the preheated oven and roast the butternut squash for 25-30 minutes. Halfway through cooking, flip the cubes to promote even browning. The squash should become golden and fork-tender, showcasing a slight caramelization on its edges when done.
Step 4: Roast the Garlic
While the squash is roasting, prepare the garlic. Slice the top off a whole bulb of garlic, drizzle with a little olive oil, and wrap it in aluminum foil. Place the wrapped garlic in the oven alongside the squash for about 30 minutes, until it’s soft and fragrant, developing a mellow sweetness.
Step 5: Combine the Ingredients
Once both the butternut squash and garlic are fully roasted, transfer the squash to a mixing bowl. Squeeze the soft roasted garlic cloves out of their skins and into the bowl. Add butter, black pepper, smoked paprika, and any desired herbs to the mixture, embracing the essence of the Roasted Garlic Butternut Mash.
Step 6: Mash to Perfection
Using a potato masher or hand mixer, begin mashing the squash and garlic together until you reach your desired consistency. If the mixture feels too thick, gradually stir in some vegetable broth or cream until it achieves a creamy, smooth texture that’s perfect for serving.
Step 7: Season & Serve
Finally, taste your Roasted Garlic Butternut Mash and adjust the seasoning as needed. Serve the mash warm, optionally garnished with fresh herbs or an extra dab of butter on top. This comforting side dish is perfect for pairing with your favorite meals, adding warmth and flavor to any dining experience.
Roasted Garlic Butternut Mash Variations
Feel free to make this recipe your own with delightful variations that enhance flavor and cater to dietary preferences!
-
Vegan Option: Substitute regular butter with vegan butter and creamy non-dairy milk for a velvety plant-based version. Enjoy this comforting dish without compromise!
-
Spicy Twist: Replace smoked paprika with a pinch of cayenne or chili powder for a kick. The added heat warms the soul just like cozy evenings by the fire.
-
Herb-Infused: Stir in finely chopped fresh herbs like rosemary or sage for aromatic depth. The fragrant addition brings a pop of freshness that lifts this mash to new heights.
-
Nutty Flavor: Add a tablespoon of tahini for a nutty twist. It not only adds creaminess but also infuses an unexpected richness that’s simply divine!
-
Cheesy Goodness: Mix in some grated Parmesan or nutritional yeast for umami flavor that melts into the mash. A cheesy variant makes it an irresistible addition to any meal!
-
Creamy Orbs: Incorporate cream cheese or sour cream for tangy creaminess. This luscious addition creates a mash that feels indulgent—a true treat for special occasions!
-
Zesty Lemon: A splash of lemon juice brightens the flavors, balancing the sweetness of the butternut squash beautifully. It adds a refreshing zing that keeps your palate excited!
For more scrumptious inspiration, try pairing this mash with my Garlic Cauliflower Mushroom Skillet for a hearty meal, or explore the comforting warmth of Roasted Poblano Soup to complement your dinner!
Make Ahead Options
These Roasted Garlic Butternut Mash are perfect for busy home cooks looking to save time! You can prepare the mashed mixture up to 3 days in advance. Simply roast the squash and garlic as instructed, then mash everything together and refrigerate in an airtight container. To maintain its creamy texture, be sure to gently reheat it on the stovetop or microwave, adding a splash of vegetable broth or cream if needed to restore its luscious consistency. For the best taste, finish by adjusting the seasoning right before serving, and enjoy this comforting side that’s just as delicious as when it’s freshly made!
Storage Tips for Roasted Garlic Butternut Mash
-
Fridge: Store leftover Roasted Garlic Butternut Mash in an airtight container for up to 3 days. Reheat gently on the stove or in the microwave, adding a splash of broth or cream to restore creaminess.
-
Freezer: For longer storage, freeze the mash in portions using freezer-safe containers. It will maintain its best quality for up to 3 months. Thaw in the fridge overnight before reheating.
-
Reheating: When ready to enjoy, reheat the mash over medium heat, stirring occasionally, and add a little liquid if needed to achieve the right consistency.
-
Airtight Tips: Ensure the container is tightly sealed to prevent any freezer burn and maintain the delightful flavors of the Roasted Garlic Butternut Mash.
Expert Tips for the Best Roasted Garlic Butternut Mash
-
Prep & Roast: Make sure the butternut squash cubes are uniform in size for even cooking. Overcrowding the baking sheet can lead to steaming rather than roasting.
-
Vegan Swap: For a vegan Roasted Garlic Butternut Mash, substitute regular butter with vegan butter and use vegetable broth or non-dairy milk to achieve that creamy consistency.
-
Flavor Boost: Don’t shy away from experimenting with spices! If you’re out of smoked paprika, regular paprika or a pinch of chili powder can provide a different yet delightful flavor.
-
Perfect Creaminess: If your mash feels too thick, stir in a splash of vegetable broth or cream to reach your preferred creamy texture.
-
Make Ahead: Prepare mashed squash in advance; simply store it in an airtight container in the fridge. Reheat gently and add a bit of liquid to restore the creaminess before serving.
-
Garnish for Appeal: Enhance the dish’s presentation and flavor by garnishing your Roasted Garlic Butternut Mash with fresh herbs or an extra dab of butter right before serving.
What to Serve with Roasted Garlic Butternut Mash
Elevate your meal with delightful pairings that bring out the warmth and comfort of this creamy side.
- Savory Roasted Chicken: Juicy, herb-seasoned chicken beautifully balances the sweet and smoky flavors of the mash, creating a satisfying plate.
- Herb-Crusted Pork Tenderloin: The juicy tenderness of pork contrasts with the creamy butternut mash, while herbs elevate the overall taste.
- Zesty Kale Salad: A fresh, tangy kale salad with citrus dressing adds brightness, cutting through the richness of the mash for a balanced meal.
- Garlic Butter Shrimp: Sweet shrimp sautéed in garlic butter offers a delightful seafood twist that complements the earthy flavors of the mash splendidly.
- Steamed Green Beans: Crisp green beans lightly seasoned with lemon provide a refreshing, crunchy texture that contrasts well with the creamy mash.
- Crispy Brussels Sprouts: Roasted until caramelized, these sprouts introduce a crispy element that pairs beautifully with soft butternut mash and enhances the overall flavor.
- Red Wine: A glass of rich, fruity red wine rounds out the meal, offering depth to the comforting flavors of the roasted garlic butternut mash.
- Pumpkin Spice Muffins: For a comforting dessert option, these sweet muffins echo the squash’s flavor, making for a lovely ending to your meal.
Roasted Garlic Butternut Mash Recipe FAQs
How do I choose a ripe butternut squash?
Absolutely! When selecting a butternut squash, look for one that feels heavy for its size, has a smooth, beige skin, and no dark spots or blemishes. You want a squash that is firm and without soft areas, which can indicate overripeness. If it has a few minor scratches, that’s okay—just avoid those with deep cuts or dark spots all over!
How should I store leftover Roasted Garlic Butternut Mash?
Great question! You can store your leftover Roasted Garlic Butternut Mash in an airtight container in the refrigerator for up to 3 days. To reheat, gently warm it on the stove or in the microwave, adding a splash of broth or cream to restore its creamy texture.
Can I freeze Roasted Garlic Butternut Mash?
The more the merrier! Freezing is an excellent way to keep extra mash on hand. Allow the Roasted Garlic Butternut Mash to cool completely, then portion it into freezer-safe containers. It will maintain its best quality for up to 3 months. Thaw it overnight in the fridge before reheating, and add a bit of liquid if it seems too thick!
What if my mash is too thick or dry?
No worries—it’s an easy fix! If your Roasted Garlic Butternut Mash turns out too thick or dry, simply add a little vegetable broth or cream, one tablespoon at a time, while stirring to achieve your desired consistency. Keep mashing until it’s silky and smooth, perfect for serving!
Are there any dietary considerations for the Roasted Garlic Butternut Mash?
Very much so! This mash is naturally gluten-free and can easily be made vegan by substituting regular butter with vegan butter and using vegetable broth or non-dairy milk instead of cream. It’s safe for most people, but always check for allergies to any specific ingredients you choose to add or substitute.
Can I substitute ingredients in the mash?
You bet! If you’re low on smoked paprika, using regular paprika or a pinch of chili powder will still bring delicious flavor to your mash. Additionally, feel free to get creative with herbs—thyme, rosemary, or even a dash of cumin can add an exciting twist to the flavor profile!
Roasted Garlic Butternut Mash: Comfort Food Made Easy
Ingredients
Equipment
Method
- Preheat your oven to 400°F (200°C). Gather a baking sheet, aluminum foil, and a mixing bowl.
- Peel and cube the butternut squash into 1-inch pieces, and toss with olive oil and a sprinkle of salt.
- Spread the squash in a single layer on the baking sheet and roast for 25-30 minutes, flipping halfway through.
- Slice the top off the garlic bulb, drizzle with olive oil, wrap in foil, and roast alongside squash for about 30 minutes.
- Transfer the roasted squash to a mixing bowl, squeeze in the roasted garlic, and add butter, pepper, paprika, and herbs.
- Mash the mixture until you reach desired consistency, adding vegetable broth or cream if too thick.
- Taste and adjust seasoning, then serve warm, optionally garnished with fresh herbs or an extra dab of butter.
Leave a Reply