
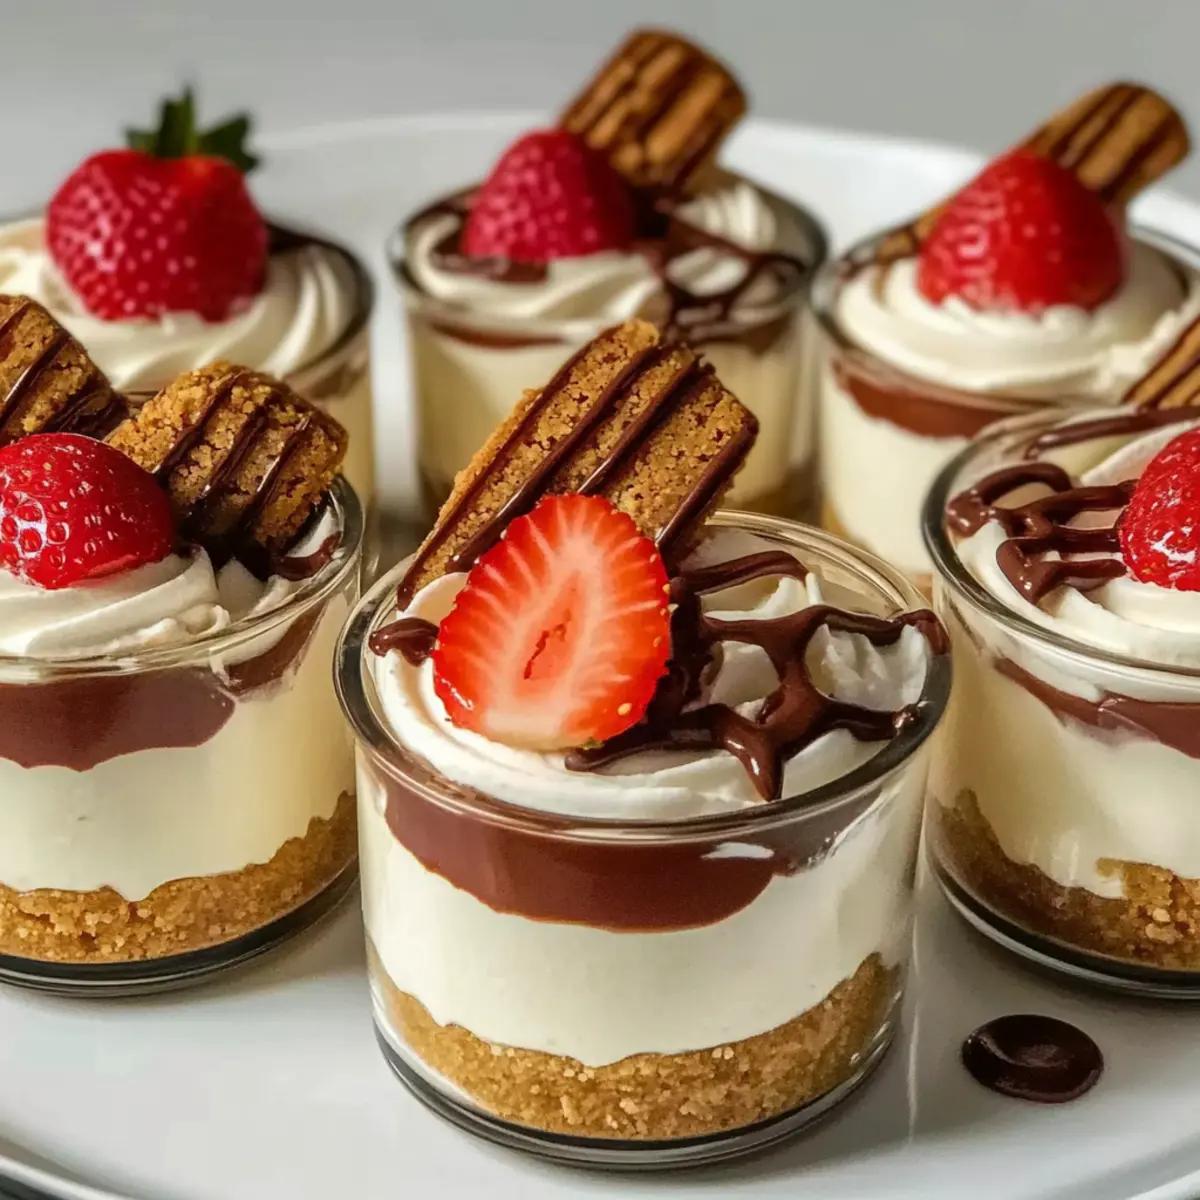
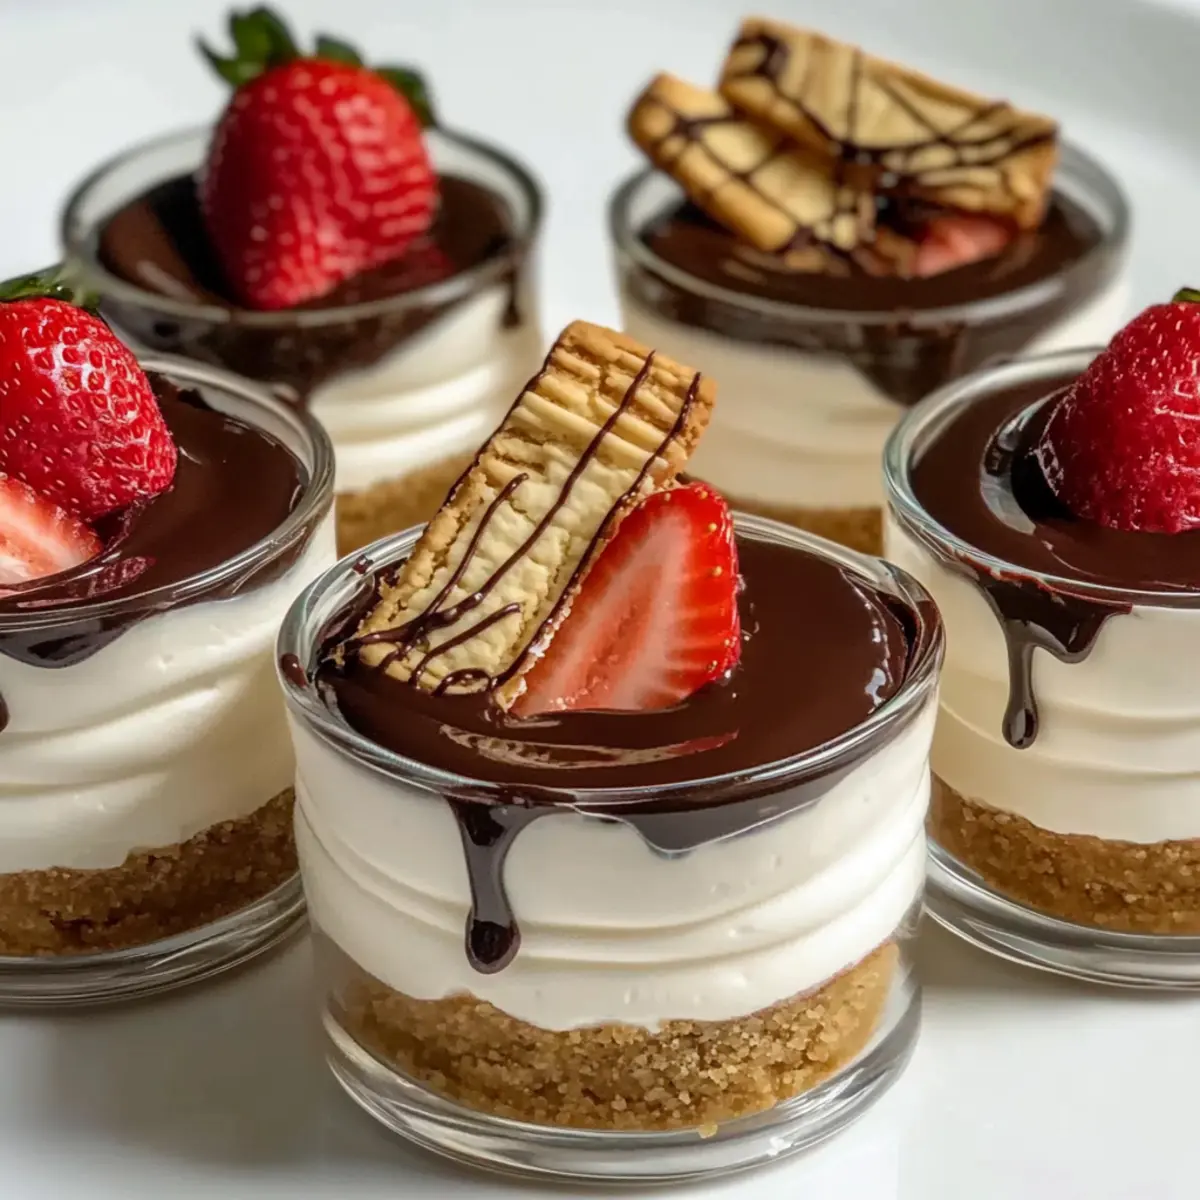
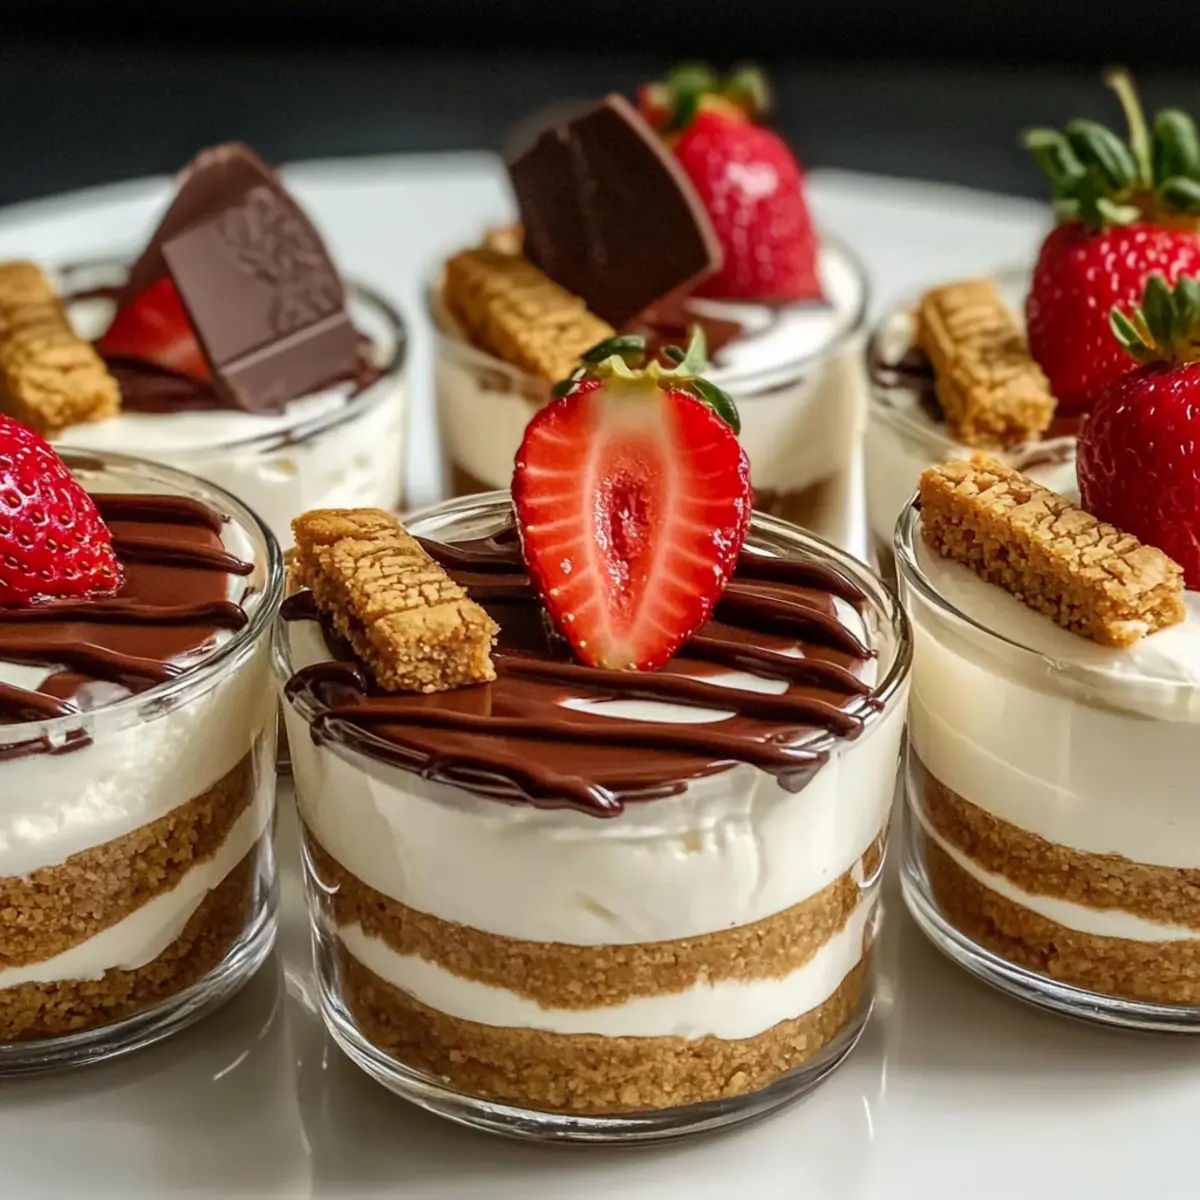
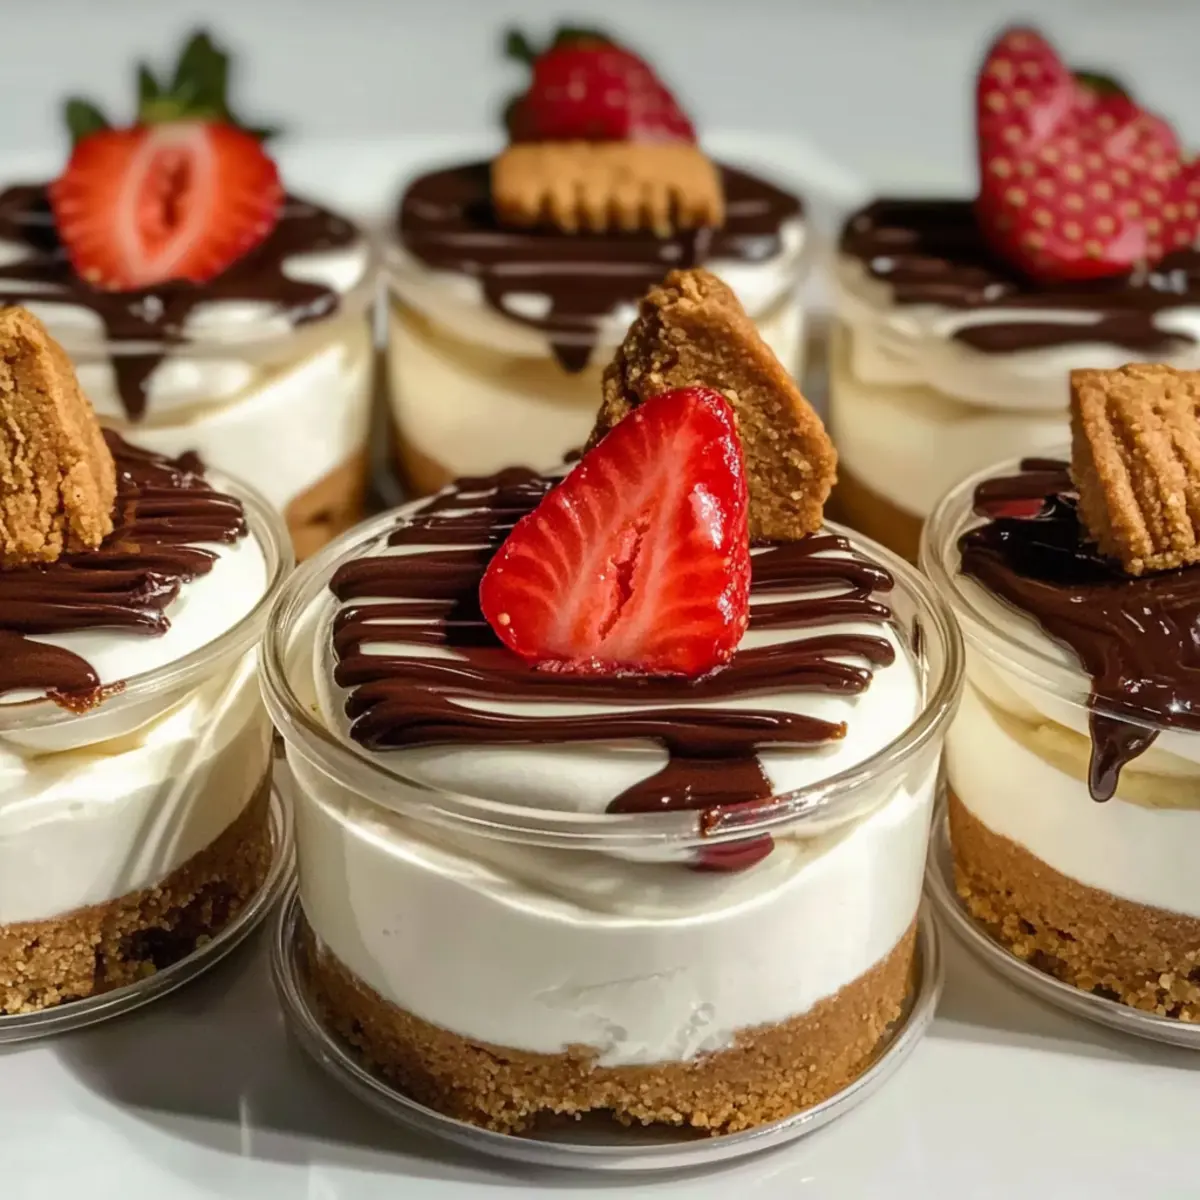
It was a warm afternoon when I stumbled upon a delightful way to satisfy my sweet tooth without the guilt or mess of traditional baking. Enter the 2-Ingredient Yogurt Cheesecake, a no-bake wonder that marries the creamy tang of Greek yogurt with the perfect crunch of cookies. This simple recipe not only saves time in the kitchen, but also offers a light, refreshing dessert that’s easy to customize for any occasion. Imagine serving this chilled treat topped with your favorite fruits or a drizzle of chocolate! Whether you’re hosting friends or treating yourself after a long day, this Yogurt Cheesecake is bound to be a hit. Ready to dive into a heavenly dessert that’s both effortless and delicious? Let’s get started!
Why is this Yogurt Cheesecake a must-try?
Simplicity: With only two ingredients, this cheesecake is perfect for bakers of all skill levels and eliminates the fuss of complicated recipes.
Customizable: Choose your favorite cookie crust, like Biscoff or graham, and personalize it with toppings such as fresh fruit or chocolate drizzle.
Light and Refreshing: As a no-bake dessert, it’s a tasty treat that won’t weigh you down, making it ideal for warm days or light meals.
Crowd-Pleasing: This lightweight dessert is a guaranteed hit at parties or family gatherings, appealing to both kids and adults alike.
Time-Saving: Forget about intricate baking; this recipe allows you to whip up a delicious dessert in no time. Dive into the decadence of this Yogurt Cheesecake today, and let your sweet tooth rejoice!
Yogurt Cheesecake Ingredients
For the Cheesecake
- Greek yogurt – Choose full-fat Greek yogurt for the creamiest texture, but low-fat is a lighter option.
- Cookies – Use your favorite variety, like Biscoff or graham, to create a deliciously crunchy crust.
Optional Toppings
- Fresh fruits – Sliced bananas or strawberries add natural sweetness and a pop of color.
- Chocolate drizzle – A rich chocolate sauce elevates the dessert with extra flavor and indulgence.
- Nuts or granola – Swap your cookies for crushed nuts or granola for a delightful crunch.
This easy-to-follow Yogurt Cheesecake recipe is your ticket to a deliciously refreshing dessert experience!
Step‑by‑Step Instructions for Yogurt Cheesecake
Step 1: Prepare the Base
Start by selecting your favorite cookies, such as Biscoff or graham, and crush them finely using a food processor or a ziplock bag and a rolling pin. Once you have a sandy texture, evenly distribute the crushed cookies at the bottom of individual glass cups or a serving bowl, pressing down gently to form a firm base.
Step 2: Add Yogurt Layer
Spoon a generous layer of full-fat Greek yogurt over the cookie crust, making sure to smooth the surface with the back of a spoon for an even layer. Aim for about a half-inch thickness, allowing that delightful creamy texture of the yogurt to fill the gaps between the cookie crumbs, creating a beautiful contrast in textures.
Step 3: Repeat Layers
Continue by adding another layer of your crushed cookies on top of the yogurt. Pat them down gently, ensuring the layer is well-distributed. Follow this with another thick layer of Greek yogurt, smoothing it out as you did previously. Repeat these layers until your ingredients are used up, finishing with a luscious layer of yogurt on top.
Step 4: Chill
Cover the assembled yogurt cheesecake with plastic wrap or a lid and place it into the refrigerator. Allow it to chill for at least 2 hours, or overnight if possible. This step is crucial for the flavors to meld together and for the cookie crust to absorb some moisture, resulting in a precisely balanced texture for the yogurt cheesecake.
Step 5: Serve and Enjoy
Once chilled, remove the yogurt cheesecake from the refrigerator. If desired, add your favorite toppings like fresh fruit, chocolate drizzle, or crushed nuts for a burst of flavor and visual appeal. Scoop out servings and enjoy the oasis of creaminess contrasted by the crunch of the cookie crust!
How to Store and Freeze Yogurt Cheesecake
-
Fridge: Store the Yogurt Cheesecake covered in the refrigerator for up to 3 days. This keeps it fresh while also allowing the flavors to continue melding.
-
Freezer: For longer storage, freeze individual portions in airtight containers for up to 2 months. Just be aware that the texture may slightly change upon thawing.
-
Thawing: To enjoy frozen portions, transfer them to the fridge overnight to gently thaw. This preserves the creamy texture of the cheesecake.
-
Reheating: There’s no need to reheat; simply enjoy it chilled, or let it sit at room temperature for a few minutes before serving for a slightly softer consistency.
Expert Tips for Yogurt Cheesecake
-
Choose the Right Yogurt: Use thick, full-fat Greek yogurt for the creamiest texture; low-fat can lead to a lighter cheesecake with less richness.
-
Moisture Control: Avoid excess moisture by not overloading the yogurt layers; too much can result in a mushy cheesecake.
-
Chill Time Is Key: Allow the yogurt cheesecake to chill overnight for the best flavor melding and firmer texture, ensuring a delightful bite.
-
Layer Evenly: Smooth each layer of yogurt for a beautiful presentation; this also helps balance the flavors between the cookie crust and yogurt.
-
Customize Your Crust: Experiment with cookie variations like Biscoff or digestive for different flavors, but ensure they blend well with the yogurt cheesecake.
-
Garnish with Joy: Dress up the cheesecake right before serving with fruits or chocolate drizzle to enhance both look and taste—make it your signature creation!
Yogurt Cheesecake Variations & Substitutions
Feel free to get creative and tailor the yogurt cheesecake to your tastes—it’s a treat that invites your personal touch!
-
Gluten-Free: Substitute traditional cookies with gluten-free cookie brands or use crushed nuts for the crust to maintain that delightful crunch.
-
Dairy-Free: Opt for coconut yogurt instead of Greek yogurt, offering a tropical twist that remains creamy and rich.
-
Flavor Infusion: Mix in vanilla extract or lemon zest to the yogurt for an aromatic flavor boost that elevates your cheesecake experience.
-
Nutty Crunch: Incorporate crushed almonds or walnuts into the cookie base for added texture and delightful nutty flavors that contrast beautifully with the yogurt.
-
Fruit Layers: Add layers of fresh berries or banana slices between the yogurt and cookie layers for a refreshing burst of flavor and natural sweetness.
-
Chocolate Indulgence: Mix cocoa powder into the yogurt before layering, giving you a luscious chocolate yogurt cheesecake that will satisfy any chocolate cravings.
-
Spiced Delight: Sprinkle cinnamon or pumpkin spice into the yogurt for a warm, cozy flavor profile—this variation is especially comforting in the cooler months.
As you experiment with these variations, don’t forget to check out delicious options like Blueberry Cheesecake Protein Bites or perhaps some chocolatey goodness with No-Bake Gingerbread Cheesecake Cups. Each twist offers exciting new flavors to keep your taste buds happy!
Make Ahead Options
These 2-Ingredient Yogurt Cheesecakes are perfect for meal prep enthusiasts looking to save time during busy weeks! You can prepare the individual cheesecake layers up to 24 hours in advance; simply assemble the cookie crust and yogurt layers, then cover and refrigerate. To maintain quality, store them properly sealed in the refrigerator to prevent any moisture loss. When you’re ready to serve, just add your favorite toppings like fresh fruit or a drizzle of chocolate for that final touch. This way, you’ll have a delightful dessert ready to impress family or friends with minimal effort!
What to Serve with 2-Ingredient Yogurt Cheesecake
Indulge your guests with a well-rounded meal that perfectly complements the refreshing taste of this no-bake dessert.
-
Fresh Fruit Salad: A medley of seasonal fruits offers a burst of color and sweetness that brightens every bite of cheesecake.
-
Chocolate-Dipped Strawberries: The rich chocolate pairs beautifully with the creamy yogurt, creating a delightful contrast that enhances the overall experience.
-
Minty Couscous Salad: Light and refreshing, this herbed salad adds a delightful texture that balances the rich cheesecake, making every mouthful a treat.
-
Chilled Herbal Iced Tea: A caffeine-free herbal iced tea provides a soothing drink option that cleanses the palate between sweet bites of cheesecake.
-
Vanilla Ice Cream: Rich and creamy, a scoop of vanilla ice cream offers a luxurious touch, enhancing the flavors of the yogurt cheesecake.
-
Lemon Tart: The tangy zest of a lemon tart mirrors the cheesecake’s brightness, creating a harmonious blend of citrus and creaminess.
-
Caramel Drizzle: For an extra touch, serve a warm caramel drizzle to enhance the dessert’s sweetness, adding depth and indulgence to every spoonful.
-
Almond Biscotti: A crunchy biscotti provides a satisfying texture contrast and a nutty flavor that pairs well with the yogurt base.
Yogurt Cheesecake Recipe FAQs
What kind of Greek yogurt should I use?
Absolutely! For the creamiest and most indulgent texture, I highly recommend using full-fat Greek yogurt. Its rich creaminess enhances the overall flavor of the cheesecake beautifully. If you’re aiming for a lighter option, low-fat Greek yogurt will do, but it may yield a less rich result.
How should I store leftover Yogurt Cheesecake?
You can store your Yogurt Cheesecake in the refrigerator for up to 3 days. Just make sure to cover it tightly with plastic wrap or a lid to keep it fresh and prevent it from absorbing any odors.
Can I freeze Yogurt Cheesecake?
Very! For longer storage, you can freeze individual portions in airtight containers for up to 2 months. Just keep in mind that the texture might change slightly upon thawing, but it will still be delicious! To thaw, simply place the containers in the fridge overnight.
What if my cheesecake layers are too runny?
If your layers are too runny, there are a few things you can try. First, ensure you’re using thick Greek yogurt; straining it through cheesecloth for about 30 minutes can help remove excess moisture. If you’ve accidentally added too much yogurt, reduce the amounts in there next time to maintain a firmer cheesecake. Giving it enough chill time overnight also helps firm things up.
Are there any dietary considerations I should know about?
Yes, if you’re serving to guests with allergies, it’s crucial to check cookie ingredients as they can contain allergens like gluten and dairy. If you’re worried about potential allergies, opt for gluten-free cookies or try using crushed nuts for the crust instead. Just ensure to communicate any ingredients with your guests so they can enjoy without worry!
Irresistibly Creamy Yogurt Cheesecake You’ll Love to Make
Ingredients
Equipment
Method
- Prepare the base by crushing your favorite cookies finely and evenly distribute them at the bottom of serving bowls.
- Add a generous layer of Greek yogurt over the cookie crust, smoothing the surface.
- Repeat layering with more cookie crumbs and yogurt until ingredients are used up.
- Chill the cheesecake for at least 2 hours or overnight to meld flavors.
- Serve chilled, adding desired toppings for extra flavor.
Leave a Reply