
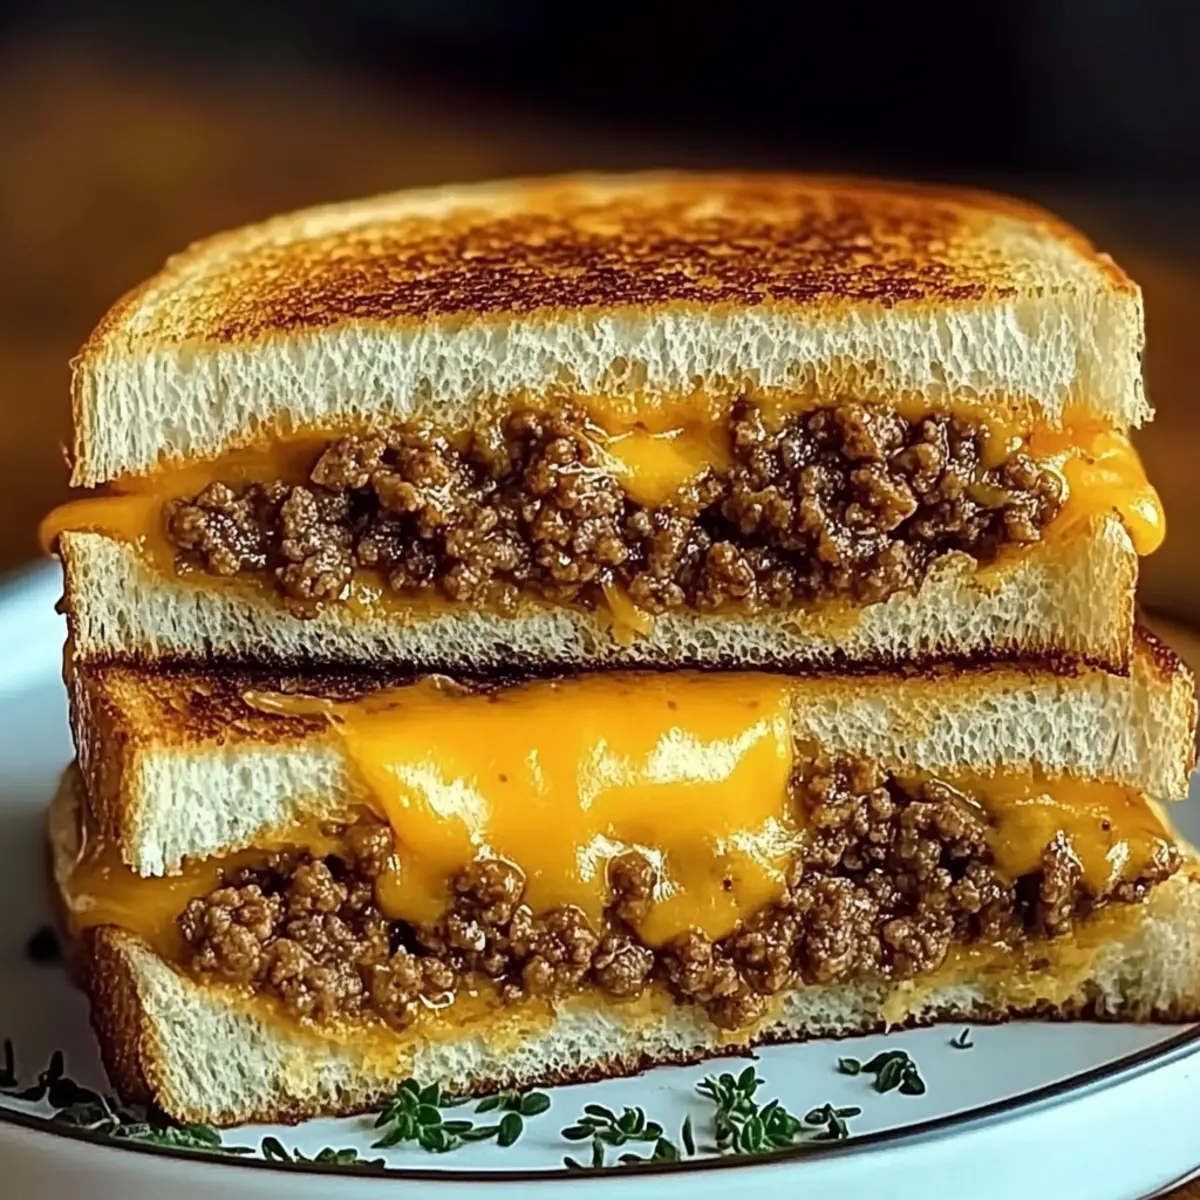
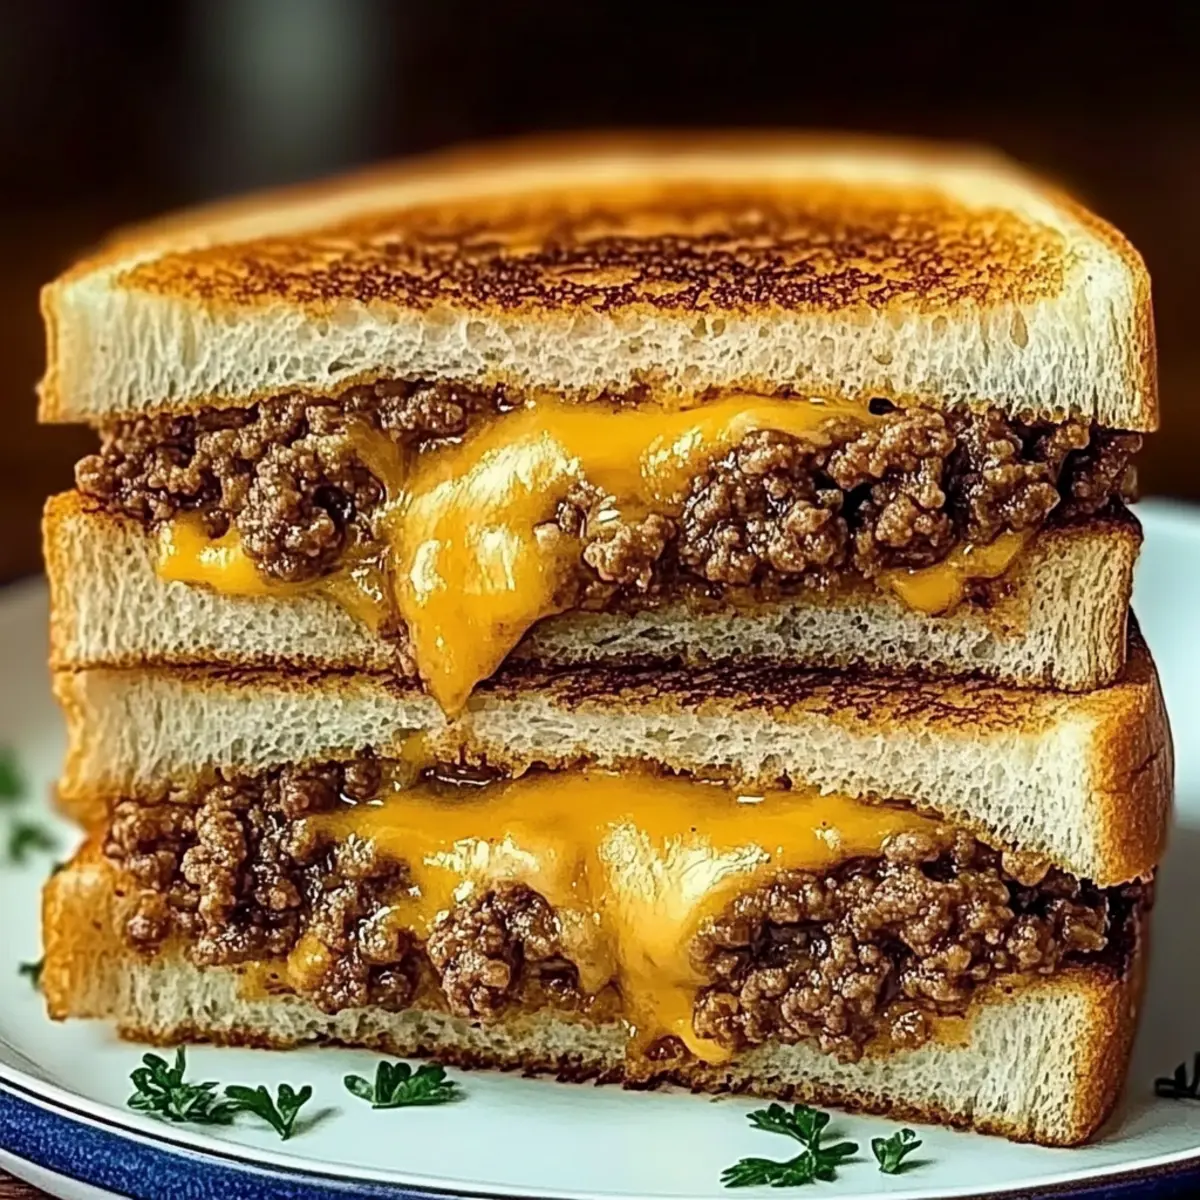
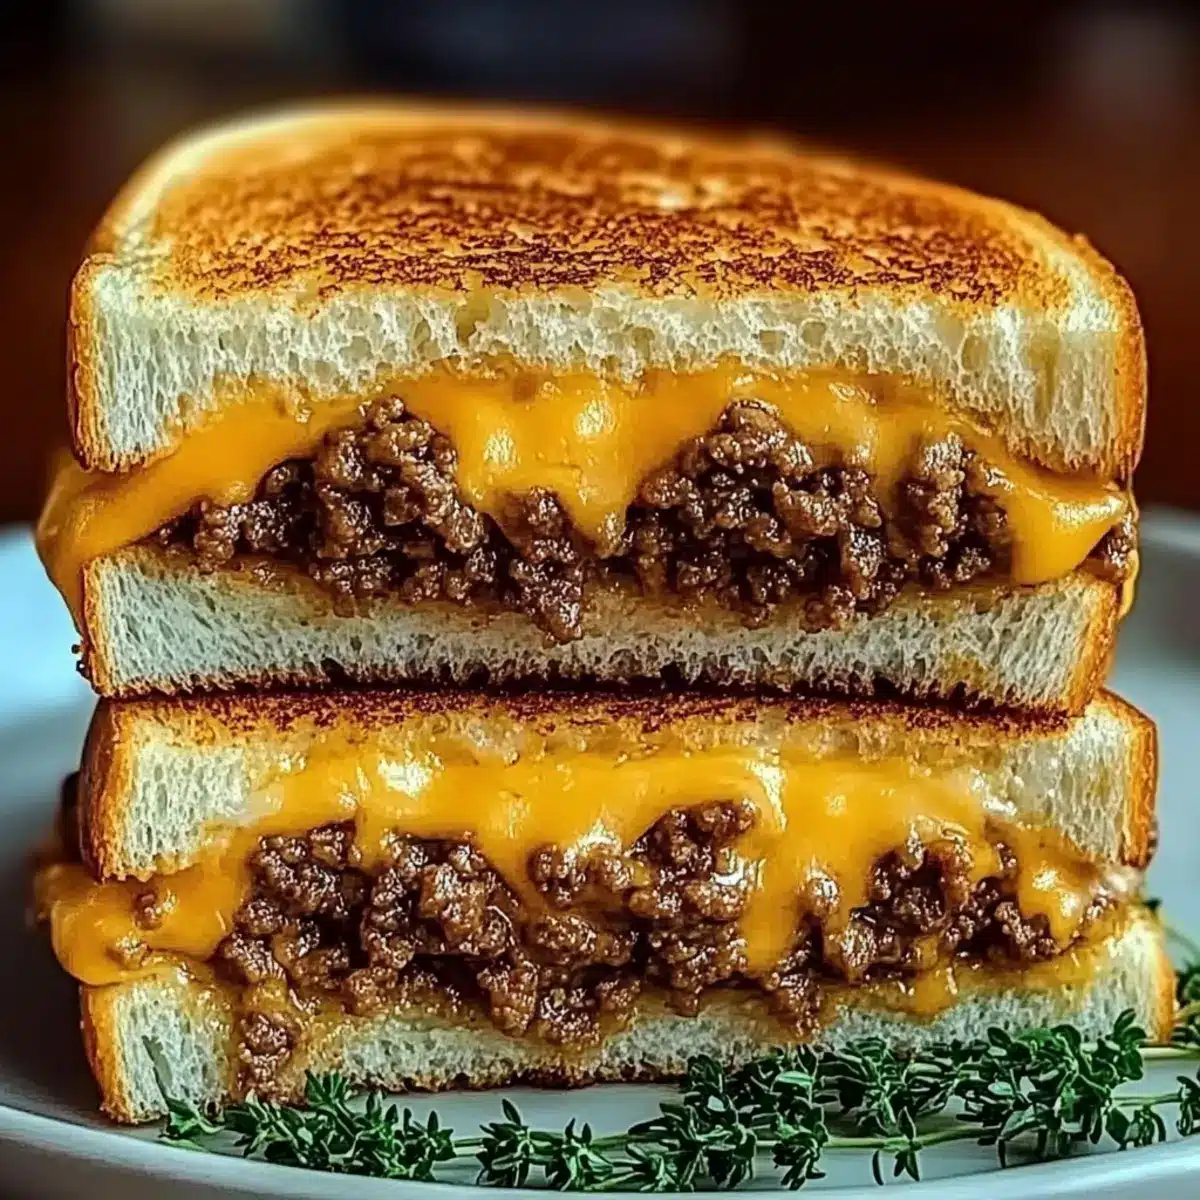
There’s something magical about sinking your teeth into a perfectly crispy sandwich, especially when it’s packed with a savory filling like my Ultimate Cheesy Ground Beef Melt. This comforting masterpiece combines seasoned ground beef with a delightful blend of cheese, creating a gooey center that’s sure to please everyone at the table. What I love most is how quick this recipe comes together—perfect for busy weeknights or a laid-back weekend evening. Plus, it’s highly customizable, so you can adjust it to suit picky eaters or your own cravings. With just a few ingredients and about 20 minutes of your time, you’ll have a hearty meal that feels like a warm hug! Ready to create your own cheesy delight and impress your family? Let’s dive into the recipe!

Why Is This Cheesy Ground Beef Melt Perfect?
Satisfying Flavor: The blend of seasoned beef and gooey cheese creates a taste explosion that warms the soul.
Quick Prep: In just 20 minutes, you can whip up a delightfully crispy sandwich, making it perfect for busy evenings.
Customizable: Tailor it to your family’s tastes—try different cheeses or swap beef for a plant-based option!
Kid-Friendly: This melt is sure to become a family favorite, keeping even the pickiest eaters happy.
Comforting Texture: Expect a golden crust enveloping a molten center that offers both crunch and chew.
Pair it with a side of warm tomato soup for an even more delightful experience! Trust me, this Ultimate Cheesy Ground Beef Melt is a quick comfort food blessing you won’t want to miss!
Cheesy Ground Beef Melt Ingredients
• For the Beef Filling
- Ground Beef – Provides the savory, meaty base; using lean beef can lighten the dish.
- Salt – Enhances overall flavor; adjust according to dietary needs.
- Black Pepper – Adds a mild heat; fresh ground pepper delivers the best flavor.
- Garlic Powder – Infuses savory depth; can be swapped with fresh minced garlic for a stronger kick.
- Onion Powder – Adds a touch of sweetness; fresh onions can be used but should be sautéed first.
• For the Cheese Meltdown
- Shredded Cheddar Cheese – Adds a sharp, creamy flavor; freshly grated cheese melts beautifully.
- Shredded Mozzarella Cheese – Contributes to a stretchy, gooey texture; try mixing with other cheeses for a unique taste.
• For the Sandwich
- Thick-Cut Bread – Holds the hearty filling well; opt for sourdough or Texas toast for added crunch.
- Butter – Creates a crispy, golden crust when toasted; use softened butter for easy spreading.
• Garnish (optional)
- Chopped Fresh Parsley – Offers a fresh touch; can be substituted with herbs like basil or thyme.
This Cheesy Ground Beef Melt is not just a sandwich; it’s a warm embrace on a plate!
Step‑by‑Step Instructions for Cheesy Ground Beef Melt
Step 1: Brown the Beef
Heat a large skillet over medium-high heat and add the ground beef. Cook for about 7–9 minutes, breaking it apart with a spatula until it’s fully browned and no longer pink. Once cooked, drain any excess fat to keep the Cheesy Ground Beef Melt from becoming greasy.
Step 2: Season the Meat
Lower the heat to medium and sprinkle in salt, black pepper, garlic powder, and onion powder. Stir the mixture continuously for another minute, allowing the flavors to meld beautifully. You’ll know it’s ready when the spices are fragrant and well incorporated, enhancing the beef’s savory goodness.
Step 3: Prepare Bread
While the beef cools slightly, take thick-cut bread and spread butter on one side of each slice. This buttery layer is crucial for achieving a golden, crispy crust. Make sure the butter is softened to spread easily and evenly across each slice for the best results.
Step 4: Assemble the Sandwich
Place the first slice of bread in the skillet, buttered-side down. Layer it generously with a mix of shredded cheddar and mozzarella cheese, followed by a spoonful of the seasoned ground beef. Top with another slice of bread, buttered-side up, creating a delightful sandwich ready to be toasted.
Step 5: Toast the Sandwiches
In the same skillet, toast the sandwich over medium heat for about 3–4 minutes per side. Use a spatula to gently press down on the sandwich as it cooks, which helps achieve that perfect, golden-brown crust. Check for melty cheese and crispy edges to know it’s done.
Step 6: Serve
Remove the Cheesy Ground Beef Melt from the skillet and let it cool for a moment. Slice it in half to reveal the gooey, savory center before serving. Enjoy this comforting sandwich hot, perhaps alongside a side of crispy fries or a warm bowl of tomato soup for an even cozier meal.
What to Serve with Cheesy Ground Beef Melt
Enhance your delightful cheesy sandwich experience with these perfect sides that offer a balance of flavors and textures.
-
Crispy French Fries: Their salty crunch complements the gooey beef melt, making each bite a satisfying pairing. Grab a side of ketchup for classic dipping bliss.
-
Tangy Pickles: The bright acidity cuts through the richness of the melt, providing a refreshing contrast. These crunchy bites can awaken your palate after each savory mouthful.
-
Mixed Greens Salad: A simple salad tossed with a light vinaigrette adds freshness and balances the hearty sandwich, offering a light and vibrant counterpoint.
-
Warm Tomato Soup: Perfect for dipping, this creamy bowl envelops the rich flavors of the melt and enhances the comfort food experience. The warmth of the soup makes it feel like a cozy hug.
-
Sweet Potato Chips: Their slight sweetness and crunch provide a unique flavor twist while still maintaining the comfort food vibe. A perfect alternative to traditional chips!
-
Apple slices with Cheese: The natural sweetness of apples alongside cheese creates a delightful balance. A light and healthy option that adds a nice refreshing crunch to your meal.
Pairing any of these sides with your Cheesy Ground Beef Melt will surely lead to a satisfying and heartwarming feast!
Cheesy Ground Beef Melt Variations
Feel free to explore these fun twists and swaps to make your cheesy melt uniquely yours!
-
Plant-Based: Use ground beef alternatives like lentils or chickpeas for a delicious vegetarian version. It’s a great way to enjoy the same flavors while staying meat-free.
-
Cheese Combo: Mix in different cheeses such as provolone or pepper jack for added flavor and a kick of heat. Each cheese brings its own personality to the melt!
-
Spice it Up: Adjust the seasoning with crushed red pepper or hot sauce for a spicier bite that zings. Perfect for those who like to turn up the heat in their meals.
-
Add Veggies: Sneak in sautéed spinach, mushrooms, or bell peppers for extra texture and nutrition. This not only enhances the flavor but also makes it heartier.
-
Swap the Bread: Try using ciabatta or whole-grain bread for a delightful twist. Each bread type adds a unique flavor and texture to your melt.
-
Dippable Delight: Serve your cheesy melt with a side of marinara sauce or cilantro-lime crema for dipping. This adds an exciting layer of flavor that everyone will love.
-
Herbed Flavor: Mix in fresh herbs like basil or thyme with the beef for a fragrant infusion. These herbs elevate your melt to gourmet status.
-
Double Cheese: For a true cheese lover’s dream, double the cheesy layers. Who can resist the gooeyness of extra cheese in every bite?
Dive into these variations and make the Ultimate Cheesy Ground Beef Melt your own masterpiece! Pair it with a side of Cheesy Taco Potatoes or a comforting bowl of Beef Pot Pie for a full meal that your family will rave about!
Make Ahead Options
These Cheesy Ground Beef Melts are ideal for meal prep, making your busy weeknights a breeze! You can prepare the seasoned ground beef mixture up to 3 days in advance; simply refrigerate it in an airtight container. For best results, allow the mixture to cool completely before storing to maintain freshness. When you’re ready to assemble, just butter your bread, layer the cheese and beef, and then toast the sandwiches in a skillet for about 3-4 minutes per side until crispy and gooey. This way, you’ll enjoy the same deliciousness as freshly made melts with minimal effort, ensuring more time to spend with family!
Expert Tips for Cheesy Ground Beef Melt
• Freshly Grate Cheese: Ensure cheese is freshly grated for the best melt. Pre-packaged cheese often contains anti-caking agents that can affect texture.
• Watch the Heat: Keep the skillet on medium heat to prevent burning. A too-hot skillet will ruin the crispy exterior and may leave the cheese unmelted inside.
• Avoid Soggy Sandwiches: Don’t overload the filling, as excessive moisture from extra ingredients can lead to sogginess. Stick to the classic components for the ideal chewy bite.
• Try Alternative Cooking Methods: For a unique twist, consider air frying for a healthier option. Cook at 370°F (188°C) for 6–8 minutes, flipping halfway for even crispiness.
• Make-Ahead Hack: Prepare the seasoned beef mixture in advance and store it in the fridge for up to 2 days. This prepped filling makes assembling your Cheesy Ground Beef Melt a breeze during busy weeknights.
Storage Tips for Cheesy Ground Beef Melt
Fridge: Store leftover Cheesy Ground Beef Melt in an airtight container for up to 3 days. Keep the sandwich whole for maximum freshness until reheating.
Freezer: If you have extra filling, freeze the seasoned beef mixture in a tightly sealed container for up to 2 months. Thaw in the fridge before assembling your sandwiches.
Reheating: To reheat, place the sandwich in a skillet over low heat for about 5 minutes each side to regain crunch and melt the cheese properly. Alternatively, use an air fryer at 350°F (175°C) for 5–6 minutes.
Assembling Ahead: You can prepare and assemble the sandwich, then wrap it tightly in foil for short-term storage in the fridge. Toast it fresh when ready to eat for the best flavor and texture.
Cheesy Ground Beef Melt Recipe FAQs
What type of bread is best for a Cheesy Ground Beef Melt?
For the best results, I recommend using thick-cut bread like sourdough or Texas toast. These varieties provide a sturdy base that holds the hearty filling well and gives that satisfying crunch when toasted.
How should I store leftover Cheesy Ground Beef Melt?
Store any leftover Cheesy Ground Beef Melt in an airtight container in the fridge for up to 3 days. It’s best to keep the sandwich whole until you’re ready to reheat to maintain freshness and texture.
Can I freeze the beef mixture for future use?
Absolutely! If you have extra seasoned beef filling, transfer it to a tightly sealed container or a freezer bag and freeze for up to 2 months. Just thaw it in the fridge overnight before making your sandwich. You’ll have an easy, quick meal ready in no time!
What if my sandwich is soggy after cooking?
To avoid a soggy Cheesy Ground Beef Melt, be careful not to overload it with moisture-rich ingredients. Stick to the core components, and ensure that your beef is well-drained after cooking. If you want a creative twist, try adding crispy veggies or using less juicy toppings!
Are there any dietary considerations for this recipe?
If you want a gluten-free option, simply swap the bread for a gluten-free variety and ensure that all seasonings are gluten-free as well. For a lighter version, opt for lean ground beef or even substitute it with a plant-based meat alternative to suit your dietary needs.
Cheesy Ground Beef Melt for Quick Comfort Food Bliss
Ingredients
Equipment
Method
- Heat a large skillet over medium-high heat and add the ground beef. Cook for about 7–9 minutes, breaking it apart with a spatula until it’s fully browned and no longer pink. Drain any excess fat.
- Lower the heat to medium and sprinkle in salt, black pepper, garlic powder, and onion powder. Stir continuously for another minute.
- Spread butter on one side of each slice of thick-cut bread.
- Assemble the sandwich with bread, cheese, and seasoned beef, topping with another slice of bread.
- Toast the sandwich in the skillet for about 3–4 minutes per side, pressing down gently.
- Remove from skillet, let cool slightly, and slice in half before serving.
Leave a Reply