
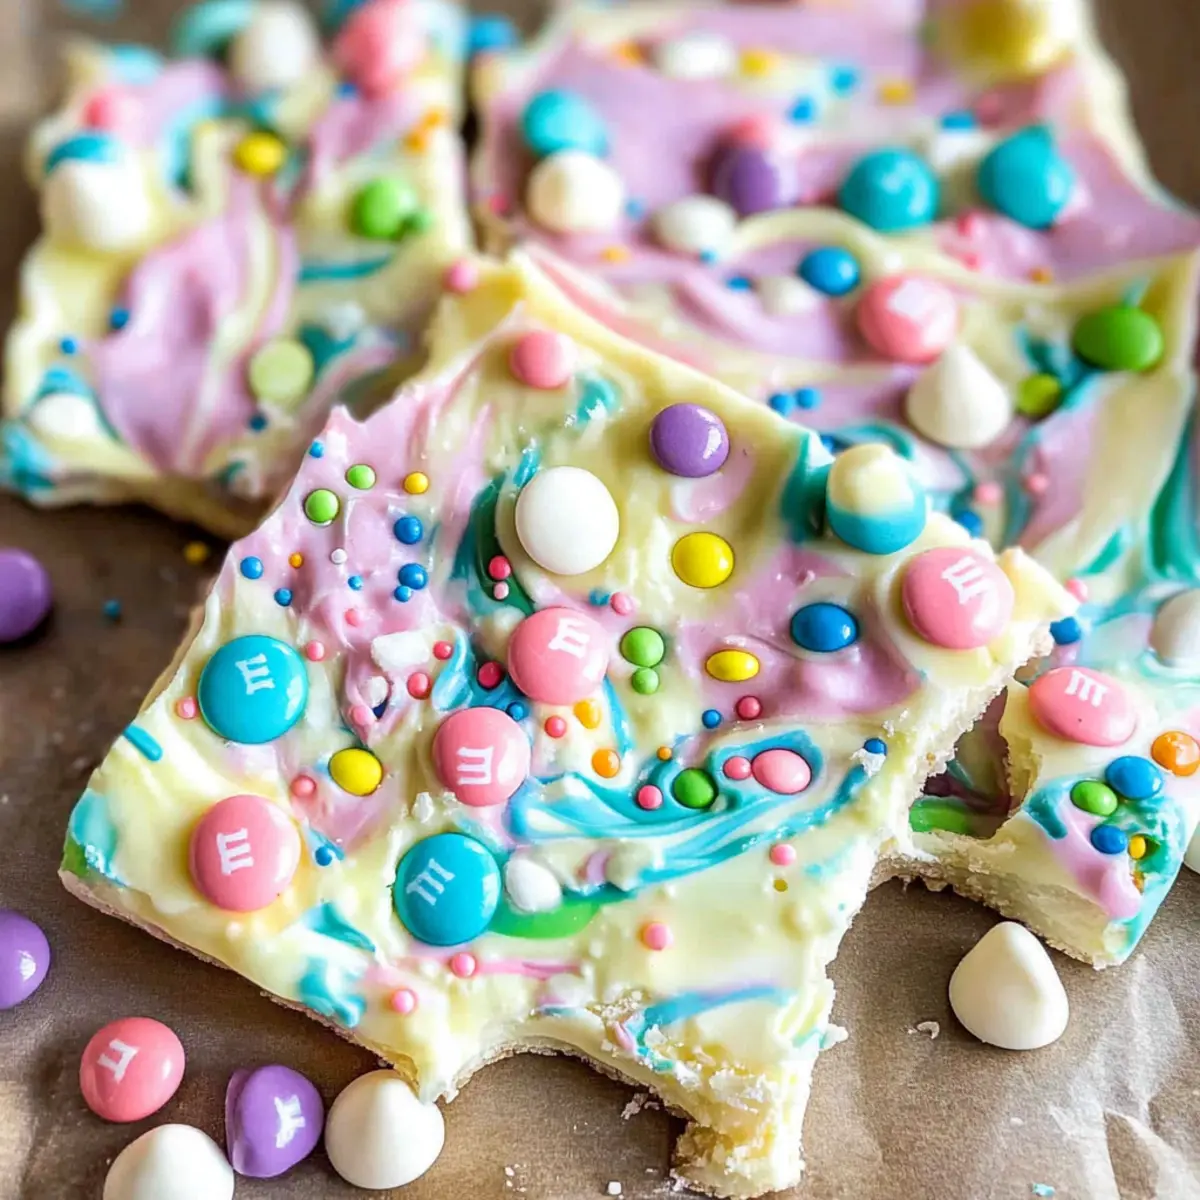
As I stood in my kitchen, the vibrant colors of spring caught my eye, and a simple idea blossomed – why not whip up a festive treat to celebrate Easter? This Quick & Easy White Chocolate Easter Bark is more than just a dessert; it’s a canvas for creativity and fun! With its creamy white chocolate base and delightful pops of color from candy melts and sprinkles, this no-bake recipe is a perfect blend of simplicity and visual appeal. It’s quick to prepare, making it an ideal project for the whole family, especially the little ones who can help sprinkle on their favorite toppings. Plus, it’s giftable! Encasing this delectable bark in a lovely box can bring a smile to anyone’s face during the holiday season. Curious to find out how to make this sweet delight? Let’s jump right into it!
Why Is This Bark So Irresistible?
Delightful, Creamy Flavor: The blend of creamy white chocolate and vibrant candy melts creates a treat that’s hard to resist.
Family-Friendly Fun: This no-bake recipe is perfect for involving your kids in the kitchen—watch their creativity shine as they decorate the bark!
Quick and Simple: With just a few ingredients and minimal steps, you can whip up this festive delight in no time.
Versatile Options: Customize with your favorite seasonal candies or even try different chocolate bases to suit all tastes.
Gift-Worthy Presentation: Package this beautiful bark in a charming box for a delightful homemade gift that’s sure to impress. For a delicious variation, check out my Chocolate Chip Banana recipe for another treat everyone will love!
White Chocolate Easter Bark Ingredients
Get ready to create this festive treat!
For the Bark
• White Chocolate Chips – 24 ounces for a sweet and creamy base that melts beautifully.
• Green Candy Melts – 2 tablespoons to add a splash of color and fun to your bark.
• Pink Candy Melts – 2 tablespoons for enhancing the visual appeal and flavor variety.
• Blue Candy Melts – 2 tablespoons to further brighten up your Easter celebration with a cheerful hue.
For the Toppings
• Easter M&M’s – 1/4 cup for delightful crunch and a seasonal burst of flavor in every bite.
• Easter Sprinkles – a generous sprinkle to make your bark irresistibly festive and visually appealing.
Now that you have the ingredients ready, let’s transform them into an eye-catching White Chocolate Easter Bark that your family will love!
Step‑by‑Step Instructions for White Chocolate Easter Bark
Step 1: Prepare Baking Sheet
Begin by lining a large baking sheet with a Silpat Mat or parchment paper. This creates a non-stick surface that will ensure your White Chocolate Easter Bark comes off easily once set. Make sure the paper hangs over the edges slightly to help lift the bark out later.
Step 2: Melt Chocolate and Candy Melts
Set up a double boiler: fill a large pot with water and bring it to a gentle simmer. Place a heat-proof bowl with 24 ounces of white chocolate over the simmering pot, stirring frequently until smooth and fully melted. In separate bowls over the smaller pot, melt 2 tablespoons each of green, pink, and blue candy melts, stirring until silky and vibrant.
Step 3: Spread Chocolate
Once the white chocolate is melted, carefully remove the bowl from the heat using a kitchen towel. Pour the melted chocolate onto the prepared baking sheet, using a spatula to spread it out evenly into a layer about 1/4 inch thick for optimum texture and bite, creating the base of your White Chocolate Easter Bark.
Step 4: Add Color Swirls
Using a spoon, drop spoonfuls of the melted colored candy melts randomly over the white chocolate layer. With a toothpick or skewer, gently swirl them together to create a beautiful, marbled effect. Be careful not to overmix, as you want to maintain those eye-catching swirls of color.
Step 5: Sprinkle Toppings
Now it’s time to add a festive touch! Scatter 1/4 cup of Easter M&M’s and a generous amount of Easter sprinkles over the chocolate mixture. This adds both texture and excitement, making your White Chocolate Easter Bark not just delicious, but also visually appealing for any Easter celebration.
Step 6: Chill to Set
Place the baking sheet in the refrigerator for about 30 minutes, allowing the chocolate to set and harden. Alternatively, leave it at room temperature for about 2 hours. You’ll know it’s ready when the bark is firm to the touch and holds its shape perfectly when lifted.
Step 7: Cut and Serve
Once fully set, carefully lift the bark off the baking sheet using the overhanging paper. Place it on a cutting board and use a sharp knife to cut it into approximately 16 pieces. Each piece should be colorful and decorated, showcasing your gorgeous White Chocolate Easter Bark that’s perfect for sharing!
How to Store and Freeze White Chocolate Easter Bark
Room Temperature: Keep the White Chocolate Easter Bark in an airtight container at room temperature for up to 3 days to maintain its freshness and texture.
Fridge: If you prefer, store it in the refrigerator for up to 2-3 weeks. It helps prolong freshness, but note that refrigeration may slightly alter the texture.
Freezer: For longer storage, wrap the bark tightly in plastic wrap and then in aluminum foil. Freeze for up to 3 months. To enjoy, simply thaw in the fridge before serving.
Reheating: Avoid reheating the bark, as it can cause the chocolate to become grainy. Enjoy it as is or right out of the fridge for a delightful crunch!
What to Serve with White Chocolate Easter Bark
Transform your Easter gathering into a delightful feast that pairs perfectly with your festive treat!
- Creamy Vanilla Ice Cream: The cool, smooth texture contrasts beautifully with the crunchy bark, making each bite a creamy dream.
- Fresh Strawberries: Juicy and vibrant, these berries add a refreshing touch that complements the sweetness of the bark and enhances its festive appeal.
- Chocolate Milkshake: Indulge in a thick and rich milkshake that will satisfy your sweet tooth, creating a delightful pairing with the creamy white chocolate.
- Carrot Cake: With its warm spices, moist texture, and tangy cream cheese frosting, the earthy flavors make a comforting contrast to the sweet bark.
- Lemonade or Citrus Punch: Refreshing drinks, with their zesty notes, serve as a delightful counterbalance to the sweetness of the White Chocolate Easter Bark.
- Nutty Trail Mix: Add a crunchy texture to your spread with a mix of nuts and dried fruits to enhance your snack palette while keeping it wholesome.
- Peanut Butter Cups: Lean into the chocolate theme with these rich, nutty treats; they echo the flavor of the bark while adding their own delightful twist.
- Coffee or Espresso: A strong, rich beverage complements the sweetness and balances the flavors of your dessert, making for a perfect after-dinner indulgence.
- Mini Cheesecakes: These bite-sized desserts are rich and creamy, providing a luxurious experience that pairs beautifully with your colorful bark.
Make Ahead Options
These White Chocolate Easter Bark pieces are a fantastic option for meal prep enthusiasts! You can melt the white chocolate and candy melts up to 24 hours in advance, storing them separately in airtight containers at room temperature to maintain their creamy texture. Additionally, you can mix your M&M’s and sprinkles into a blend ready to top your bark right before serving, preventing any sogginess. When you’re ready to prepare, simply follow the final steps by spreading the melted chocolate, creating swirls, adding your toppings, and chilling until set. This way, you’ll achieve that delightful, homemade treat with minimal effort on the day of your celebration!
White Chocolate Easter Bark Variations
Feel free to mix things up and create your perfect version of this delightful bark!
-
Dairy-Free: Use dairy-free white chocolate chips and coconut oil to create a creamy base that’s accessible for lactose-intolerant friends.
-
Nutty Delight: Fold in chopped nuts like almonds or hazelnuts for an extra crunch that adds depth to every bite. The richness of nuts beautifully complements the sweetness of the chocolate.
-
Fruit Infusion: Toss in dried fruits such as cranberries or apricots. This variation provides a chewy texture that pairs impeccably with the creamy bark.
-
Festive Colors: Try using seasonal candy melts in traditional holiday colors—like reds, greens, or golds—to tailor the bark for special occasions.
-
Crunchy Cookies: Crush up your favorite cookies, like Oreos or graham crackers, and sprinkle them on top for a crunchy surprise that kids will adore.
-
Spicy Kick: Add a pinch of cayenne pepper to your melted white chocolate for a surprising twist. The subtle heat enhances the sweet taste in thrilling ways!
-
Flavorful Extracts: Experiment with various extracts, like almond or peppermint, to infuse a unique flavor into your bark. A splash of orange zest can also elevate the treat with a citrusy zing.
For more creative ideas, check out my scrumptious Dark Chocolate Quinoa recipe, or indulge in a classic Chocolate Chip Banana treat for another delicious dessert everyone will enjoy!
Expert Tips for White Chocolate Easter Bark
-
Melt Carefully: Avoid overheating the chocolate; it can seize if it gets too hot. Melt slowly for a smooth texture of your White Chocolate Easter Bark.
-
Swirl Techniques: Use the tip of a toothpick to create beautiful swirls without overmixing. This helps maintain the vibrant colors instead of blending into a muddled look.
-
Chill Times: Ensure your chocolate sets completely before cutting. If it’s too soft, the pieces may break apart. Chill for 30 minutes or let it sit at room temperature for 2 hours.
-
Storage Secrets: Keep leftovers in an airtight container at room temperature or refrigerated to keep them fresh for up to 2-3 weeks.
-
Inclusivity Option: For a fun twist, add nuts or dried fruits to the topping for a different flavor profile that appeals to varying tastes in your family!
White Chocolate Easter Bark Recipe FAQs
What type of white chocolate should I use?
Absolutely! For the best results, I recommend using high-quality white chocolate chips or bars. The higher the cocoa butter content, the creamier the final result will be. If you opt for baking chocolate, just ensure it’s labeled for melting.
How do I know when the chocolate is fully melted?
Very! When melting, stir frequently. The chocolate is ready when it’s smooth and glossy, and there are no lumps remaining. Be vigilant as overheating can lead to seizing, which you want to avoid.
How long can I store the White Chocolate Easter Bark?
You can store your bark in an airtight container at room temperature for about 3 days. If you refrigerate it, it will last for 2-3 weeks, though the texture might be slightly firmer.
Can I freeze the White Chocolate Easter Bark?
Yes! For optimal freezing, wrap the bark tightly in plastic wrap and then place it in an airtight container. It can be frozen for up to 3 months. To enjoy later, simply transfer it to the fridge for a few hours to thaw before serving.
What should I do if the chocolate seizes while melting?
Oh no! If this happens, don’t panic. You can try adding a teaspoon of vegetable oil or coconut oil to the melted chocolate and stir vigorously until smooth. This can salvage your mixture and allow you to continue with your recipe smoothly.
Are there any allergy considerations for this recipe?
Definitely! Keep in mind that while the basic ingredients are generally safe, if you have allergies, ensure to use allergy-friendly candies and chocolate to avoid cross-contamination. Always check labels for possible allergens, especially with the M&M’s and candy melts.
Irresistibly Creamy White Chocolate Easter Bark Recipe
Ingredients
Equipment
Method
- Prepare Baking Sheet: Line a large baking sheet with a Silpat Mat or parchment paper.
- Melt Chocolate and Candy Melts: Set up a double boiler and melt the white chocolate and candy melts separately.
- Spread Chocolate: Pour the melted white chocolate onto the baking sheet, spreading evenly.
- Add Color Swirls: Drop spoonfuls of colored candy melts and swirl to combine.
- Sprinkle Toppings: Scatter Easter M&M's and sprinkles over the mixture.
- Chill to Set: Place in the refrigerator for 30 minutes to harden.
- Cut and Serve: Lift the bark off and cut into pieces.
Leave a Reply