
As I stood in my kitchen, the sweet scent of melting chocolate began to fill the air, transporting me back to cherished childhood memories of baking with my mom. Now, I’m excited to introduce you to my take on the classic cookie: Perfectly Chewy Gluten-Free Chocolate Chip Cookies. These tender delights combine the perfect balance of a crisp edge and a soft, chewy center, offering a delicious treat without the gluten. Best of all, this recipe comes together in a flash, making it an ideal choice for busy evenings or unexpected guests. Plus, you can whip up a batch and stock your freezer with mouthwatering cookies that are ready whenever a craving strikes. So grab your mixing bowl, and let’s create a sweet moment together—who can resist the allure of freshly baked cookies?
Why Make Gluten-Free Cookies?
Simplicity: These cookies come together quickly, perfect for those on the go.
Chewy Center: Achieve that sought-after chewy texture with just the right balance of ingredients.
Flavorful Twist: Adapt this classic by adding nuts or different types of chocolate for a unique spin, just like in my Puff Pastry Breakfast recipe!
Crowd-Pleasing: Ideal for sharing; these treats are sure to impress friends and family alike.
Versatile: Whether you prefer chewy or crispy cookies, this recipe can be tailored to your taste. With these gluten-free goodies, you’ll never look back!
Gluten-Free Chocolate Chip Cookie Ingredients
For the Cookie Dough
• All-Purpose Gluten-Free Flour – Provides structure and a suitable base; almond flour can be used for a nuttier taste.
• Baking Soda – Helps cookies rise and achieve a chewy texture; ensure it’s fresh for the best results.
• Brown Sugar – Adds moisture and richness; light brown sugar gives a milder flavor, while dark brown sugar intensifies sweetness.
• Granulated Sugar – Balances moisture from brown sugar, speeding up caramelization and crisping.
• Unsalted Butter – Provides flavor and moisture; use coconut oil for a dairy-free option.
• Eggs – Binds ingredients together and adds moisture; whisk until pale for optimal fluffiness.
• Vanilla Extract – Enhances the cookie flavor; always prefer pure extract for depth.
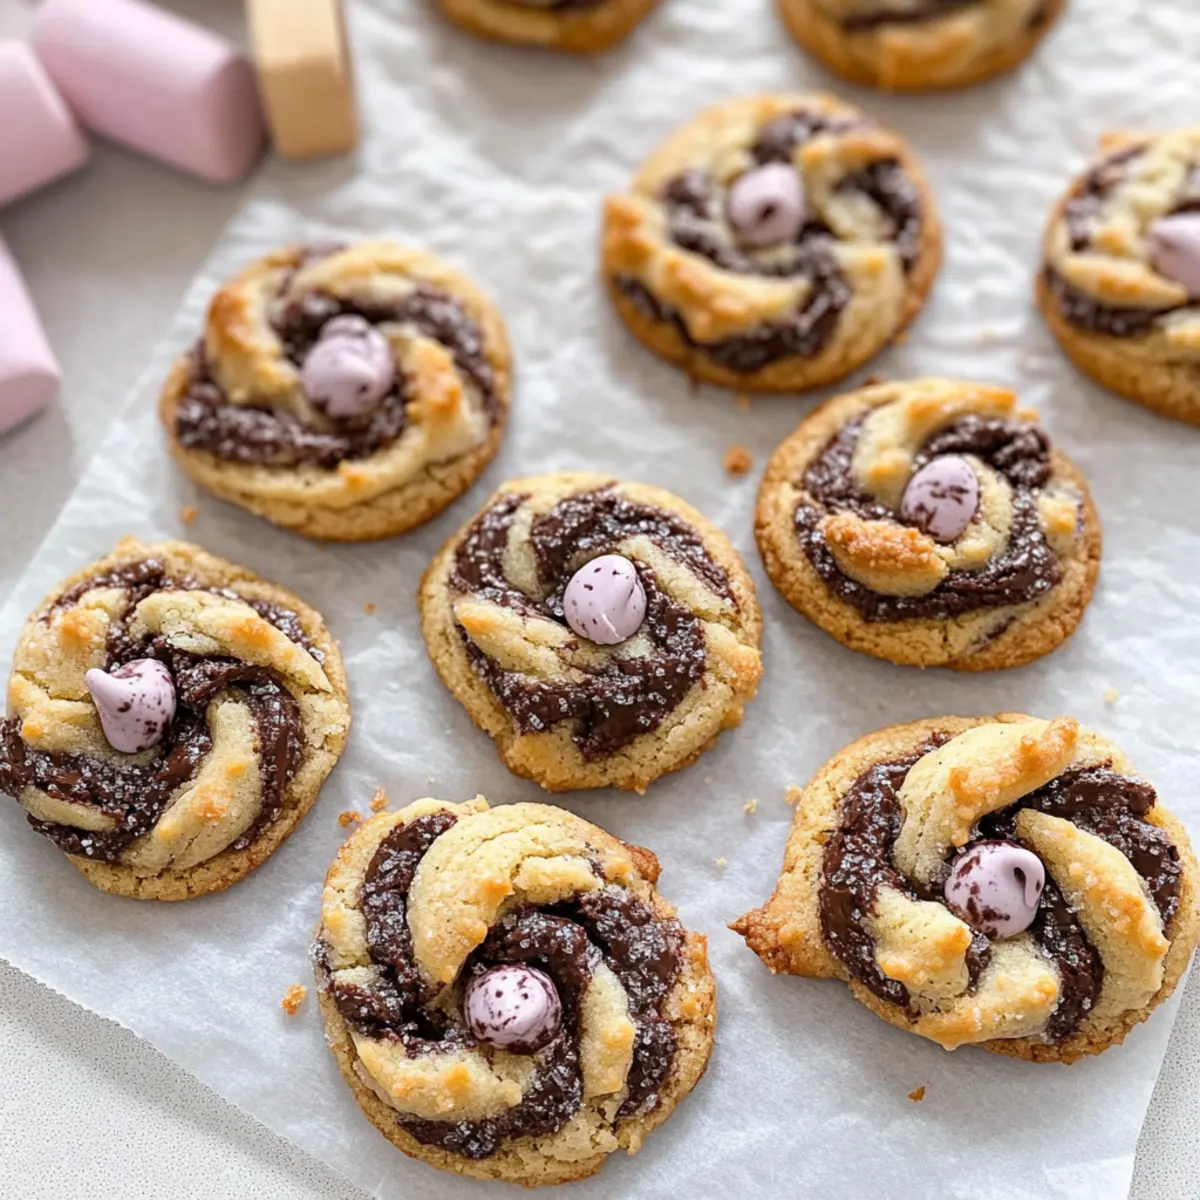
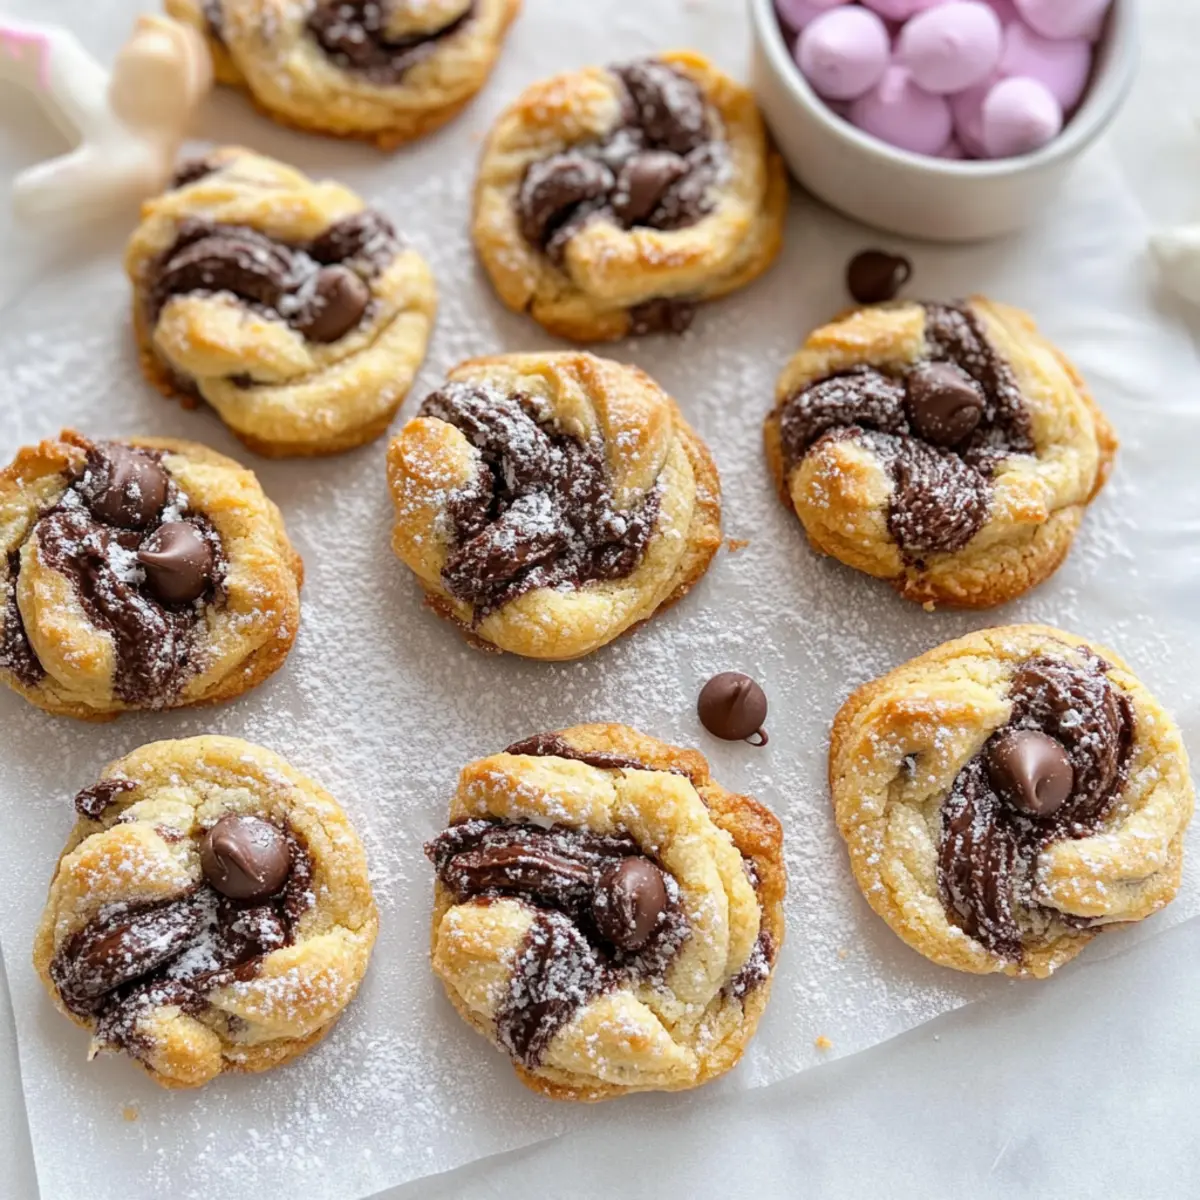
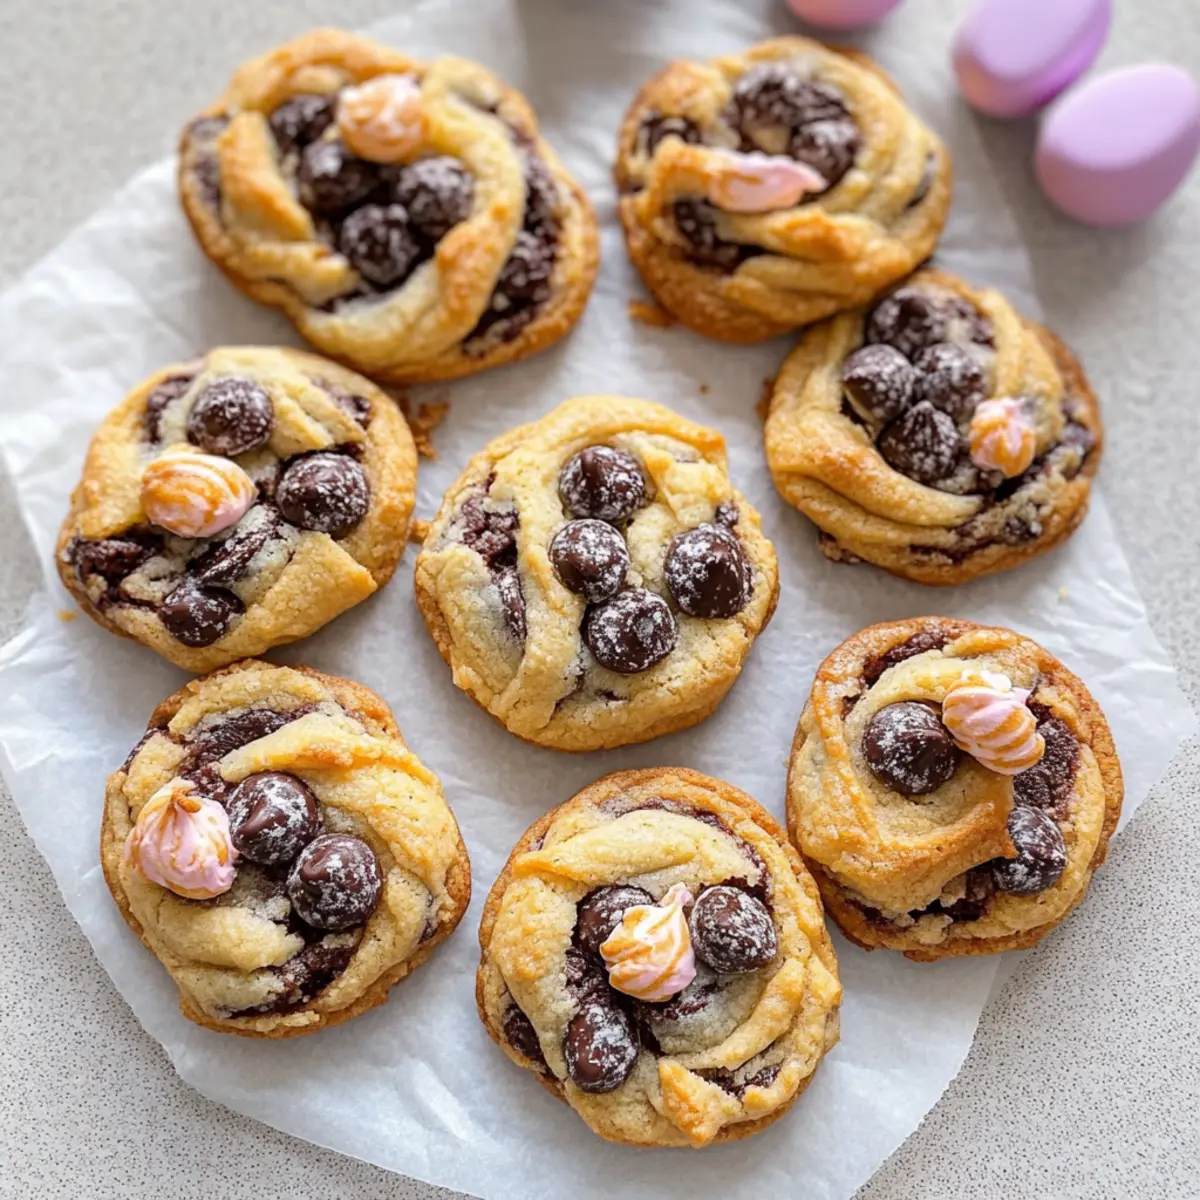
• Chocolate Chips – The star ingredient, providing sweetness and a delightful texture contrast; semi-sweet or dark chocolate is recommended.
Optional Add-Ins
• Chopped Nuts – Like walnuts or pecans for a nutty twist; they add crunch and flavor; consider a mix for variety!
• Cacao Nibs – Substitute for chocolate chips for a less sweet and more intense chocolate experience.
• Flavored Extracts – Almond or orange extracts bring a unique taste profile to your cookies.
Feel free to experiment and tailor this recipe as you wish—after all, these gluten-free chocolate chip cookies are sure to delight!
Step‑by‑Step Instructions for Perfectly Chewy Gluten-Free Chocolate Chip Cookies
Step 1: Prepare the Dough
In a large mixing bowl, cream together ¾ cup of unsalted butter and ½ cup of brown sugar with an electric mixer on medium speed for about 2-3 minutes until the mixture is light and fluffy. This step is essential for ensuring a tender cookie, so keep mixing until you achieve a smooth texture.
Step 2: Add Eggs and Vanilla
Beat in two eggs, one at a time, blending well after each addition. Stir in 1 teaspoon of pure vanilla extract until everything is thoroughly incorporated. The batter should appear glossy and cohesive, signaling that you’re ready for the dry ingredients, which will contribute to your chewy gluten-free chocolate chip cookies.
Step 3: Mix Dry Ingredients
In a separate bowl, combine 1 ½ cups of all-purpose gluten-free flour, 1 teaspoon of baking soda, and a pinch of salt. Whisk these dry ingredients together until well mixed, ensuring there are no lumps, as this helps to evenly distribute the leavening agent that will give your cookies their delightful rise.
Step 4: Combine Mixtures
Gradually add the dry mixture to the wet ingredients, mixing on low speed until just combined. Avoid overmixing to preserve the tenderness of your cookies. You’ll know it’s time to stop mixing when no visible flour remains and the dough starts to pull away from the sides of the bowl.
Step 5: Fold in Chocolate Chips
Gently fold in 1 cup of chocolate chips using a spatula or wooden spoon, making sure they are evenly distributed throughout the dough. This step is where you can also add any optional ingredients like chopped nuts if desired, enhancing the flavor and texture of your perfectly chewy gluten-free chocolate chip cookies.
Step 6: Chill the Dough
Cover the bowl with plastic wrap and refrigerate the dough for at least 30 minutes. Chilling is a crucial step, as it helps prevent the cookies from spreading too much during baking and enhances their chewy texture, making your final product even more delicious.
Step 7: Preheat the Oven
While the dough is chilling, preheat your oven to 350°F (175°C). This temperature is perfect for achieving a golden-brown edge while keeping the center of your cookies soft and chewy. Line baking sheets with parchment paper to ensure the cookies bake evenly and don’t stick.
Step 8: Scoop and Bake
Once the dough is chilled, use an ice cream scoop to portion out the dough onto your prepared baking sheets, spacing them about 2 inches apart. Bake in the preheated oven for 10-12 minutes, or until the edges are lightly golden and the centers appear slightly underbaked. This visual cue will ensure that your cookies remain wonderfully chewy.
Step 9: Cool and Enjoy
After baking, allow the cookies to cool on the baking sheets for about 5 minutes. This resting time will help them firm up without becoming too hard. After that, transfer them to wire racks to cool completely, so you can enjoy your perfectly chewy gluten-free chocolate chip cookies at their best!
Storage Tips for Gluten-Free Chocolate Chip Cookies
Room Temperature: Store baked cookies in an airtight container for up to 5 days. This keeps them fresh and ready for snacking anytime!
Fridge: If you want to extend freshness, place the cookies in the refrigerator for up to 1 week in a sealed container. Be sure to let them warm to room temperature before serving.
Freezer: For longer storage, freeze cookies in a single layer, then transfer them to a freezer-safe bag or container. They can be kept for up to 3 months; just thaw them at room temperature when you’re ready to enjoy your gluten-free chocolate chip cookies.
Reheating: To revive a freshly baked taste, microwave a cookie for about 10-15 seconds, or warm them in the oven at 350°F (175°C) for a few minutes.
What to Serve with Perfectly Chewy Gluten-Free Chocolate Chip Cookies?
Bake a batch of these delightful cookies, and you’ll want the perfect complements to enhance your sweet experience.
- Cold Milk: A classic pairing, the creamy richness of cold milk perfectly balances the sweetness of the cookies, making each bite even more indulgent.
- Vanilla Ice Cream: A scoop of velvety vanilla ice cream adds a delightful contrast to the warm cookies, creating a classic dessert that never fails to impress.
- Chocolate Lava Cake: For a chocolate lover’s dream, serve these cookies alongside a gooey lava cake, elevating your dessert to decadent heights with delightful textures.
- Fresh Berries: Refreshing strawberries or raspberries are a bright contrast, adding a hint of tartness that beautifully cuts through the sweetness of the cookies.
- Espresso: A strong cup of espresso pairs well with the richness of the cookies, enhancing their chocolatey flavor and adding a sophisticated touch to your dessert experience.
- Nutty Bark: Serve with a piece of dark chocolate nut bark; the crunch and saltiness of the nuts add a wonderful texture that complements the chewy chocolate cookies.
- Chai Latte: Enjoy these cookies with a warm chai latte, where the fragrant spices beautifully meld with the sweetness of your freshly baked treats.
- Coconut Macaroons: Add a chewy coconut macaroon alongside; the different chewy textures create a fascinating mouthfeel with every bite.
- Caramel Sauce: Drizzle cookies with warm caramel sauce for an extra layer of sweetness and a gooey experience that everyone will love!
Make Ahead Options
These Perfectly Chewy Gluten-Free Chocolate Chip Cookies are a fantastic option for meal prep, allowing you to save time for busy evenings. You can prepare the dough up to 24 hours in advance; simply cover it with plastic wrap and refrigerate. This step not only enhances the flavors but also helps maintain the chewy texture. If you prefer, you can also scoop and freeze the cookie dough in individual portions for up to 3 months—just bake from frozen, adding an extra minute or two to the baking time. When you’re ready to enjoy these mouthwatering cookies, bake them straight from the fridge or freezer, and you’ll have delicious cookies in no time, just as delightful as if they were freshly made!
Expert Tips for Gluten-Free Cookies
Uniform Size: Use an ice cream scoop to create cookies of the same size, ensuring even baking and a consistent texture.
Chill the Dough: Don’t skip the chilling step; it prevents cookies from spreading too much and enhances the chewy texture.
Baking Time: Watch your cookies closely; for the best chewy experience, they should look slightly underbaked in the center when you take them out.
Quality Ingredients: Opt for high-quality chocolate chips to elevate the flavor. Experiment with a mix of chocolate types for added depth in your gluten-free cookies.
Mixing Technique: Avoid overmixing after adding the dry ingredients; stop when the flour is just incorporated to maintain a tender cookie.
Variations & Substitutions for Gluten-Free Cookies
Feel free to let your creativity shine with these flavorful twists and swaps that will make your gluten-free chocolate chip cookies truly unique!
-
Nutty Addition: Add chopped walnuts or pecans for a delightful crunch and rich flavor. These nuts harmonize with the chocolate, providing extra depth in every bite.
-
Cocoa Nibs: Substitute cacao nibs for chocolate chips to enjoy a more intense chocolate flavor with less sweetness. It’s a wonderful way to elevate your cookies without the added sugar.
-
Flavored Extracts: Experiment with almond or orange extracts to transform the flavor profile. Just a small amount can give your cookies a surprising twist that will impress your family.
-
Oat Flour: Swap out some of the gluten-free flour for oat flour to add a wholesome, nutty texture. This is an excellent way to incorporate a bit of whole grain goodness into your treats.
-
Coconut Oil: For a dairy-free version, use coconut oil instead of butter. It adds a subtle coconut flavor that complements the sweetness of the chocolate beautifully.
-
Dark Chocolate: Use dark chocolate chips instead of semi-sweet for a richer taste. The deep, bittersweet profile pairs wonderfully with the cookie’s sweetness.
-
Spiced Up: Add a pinch of cinnamon or nutmeg for a warm spice that makes your cookies taste even more comforting. These spices perfectly complement the chocolate and elevate the overall experience.
-
Gluten-Free Graham Crackers: Crumble gluten-free graham crackers into the dough for a fun texture and a hint of caramelized flavor, reminiscent of your favorite campfire treats!
So why settle for the ordinary? Dive into these variations and make these cookies your own! For a delightful breakfast treat, don’t forget to check out my Puff Pastry Breakfast recipe that’s full of surprises, just like these fantastic cookies!
Perfectly Chewy Gluten-Free Chocolate Chip Cookies Recipe FAQs
What type of gluten-free flour should I use?
I recommend using a high-quality all-purpose gluten-free flour blend that includes xanthan gum, which provides the structure needed for your cookies. If you prefer a nuttier flavor, almond flour can be a great substitute. Just remember that different flours can affect texture, so experiment to find your favorite!
How should I store leftover cookies?
To keep your cookies fresh, store them in an airtight container at room temperature for up to 5 days. If you’d like to extend their freshness, they can also be refrigerated for up to a week. When ready to enjoy, let them warm to room temperature for the best taste.
Can I freeze these cookies?
Absolutely! To freeze your cookies, first arrange them in a single layer on a baking sheet and freeze until solid. Then, transfer them to a freezer-safe bag or container, where they can be kept for up to 3 months. When you’re ready for a treat, simply thaw at room temperature or warm in the oven at 350°F (175°C) for a few minutes.
What if my cookies spread too much while baking?
If your cookies spread too much in the oven, it’s often due to the dough not being chilled long enough or the butter being too soft at the start. Make sure to chill the dough for at least 30 minutes before baking. Also, consider checking that your butter is at the right temperature; it should be softened, not melted.
Are these cookies safe for those with nut allergies?
If you’re baking for someone with nut allergies, be cautious with any add-ins. The main ingredients in this recipe do not contain nuts, but always double-check that your chocolate chips and any alternative flour you use are processed in a nut-free facility. For safety, skip any optionals like nuts altogether to avoid cross-contamination.
What variations can I try for these cookies?
You can get creative with your cookie recipe! For a richer flavor, try incorporating different types of chocolate chips, like dark chocolate or white chocolate. You can also add a pinch of sea salt on top before baking for a delightful contrast to the sweetness. If you’re feeling adventurous, mixing in some chopped dried fruits or even peppermint extract can provide a fun twist!
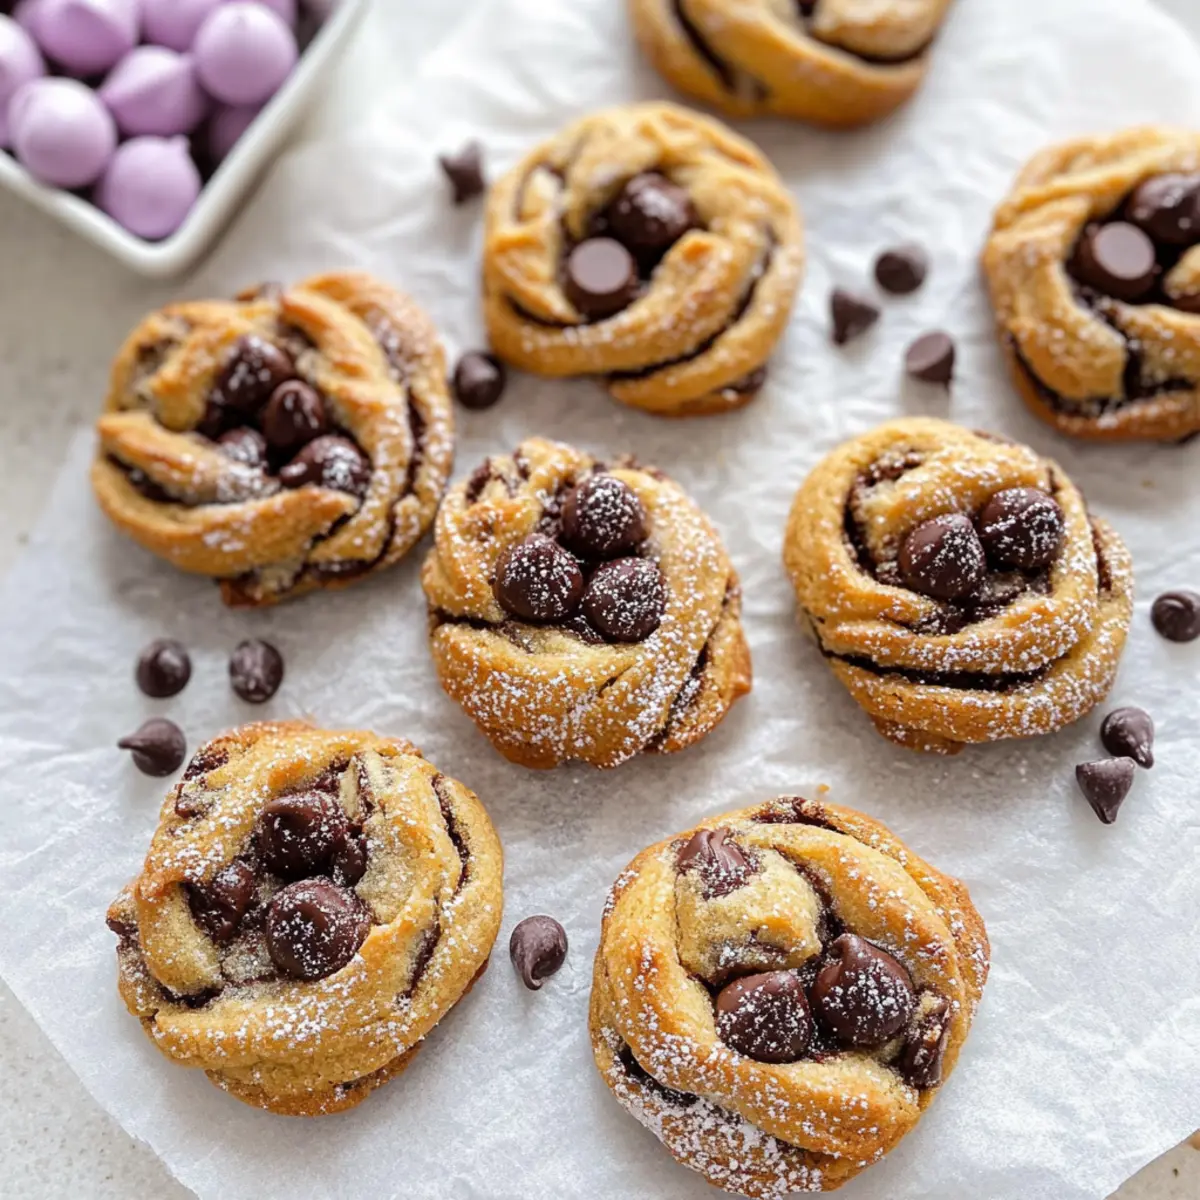
Puff Pastry Easter Nests that Wow with Sweet Surprise
Ingredients
Equipment
Method
- Prepare the dough by creaming together the butter and brown sugar until light and fluffy.
- Add eggs and vanilla, blending well until glossy.
- Mix dry ingredients in a separate bowl and incorporate into wet mixture.
- Fold in chocolate chips and any optional ingredients.
- Chill the dough for at least 30 minutes.
- Preheat the oven to 350°F (175°C) and prepare baking sheets.
- Scoop dough onto prepared sheets, bake for 10-12 minutes until golden.
- Cool on sheets before transferring to wire racks.
Leave a Reply