
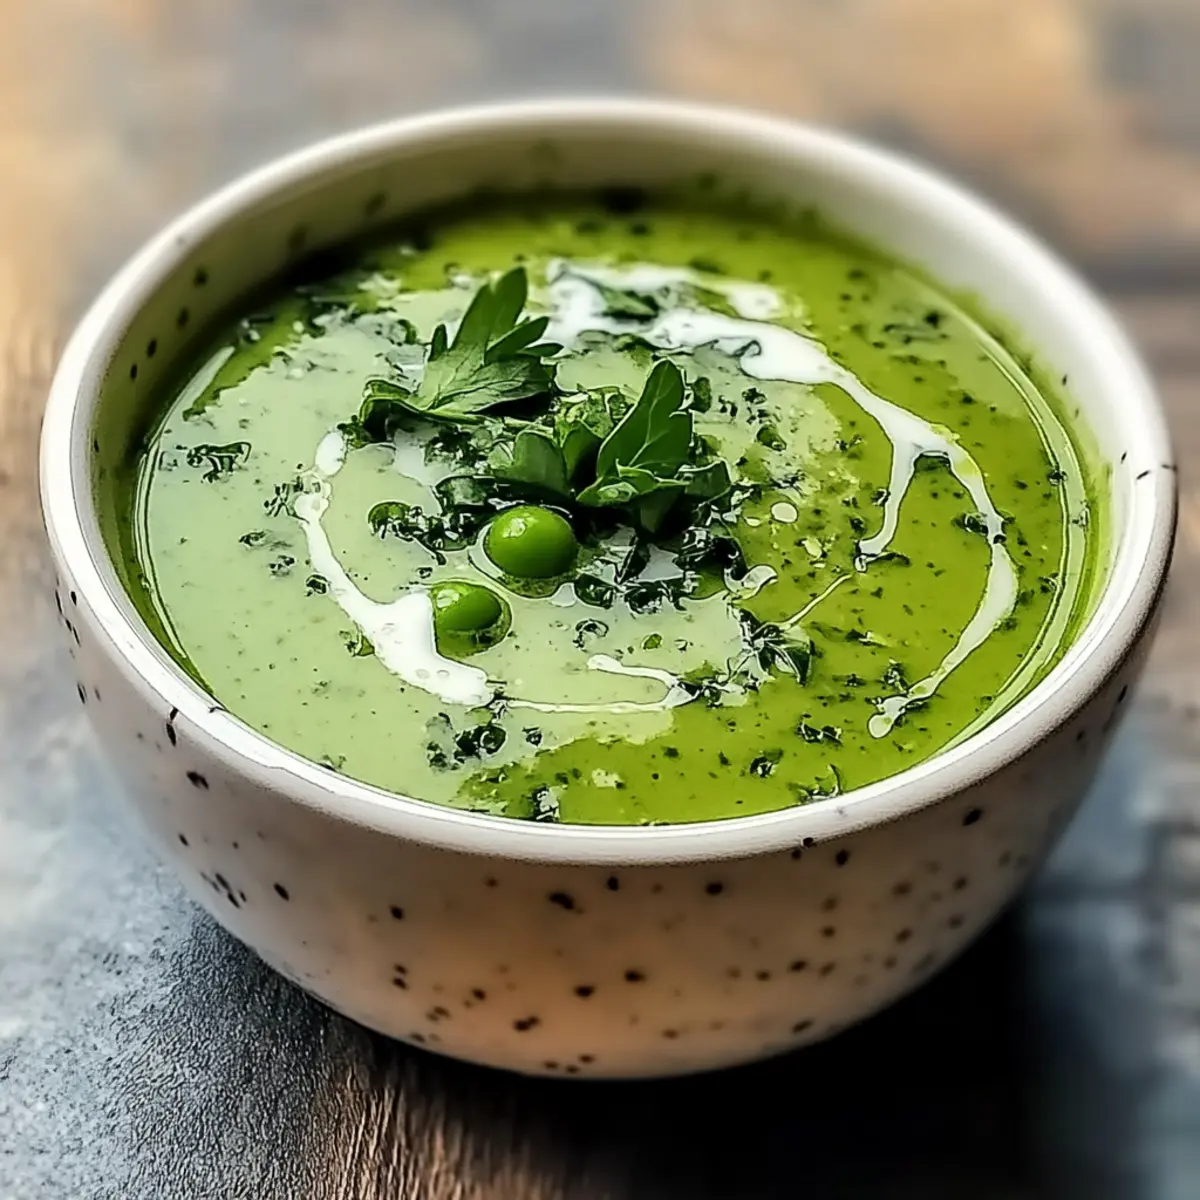
Stepping into my kitchen on a chilly day, the comforting aroma of simmering greens began to whisk away the winter blues. That’s when I knew it was time to whip up a batch of Creamy Green Goddess Herb Soup. This vibrant, healthy soup is more than just nourishment; it’s a hug in a bowl, featuring an immunity-boosting blend of fresh vegetables and warm spices. What I love most about this recipe is its quick preparation—perfect for busy weeknights—and how it can easily become a crowd-pleaser for the whole family. With its creamy texture and bright flavors, it’s not only satisfying but also allows for plenty of customization with seasonal greens. Are you ready to bring a little warmth and joy to your table? Let’s dive into this delicious adventure!
Why Is This Soup So Special?
**Comforting **: Every spoonful of this Green Goddess Herb Soup wraps you in a cozy embrace, perfect for those chilly evenings.
Nutrient-Packed: Filled with vibrant greens and health-boosting spices, this soup not only satisfies your hunger but also nourishes your body.
Quick and Easy: Ready in under 30 minutes, it’s an ideal choice for busy weeknights when you crave something wholesome without spending hours in the kitchen.
Versatile: Feel free to switch up the greens or spices based on what you have at home or what’s in season—your creativity is the only limit!
Pair it with a hearty loaf of crusty bread or a refreshing side salad for a complete meal that everyone will love. If you’re looking for more comforting cozy options, check out our Potsticker Soup Cozy or Lasagna Soup Cozy.
Green Goddess Herb Soup Ingredients
For the Base
• Olive Oil – Provides necessary fat for sautéing and flavor; avocado oil can be a great substitute.
• Onion – Adds sweetness and depth to the soup; you can swap it with shallots for a milder taste.
• Leek – Offers a delicate onion flavor; in a pinch, use an extra onion if leeks are unavailable.
• Celery – Adds crunch and earthiness; no exact substitute, but you could try more fennel for a different taste.
• Fennel – Imparts a slightly sweet and anise-like flavor; simply omit if you prefer a different profile.
For the Aromatics
• Garlic – Brings aromatic flavor; fresh garlic is best, but you can use garlic powder in a pinch.
• All Spice Powder – Introduces warmth and complexity; try a mix of nutmeg and cinnamon if you’re feeling adventurous.
• Cumin Powder – Offers earthy notes; coriander can substitute for a lighter flavor.
For the Creamy Base
• Potato – Creates a creamy base when blended; rutabaga is a low-carb alternative.
• Broccoli – Provides nutrition and bright color; cauliflower works well as a substitute.
For the Greens and Color
• Frozen Peas – Sweetness and vibrant color without the need to thaw; fresh peas can work instead.
• Kale Leaves – Enhances nutrition with a chewy texture; you can swap it for Swiss chard.
• Baby Spinach – Adds freshness; feel free to substitute with other leafy greens you have on hand.
For the Finish
• Thickened Cream – Contributes creaminess; coconut cream is a vegan option or simply omit for a lighter soup.
• Salt – Elevates the flavor; use kosher or sea salt and adjust to your taste.
• Black Pepper – Introduces warmth and a little spice; white pepper can be a milder alternative.
• Water – Forms the foundation of the soup; adjust to achieve your desired thickness.
For Garnish
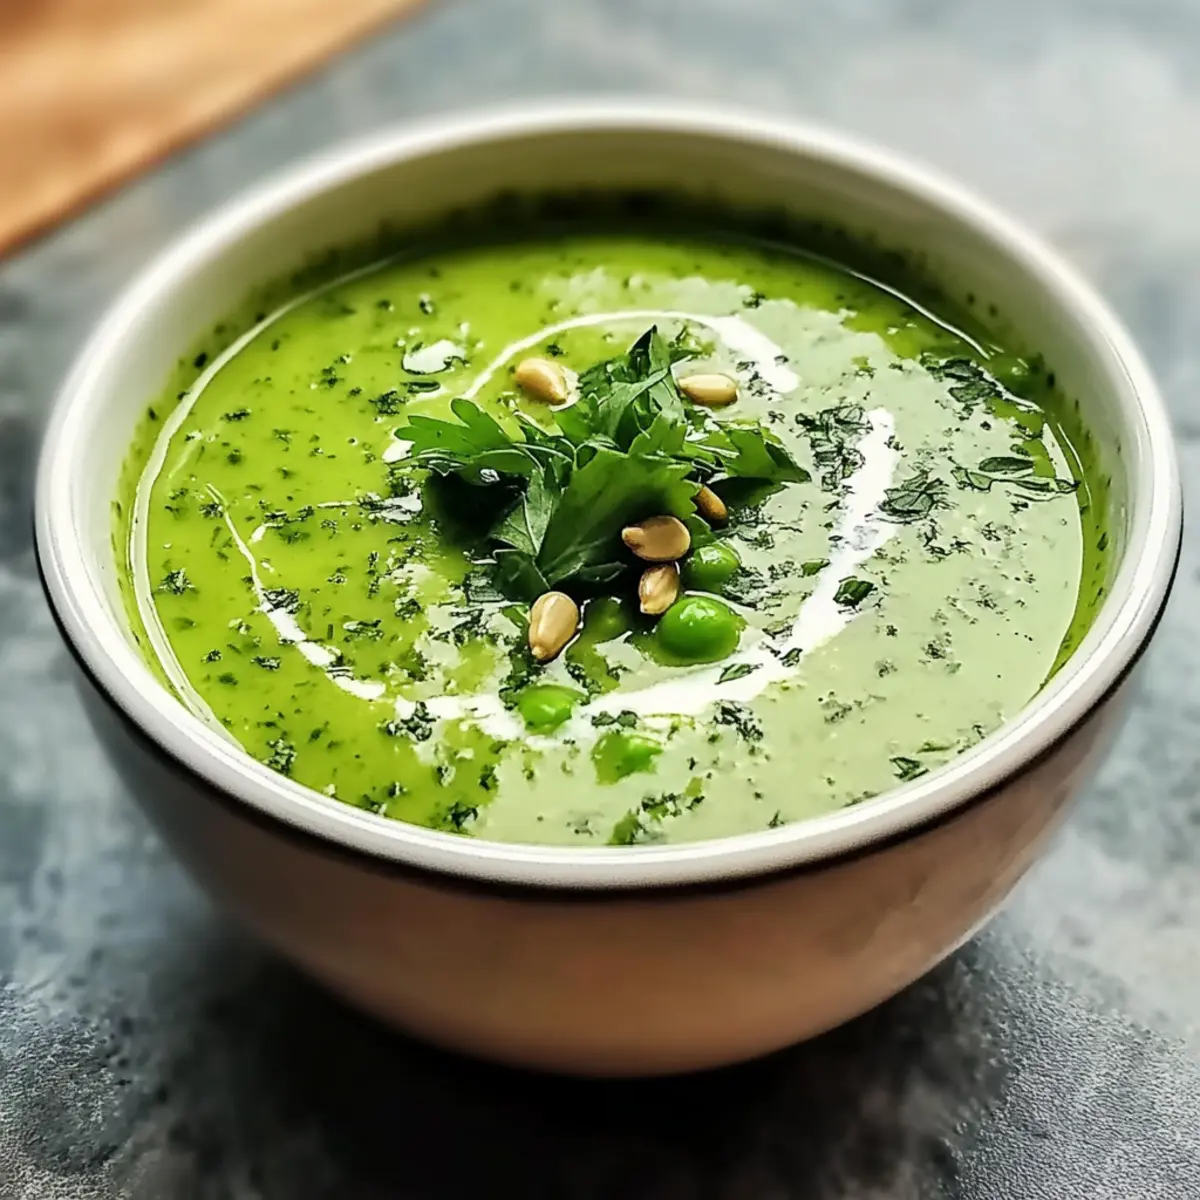
• Toasted Sunflower Seeds – Provides a delightful crunch; you can substitute with croutons or other nuts if desired.
Dive into the delightful world of Green Goddess Herb Soup! Your journey towards a nourishing and delicious meal starts right here.
Step‑by‑Step Instructions for Green Goddess Herb Soup
Step 1: Heat the Base
In a pressure cooker, heat 2 tablespoons of olive oil over medium heat. Once shimmering, toss in finely chopped onion, leek, fennel, and celery. Sauté these aromatic vegetables for about 8–10 minutes until they are soft and fragrant, stirring occasionally. This creates a flavorful foundation for your Green Goddess Herb Soup.
Step 2: Add the Aromatics
Next, add minced garlic, 1 teaspoon of all spice powder, and 1 teaspoon of cumin to the pot. Sauté the mixture for an additional 1–2 minutes until the garlic becomes fragrant, stirring constantly. The spices should gently release their warm aromas, enveloping your kitchen with a delightful scent and enhancing the flavor of your soup.
Step 3: Incorporate the Veggies
Stir in diced potato and broccoli, cooking for 2 more minutes to soften them slightly. This step ensures the vegetables start to meld with the aromatic base, preparing them for the blending stage. As the broccoli turns a vibrant green, it signals that your Green Goddess Herb Soup is coming together beautifully.
Step 4: Pressure Cook the Mixture
Pour in enough water to cover the vegetables fully, about 4 cups, and seal the lid of the pressure cooker. Bring it to pressure, then cook for 4 minutes. This will create a tender texture and lock in the nutrients, making your soup both delicious and healthy.
Step 5: Blend the Soup
Carefully perform a quick release of the pressure, ensuring steam escapes safely. Blend the soup until smooth using an immersion blender or transfer it to a regular blender in batches. The vibrant color of the Green Goddess Herb Soup should be beautifully creamy and inviting at this point.
Step 6: Add the Greens
Stir in a generous handful of chopped kale, baby spinach, and frozen peas. Allow them to wilt slightly in the warm soup, which will take about 2–3 minutes. This step not only boosts nutrition but also adds vibrant color and freshness, making your Green Goddess Herb Soup truly tempting.
Step 7: Finish with Cream
Finally, mix in 1 cup of thickened cream and season the soup with salt and black pepper to taste. Allow everything to heat through for another 2 minutes while stirring gently. This addition creates a rich, creamy texture, elevating your Green Goddess Herb Soup to a comforting delight.
Step 8: Serve and Enjoy
Ladle the creamy Green Goddess Herb Soup into warm bowls and garnish with a drizzle of cream or olive oil alongside toasted sunflower seeds for added crunch. Serve warm, inviting family and friends to join you in enjoying this cozy, nourishing dish that encapsulates winter’s warmth and health benefits.
Green Goddess Herb Soup Variations
Feel free to explore these delicious variations that can take your Green Goddess Herb Soup to new aromatic heights!
-
Leafy Green Swap: Use different leafy greens like Swiss chard or turnip greens to change the flavor profile, bringing a personal touch to each bowl. The vibrant hues and unique tastes will delight your palate.
-
Spice Adjustment: Adapt the warmth to your liking by adjusting all spice and cumin levels. This flexibility allows you to create a version that perfectly suits your spice tolerance while still delivering that comforting goodness.
-
Chunky Delight: Reserve some sautéed veggies before blending for a chunkier texture. By stirring them back in after blending, you’ll create a delightful contrast that adds both flavor and depth to every spoonful.
-
Nutty Finish: Top with toasted almond slices or pecans instead of sunflower seeds for a nutty crunch. This swap not only enhances texture but also infuses wonderful nutty flavors into your soup.
-
Coconut Cream: For a silky vegan option, replace thickened cream with coconut cream. This substitution adds a tropical twist while keeping it creamy and delicious. It’s a refreshing take, especially on warm days!
For even more cozy recipe ideas, consider trying my Coconut Curry Soup with Dumplings—it’s a delightful way to spice things up in your kitchen!
-
Heat It Up: Add a dash of cayenne or red pepper flakes for a spicy kick. This simple tweak can turn the comforting soup into a warming, lively experience perfect for those chilly evenings.
-
Herb Infusion: Experiment with fresh herbs like basil or cilantro to brighten the flavors. They add an aromatic freshness that complements the rich, creamy base of the soup delightfully.
Whichever variation you choose, each adaptation allows you to make this Green Goddess Herb Soup truly your own. Happy cooking!
How to Store and Freeze Green Goddess Herb Soup
Fridge: Store in airtight containers for up to 3 days. Allow the soup to cool completely before sealing to preserve freshness.
Freezer: Freeze in portions for long-term storage, leaving space for expansion. It can last up to 3 months in the freezer.
Reheating: Gently reheat on the stove, adding a splash of water or broth to maintain the creamy texture. Stir well before serving.
Thawing: For frozen soup, thaw overnight in the fridge before reheating for a quick and easy meal that retains its nourishing goodness.
What to Serve with Green Goddess Herb Soup?
Bring your family around the table with vibrant dishes that perfectly complement the cozy embrace of this nourishing soup.
- Crusty Whole Grain Bread: The hearty texture contrasts beautifully with the creamy soup, soaking up every flavorful drop.
- Simple Arugula Salad: Fresh peppery greens add a light crunch and a bright, refreshing kick to balance the rich soup.
- Quinoa Pilaf: Nutty and fluffy, quinoa provides a protein boost and enhances the overall nutritional profile of your meal.
- Roasted Root Vegetables: Their natural sweetness and caramelized edges create a delightful contrast, adding depth to your dining experience.
- Savory Cheese Toasts: Crisp, gooey cheese on toasted bread amplifies comfort, making each spoonful of soup even more satisfying.
- Herbed Couscous: The light and fluffy couscous infused with fresh herbs creates a delightful texture combination with the soup.
- Zesty Lemon Water: A refreshing drink that cuts through the soup’s creaminess, ensuring your palate is vibrantly enlivened.
- Ginger Pear Crisp: End your meal on a sweet note, where fragrant spices harmonize with the fresh fruit for a delightful contrast to the soup’s warmth.
- Honey-Sweetened Yogurt: A dollop of creamy yogurt on top offers a tangy finish, perfectly balancing the dish’s flavors.
Expert Tips for Green Goddess Herb Soup
Prepping Ahead: Chop vegetables in advance to save time during cooking; this small step can transform your weeknight dinner experience.
Garnish Wisely: Experiment with different toppings like croutons or roasted nuts for an enticing crunch that elevates your Green Goddess Herb Soup.
Customize Greens: Feel free to mix different leafy greens; using seasonal varieties can add unique flavors and even boost nutrition.
Storage Savvy: Store leftovers in airtight containers to maintain freshness; remember to leave space for expansion if freezing for later use.
Reheat Gently: When reheating, add a splash of water or broth to ensure the creamy texture remains luscious and smooth, avoiding separation or curdling.
Taste As You Go: Adjust seasoning gradually, adding salt and pepper at the end, to enhance the flavors without overpowering the dish; remember, you can always add more!
Make Ahead Options
These Green Goddess Herb Soup prep tips are perfect for busy home cooks looking to save time! You can chop all the vegetables and store them in an airtight container in the refrigerator up to 24 hours in advance. Additionally, you can prepare the soup base—sautéing the aromatics and cooking the potatoes and broccoli—then let it cool before refrigerating it for up to 3 days. When you’re ready to enjoy your nourishing soup, simply reheat, blend until smooth, and stir in the greens and cream right before serving. This way, you’ll have a flavorful and comforting meal with minimal effort—and just as delicious as if you made it fresh!
Green Goddess Herb Soup Recipe FAQs
How can I select the best ingredients for my Green Goddess Herb Soup?
Absolutely! When choosing your greens, look for vibrant, crisp leaves without any dark spots or wilting. For vegetables like broccoli and kale, aim for bright colors and firm textures to ensure maximum freshness and flavor. Additionally, opt for organic produce when possible for the best taste and nutrition.
How should I store leftover Green Goddess Herb Soup?
After making your Green Goddess Herb Soup, let it cool completely before transferring it into airtight containers. In the fridge, it will stay fresh for up to 3 days. If you wish to store it longer, consider freezing your soup. Just be sure to leave some space at the top of the containers for expansion as it freezes.
Can I freeze Green Goddess Herb Soup?
Very much! To freeze your soup, portion it into airtight freezer-safe containers or resealable bags, leaving space for it to expand. It will keep well in the freezer for up to 3 months. When you’re ready to enjoy it, thaw it overnight in the fridge and then gently reheat, adding a splash of water or broth to restore its creamy texture.
What should I do if my Green Goddess Herb Soup is too thick?
If you find your soup has thickened too much, don’t worry! Simply add a little vegetable broth or water, stirring gently until you reach your desired consistency. You can adjust this gradually to ensure the flavor remains balanced.
Are there any dietary considerations when making this soup?
Absolutely! This Green Goddess Herb Soup can easily be made vegan by substituting the thickened cream with coconut cream or simply omitting it altogether. Also, if you or your guests have allergies, ensure to check if any of the ingredients, like nuts, are a potential issue. Always feel free to customize this delightful dish according to your dietary needs.
How do I enhance the flavor of my Green Goddess Herb Soup?
To really bring out the flavors, consider sautéing your aromatics like garlic and onion until they’re golden and fragrant. Additionally, taste as you go, adjusting spices like salt and pepper gradually. You could also try adding a splash of lemon juice or a sprinkle of fresh herbs before serving for that extra delicious touch!
Green Goddess Herb Soup: A Cozy, Nutritious Hug in a Bowl
Ingredients
Equipment
Method
- In a pressure cooker, heat 2 tablespoons of olive oil over medium heat. Once shimmering, toss in finely chopped onion, leek, fennel, and celery. Sauté these aromatic vegetables for about 8–10 minutes until soft and fragrant.
- Add minced garlic, 1 teaspoon of all spice powder, and 1 teaspoon of cumin to the pot. Sauté for an additional 1–2 minutes until the garlic becomes fragrant.
- Stir in diced potato and broccoli, cooking for 2 more minutes to soften them slightly.
- Pour in enough water to cover the vegetables fully, about 4 cups, and seal the lid of the pressure cooker. Cook for 4 minutes under pressure.
- Perform a quick release of the pressure and blend the soup until smooth using an immersion blender.
- Stir in chopped kale, baby spinach, and frozen peas. Allow them to wilt slightly in the warm soup, about 2–3 minutes.
- Mix in 1 cup of thickened cream and season the soup with salt and black pepper to taste. Heat through for another 2 minutes.
- Ladle the soup into warm bowls and garnish with toasted sunflower seeds.
Leave a Reply