
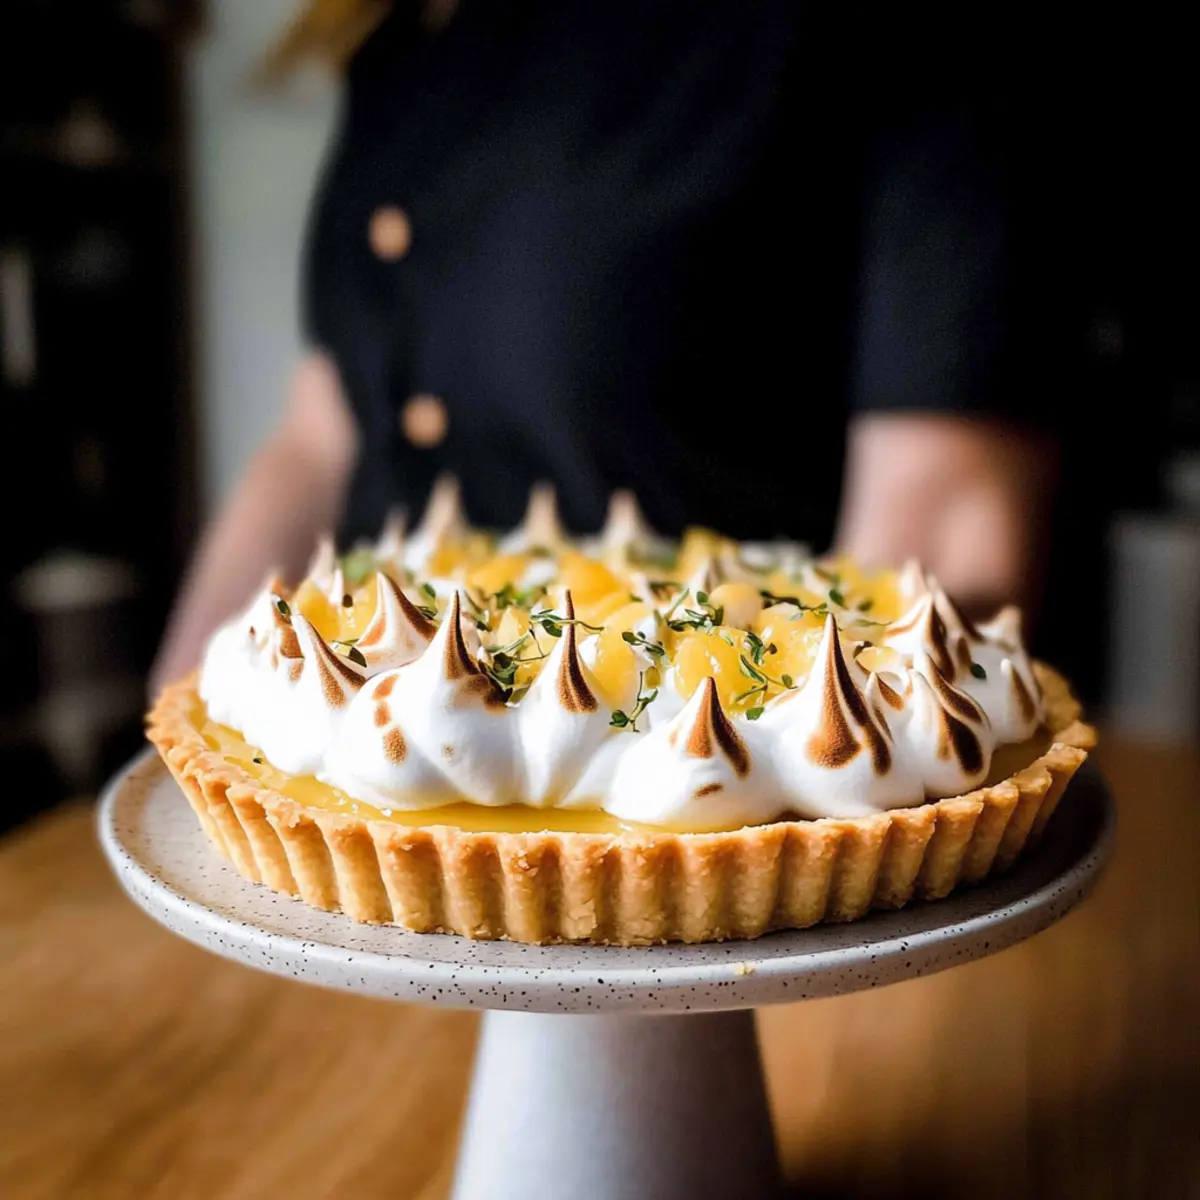
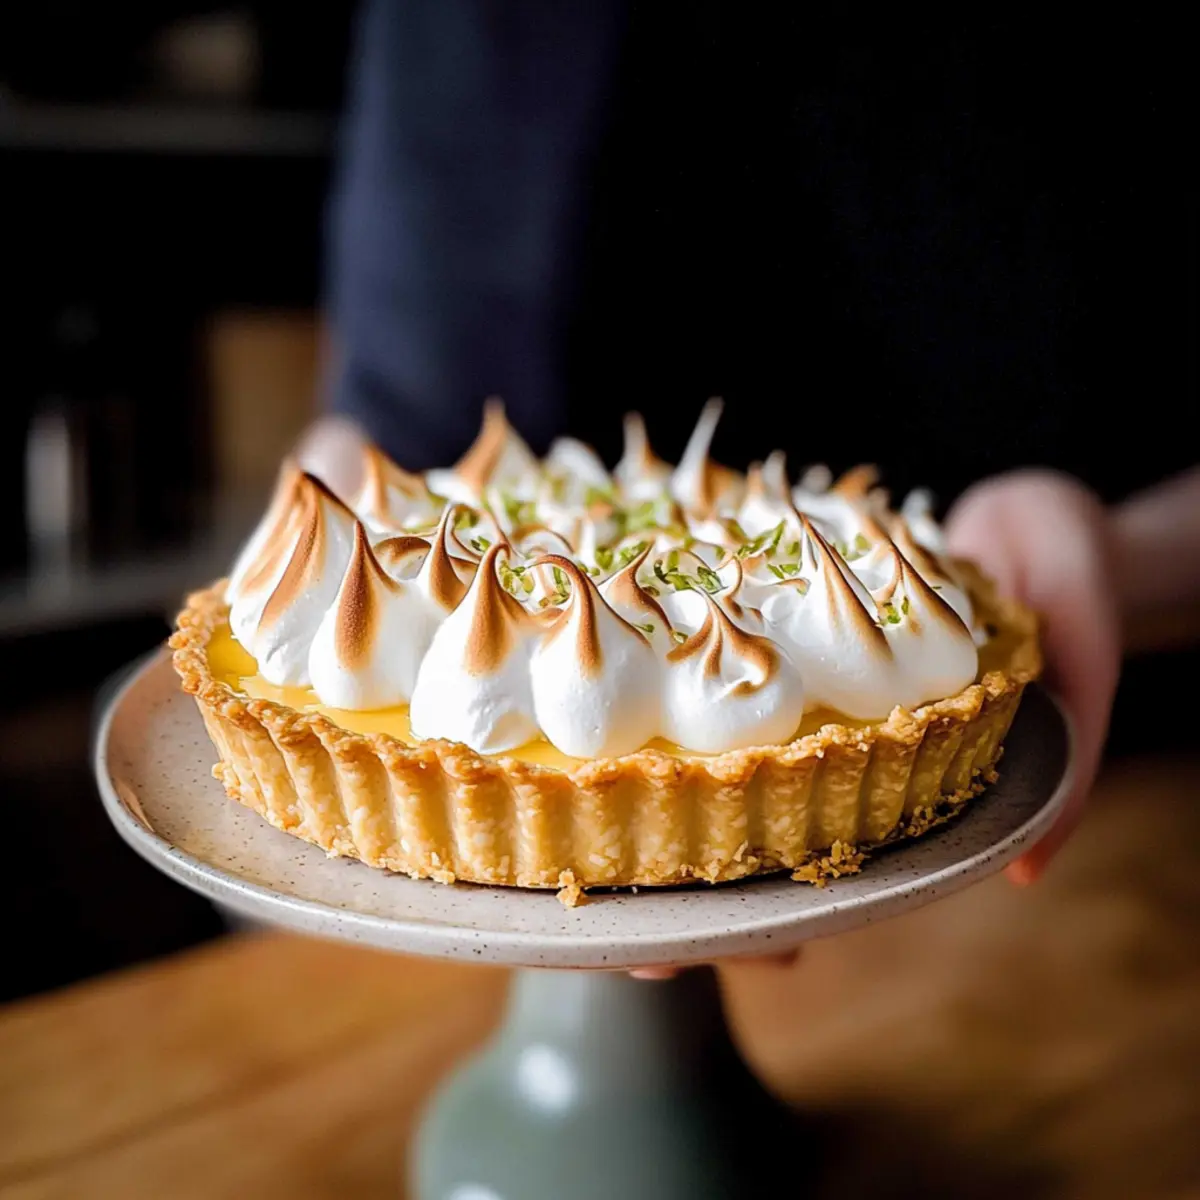
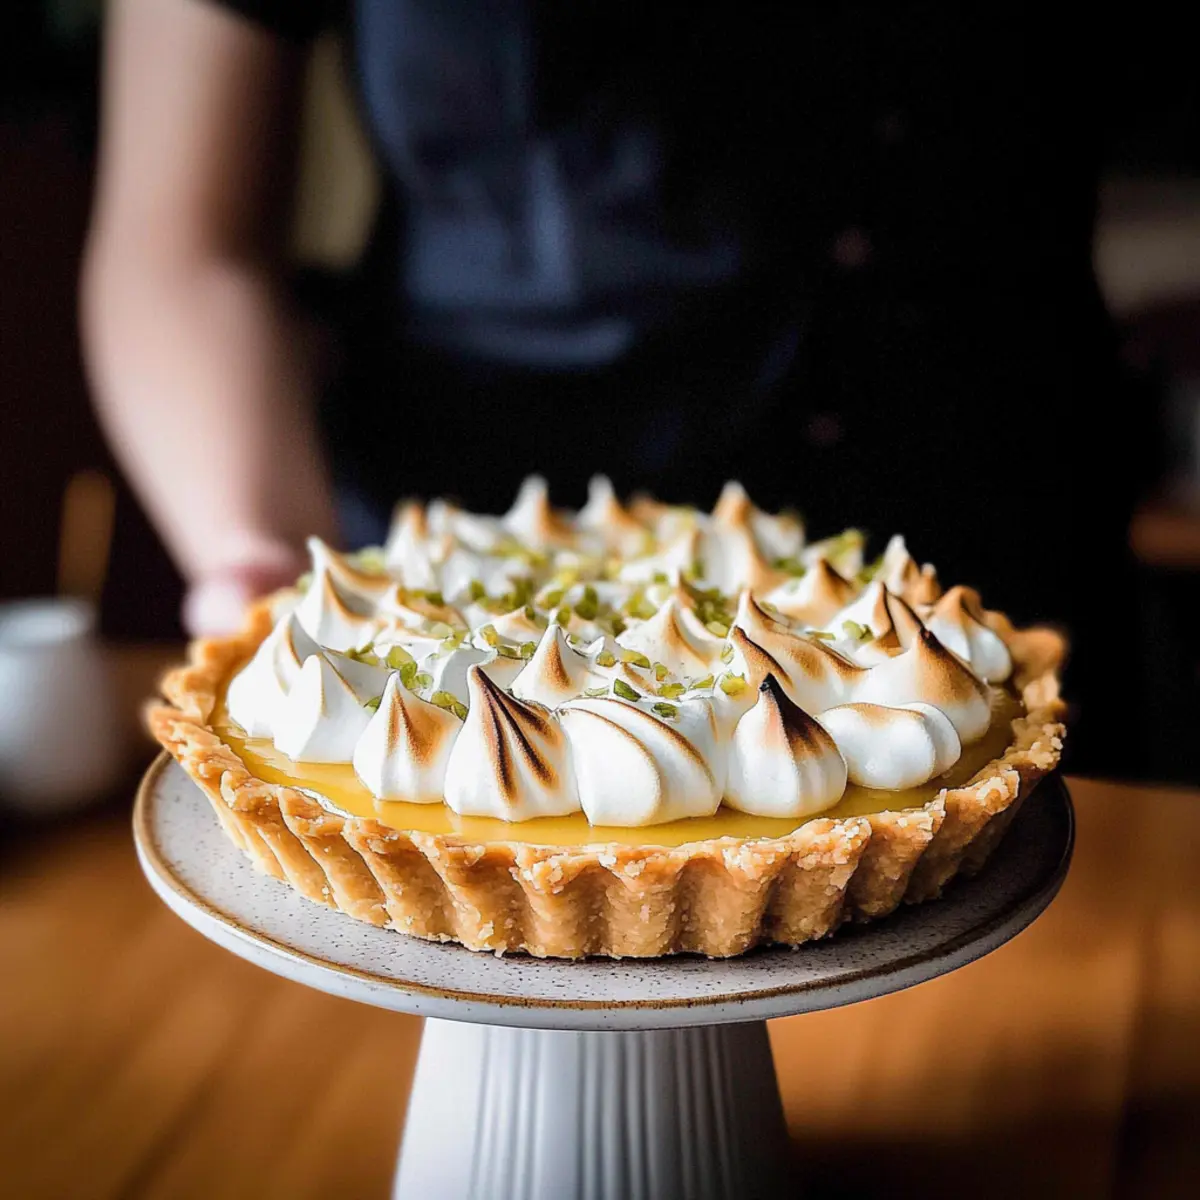
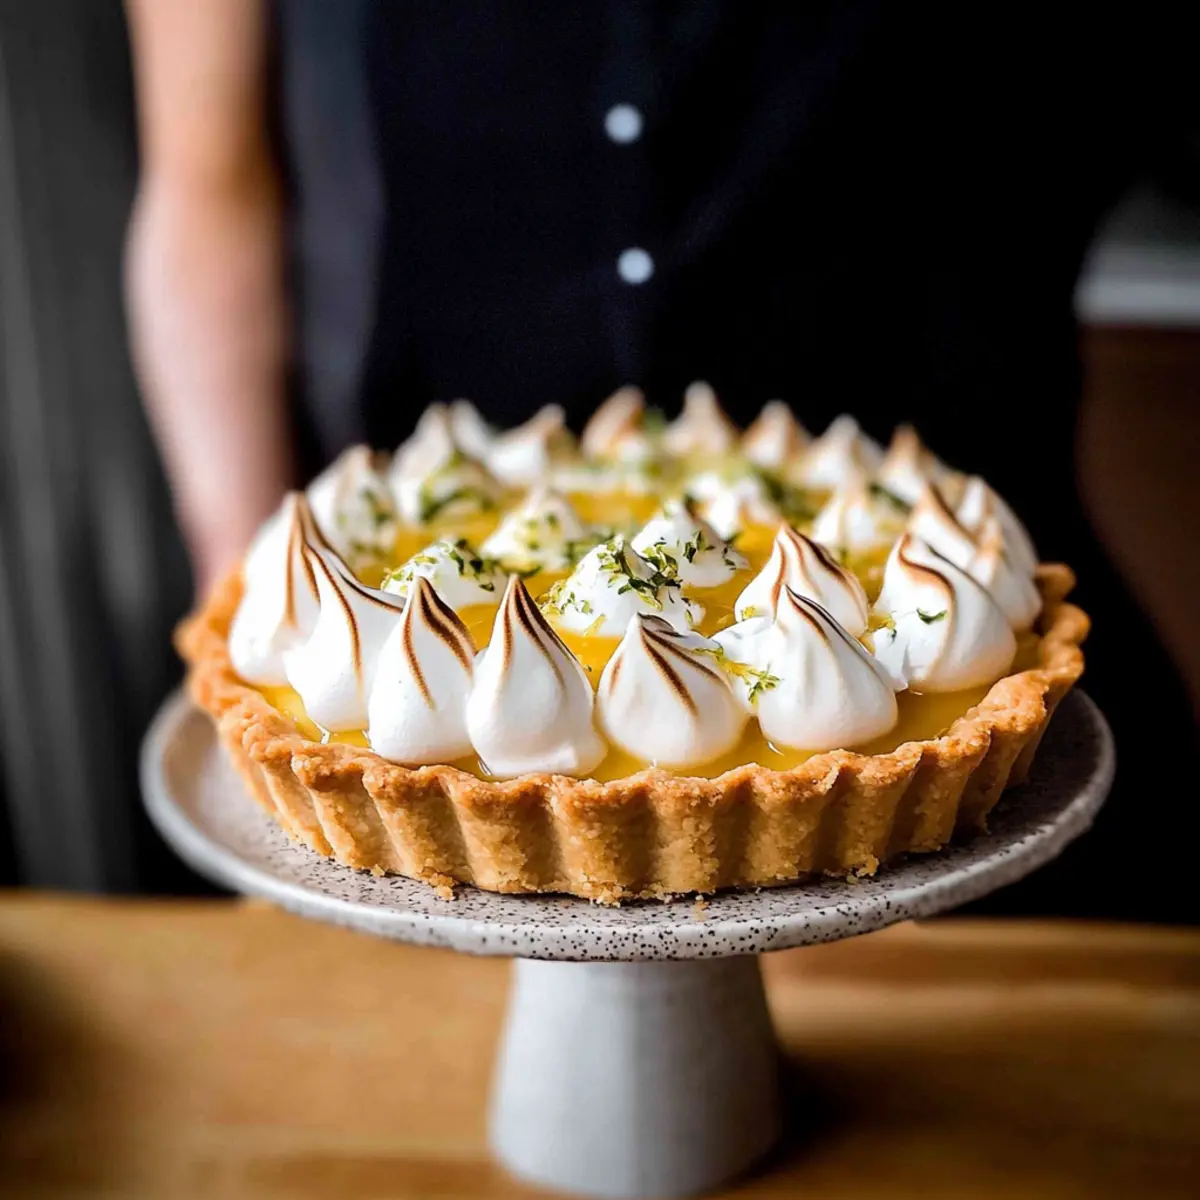
The scent of freshly zested lemons wafted through my kitchen as I embarked on the delightful journey of making a Lemon Meringue Tart. This recipe blends tangy lemon curd with a light, airy meringue, all nestled in a buttery, flaky crust that’s pure bliss. Not only does this Lemon Meringue Tart boast a stunning presentation, but it’s also a showstopper for any gathering, leaving your guests craving seconds. Whether you choose to whip up a full tart or opt for adorable mini tartlets, you’ll find that this dessert is perfect for summer soirees or cozy family dinners. Ready to impress with a dish that tastes as magnificent as it looks? Let’s get baking!
Why is this Tart a Must-Try?
Irresistible Flavor: This Lemon Meringue Tart combines zesty lemon curd and sweet meringue for a delightful contrast that dances on your taste buds.
Easy to Customize: With options to make mini tartlets, you can adapt the recipe for any occasion—perfect for summer picnics or intimate gatherings.
Eye-Catching Presentation: Its stunning layers and golden meringue make it the centerpiece of any dessert table, guaranteed to impress your guests.
Perfect for Any Season: Whether it’s a warm summer night or a cozy winter gathering, this tart brings a burst of sunshine to your dining experience.
Storage-Friendly: It’s easy to prepare ahead of time and store in the fridge, making it a time-saving option for busy home chefs.
For more delightful desserts, check out my Breakfast Protein Biscuits or consider a refreshing bowl of Lemon Poppy Seed oats for brunch!
Lemon Meringue Tart Ingredients
For the Crust
• All-Purpose Flour – Provides structure to the crust; gluten-free flour can be used for a gluten-free option.
• Powdered Sugar – Adds sweetness and ensures a tender crust; substitute with granulated sugar if needed.
• Salt – Enhances the flavor of the crust.
• Cold Unsalted Butter – Creates flakiness; keep it cold and cut into cubes for best results.
• Large Egg Yolk – Adds richness and helps bind the crust together.
• Cold Water – Assists in bringing the dough together; adjust based on consistency.
For the Lemon Filling
• Large Egg Yolks – Forms the base of the luscious lemon curd filling.
• Cornstarch – Thickens the custard; can be swapped with flour if necessary.
• Granulated White Sugar – Sweetens the filling perfectly.
• Water – Used for preparing the custard.
• Freshly Squeezed Lemon Juice – Imparts tanginess and flavor; bottled lemon juice is a good substitute in a pinch.
• Lemon Zest – Intensifies the lemon flavor; fresh zest is recommended for authenticity.
• Butter (for custard) – Adds creaminess to the filling.
For the Meringue
• Large Egg Whites – Essential for creating the airy meringue.
• Cream of Tartar – Stabilizes the meringue for sturdy peaks; can be substituted with lemon juice if needed.
Step‑by‑Step Instructions for Dreamy Lemon Meringue Tart
Step 1: Prepare the Crust
Start by combining all-purpose flour, powdered sugar, and salt in a food processor. Add cold, cubed unsalted butter and pulse until the mixture resembles coarse crumbs, about 15-20 seconds. Incorporate the egg yolk and cold water, pulsing until the dough just comes together. Form the dough into a disc, wrap in plastic wrap, and refrigerate for at least 2 hours to chill.
Step 2: Roll the Dough
Once the dough is chilled, lightly flour your work surface and roll it out into a 12-inch circle, about 1/8 inch thick. Carefully transfer the rolled dough to a 9-inch pie dish, gently pressing it into the sides and bottom. Use a fork to perforate the bottom and freeze for 30 minutes to firm up the crust before baking.
Step 3: Blind Bake
Preheat your oven to 350°F (175°C). Line the chilled crust with parchment paper, filling it with baking beans or rice for weight. Bake in the preheated oven for about 35 minutes, or until the edges are golden brown. Remove the weights and parchment, then cool completely on a wire rack before filling it with lemon curd.
Step 4: Make the Filling
In a mixing bowl, whisk together the large egg yolks and cornstarch until smooth. In a saucepan over medium heat, combine water, freshly squeezed lemon juice, granulated sugar, salt, and lemon zest, stirring until dissolved. Gradually whisk the hot mixture into the egg yolks, then return it to the saucepan. Cook over medium heat, stirring constantly, until thickened—5-7 minutes. Remove from heat, stir in the butter until melted, then pour the filling into the cooled crust. Chill for at least 8 hours to set.
Step 5: Make the Meringue
For the meringue, set up a double boiler by simmering water in a pot. In a heatproof bowl, combine egg whites, granulated sugar, and cream of tartar. Whisk constantly over simmering water until the sugar dissolves, about 4-5 minutes. Once dissolved, transfer to an electric mixer and beat on high speed until stiff peaks form, approximately 5-7 minutes.
Step 6: Final Chill
Spread the fluffy meringue over the chilled lemon filling, creating peaks for added texture. Use a kitchen torch or place it under the broiler for 1-2 minutes to lightly toast the meringue, watching closely to prevent burning. Refrigerate the completed Lemon Meringue Tart until ready to serve, storing any leftovers in an airtight container for up to 3 days.
Make Ahead Options
These Lemon Meringue Tarts are a delightful option for meal prep enthusiasts! You can prepare the buttery crust up to 24 hours in advance; simply store it tightly wrapped in the refrigerator. The lemon filling can also be made ahead and kept in the fridge for up to 3 days—make sure to chill it properly to set. Combine the filling with the crust before serving for that fresh, vibrant taste. When you’re ready to add the meringue, whip it up just before serving to ensure it remains fluffy and light. This way, you can enjoy restaurant-quality results with minimal last-minute effort, making your baking experience perfectly manageable!
What to Serve with Creamy Lemon Meringue Tart
Looking to create the ultimate dessert experience? Pairing your Lemon Meringue Tart with complementary side dishes can elevate your gathering to new heights.
-
Fresh Berries: The tartness of strawberries and blueberries adds a burst of freshness that perfectly complements the sweet and tangy flavors of the tart. Consider a medley of mixed berries for an eye-catching presentation.
-
Whipped Cream: A dollop of lightly sweetened whipped cream provides a creamy, luscious texture that enhances the lightness of the meringue topping. Serve it on the side for a delightful contrast.
-
Coffee or Tea: A cup of rich espresso or herbal tea can balance the bold citrus flavors, creating a soothing finish to your meal. The warmth of the beverage will invite cozy conversation around the dessert table.
-
Mint Salad: A light, fresh mint salad adds a refreshing crunch and elevates the dish with a fragrant twist. Toss it with lemon vinaigrette for a zesty accent that ties back to the lemony tart.
-
Chocolate Sauce: For an indulgent treat, drizzle chocolate sauce over slices of the tart. The sweetness of the chocolate provides a decadent contrast to the tart’s brightness, making it utterly irresistible.
-
Citrus Sorbet: Cool and refreshing, a scoop of citrus sorbet can cleanse the palate, delighting your guests with its vibrant flavors. It’s a perfect match for the tart, echoing its zesty notes without overpowering them.
Explore different textures and flavors to create a symphony of excitement around your Lemon Meringue Tart!
How to Store and Freeze Lemon Meringue Tart
Fridge: Store the tart in an airtight container in the refrigerator for up to 3 days. This will help maintain the integrity of the crust and filling.
Freezer: It’s not recommended to freeze the entire tart with meringue, as it alters the texture. However, you can freeze the crust and filling separately for up to 1 month.
Leftovers: If you have leftover lemon meringue tart, ensure the meringue is intact, and keep it covered in the fridge. But try to enjoy it as fresh as possible!
Reheating: If the crust is slightly softened, you can re-crisp it in a 350°F oven for about 5-10 minutes before serving, but avoid reheating the meringue.
Lemon Meringue Tart Variations
Feel free to explore these delightful twists that will elevate your Lemon Meringue Tart experience!
- Citrus Swap: Substitute lemon juice with lime or grapefruit juice for a refreshing flavor twist.
- Mini Tartlets: Create individual tartlets using a muffin tin for portion-controlled delights; bake for a shorter time.
- Sweetener Switch: Use honey or maple syrup instead of granulated sugar for a natural sweetness with a unique flavor.
- No-Bake Option: Make a no-bake lemon filling using gelatin for a fun twist; just refrigerate until set.
- Herb Infusion: Add a touch of finely minced fresh basil or mint to the lemon filling for an aromatic surprise.
- Graham Cracker Crust: Swap the traditional crust with a graham cracker crust for a sweeter, crunchier base.
- Nutty Twist: Fold in finely chopped nuts like almonds or hazelnuts into the meringue for delightful texture and flavor.
- Fruity Topping: Top the meringue with fresh berries like raspberries or strawberries for a pop of color and flavor.
These variations allow for creative experimentation and cater to various tastes while maintaining the charm of your gorgeous Lemon Meringue Tart. For more flavor inspiration, don’t miss out on my luscious Breakfast Protein Biscuits or the zesty Lemon Poppy Seed oats!
Expert Tips for Lemon Meringue Tart
-
Butter Temperature: Keep the butter cold: Using cold unsalted butter is essential for a flaky crust, so don’t let it get too warm before mixing.
-
Perfect Thickness: Avoid overcooking the filling: The lemon custard should be thick enough to coat the back of a spoon but not too thick, to ensure a creamy texture.
-
Meringue Consistency: Beat to stiff peaks: While whisking the meringue, ensure that you reach stiff peaks, but avoid overbeating, which can lead to graininess.
-
No Freezing: Skip meringue freezing: If you’re thinking of freezing the tart, know that meringue does not hold up well in the freezer and alters the texture.
-
Serve Fresh: Enjoy promptly: For the best flavor and texture, serve the Lemon Meringue Tart soon after preparing. Refrigerate leftovers for up to 3 days.
Lemon Meringue Tart Recipe FAQs
How do I choose the best lemons for this tart?
Absolutely! Look for lemons that are bright yellow and slightly firm, as this indicates ripeness. Avoid lemons with dark spots or a dry skin, as they may be past their prime. Fresh lemons yield the best juice and zest, which are crucial for that vibrant flavor in your Lemon Meringue Tart.
How should I store leftovers of the Lemon Meringue Tart?
It’s best to store the tart in an airtight container in the refrigerator for up to 3 days. This helps keep the crust firm and the filling fresh. If it becomes slightly soft, don’t worry! Pop it in a 350°F oven for about 5 minutes to re-crisp the crust before serving.
Can I freeze this Lemon Meringue Tart?
While it’s not ideal to freeze the entire tart with meringue—since it alters texture—you can freeze the crust and lemon filling separately. Allow them to cool completely, wrap them tightly in plastic wrap, and store them in freezer bags. They can be frozen for up to 1 month. When ready to use, thaw in the refrigerator overnight and then add the meringue fresh.
What should I do if my meringue isn’t forming stiff peaks?
Very! If your meringue isn’t reaching stiff peaks, this may be due to traces of yolk in the egg whites or equipment that retains grease. Ensure all bowls and mixers are completely clean and dry. Start by beating at low speed until foamy and then gradually increase to high speed until you reach that perfect peak.
What if I have an egg allergy?
For those with an egg allergy, I recommend exploring egg substitutes specifically designed for meringue. Aquafaba, the liquid from canned chickpeas, can be whisked to form peaks similar to egg whites. Use about 3 tablespoons of aquafaba for each egg white needed, and add a bit of cream of tartar to stabilize it.
Can I adjust the sweetness of the filling?
Absolutely! If you prefer a less sweet filling, you can reduce the amount of sugar in the lemon curd. Start by cutting it down by a quarter to find your ideal balance of tart and sweet. Just remember, the lemon flavor should still shine through, so keep tasting as you adjust!
Dreamy Lemon Meringue Tart with a Flaky Buttery Crust
Ingredients
Equipment
Method
- Start by combining all-purpose flour, powdered sugar, and salt in a food processor. Add cold, cubed unsalted butter and pulse until the mixture resembles coarse crumbs, about 15-20 seconds. Incorporate the egg yolk and cold water, pulsing until the dough just comes together. Form the dough into a disc, wrap in plastic wrap, and refrigerate for at least 2 hours to chill.
- Once the dough is chilled, lightly flour your work surface and roll it out into a 12-inch circle, about 1/8 inch thick. Carefully transfer the rolled dough to a 9-inch pie dish, gently pressing it into the sides and bottom. Use a fork to perforate the bottom and freeze for 30 minutes to firm up the crust before baking.
- Preheat your oven to 350°F (175°C). Line the chilled crust with parchment paper, filling it with baking beans or rice for weight. Bake in the preheated oven for about 35 minutes, or until the edges are golden brown. Remove the weights and parchment, then cool completely on a wire rack before filling it with lemon curd.
- In a mixing bowl, whisk together the large egg yolks and cornstarch until smooth. In a saucepan over medium heat, combine water, freshly squeezed lemon juice, granulated sugar, salt, and lemon zest, stirring until dissolved. Gradually whisk the hot mixture into the egg yolks, then return it to the saucepan. Cook over medium heat, stirring constantly, until thickened—5-7 minutes. Remove from heat, stir in the butter until melted, then pour the filling into the cooled crust. Chill for at least 8 hours to set.
- For the meringue, set up a double boiler by simmering water in a pot. In a heatproof bowl, combine egg whites, granulated sugar, and cream of tartar. Whisk constantly over simmering water until the sugar dissolves, about 4-5 minutes. Once dissolved, transfer to an electric mixer and beat on high speed until stiff peaks form, approximately 5-7 minutes.
- Spread the fluffy meringue over the chilled lemon filling, creating peaks for added texture. Use a kitchen torch or place it under the broiler for 1-2 minutes to lightly toast the meringue, watching closely to prevent burning. Refrigerate the completed Lemon Meringue Tart until ready to serve, storing any leftovers in an airtight container for up to 3 days.
Leave a Reply