
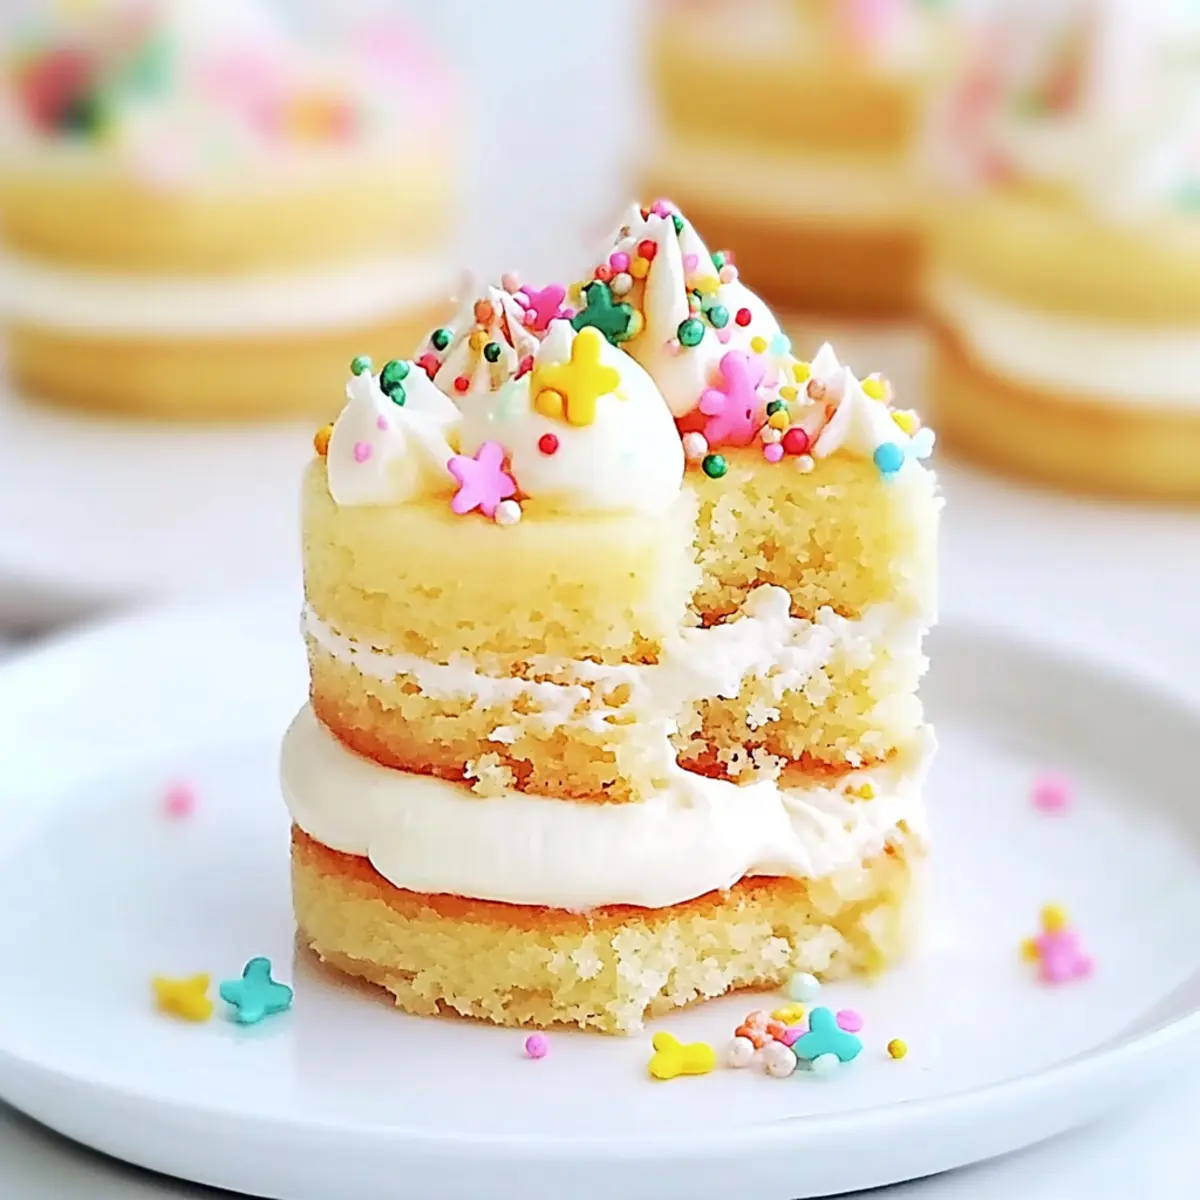
The sweet scent of vanilla wafts through the air as I pull these precious Mini Vanilla Bean Cakes from the oven, and all my worries fade away. There’s something truly enchanting about these elegant little treats; their tender crumb and silky buttercream, infused with aromatic flecks of real vanilla bean, make them a delightful addition to any gathering. With easy preparation and crowd-pleasing appeal, they effortlessly elevate brunches, celebrations, or simply an afternoon tea. Each mini cake is not just a bite of bliss, but also a tiny canvas for your creativity when it comes to decoration. Curious about how to whip up this charming delicacy and bring a touch of elegance to your table? Let’s get baking!
Why are Mini Vanilla Bean Cakes irresistible?
Irresistible, these Mini Vanilla Bean Cakes are a delightful treat that captivates everyone at your gathering. Elegant yet simple, they showcase the beauty of classic baking with minimal effort. Aromatically infused, the real vanilla bean seeds create an enticing flavor that elevates each bite. Perfect for sharing, these mini cakes are a stunning centerpiece for brunches or tea parties. If you’re looking for more sweet inspirations, try my Apple Cinnamon Pancakes or Mini Grilled Cheese for a delicious breakfast spread!
Mini Vanilla Bean Cakes Ingredients
For the Cakes
- Cake Flour – Provides a tender, fine crumb and structure; sifted for lighter texture. Substitution: All-purpose flour can be used but may not yield the same tenderness.
- Baking Powder – Leavens the batter, creating lift in cakes. Note: Ensure freshness for optimal results.
- Salt – Balances sweetness and enhances flavors while slightly strengthening gluten structure.
- Whole Milk (room temperature) – Moistens dry ingredients and contributes to a tender cake texture. Note: Bring to room temperature to prevent lumps in the batter.
- Egg Whites (room temperature) – Stabilizes and lightens the cake, helping create an airy crumb. Note: Beaten at room temperature for better lift.
- Unsalted Butter (room temperature) – Adds richness and tenderness; creams well with sugar for aeration.
- Sugar – Sweetens the cake and aids in aeration during creaming; helps achieve a fine crumb.
- Scraped Vanilla Bean Seeds – Infuse strong vanilla flavor with visual appeal from the flecks of bean.
- Pure Vanilla Extract – Reinforces vanilla flavor in the batter, complementing the seeds.
For the Frosting
- Unsalted Butter (for frosting, softened) – Forms a creamy base for buttercream frosting.
- Powdered Sugar (sifted) – Adds sweetness and smoothness, aiding in achieving a stable frosting.
- Clear Vanilla Extract – Maintains bright white frosting color without altering flavor. Note: Regular extract may tint frosting slightly.
- Heavy Cream or Milk – Adjusts frosting consistency; added gradually for desired texture.
For Decoration
- Edible Easter Grass & Pastel Sprinkles – Decorative elements that enhance presentation. Note: Use within serving time to maintain freshness.
Now that you have the ingredients, you’re one step closer to bringing the comforting charm of Mini Vanilla Bean Cakes into your kitchen!
Step‑by‑Step Instructions for Mini Vanilla Bean Cakes
Step 1: Preheat the Oven
Begin by preheating your oven to 350°F (175°C). As the oven warms, prepare a nonstick cupcake pan by lightly spraying it with cooking spray to ensure the mini cakes release easily after baking. This proactive step will streamline your baking process, allowing you to focus on creating the delightful Mini Vanilla Bean Cakes.
Step 2: Mix Dry Ingredients
In a medium bowl, sift together the cake flour, baking powder, and salt. This process aerates the flour, which is essential for achieving a light and tender crumb in your Mini Vanilla Bean Cakes. Once sifted, set the mixture aside, so it’s ready to incorporate into your batter later.
Step 3: Combine Wet Ingredients
In another bowl, whisk together the room temperature whole milk and egg whites until fully combined and smooth. This mixture will not only hydrate the dry ingredients but also contribute to the airy texture of your cakes. Setting these aside lets the flavors meld beautifully before they join the dry ingredients.
Step 4: Cream Butter and Sugar
Using a stand mixer fitted with the paddle attachment, cream the softened unsalted butter and sugar together until light and fluffy, which should take about 3 minutes. The mixture will turn pale and aerated, creating the ideal base for your Mini Vanilla Bean Cakes that enhances both flavor and texture.
Step 5: Add Vanilla Bean
Once your butter and sugar are creamed, mix in the scraped vanilla bean seeds and pure vanilla extract. This addition infuses the batter with a deliciously aromatic vanilla flavor, which is essential for creating the rich essence of your Mini Vanilla Bean Cakes. Scrape down the bowl to ensure even distribution.
Step 6: Mix Wet and Dry Ingredients
Gradually alternate adding the dry and wet mixtures into the creamed butter while mixing on low speed. Start with a third of the dry mixture, followed by half of the wet, continuing this pattern until everything is fully combined and smooth. Be careful not to overmix; this will help keep your cakes light and fluffy.
Step 7: Fill and Bake
Scoop the batter into your prepared cupcake wells, filling each about two-thirds full for an even rise. Place the pan in the preheated oven and bake for 18-22 minutes. They are ready when a toothpick inserted in the center comes out clean, signaling that your Mini Vanilla Bean Cakes are perfectly baked.
Step 8: Cool the Cakes
Once baked, remove the pan from the oven and let the Mini Vanilla Bean Cakes cool in the pan for 5 minutes. Then transfer them to a wire rack to cool completely. This step is crucial for allowing the cakes to firm up and set the stage for frosting later.
Step 9: Prepare the Frosting
In a mixing bowl, beat the softened unsalted butter until light and fluffy. Gradually add in the sifted powdered sugar, continuing to mix until smooth. Finally, blend in the clear vanilla extract and a splash of heavy cream or milk until you reach your desired frosting consistency for those irresistible Mini Vanilla Bean Cakes.
Step 10: Assemble the Cakes
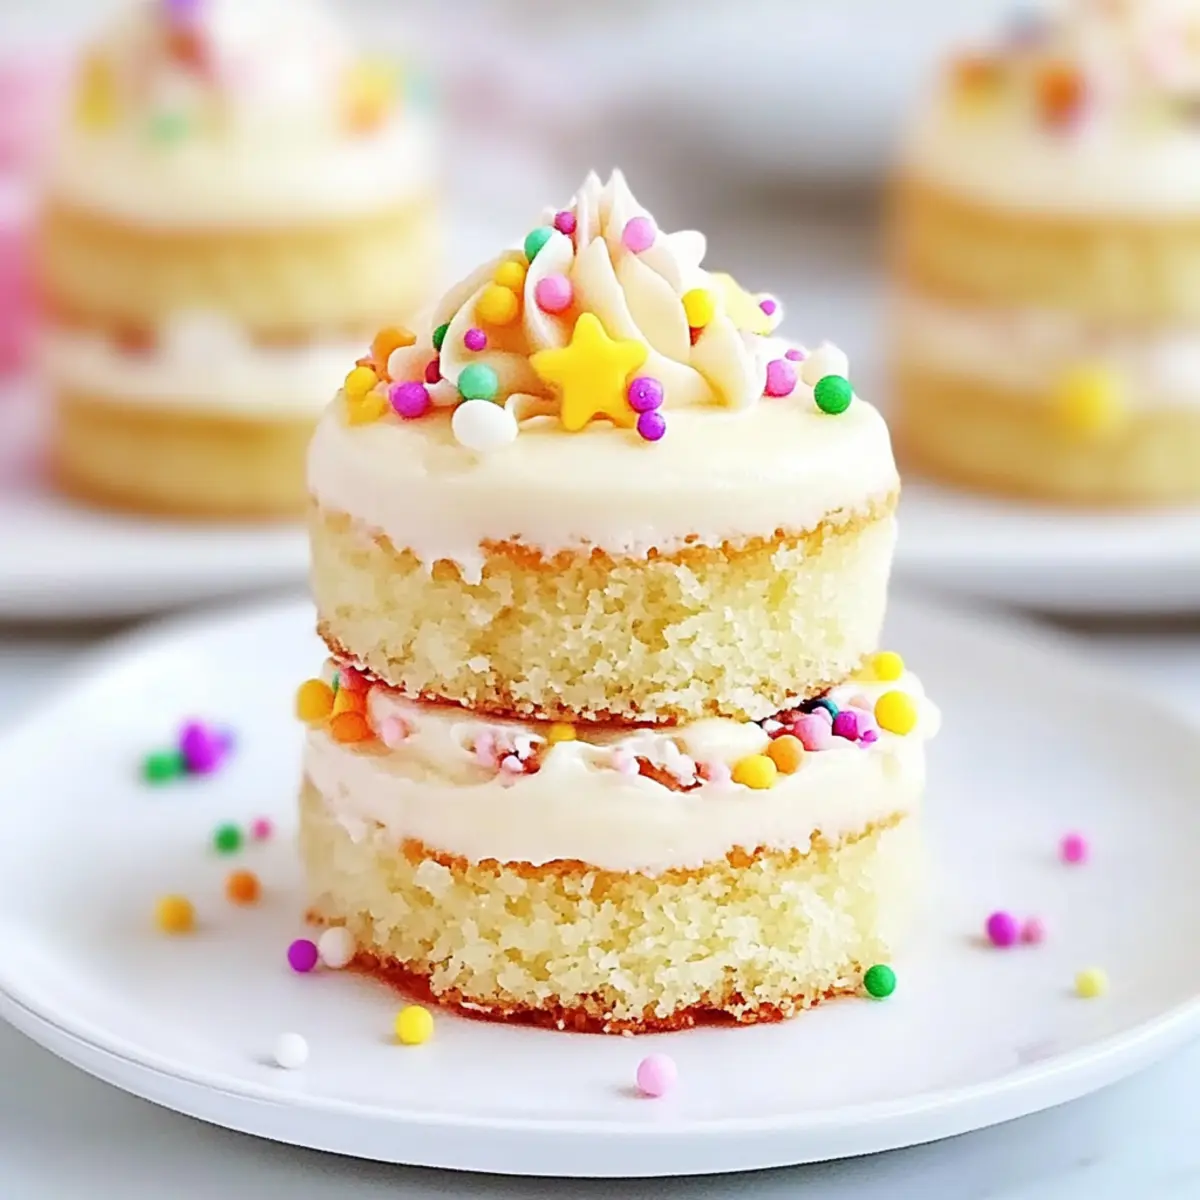
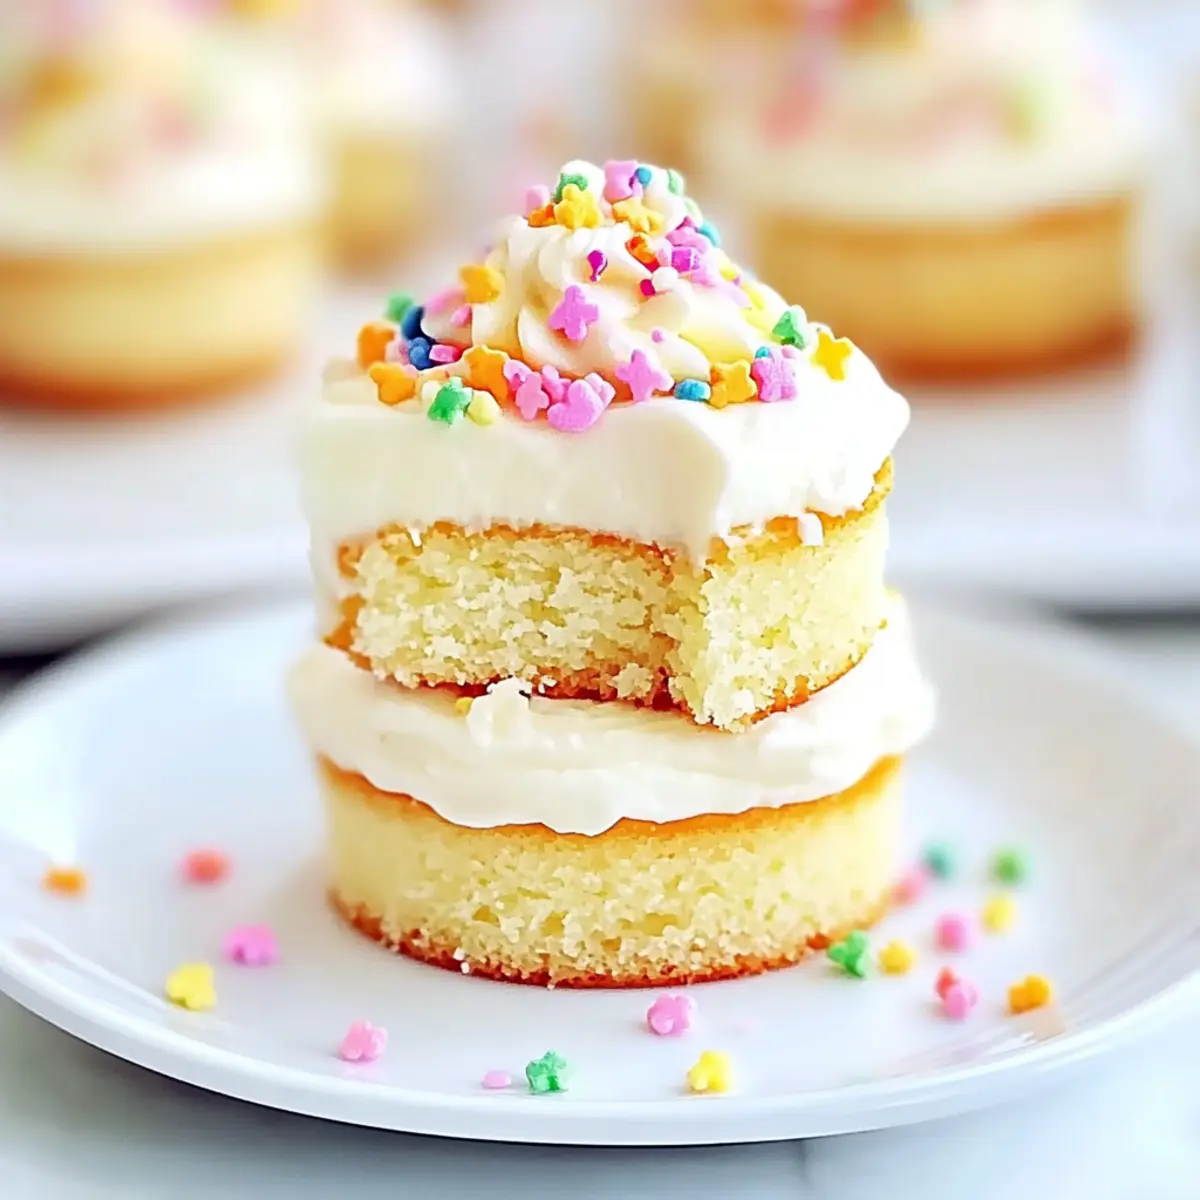
Once the cakes are cool, use a serrated knife to carefully trim the domes off for a flat surface. Pipe frosting onto the flat side of one cake, then stack another on top, creating delightful layers. This process contributes to the visual appeal and ensures each bite is a mouthful of creamy goodness.
Step 11: Decorate and Serve
To finish, decorate your Mini Vanilla Bean Cakes with festive edible Easter grass and pastel sprinkles for a charming touch. These visual elements enhance presentation, making your cakes perfect for celebrations. Serve immediately, or store in the refrigerator if assembled in advance, ensuring they stay fresh.
Make Ahead Options
These Mini Vanilla Bean Cakes are fantastic for meal prep! You can prepare the cake layers up to 3 days in advance by baking and cooling them completely before wrapping them tightly in plastic wrap and storing them at room temperature. For the buttercream frosting, make it the day before and refrigerate it in an airtight container; simply re-whip it to restore its texture before using. When you’re ready to serve, carefully trim the tops of the cooled cakes, frost them, and add your decorative touches. This way, you can enjoy delicious homemade Mini Vanilla Bean Cakes with minimal effort, making them perfect for busy weeknights or last-minute gatherings!
Mini Vanilla Bean Cakes Variations & Substitutions
Feel free to explore delightful twists and swaps to make these Mini Vanilla Bean Cakes uniquely yours!
-
Gluten-Free: Use a 1:1 gluten-free flour blend for a tender, gluten-free option without sacrificing flavor.
-
Dairy-Free: Substitute whole milk with almond or coconut milk and use vegan butter in the frosting for a dairy-free treat.
-
Fruity Twist: Add a tablespoon of lemon zest to the batter for a refreshing citrus flavor that pairs beautifully with vanilla.
-
Chocolate Lovers: Incorporate cocoa powder into the cake mix (adjust sugar) for a chocolatey version that’s still tender and moist.
-
Nutty Delight: Stir in finely chopped almonds or walnuts into the batter for a delightful crunch and added richness.
-
Seasonal Spice: Fold in a teaspoon of pumpkin spice or cinnamon for a seasonal flavor boost that warms every bite.
-
Frosting Variations: Mix in mashed strawberries or crushed raspberries into the frosting for a fruity twist that adds a pop of color and flavor.
-
Personalized Decorations: Ditch the Easter grass and decorate with crushed cookies or crushed nuts for a unique garnish; feel free to embrace your creativity!
No matter which variation you choose, these delightful options bring an extra layer of love and excitement to your Mini Vanilla Bean Cakes. And if you’re in the mood for more delicious recipes, don’t miss my Vanilla Cinnamon Buttermilk or check out my Apple Cinnamon Pancakes for a breakfast treat!
How to Store and Freeze Mini Vanilla Bean Cakes
-
Fridge: Store assembled Mini Vanilla Bean Cakes in an airtight container for up to 3 days. This helps maintain their freshness and prevents the frosting from drying out.
-
Room Temperature: If you have unassembled cake layers, keep them at room temperature for up to 2 days. Be sure to wrap them well to avoid any moisture loss or contamination.
-
Freezer: You can freeze unassembled mini cakes for up to 2 months. Wrap each layer in plastic wrap and place them in a freezer bag. Frost once thawed for the best texture.
-
Reheating: For serving, thaw frozen cake layers in the refrigerator overnight. If desired, gently reheat in the microwave for 10-15 seconds to refresh the flavor before frosting and serving.
Expert Tips for Mini Vanilla Bean Cakes
-
Room Temperature Ingredients: Ensure all ingredients like butter, milk, and egg whites are at room temperature for better emulsification, resulting in a more tender cake.
-
Sift Carefully: Always sift your dry ingredients like cake flour and baking powder. This aerates the flour and prevents lumps, key for achieving that light, fluffy texture in your Mini Vanilla Bean Cakes.
-
Alternation Technique: When mixing wet and dry ingredients, alternate them to avoid overworking the gluten. This step helps maintain the cakes’ tender crumb.
-
Consistent Portions: Use a consistent scoop size to fill the cupcake wells, ensuring even baking and uniform mini cakes. This not only looks appealing but also helps them bake uniformly.
-
Frosting Texture: Gradually add liquid to the frosting for optimal consistency. Overmixing the frosting can lead to it becoming greasy, so beat just until smooth for the best finish on your Mini Vanilla Bean Cakes.
-
Chilling Frosting: If the frosting becomes too soft while decorating, chill it briefly to maintain its shape while piping, ensuring your final look is polished and professional.
What to Serve with Mini Vanilla Bean Cakes
These delightful mini cakes are not just a treat on their own; they can be paired with various dishes to create a complete and enchanting experience.
- Fresh Berries: A bowl of mixed berries brings a burst of natural sweetness and a pop of color that enhances the vanilla flavor.
- Whipped Cream: A dollop of airy whipped cream adds a light richness that perfectly complements the tender crumb of the mini cakes.
- Fruit Sorbet: Serve alongside a refreshing fruit sorbet for a delightful contrast in temperature and texture, enhancing the dessert’s sweetness.
- Coffee or Tea: Pairing with a warm cup of coffee or a fragrant herbal tea elevates the whole experience, balancing sweetness with warmth.
- Almond Biscotti: For a charming nod to traditional desserts, serve with almond biscotti that adds a satisfying crunch and nutty flavor.
- Chocolate Sauce: Drizzling rich chocolate sauce over the cakes adds a decadent touch, perfect for those who adore a hint of cocoa with vanilla.
- Pistachio Ice Cream: The creamy texture of pistachio ice cream alongside the soft cakes brings an elegant touch of flavor contrast to the table.
- Petite Fours: Serve these mini cakes alongside petite fours for a sweet dessert platter, allowing guests to enjoy a variety of treats in small portions.
- Sparkling Lemonade: A glass of fizzy lemonade provides a refreshing palate cleanser, making each bite of the cakes even more delightful.
- Caramel Sauce: A drizzle of warm caramel sauce adds a rich sweetness that complements the vanilla, creating a luxurious dessert experience.

Mini Vanilla Bean Cakes Recipe FAQs
What is the best way to select ripe ingredients for Mini Vanilla Bean Cakes?
Absolutely! When looking for ingredients, choose fresh, high-quality products. For the best flavor, use room-temperature unsalted butter that feels soft yet firm and eggs that are large, fresh, and free of cracks. Make sure your vanilla beans are plump and fragrant, as this will enhance the cakes significantly.
How should I store Mini Vanilla Bean Cakes to keep them fresh?
You can store assembled Mini Vanilla Bean Cakes in an airtight container in the refrigerator for up to 3 days. It’s crucial to seal them well to prevent the frosting from drying out. Unassembled cake layers can be kept at room temperature covered for up to 2 days, but they’re best if refrigerated if you need longer storage.
Can I freeze Mini Vanilla Bean Cakes?
Yes, you can freeze unassembled Mini Vanilla Bean Cakes! Wrap each layer tightly in plastic wrap, then place them in a freezer bag. They will keep well in the freezer for up to 2 months. To enjoy, simply thaw the layers in the refrigerator overnight and frost them once they’re fully thawed for the best texture.
What are some common troubleshooting tips for Mini Vanilla Bean Cakes?
If your cakes domed too high during baking, it might indicate you mixed too quickly or overmixed the batter. For flat layers, pour equal amounts into each cupcake well to ensure even baking. If your frosting turned out too loose, incrementally add sifted powdered sugar; this should help thicken it to the desired spreadable consistency.
Are there any dietary considerations for Mini Vanilla Bean Cakes?
These cakes contain common allergens like eggs and dairy, so if you’re catering to someone with allergies, consider substitutes. For an egg replacement, try using a flax egg or applesauce. Use a dairy-free butter alternative and plant-based milk for a dairy-free version, ensuring everyone can enjoy these delightful treats!
How can I enhance the flavor of the vanilla in Mini Vanilla Bean Cakes?
For an extra boost of vanilla flavor in your Mini Vanilla Bean Cakes, try using both scraped vanilla bean seeds and high-quality pure vanilla extract. Additionally, letting your batter rest for about 10 minutes before baking will allow the flavors to meld beautifully. This results in a richer taste that everyone will appreciate!
Mini Vanilla Bean Cakes for Sweet Celebrations and Cozy Moments
Ingredients
Equipment
Method
- Preheat your oven to 350°F (175°C). Prepare a nonstick cupcake pan by lightly spraying it with cooking spray.
- In a medium bowl, sift together the cake flour, baking powder, and salt.
- In another bowl, whisk together the room temperature whole milk and egg whites until fully combined.
- Using a stand mixer, cream the softened unsalted butter and sugar together until light and fluffy, about 3 minutes.
- Mix in the scraped vanilla bean seeds and pure vanilla extract.
- Gradually alternate adding the dry and wet mixtures into the creamed butter until fully combined.
- Scoop the batter into your prepared cupcake wells, filling each about two-thirds full. Bake for 18-22 minutes.
- Remove the pan from the oven and let the cakes cool for 5 minutes before transferring to a wire rack.
- In a mixing bowl, beat the softened unsalted butter until light and fluffy. Gradually add sifted powdered sugar, then blend in clear vanilla extract and heavy cream until desired consistency.
- Once the cakes are cool, trim the domes off and pipe frosting onto one cake, stacking another on top.
- Decorate with edible Easter grass and pastel sprinkles before serving.
Leave a Reply