
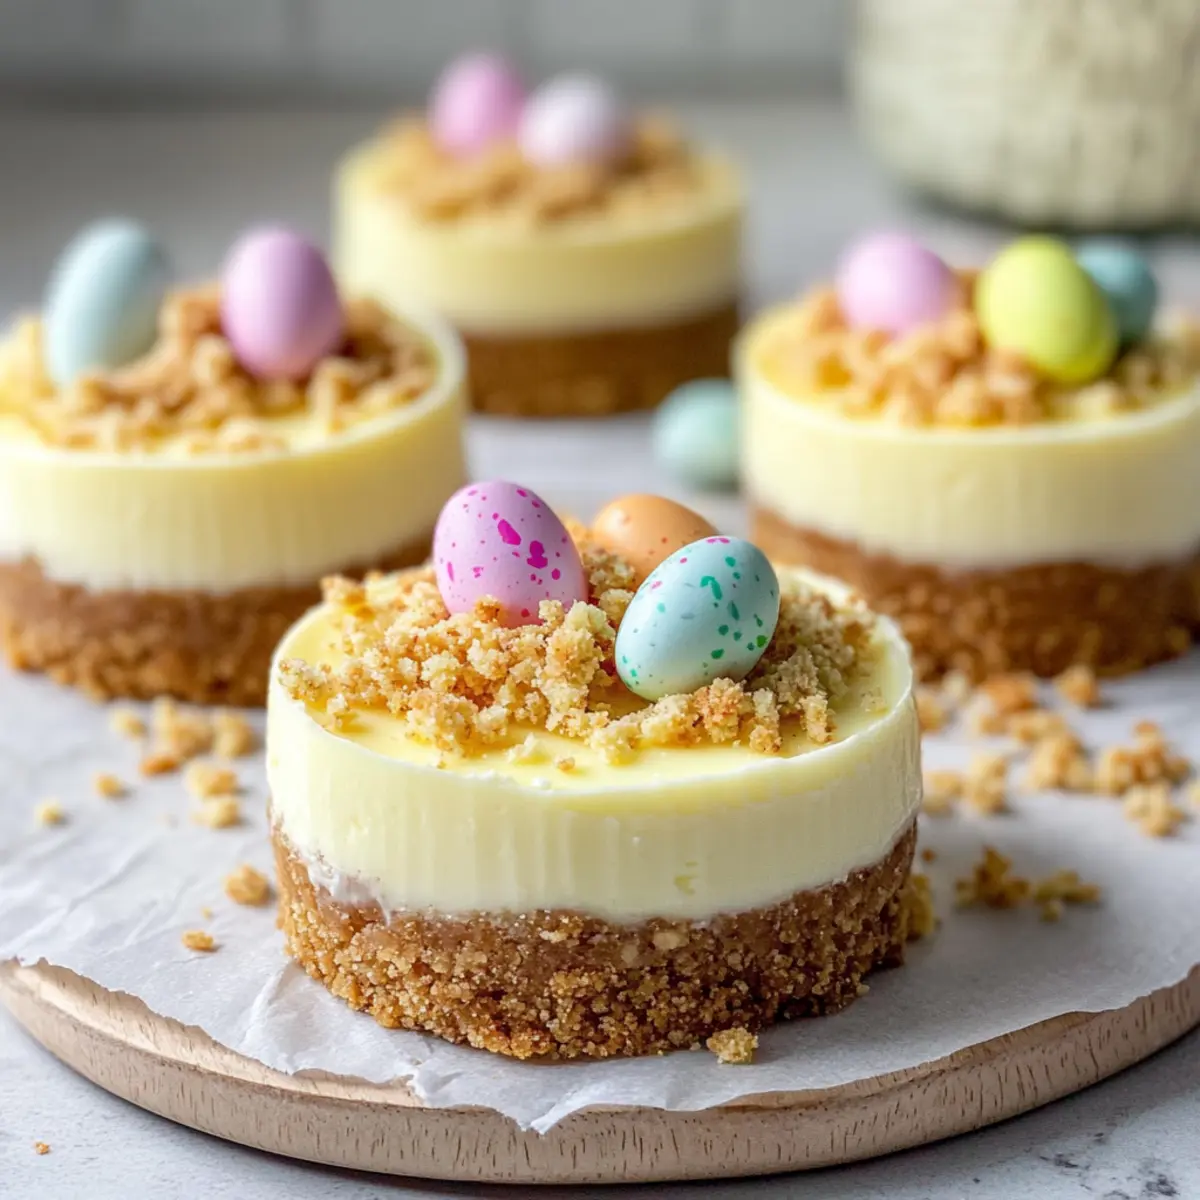
I caught a whiff of spring the other day, and it instantly took me back to those delightful Easter gatherings filled with laughter and sweet treats. One dessert that has claimed a special spot in my heart is the No Bake Mini Egg Cheesecake. This easy, no-bake wonder features a smooth, creamy filling resting on a buttery graham cracker crust, perfect for impressing family and friends without the fuss of an oven. Not only is it a crowd-pleaser with its pastel-hued decorations, but it also offers a low-stress baking experience that’s ideal for the busy holiday season. Whether you’re a seasoned baker or just starting out, these mini cheesecakes are here to elevate your dessert game. Are you ready to create a delicious festive masterpiece that will have everyone asking for seconds? Let’s dive in!
Why make No Bake Mini Egg Cheesecake?
Effortless Preparation: With no baking required, this recipe makes it a breeze to whip up a stunning dessert for Easter celebrations.
Creamy Goodness: The smooth, velvety filling pairs perfectly with the crunchy graham cracker crust, resulting in a delightful contrast that will leave you wanting more.
Crowd Favorite: Festively decorated with colorful mini eggs, these cheesecakes are bound to be the centerpiece of your dessert table, impressing guests of all ages.
Versatile Toppings: Feel free to get creative! Whether it’s drizzling chocolate on top or swapping mini eggs for jelly beans, there’s no shortage of delightful variations to try.
Make Ahead Magic: Prepare these delights a day early to alleviate last-minute stress, allowing you to enjoy the festivities worry-free. Explore even more delightful desserts like Mini Grilled Cheese to complement your Easter spread!
No Bake Mini Egg Cheesecake Ingredients
• Get ready to create the ultimate Easter delight!
For the Crust
- Graham Crackers – These form the perfect buttery base for your cheesecake; feel free to swap for gluten-free options if needed.
- Butter – Ensures the crust sticks together beautifully and adds richness.
For the Filling
- Cream Cheese – The key to a rich and creamy filling; make sure it’s softened for easy blending.
- Powdered Sugar – Sweetens your cheesecake without leaving a grainy texture; alternatively, granulated sugar works with extra mixing.
- Whipped Topping/Cool Whip – Adds lightness to the filling for a delightful fluff; homemade whipped cream can be used for a fresh option.
For the Topping
- Mini Eggs (e.g., Cadbury) – The star of the show, adding texture and color; any festive candy can be used for a fun twist!
Step‑by‑Step Instructions for No Bake Mini Egg Cheesecake
Step 1: Prepare the Crust
Start by crushing about 10–12 graham crackers into fine crumbs using a food processor or by placing them in a zip-top bag and crushing with a rolling pin. In a bowl, combine the crumbs with 5 tablespoons of melted butter, mixing until the mixture resembles wet sand. Press the crust mixture firmly into the bottoms of muffin tins or individual serving dishes to create a solid base.
Step 2: Make the Filling
In a large mixing bowl, beat 8 ounces of softened cream cheese and ½ cup of powdered sugar together using an electric mixer until the mixture is completely smooth and free of lumps, which should take about 2–3 minutes. Carefully fold in 1 cup of whipped topping until fully incorporated, ensuring you maintain that delightful light and fluffy texture.
Step 3: Assemble Cheesecakes
Spoon the creamy filling evenly over the prepared crusts, using a spatula to spread and smooth the tops. Be sure to fill each crust to the brim for a beautiful presentation. After smoothing the tops, tap the muffin tin gently on the countertop to remove any air bubbles, ensuring a perfect finish for each No Bake Mini Egg Cheesecake.
Step 4: Chill
Refrigerate the mini cheesecakes for at least 4 to 6 hours, or until they are set firmly. For the best results, consider chilling them overnight; this will enhance the texture and make them easier to serve. You’ll know they’re ready when the filling is firm to the touch but still jiggly like a well-set mousse.
Step 5: Garnish
Once fully chilled, remove the cheesecakes from the refrigerator and carefully pop them out of the muffin tin if necessary. Sprinkle the tops generously with crushed mini eggs or any festive candy of your choice, adding a pop of color and crunch. Serve these delightful No Bake Mini Egg Cheesecakes chilled for a refreshing treat that everyone will love.
What to Serve with No Bake Mini Egg Cheesecake
Creating a delightful Easter feast is all about balancing flavors, textures, and color to make your dessert truly shine.
-
Fresh Fruit Salad: Bright and juicy, a medley of seasonal fruits provides a refreshing contrast to the rich cheesecake, enhancing the overall dining experience. Consider adding a squeeze of lime for zesty brightness.
-
Creamy Vanilla Ice Cream: A scoop of smooth vanilla ice cream complements the cheesecake’s creamy texture, and the cold temperature offers a delightful contrast that enhances every sweet bite.
-
Chocolate Drizzle: Elevate your mini cheesecakes by drizzling melted chocolate over the top. The smooth richness adds a decadent touch, making each bite that much more indulgent.
-
Elderflower Sparkling Water: The floral notes in elderflower sparkling water beautifully accompany the sweetness of the cheesecake, providing a light and effervescent refreshment to cleanse the palate.
-
Dark Chocolate-Covered Strawberries: These charming bites add both visual appeal and a contrasting flavor—sweet and tart—that pairs well with the cheesecake’s sweetness. Perfect for a festive touch!
-
Mini Carrot Cakes: A small, spiced carrot cake portion serves as a wonderful flavor counterpoint to your cheesecake, merging seasonal flavors and textures for a contrast everyone will love.
-
Easter-themed Sugar Cookies: Add playful, decorative cookies alongside, echoing the festive spirit and enriching the dessert experience while inviting guests of all ages to indulge.
-
Savory Tea Sandwiches: Balance the sweetness of the cheesecake with a variety of tea sandwiches—cucumber, smoked salmon, or egg salad—for a delightful mix of savory and sweet during your gathering.
How to Store and Freeze No Bake Mini Egg Cheesecake
Fridge: Store the mini cheesecakes covered with plastic wrap or in an airtight container in the fridge for up to 3 days to maintain their freshness.
Freezer: For longer storage, freeze the cheesecakes in an airtight container for up to 2 months. Wrap each cheesecake individually in plastic wrap before placing them in the container.
Thawing: To enjoy frozen No Bake Mini Egg Cheesecake, transfer them to the fridge and let them thaw overnight before serving.
Reheating: These cheesecakes are best served cold and should not be reheated, as the creamy texture may change.
Expert Tips for No Bake Mini Egg Cheesecake
-
Soften Cream Cheese: Ensure it’s at room temperature to prevent lumps in your filling. This step is crucial for a smooth texture in your No Bake Mini Egg Cheesecake.
-
Chill Longer for Firmness: For the best texture, refrigerate overnight. This allows the cheesecakes to set properly, making them easier to serve.
-
Gentle Mixing: Avoid overmixing the whipped topping when folding it into the cream cheese. This helps maintain the light and fluffy texture of your cheesecake.
-
Use Parchment Paper: Line muffin tins with parchment paper for easy removal of the cheesecakes. This simple trick can save you time and frustration when serving.
-
Experiment with Toppings: Feel free to use various candies or drizzle chocolate on top for a personal touch. This not only enhances flavor but also leaves room for creativity with your No Bake Mini Egg Cheesecake.
No Bake Mini Egg Cheesecake Variations
Ready to get creative with your No Bake Mini Egg Cheesecake? Customize this delightful treat to suit your taste and keep your guests guessing!
-
Colorful Candy Swap: Replace mini eggs with M&M’s or jelly beans for a vibrant, playful twist. The different textures will add a fun surprise to each bite.
-
Chocolate Drizzle: Top your cheesecake with a luscious drizzle of melted chocolate for an indulgent finish. This simple addition takes the flavor to a whole new level!
-
Flavored Extracts: Add a splash of vanilla or almond extract to the filling. This subtle hint will enhance the flavor profile and give your cheesecake a gourmet touch.
-
Nutty Addition: Incorporate crushed nuts like pecans or almonds into the crust for added crunch. It brings a delightful nuttiness that complements the creamy filling.
-
Fruity Fusion: Mix in some mashed berries or fruit puree with the filling. Berries not only add flavor but also a beautiful color contrast, making your cheesecake even more appealing.
-
Heightened Heat: For a bit of spice, sprinkle some cayenne pepper or cinnamon into the filling. It’s a unique twist that will surprise and delight adventurous palettes.
-
Dairy-Free Delight: Substitute the cream cheese with a vegan cream cheese or cashew-based alternative. The flavors remain delicious while accommodating dietary needs!
-
Garnish Galore: Instead of mini eggs, use crushed graham crackers or chocolate shavings to top your cheesecake. This keeps the presentation fresh and exciting without losing that festive touch.
With these variations, your No Bake Mini Egg Cheesecake becomes a canvas for your creativity! Explore these ideas and serve up a delicious dessert masterpiece, perfect for festive gatherings. For more delightful dessert options, check out my Baked Eggs Napoleon or Bake Gingerbread Cheesecake!
Make Ahead Options
These No Bake Mini Egg Cheesecakes are ideal for busy home cooks looking to save time during holiday gatherings! You can prepare the crust and filling up to 24 hours in advance—just make the crust and refrigerate it while you whip up the filling. To keep the texture delightful, store them covered in the refrigerator. When you’re ready to serve, simply spoon the filling over the chilled crust, smooth the tops, and chill again if needed for about 30 minutes to set. Finally, garnish with crushed mini eggs right before serving to ensure they stay colorful and vibrant. Enjoy stress-free entertaining with these make-ahead cheesecakes!
No Bake Mini Egg Cheesecake Recipe FAQs
How do I select ripe ingredients?
Absolutely! For the best No Bake Mini Egg Cheesecake, ensure your cream cheese is at room temperature and fully softened. This will help you achieve a creamy, smooth filling without lumps. Additionally, choose fresh whipped topping or cool whip, and check for any unusual odors or inconsistencies.
How should I store my No Bake Mini Egg Cheesecake?
To keep your mini cheesecakes fresh, store them covered in the refrigerator for up to 3 days. An airtight container works wonders to keep them sealed from other odors. I often use plastic wrap tightly wrapped around each one if I’m just storing them in a baking dish.
Can I freeze No Bake Mini Egg Cheesecake?
Absolutely! You can freeze your mini cheesecakes for up to 2 months. Wrap each cheesecake individually in plastic wrap, then place them in an airtight container or a freezer bag. When you’re ready to enjoy, simply transfer them to the fridge to thaw overnight; they’ll be just as delicious!
What can I do if my filling is too runny?
If your filling ends up too runny, give it a little more chilling time in the fridge! A good 1 to 2 hours longer can help it firm up. If it’s still not achieving the desired texture, consider folding in a bit more whipped topping or refrigerating it for 1-2 hours at a time until it thickens. Avoid overmixing, which can make the cream cheese mixture too soft.
Can this cheesecake be modified for dietary restrictions?
Yes, indeed! For a gluten-free version, swap the graham crackers for gluten-free biscuits. If you or someone you’re serving has dairy allergies, look for plant-based cream cheese and whipped toppings. You can also use your favorite sweetener to suit dietary needs, just remember to adjust quantities based on the sweetness level.
How do I ensure my cheesecake will come out of the tin easily?
I recommend using parchment paper liners in your muffin tins, which will allow for easy removal. If you don’t have liners, an alternative is to lightly grease the muffin tin with butter or cooking spray beforehand. Popping them in the freezer for about 20-30 minutes before serving can also help firm up the cheesecakes for easier release.
Irresistible No Bake Mini Egg Cheesecake for Effortless Easter Fun
Ingredients
Equipment
Method
- Start by crushing about 10–12 graham crackers into fine crumbs using a food processor or by placing them in a zip-top bag and crushing with a rolling pin.
- In a bowl, combine the crumbs with 5 tablespoons of melted butter, mixing until the mixture resembles wet sand. Press the crust mixture firmly into the bottoms of muffin tins or individual serving dishes to create a solid base.
- In a large mixing bowl, beat 8 ounces of softened cream cheese and ½ cup of powdered sugar together using an electric mixer until the mixture is completely smooth and free of lumps.
- Carefully fold in 1 cup of whipped topping until fully incorporated, ensuring you maintain that delightful light and fluffy texture.
- Spoon the creamy filling evenly over the prepared crusts, using a spatula to spread and smooth the tops. Be sure to fill each crust to the brim for a beautiful presentation.
- Refrigerate the mini cheesecakes for at least 4 to 6 hours, or until they are set firmly.
- Once fully chilled, sprinkle the tops generously with crushed mini eggs or any festive candy of your choice.
- Serve these delightful No Bake Mini Egg Cheesecakes chilled for a refreshing treat that everyone will love.
Leave a Reply