
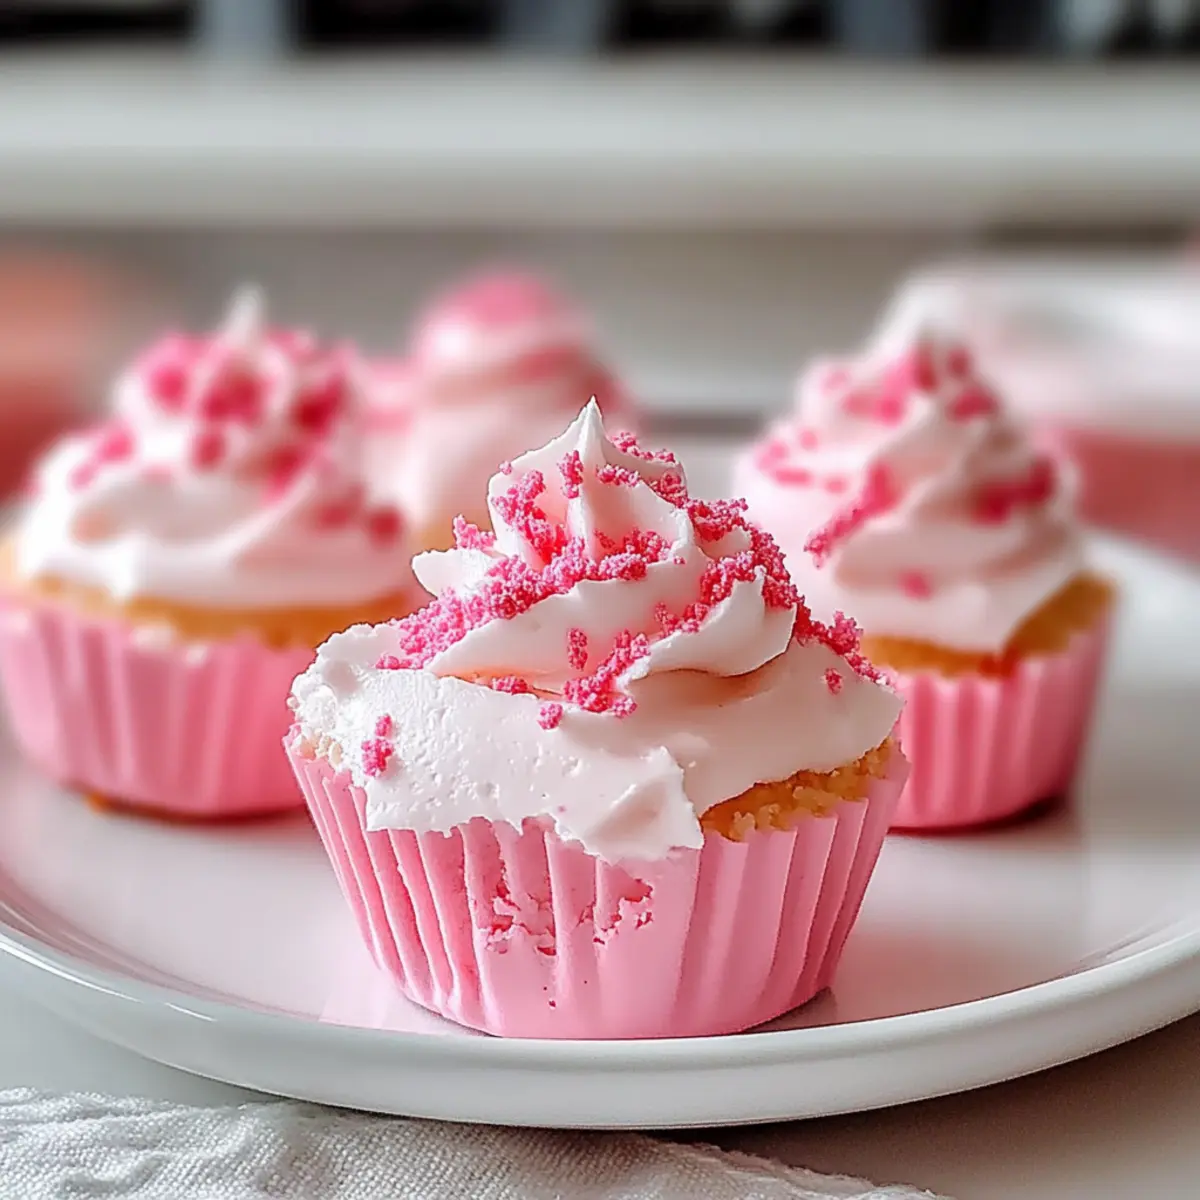
“Did you hear that?” It was my friend, her voice dripping with excitement as she described the latest sweet treat that had stolen her heart. The star of the show? No-Bake Pink Velvet Cheesecake Bites! Intrigued, I knew I had to whip up my own batch. These delightful morsels feature a velvety texture and a pastel hue that instantly brighten any gathering—or simply a cozy night in. Not only are they incredibly easy to prepare, requiring no baking at all, but their customizable nature means you can make them gluten-free, dairy-free, or sugar-free without sacrificing an ounce of taste. Whether you’re looking for a crowd-pleasing dessert or a sweet surprise for yourself, these cheesecake bites are sure to satisfy your cravings. So, are you ready to indulge in this creamy, dreamy treat that will have everyone asking for seconds?
Why Are These Cheesecake Bites So Special?
Easy Preparation: No baking required means you can whip these up quickly, making them perfect for last-minute gatherings or weeknight treats.
Customizable Options: Tailor to your taste by substituting ingredients for gluten-free, dairy-free, or sugar-free versions, ensuring everyone can enjoy them!
Vibrant Appeal: Charming pink hue not only looks stunning but also makes them a hit at parties and celebrations, drawing attention before they even hit the taste buds.
Creamy Texture: Decadent and rich, the combination of cream cheese and heavy cream creates an indulgent filling that melts in your mouth, leaving you wanting more.
Time-Saving: Chill and serve—after a few hours in the fridge, they’re ready to dazzle your guests or satisfy your sweet tooth!
Serve in Style: Pair them with fresh strawberries or a drizzle of chocolate for an added flair—perfect for impressing friends or treating yourself! Why not check out our other recipes like Bake Gingerbread Cheesecake for more delightful desserts?
No-Bake Pink Velvet Cheesecake Ingredients
• To create your delightful No-Bake Pink Velvet Cheesecake Bites, gather these essential ingredients.
For the Crust
- Graham Cracker Crumbs – Provides a sweet and crunchy base; substitute with gluten-free cookie crumbs for a gluten-free option.
- Granulated Sugar – Enhances the sweetness of the crust; adjust quantity based on your sweetness preference.
- Unsalted Butter – Adds richness and helps bind the crumbs; melting it makes mixing easier.
For the Filling
- Cream Cheese – The star ingredient for creamy texture; remember to use room temperature for a smooth filling.
- Powdered Sugar – Ensures the filling is sweet and smooth; sifting helps avoid lumps.
- Heavy Cream – Adds fluffiness and a rich mouthfeel; try coconut cream for a delicious dairy-free version.
- Vanilla Extract – Infuses a warm, comforting flavor; pure vanilla will give it the best taste.
- Pink Food Coloring – Gives cheesecake its signature hue; natural colorants like beet juice can be used for a healthier choice.
For Topping
- Whipped Cream – Adds a beautiful finish; fresh whipped cream creates a light topping.
- Sprinkles (Optional) – For extra color and a festive touch; choose colors that match your occasion.
Step‑by‑Step Instructions for No-Bake Pink Velvet Cheesecake Bites
Step 1: Prepare the Crust
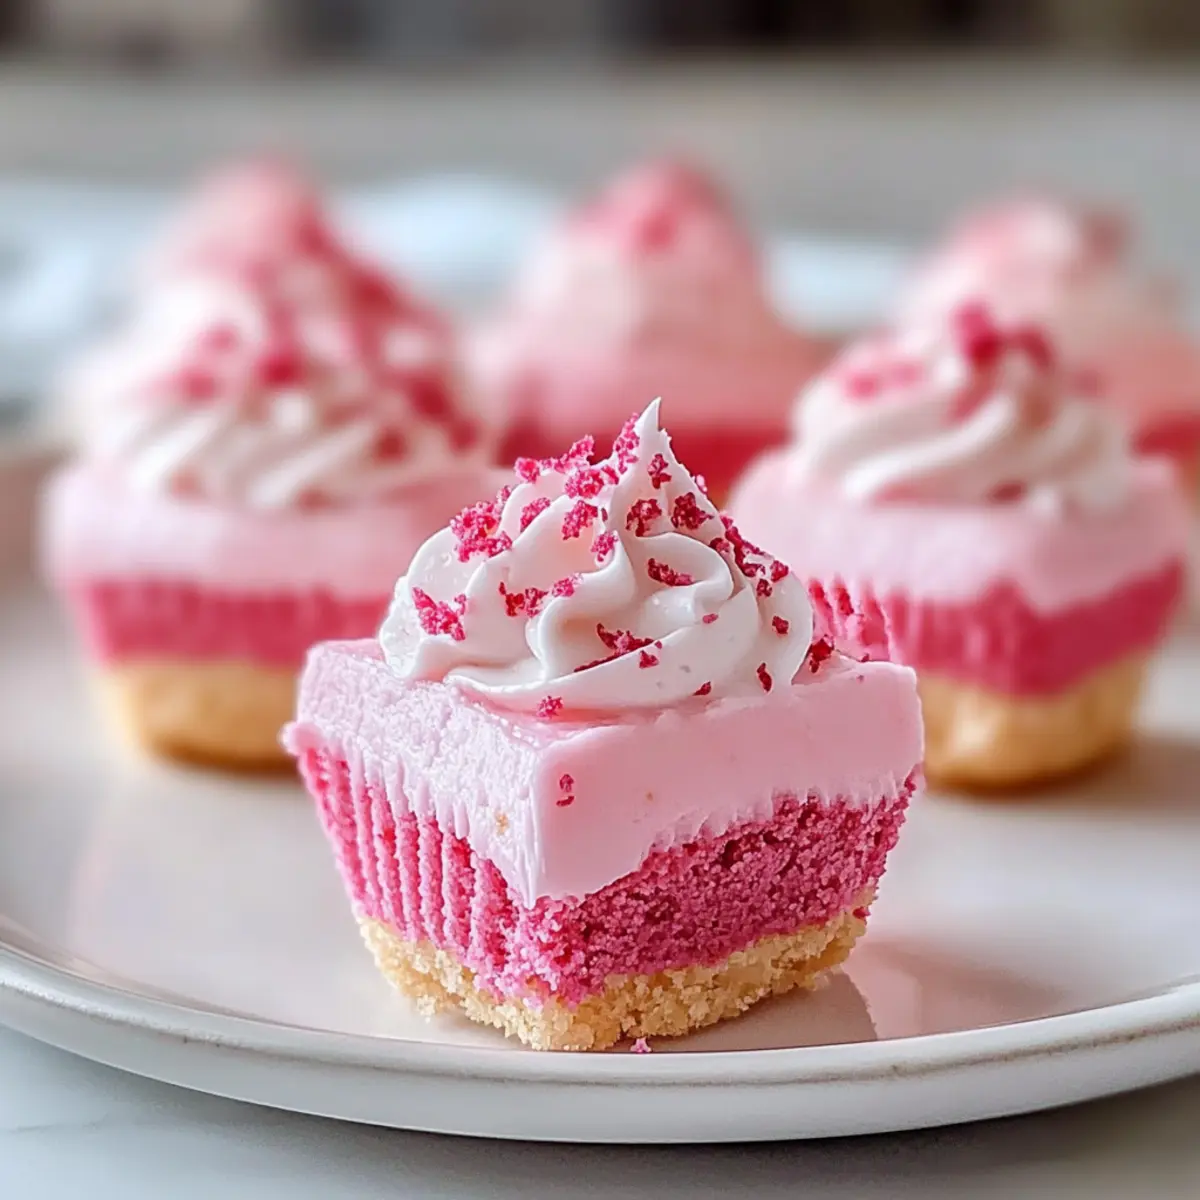
In a medium bowl, mix together graham cracker crumbs and granulated sugar. Pour in melted unsalted butter and stir until the mixture resembles wet sand. Press this blend firmly into the bottom of a 9-inch square baking dish, ensuring it’s evenly distributed and compact. The crust should have a nice, solid base for your No-Bake Pink Velvet Cheesecake Bites.
Step 2: Make the Filling
In a large bowl, allow the cream cheese to soften, then beat it with an electric mixer until smooth and creamy. Gradually add the powdered sugar, heavy cream, and vanilla extract, continuing to mix until the filling is light and fluffy, about 3-4 minutes. Stir in the pink food coloring, mixing until you achieve your desired shade. This luscious filling is the heart of your pink velvet cheesecake bites.
Step 3: Assemble Cheesecake Bites
Spread the creamy pink cheesecake mixture evenly over the prepared crust, using a spatula to create a smooth, level surface. Make sure the filling reaches every corner of the dish for uniform bites. This layer gives the No-Bake Pink Velvet Cheesecake Bites their signature velvety texture, making them irresistibly decadent.
Step 4: Chill the Cheesecake
Cover the baking dish with plastic wrap and refrigerate for at least 4 hours, or until the filling is set firm. You can also chill it overnight for optimal results. The chilling time allows the flavors to meld beautifully while ensuring a delightful firmness that’ll hold up when served.
Step 5: Serve and Decorate
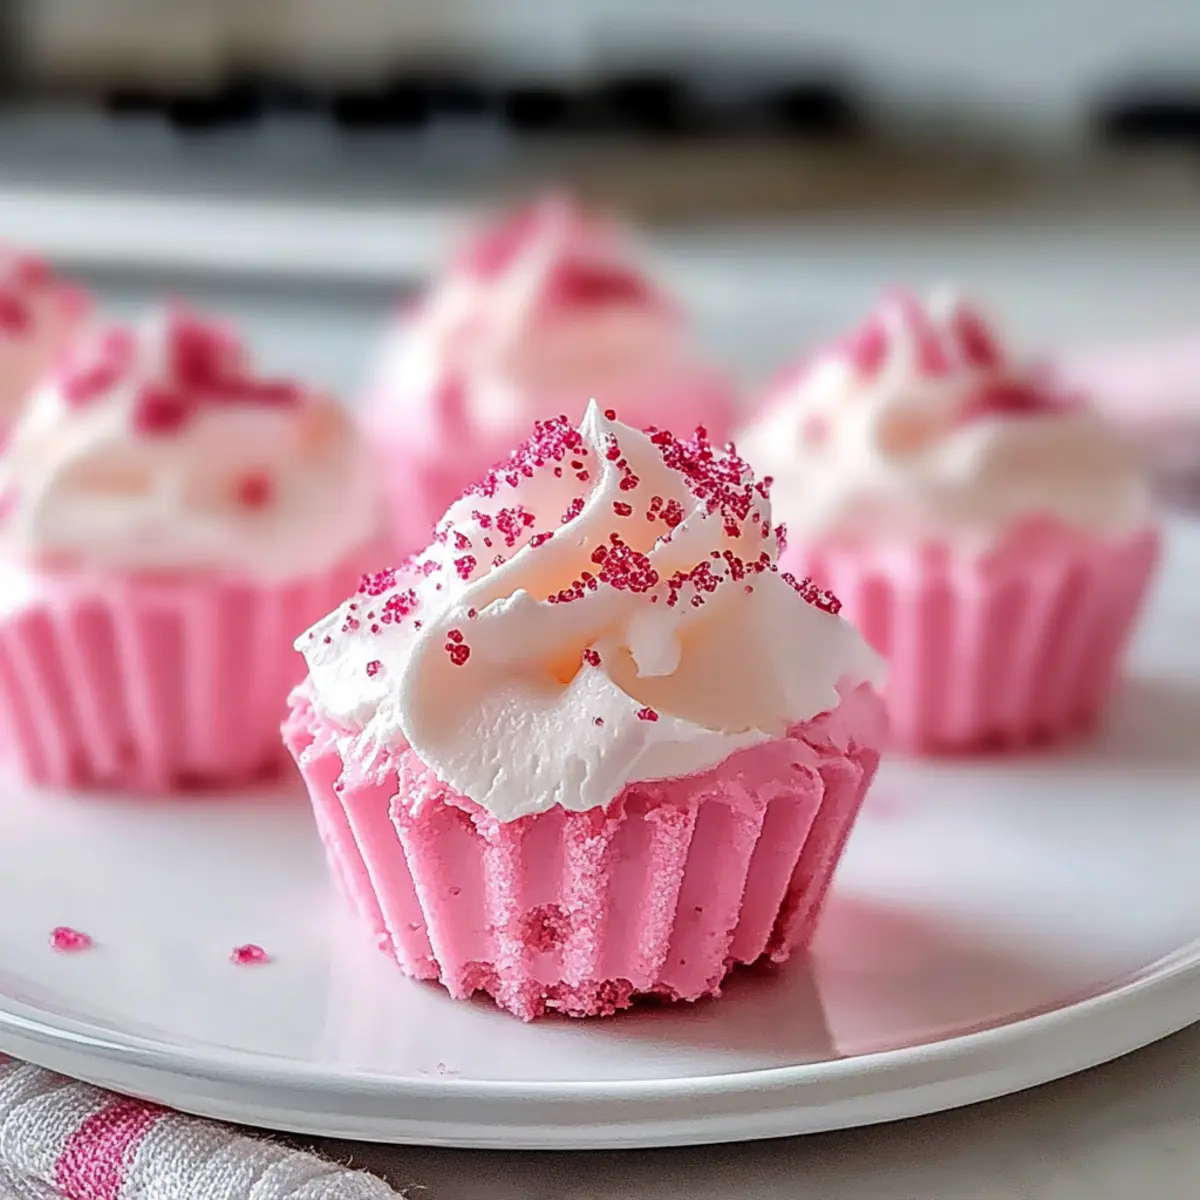
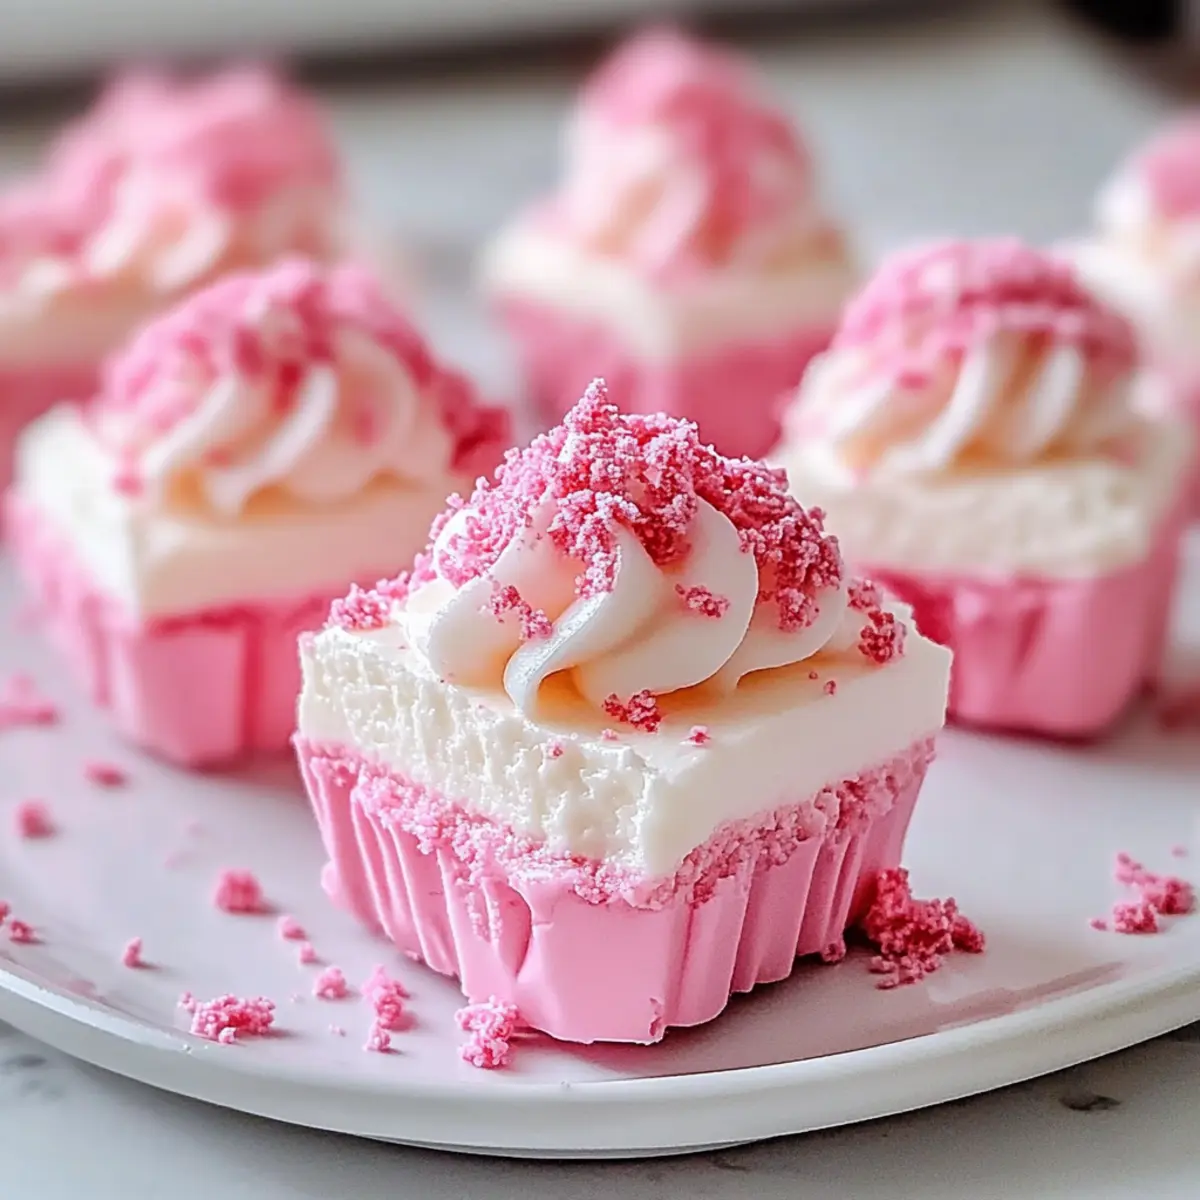
Once chilled, remove your cheesecake from the fridge and cut it into bite-sized squares. Top each piece with a dollop of freshly whipped cream for a light finish and scatter optional sprinkles on top for an extra festive touch. These visual additions make your No-Bake Pink Velvet Cheesecake Bites even more tempting!
Expert Tips for No-Bake Pink Velvet Cheesecake
-
Room Temperature Cream Cheese: Ensure your cream cheese is softened to room temperature for a smooth filling without any lumps.
-
Chilling is Crucial: Don’t rush the chilling process; allow at least 4 hours for the cheesecake to set properly for the best texture.
-
Smooth Layers: When spreading the filling, use a spatula to create an even layer across the crust—this gives your No-Bake Pink Velvet Cheesecake a professional look.
-
Flavor Adaptability: Feel free to experiment with different extracts or mix-ins; adding fresh fruits or cocoa can elevate the flavor profile wonderfully.
-
Storage Savvy: Keep any leftovers in an airtight container in the fridge to maintain freshness for up to 5 days or freeze for longer preservation.
No-Bake Pink Velvet Cheesecake Variations
Customize your dessert adventure with these delightful variations that invite creativity and tailored tastes!
- Gluten-Free: Use almond flour or gluten-free cookie crumbs for the crust to keep it celiac-friendly. The result is just as crunchy and satisfying!
- Dairy-Free: Substitute heavy cream with coconut cream and use dairy-free cream cheese to create a rich filling without the dairy. You’ll still get that dreamy texture!
- Sugar-Free: Replace granulated sugar with a sugar substitute and powdered sugar with stevia for a guilt-free bite. Everyone can indulge without the extra calories!
- Flavor Twists: Try adding unsweetened cocoa powder for a chocolatey delight or mix in fresh berries for a burst of flavor and color. The possibilities are endless!
- Colorful Surprise: For additional fun, incorporate natural colorants like beet juice instead of traditional food coloring. This way, your treats are not only pretty but also wholesome!
- Savory Crunch: Add crushed pretzels or nuts into the crust for a delightful contrast in flavor and texture. This savory twist will elevate your cheesecake bites!
- Fruity Delight: Top your cheesecake bites with a layer of fruit preserves or fresh fruit slices to bring a refreshing tartness that complements the creamy filling.
- Mini Cheesecake Cups: Instead of a large dish, portion your cheesecake filling into individual cups or muffin tins for easier serving. Perfect for parties or when you just want a little treat!
For more delightful desserts, don’t forget to check out our recipe for Blueberry Cheesecake Protein for a fun twist on cheesecake!
What to Serve with No-Bake Pink Velvet Cheesecake Bites
Elevate your dessert experience by pairing these delightful bites with complementary flavors and textures that will dazzle your taste buds.
-
Fresh Strawberries: The juicy sweetness of strawberries enhances the creamy filling, adding a splash of freshness.
-
Chocolate Drizzle: A rich chocolate drizzle adds indulgence, perfectly contrasting the lightness of the cheesecake bites.
-
Mini Fruit Skewers: Colorful fruit skewers provide a playful and vibrant side, adding a refreshing element to the dessert table.
-
Whipped Cream Clouds: Light dollops of whipped cream boost the creamy texture, making each bite even more luscious and inviting.
-
Sparkling Rosé: A chilled glass of sparkling rosé complements the pink hue while its effervescence cuts through the richness.
-
Lemon Zest: A sprinkle of lemon zest on top adds a zesty brightness, balancing the sweetness with a hint of tartness.
-
Cookie Crumbs: Scatter some cookie crumbs around the plate for an extra textural contrast and a playful touch.
-
Caramel Sauce: A drizzle of caramel adds a sweet, buttery richness that pairs beautifully with the pink velvet flavor.
How to Store and Freeze No-Bake Pink Velvet Cheesecake
Fridge: Keep your No-Bake Pink Velvet Cheesecake Bites in an airtight container for up to 5 days. This ensures they stay fresh and creamy, ready to delight at a moment’s notice.
Freezer: For longer storage, freeze the cheesecake bites in a single layer on a baking sheet. Once solid, transfer to a resealable container and store for up to 2 months.
Thawing: To enjoy after freezing, thaw the bites overnight in the fridge for the best texture and flavor before serving.
Reheating: These treats are best served chilled, so there’s no need to reheat. Simply enjoy them straight from the fridge!
Make Ahead Options
These No-Bake Pink Velvet Cheesecake Bites are perfect for meal prep enthusiasts! You can prepare the crust up to 24 hours in advance by mixing the graham cracker crumbs, sugar, and melted butter, then pressing it into the baking dish. For the filling, whip it up and store it separately in the fridge for up to 2 days before assembly to keep it fresh and fluffy. When you’re ready to serve, simply spread the filling over the prepared crust, chill for at least 4 hours (or overnight if you prefer), and top with whipped cream and sprinkles just before serving. This way, you’ll have a delicious dessert ready with minimal effort, saving you valuable time on busy days!
No-Bake Pink Velvet Cheesecake Bites Recipe FAQs
What type of cream cheese should I use?
Absolutely! For the best creamy texture, use full-fat cream cheese that is at room temperature. This ensures a smooth filling without lumps. I always recommend taking it out of the fridge at least 30 minutes before starting to make your cheesecake bites.
How should I store the cheesecake bites?
Very simply! Store your No-Bake Pink Velvet Cheesecake Bites in an airtight container in the refrigerator for up to 5 days. This keeps them fresh and maintains their creamy texture, ready for a delightful treat whenever you fancy!
Can I freeze the cheesecake bites?
Definitely! To freeze, slice your cheesecake bites and arrange them in a single layer on a baking sheet to freeze individually. Once solid, transfer them to a resealable container, where they’ll stay good for up to 2 months. When you’re ready to enjoy them, just thaw in the fridge overnight for the best texture.
How can I tell if my cheesecake is set properly?
I completely understand that concern! After chilling for at least 4 hours, the filling should be firm to the touch and not jiggle excessively when shaken slightly. If you’re uncertain, it’s okay to leave it in the fridge overnight for that perfect, sliceable texture!
What are some gluten-free or dairy-free substitutes I can use?
For a gluten-free version, swap out the graham cracker crumbs for gluten-free cookie crumbs or almond flour. If you need to go dairy-free, substitute heavy cream with coconut cream and use dairy-free cream cheese. These alternatives work beautifully while keeping the flavor delightful.
Are there any allergens I should be aware of?
Absolutely! Always check for individual allergies, particularly with ingredients like cream cheese and butter, which contain dairy. You can make sure everyone enjoys these cheesecake bites by customizing the recipe to be allergy-friendly with the mentioned substitutions!
No-Bake Pink Velvet Cheesecake Bites for Sweet Celebrations
Ingredients
Equipment
Method
- In a medium bowl, mix graham cracker crumbs and granulated sugar. Pour in melted unsalted butter and stir until the mixture resembles wet sand. Press into the bottom of a 9-inch square baking dish.
- In a large bowl, beat room temperature cream cheese with an electric mixer until smooth. Gradually add powdered sugar, heavy cream, and vanilla extract, mixing until light and fluffy, about 3-4 minutes. Stir in pink food coloring until desired shade is achieved.
- Spread the creamy pink cheesecake mixture evenly over the prepared crust using a spatula.
- Cover the baking dish with plastic wrap and refrigerate for at least 4 hours, or until set firm.
- Cut into bite-sized squares and top with whipped cream and sprinkles.
Leave a Reply