
As I stood in my kitchen, the savory aroma of sautéed onions began to fill the air, instantly evoking memories of cozy family nights. Today, I’m excited to share with you my recipe for One-Pot Oyakodon—a comforting Japanese chicken and egg rice bowl that beautifully captures the essence of home-cooked warmth. This dish combines tender chicken thighs and softly set eggs in a flavorful broth, making it not only a delightful choice for any night of the week but also a testament to the beauty of simple ingredients. With its quick prep time and one-pot convenience, Oyakodon is perfect for those evenings when you crave something delicious yet fuss-free. Ready to dive into this heartwarming dish? Let’s get cooking!
Why is One Pot Oyakodon a Must-Try?
Simplicity: This recipe is all about one-pot convenience, making it a breeze to whip up even on your busiest nights.
Comforting Flavors: The heavenly combination of tender chicken, silky eggs, and a savory broth will wrap you in a warm hug with every bite.
Time-Saving: Ready in under 30 minutes, it’s the ideal solution for those who want to enjoy homemade goodness without the lengthy prep.
Gluten-Free Option: By using tamari and gluten-free certified mirin, this dish is accessible for everyone, so no one misses out on the joy of Oyakodon.
For similar comforting meals, don’t miss my recipes for Veggie Pot Pie or Beef Pot Pie. They’re sure to satisfy your cravings!
One Pot Oyakodon Ingredients
For the Chicken
• Boneless, Skinless Chicken Thighs – Provides tenderness and rich flavor; chicken breast can be used but may result in a drier texture.
For the Broth
• Dashi or Low-Sodium Chicken Stock – The base for the sauce, providing umami; substitute with homemade stock if desired.
• Soy Sauce – Adds savory depth; use tamari for a gluten-free version.
• Mirin – Adds sweetness typical in Japanese cooking; ensure gluten-free certified mirin is used for accessibility.
• Sake – Enhances flavor richness; no direct substitution suggested.
• Sugar – Balances flavors in the sauce; no specific replacement noted.
For the Rice & Eggs
• Japanese Short-Grain Rice – Essential for authentic texture; avoid using day-old rice and opt for freshly cooked instead.
• Large Eggs – Creates a custard-like texture crucial for the dish; ensure they are lightly beaten for best results.
For Garnish
• Yellow Onion – Adds sweetness and depth to the dish; no substitution necessary.
• Spring Onions – Adds color and a mild onion flavor; this is an optional addition.
Whether you’re trying your hand at making this delightful One Pot Oyakodon for the first time or honing your skills, each ingredient plays a vital role in crafting this heartwarming dish!
Step‑by‑Step Instructions for One Pot Oyakodon
Step 1: Sauté the Onions
Begin by heating a medium-sized pot over medium heat. Add a drizzle of oil, then toss in the sliced yellow onions. Sauté them for about 3–4 minutes until they turn translucent and fragrant, stirring occasionally to avoid browning. The softened onions will form a sweet base for your One Pot Oyakodon.
Step 2: Brown the Chicken
Next, add the boneless, skinless chicken thighs to the pot, arranging them in a single layer. Sauté for approximately 5-7 minutes until the chicken is nicely browned on all sides. Keep stirring gently to ensure even cooking and that the onion doesn’t burn. The chicken should be golden, indicating it’s ready for the next step.
Step 3: Make the Savory Broth
Pour in the dashi or low-sodium chicken stock, followed by the soy sauce, mirin, sake, and sugar. Stir to combine all the flavors and bring the mixture to a simmer. Allow it to cook for 5 minutes, reducing the heat slightly if necessary. The broth should become aromatic and slightly thickened, coating the chicken beautifully.
Step 4: Add the Eggs
Carefully pour the lightly beaten eggs over the top of the chicken and broth mixture. Immediately cover the pot with a lid and reduce the heat to low. Allow it to cook for about 3-4 minutes until the eggs are softly set and have a silky texture. Avoid lifting the lid too often to maintain the heat.
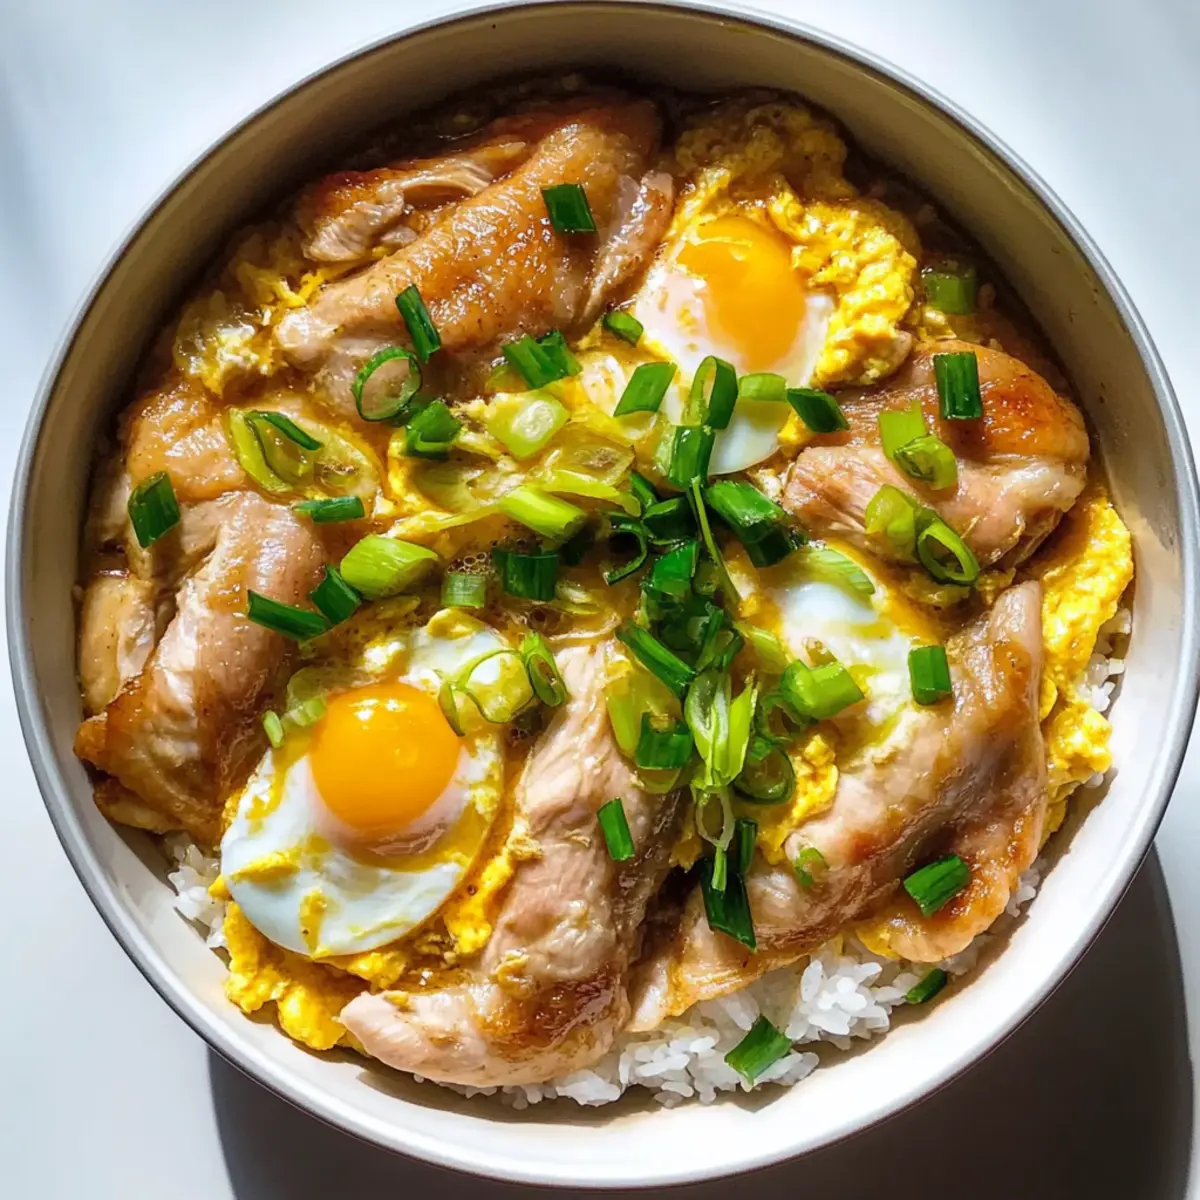
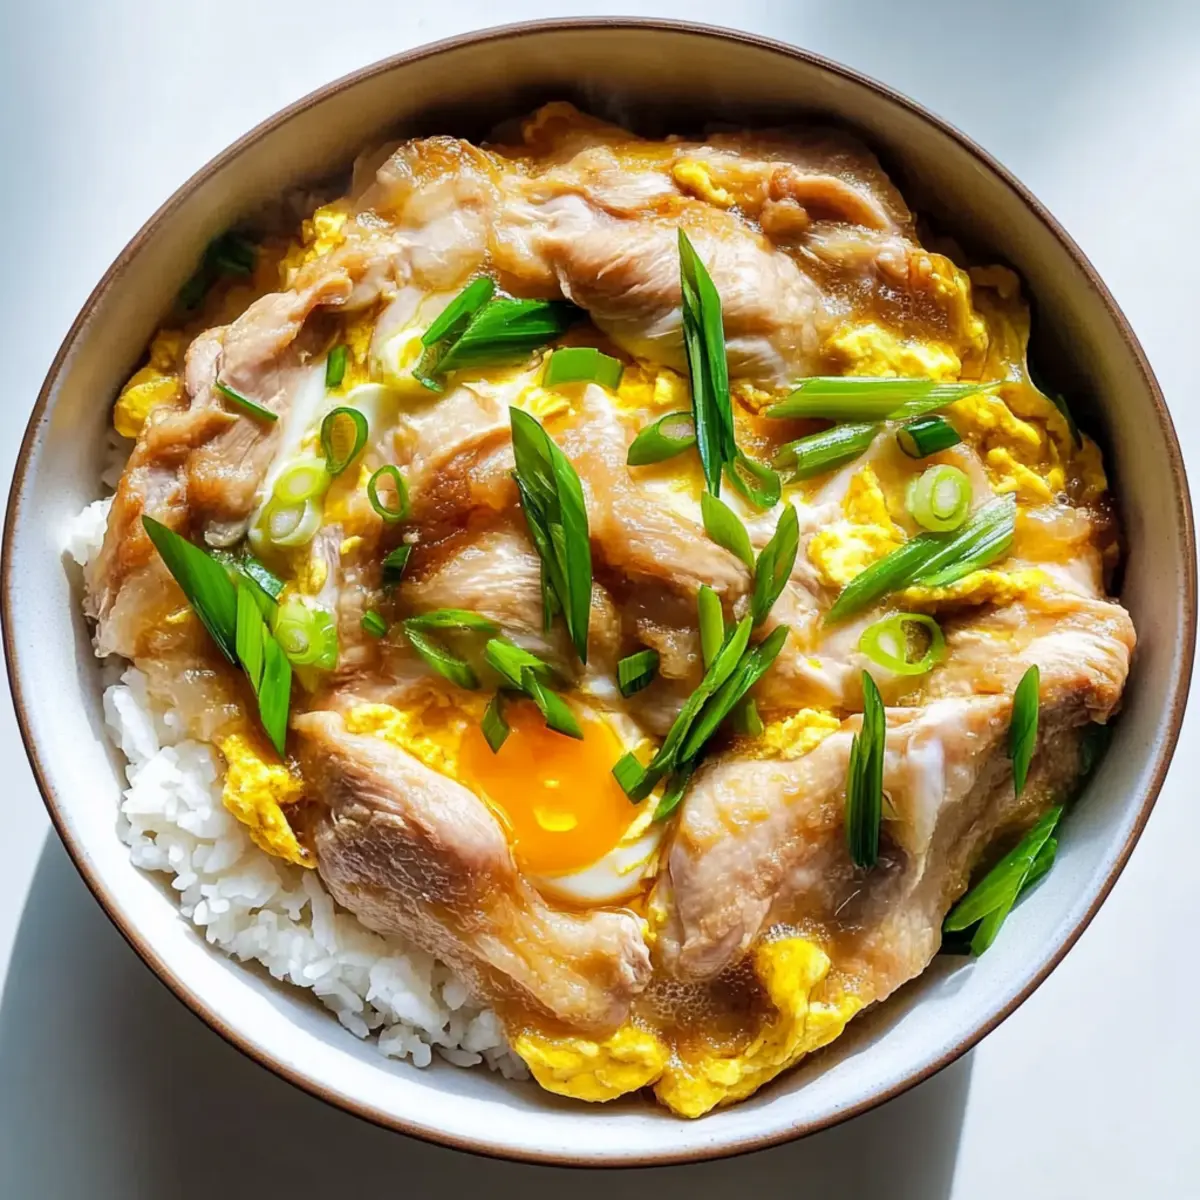
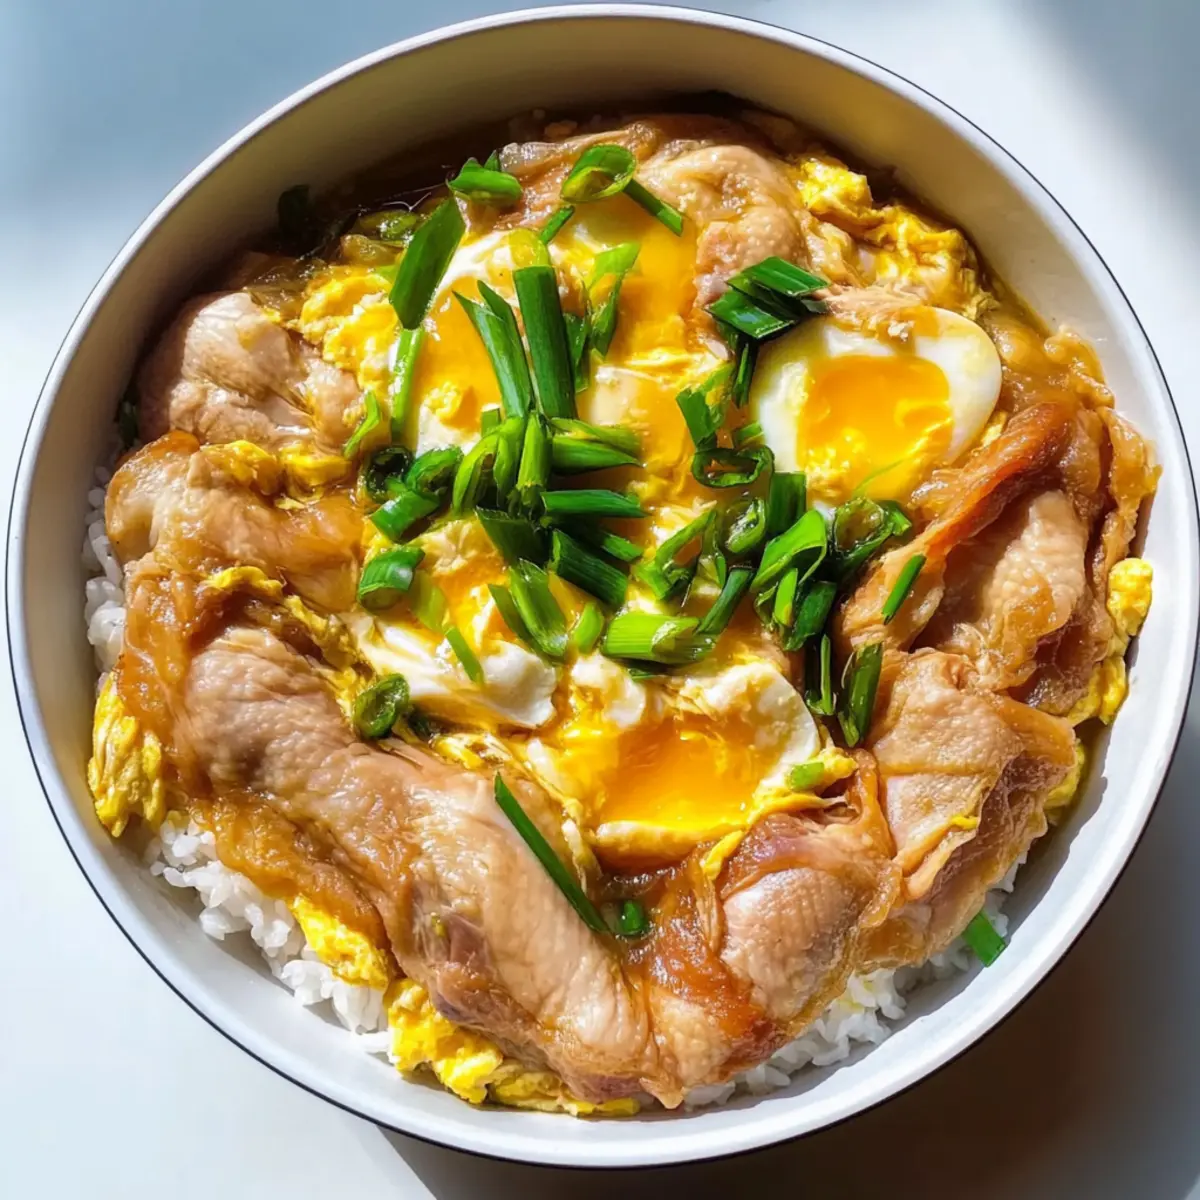
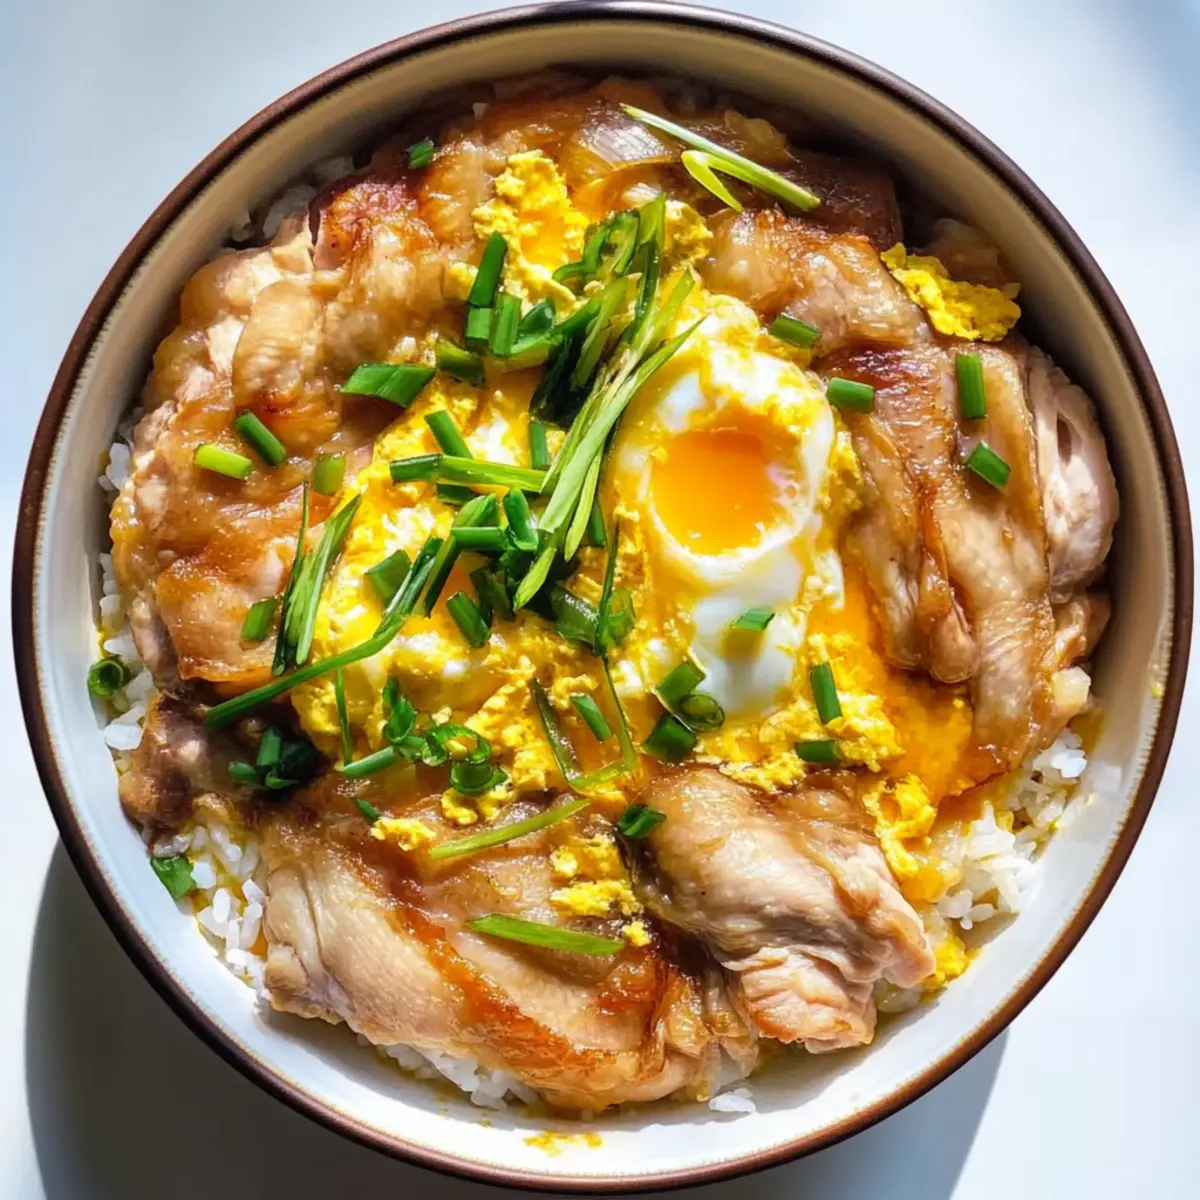
Step 5: Serve and Garnish
Once the eggs are cooked to your liking, remove the pot from the heat. Fluff the freshly cooked Japanese short-grain rice in individual bowls and ladle generous portions of the One Pot Oyakodon over the top. Finish with a sprinkle of sliced spring onions for a touch of color and freshness before serving, and enjoy your cozy meal!
Make Ahead Options
One Pot Oyakodon is a fantastic choice for meal prep, allowing you to enjoy a homemade meal without the last-minute rush. To prep ahead, you can make the savory broth (step 3) up to 3 days in advance; simply refrigerate it in an airtight container. Additionally, chop the onions and store them separately for quick assembly. When you’re ready to enjoy this comforting dish, reheat the broth in a pot, add the chicken, and follow steps 2 and 4 to finish cooking with the lightly beaten eggs. Keeping the broth and chicken separate until cooking preserves the quality and freshness, ensuring your Oyakodon is just as delicious as freshly made!
One Pot Oyakodon: Delightful Variations Await
Feel free to tailor this One Pot Oyakodon to your taste buds and dietary needs with these exciting variations!
-
Vegetarian: Substitute chicken with tofu for a satisfying plant-based option. This change won’t compromise the dish’s essence and creates a lovely texture.
-
Mushroom Medley: Add sliced shiitake mushrooms to enhance the umami flavor profile. They’ll introduce a delightful earthiness that pairs beautifully with the chicken.
-
Seasonal Veggies: Toss in seasonal veggies like bok choy or snap peas for a colorful twist. This not only boosts nutrition but also adds a refreshing crunch to each bite.
-
Heat It Up: For spice lovers, incorporate a pinch of red pepper flakes or sliced chili peppers while simmering the broth. This will elevate the dish with a subtle kick that warms you up.
-
Broth Swap: Want to experiment? Try using homemade stock instead of dashi for a personalized flavor. It allows you to control the saltiness and enriches the dish with your unique touch.
-
Quinoa Twist: Opt for quinoa instead of rice for a protein-packed variation. This nutty grain will offer a deliciously different texture, perfect for those looking for gluten-free options.
-
Sweet Glaze: Drizzle a touch of honey or maple syrup over the finished dish for a hint of sweetness that beautifully balances the savory notes.
For even more comforting recipes, check out my Veggie Pot Pie or Beef Pot Pie—they’ll surely make your next meal embrace all the warmth of home!
Expert Tips for One Pot Oyakodon
-
Prep Before Cooking: Have all your ingredients prepped and ready before you start cooking. This ensures a smooth process and prevents any ingredient from overcooking while you gather others.
-
Perfect Rice: Use freshly cooked Japanese short-grain rice for the best texture. Day-old rice can lead to a mushy dish, so don’t skip this step for your Oyakodon.
-
Egg Timing: Add the eggs after simmering the broth, and cover immediately. Avoid lifting the lid too often to maintain steam, resulting in perfectly soft and silky eggs.
-
Flavor Boost: For a richer taste, consider adding sliced shiitake mushrooms or a pinch of red pepper flakes while cooking the chicken to elevate your One Pot Oyakodon.
-
Garnishing Tips: Don’t skip the spring onions! They add freshness and a vibrant pop of color that makes the dish visually appealing and enhances its flavor.
-
Avoid Over-Reducing: Be cautious not to reduce the broth too much. It should remain flavorful and slightly thickened without turning too syrupy, keeping your One Pot Oyakodon moist and delicious.
How to Store and Freeze One Pot Oyakodon
Fridge: Store any leftover One Pot Oyakodon in an airtight container in the refrigerator for up to 3 days. Reheat gently on the stovetop or in the microwave until warmed through.
Freezer: For longer storage, freeze individual portions in airtight containers or freezer bags for up to 2 months. Thaw in the fridge overnight and reheat on the stove for best texture.
Reheating: When reheating, add a splash of water or broth to prevent the rice from becoming too dry. Heat slowly over low heat, stirring occasionally to ensure even warming.
Tips: If you’re batch cooking this delicious dish, consider preparing just the broth ahead of time and refrigerating it. Add the chicken and eggs when ready to enjoy, to maintain the freshest taste and texture.
What to Serve with One Pot Oyakodon?
Nothing completes a cozy Japanese meal better than delightful pairings that enhance your Oyakodon experience.
-
Miso Soup: A warm and savory broth with tofu and seaweed, it perfectly complements the rich flavors of Oyakodon, adding comfort to your meal.
-
Japanese Pickles (Tsukemono): These refreshing, tangy bites offer a crunchy contrast that balances the softness of the rice bowl, making every bite exciting.
-
Side Salad: A crisp cucumber and daikon salad drizzled with sesame dressing brings freshness and a satisfying crunch, brightening up your Oyakodon.
-
Edamame: Tender, lightly salted edamame pods are a simple snack that pairs beautifully, providing a protein boost and a light touch alongside the hearty dish.
-
Steamed Vegetables: A medley of seasonal veggies like bok choy and carrots, lightly steamed, adds color and nutrition while keeping the meal healthful and vibrant.
-
Green Tea: A soothing cup of freshly brewed green tea enhances flavor and aids digestion, making it a lovely accompaniment to your comforting rice bowl.
Combining these delicious sides boosts texture and flavors, creating a fulfilling and memorable family meal.
One Pot Oyakodon Recipe FAQs
What type of chicken should I use for One Pot Oyakodon?
Absolutely! Boneless, skinless chicken thighs are recommended for their tenderness and rich flavor. If you prefer, you can use chicken breast, but be aware that it may result in a drier texture due to the lower fat content.
How should I store leftover One Pot Oyakodon?
Store any leftover Oyakodon in an airtight container in the refrigerator for up to 3 days. Just reheat it gently on the stovetop or in the microwave until warmed through, ensuring you add a splash of water or broth to keep the rice from drying out.
Can I freeze One Pot Oyakodon?
Very! For longer storage, freeze individual portions in airtight containers or freezer bags for up to 2 months. To thaw, place the container in the fridge overnight. When ready to eat, reheat on the stove over low heat, stirring occasionally and adding a bit of water if needed to maintain moisture.
What should I do if my eggs overcook in One Pot Oyakodon?
Don’t worry; it happens to the best of us! If you find your eggs have overcooked and are too firm, simply reduce the cooking time next time. Cook the eggs on low heat while covered for about 3-4 minutes or until they are just softly set. You want them to have that silky custard-like texture, so keep an eye on them!
Is One Pot Oyakodon safe for people with gluten allergies?
Yes, indeed! For a gluten-free option, use tamari instead of soy sauce and ensure you have gluten-free certified mirin and sake. It’s a comforting and delicious dish that everyone can enjoy, regardless of dietary needs.
What if I want to add more vegetables to my One Pot Oyakodon?
The more, the merrier! To incorporate more vegetables, consider adding sliced shiitake mushrooms or seasonal veggies such as peas or bok choy. Just sauté them along with the onions or add them into the broth, allowing them to cook until tender, enhancing both flavor and nutrition in your dish.
One Pot Oyakodon: Cozy Chicken and Egg Rice Bowl Delight
Ingredients
Equipment
Method
- Begin by heating a medium-sized pot over medium heat. Add a drizzle of oil, then toss in the sliced yellow onions. Sauté them for about 3–4 minutes until they turn translucent and fragrant.
- Next, add the boneless, skinless chicken thighs to the pot, arranging them in a single layer. Sauté for approximately 5-7 minutes until the chicken is nicely browned on all sides.
- Pour in the dashi or low-sodium chicken stock, followed by the soy sauce, mirin, sake, and sugar. Stir to combine and bring to a simmer. Allow to cook for 5 minutes.
- Carefully pour the lightly beaten eggs over the top of the chicken and broth mixture. Immediately cover the pot and reduce heat to low. Cook for about 3-4 minutes until eggs are softly set.
- Once the eggs are cooked to your liking, remove from heat. Fluff the rice in individual bowls and ladle portions of Oyakodon over the top. Finish with spring onions and enjoy!
Leave a Reply