
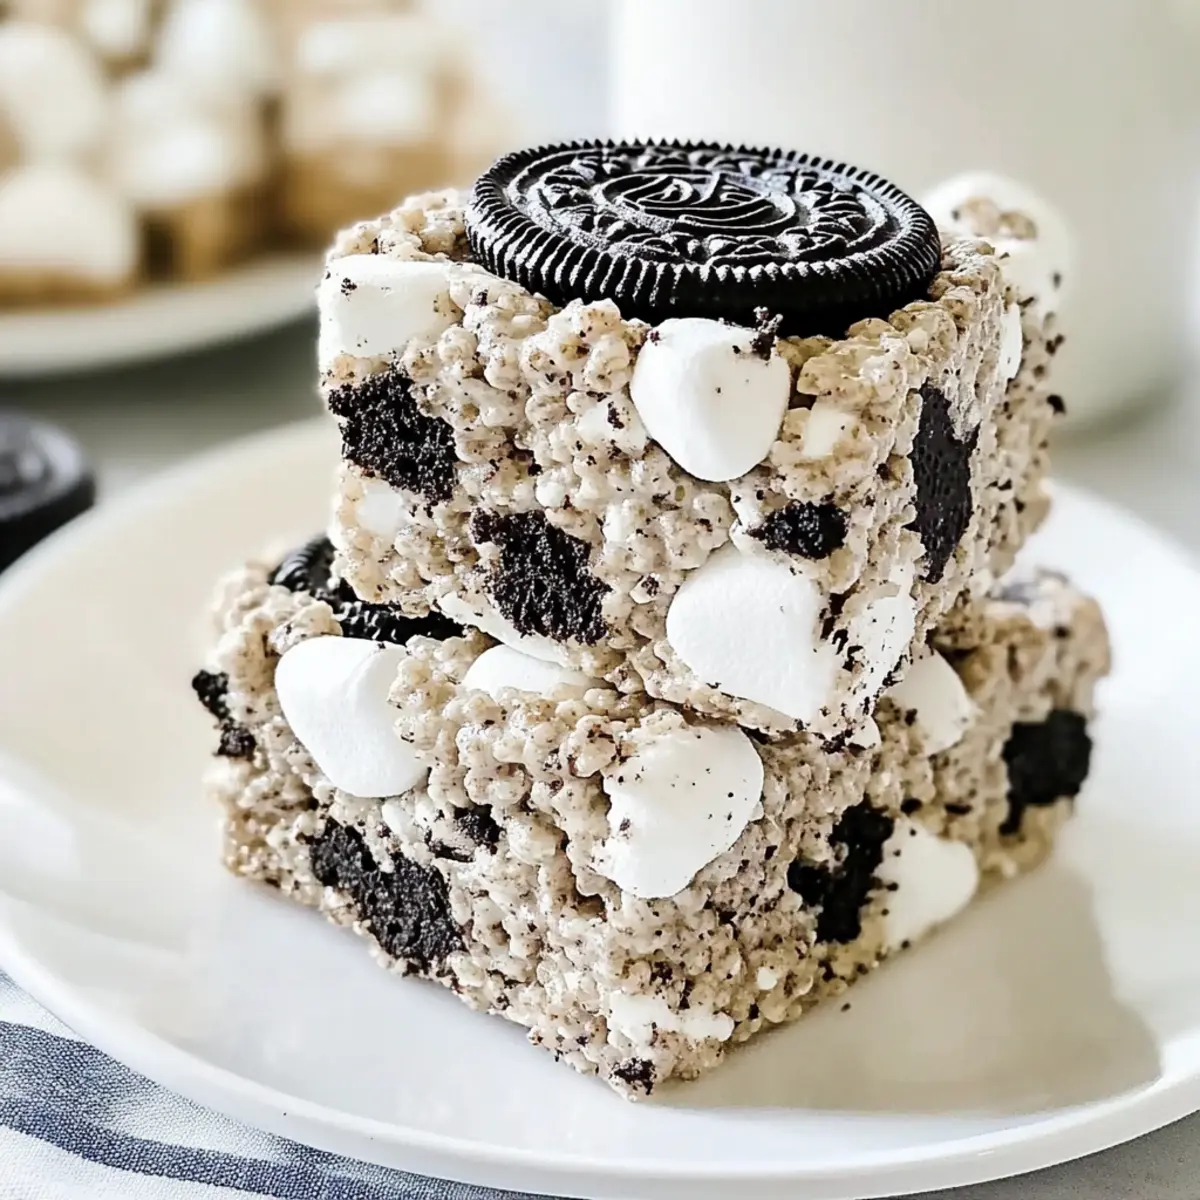
Craving something sweet but don’t want to spend hours in the kitchen? Meet my No-Bake Oreo Krispies—a delightful dessert that’s quick to whip up and even easier to devour! In just 10 minutes, you can create a chewy, crunchy treat combining beloved Oreos and gooey marshmallows, making them an instant favorite for both kids and adults. These Oreo Krispies not only satisfy your sweet tooth but also make for a fun, customizable treat perfect for gatherings or cozy nights in. Whether you’re hosting a party or simply looking for a comforting snack, you can dress them up with toppings or keep them classic and simple. What flavor combinations will you dream up?
Why Are Oreo Krispies a Must-Try?
Quick and Easy: No baking means you can make these treats in just 10 minutes! Perfect for a last-minute dessert or after-school snack.
Kid-Friendly Fun: Kids will love joining in on the mixing and shaping, making it a great family activity.
Customizable Goodness: Whether you want to sprinkle in some nuts, drizzle chocolate, or add fruity twists, the options are endless!
Crowd-Pleasing Flavor: With that classic cookies and cream taste, these Oreo Krispies are bound to be the highlight of any gathering.
Gluten-Free Options: Easily adapt this recipe to suit gluten-free diets by choosing the right sandwich cookies and cereals.
Elevate your dessert game with these delightful treats, and check out our tips on storage and make-ahead options to keep them fresh and ready for whenever that sweet craving strikes!
Oreo Krispies Ingredients
For the Base
- Butter – Provides richness and helps bind the ingredients; use salted butter for a perfect balance of flavors.
- Mini Marshmallows – Creates the gooey texture that binds the treats; avoid cutting them down for best results.
- Krispie Cereal – Provides the classic crispy base; other puffed cereals can work as substitutes if needed.
- Oreo Cookies – Add that iconic cookies and cream flavor; using whole Oreos maximizes flavor, but feel free to swap with other chocolate sandwich cookies if desired.
- Salt – Enhances overall flavor; skip if using salted butter.
Feel free to let your creativity shine in the kitchen as you prepare these delicious Oreo Krispies!
Step‑by‑Step Instructions for Oreo Krispies
Step 1: Gather Ingredients
Start by gathering all your ingredients for the Oreo Krispies in a large mixing bowl. You’ll need 6 cups of Rice Krispies cereal, 1 cup of crushed Oreo cookies, and 1 cup of mini marshmallows. Having everything ready will streamline the process and make mixing easier.
Step 2: Melt Butter and Marshmallows
In a medium saucepan, melt 4 tablespoons of butter over medium heat until it bubbles but doesn’t turn brown. Add in 8 cups of mini marshmallows and a pinch of salt, stirring constantly for about 3-4 minutes until the mixture is smooth and glossy. This step is key for achieving that perfect gooey texture.
Step 3: Combine Ingredients
Once your marshmallow mixture is ready, pour it over the Rice Krispies and crushed Oreos in the large mixing bowl. Gently fold everything together using a spatula, ensuring the cereal and cookies are evenly coated without crushing them. The mixture should start to clump together, forming that delightful treat.
Step 4: Transfer and Shape
Carefully transfer the mixture into a greased 9-inch square pan. Use your hands or a spatula to press it down evenly, ensuring a smooth top. This step is important to create the perfect texture for your Oreo Krispies, so the mixture packs together nicely.
Step 5: Cool and Cut
Allow the pan to sit at room temperature for about 30 minutes to let the Oreo Krispies set properly. Once they’re firm, use a sharp knife to cut them into squares. Enjoy these irresistible treats right away, or store them for later indulgence!
What to Serve with Oreo Krispies?
Indulging in these sweet, chewy delights opens the door to a world of delicious pairings that can elevate your treat experience.
- Cold Milk: A classic combo that enhances the sweetness, making each bite even more satisfying.
- Vanilla Ice Cream: The creamy richness of ice cream complements the crunchy texture perfectly, creating a delightful dessert duo.
- Chocolate Sauce: Drizzle some over for an extra indulgent touch; this adds both visual appeal and rich flavor.
- Fresh Berries: Their natural tartness brings a fresh contrast to the sweet and gooey Oreo Krispies, adding a burst of flavor.
- Whipped Coconut Cream: Light and airy, this is a lovely dairy-free option that enhances the treats’ cookies and cream taste.
- Coffee: A warm cup balances the sweetness of the Oreo Krispies, making it a great pairing, especially for adult gatherings.
- Nutty Trail Mix: Provides a crunchy texture and saltiness that contrasts beautifully with the sweet, chewy treats; it’s a fun addition to any snack spread.
- Fruit Kabobs: Colorful and fun, serving fruit on skewers creates a playful contrast while maintaining a healthy balance to the dessert.
Oreo Krispies Variations & Substitutions
Get ready to make these Oreo Krispies your own with delightful twists and swaps that will elevate your treat game!
-
Gluten-Free: Use gluten-free Oreos and Rice Krispies to satisfy everyone’s cravings without sacrificing flavor.
-
Nutty: Fold in ½ cup of chopped nuts, like almonds or pecans, for an extra crunch and some healthy fats. The contrast in textures adds a wonderful surprise with every bite.
-
Peanut Butter Blast: Stir in ½ cup of creamy peanut butter into the melted marshmallow mixture for a deliciously nutty flavor that pairs beautifully with chocolate.
-
Chocolate Drizzle: Top your treats with a drizzle of melted chocolate for an elegant touch that enhances both flavor and visual appeal.
-
Fruit Fusion: Mix in freeze-dried strawberries or raspberries for a burst of fruity flavor and a pop of color. These little gems add a vibrant twist that’s sure to impress.
-
S’mores Style: Replace a portion of the Rice Krispies with graham cracker crumbs, and combine mini marshmallows with chocolate chips for a fun s’mores version that will transport you to campfire nights.
-
Candy Crush: Sprinkle bite-sized candy pieces, like M&M’s or crushed Butterfingers, into the mixture for an extra sweetness and a colorful surprise.
-
Spicy Kick: For a daring twist, add a pinch of cayenne pepper to the melted marshmallow mixture. This unexpected heat turns your Oreo Krispies into an adventurous treat!
No matter which variation you choose, these ideas will add unique flavors and create a delightful experience for your taste buds. So roll up your sleeves, and let your creativity shine in the kitchen! Would you like to explore additional storage tips and serving suggestions? Check out our ideas on what to serve with these treats for a truly memorable dessert experience!
Storage Tips for Oreo Krispies
- Room Temperature: Store your Oreo Krispies in an airtight container at room temperature for up to 1 week to maintain their delicious chewiness and crunch.
- Fridge: If you prefer a softer texture, refrigerate the treats in an airtight container for up to 2 weeks, but note they may lose some crispness.
- Freezer: For longer storage, freeze your Oreo Krispies in a freezer-safe container for up to 3 months. Just layer them with parchment paper to prevent sticking.
- Reheating: When ready to enjoy, let the frozen treats thaw at room temperature for about 15-20 minutes. This brings back their delightful texture.
Expert Tips for Oreo Krispies
-
Smooth Marshmallows: Ensure your marshmallow mixture is completely smooth to avoid lumps and achieve that glossy finish, which is vital for perfect Oreo Krispies.
-
Gentle Folding: Use a gentle folding technique when mixing in the cereal and Oreos. This prevents crushing the Rice Krispies, maintaining their delightful crunch.
-
Grease Everything: Don’t forget to grease your pan and utensils! This simple step makes it much easier to remove the treats without them sticking.
-
Cooling Time Matters: Allow the mixture to cool completely for at least 30 minutes. This is crucial for the treats to set properly and enhance their chewyness.
-
Keep It Customizable: Feel free to experiment with different mix-ins and toppings. Just remember to balance flavors to complement the classic Oreo Krispies without overpowering them.
Make Ahead Options
These Oreo Krispies are a fantastic make-ahead treat that saves you valuable time! You can prepare the dry ingredients—6 cups of Rice Krispies cereal and 1 cup of crushed Oreos—up to 24 hours in advance. Simply store them in an airtight container to keep them fresh. Additionally, the melted marshmallow mixture can be made ahead and refrigerated for up to 3 days; just reheat gently before combining with the dry ingredients. This ensures the mixture retains its gooey texture without losing quality. When you’re ready to serve, combine the prepped components, press them into the pan, and let them cool for about 30 minutes for that perfect chewy, crunchy treat that everyone will love!
Oreo Krispies Recipe FAQs
How do I select the best Oreos for my Oreo Krispies?
Absolutely! Use fresh, whole Oreos for maximum flavor. Look for packages without dark spots or cracks, as these can affect taste. If you’re feeling adventurous, you can swap regular Oreos for flavored ones like peanut butter or mint for a unique twist!
What is the best way to store Oreo Krispies?
For sure! Store your Oreo Krispies in an airtight container at room temperature for up to 1 week to keep them chewy and fresh. If you prefer a softer treat, you can refrigerate them for up to 2 weeks in an airtight container, though this may soften the crispy texture.
Can I freeze Oreo Krispies, and how do I do it?
Very much so! To freeze your Oreo Krispies, cut them into squares and layer them in a freezer-safe container, placing parchment paper between layers to avoid sticking. They can stay good for up to 3 months. When you’re ready to enjoy, simply let them thaw at room temperature for about 15-20 minutes before digging in.
What if my marshmallow mixture is lumpy when making Oreo Krispies?
No worries—this can happen sometimes! If your marshmallow mixture turns out lumpy, keep stirring it over low heat until all the lumps melt away and it becomes smooth. If you see it starting to brown, remove it from the heat immediately to avoid a scorched taste. Remember, patience is key!
Are there any dietary considerations for making Oreo Krispies?
Absolutely! If you’re making these treats for someone with gluten sensitivities, ensure you use gluten-free Rice Krispies and an appropriate brand of sandwich cookies. Always check labels for any allergens, and feel free to adjust mix-ins to suit dietary preferences. Your loved ones will appreciate the thoughtful touch!
How do I customize my Oreo Krispies?
The more the merrier! You can create endless variations by adding in chopped nuts, drizzling melted chocolate on top, or even mixing in freeze-dried fruits for a fruity explosion! Just remember to balance the flavors so that the classic cookies and cream vibe shines through.
Oreo Krispies: Quick No-Bake Treats Everyone Will Love
Ingredients
Equipment
Method
- Gather all your ingredients in a large mixing bowl.
- Melt the butter in a medium saucepan over medium heat, then stir in mini marshmallows and salt until smooth.
- Pour the marshmallow mixture over the Rice Krispies and crushed Oreos, and fold gently.
- Transfer the mixture into a greased 9-inch square pan and press it down evenly.
- Let the pan sit at room temperature for 30 minutes to let the Oreo Krispies set, then cut into squares.
Leave a Reply