
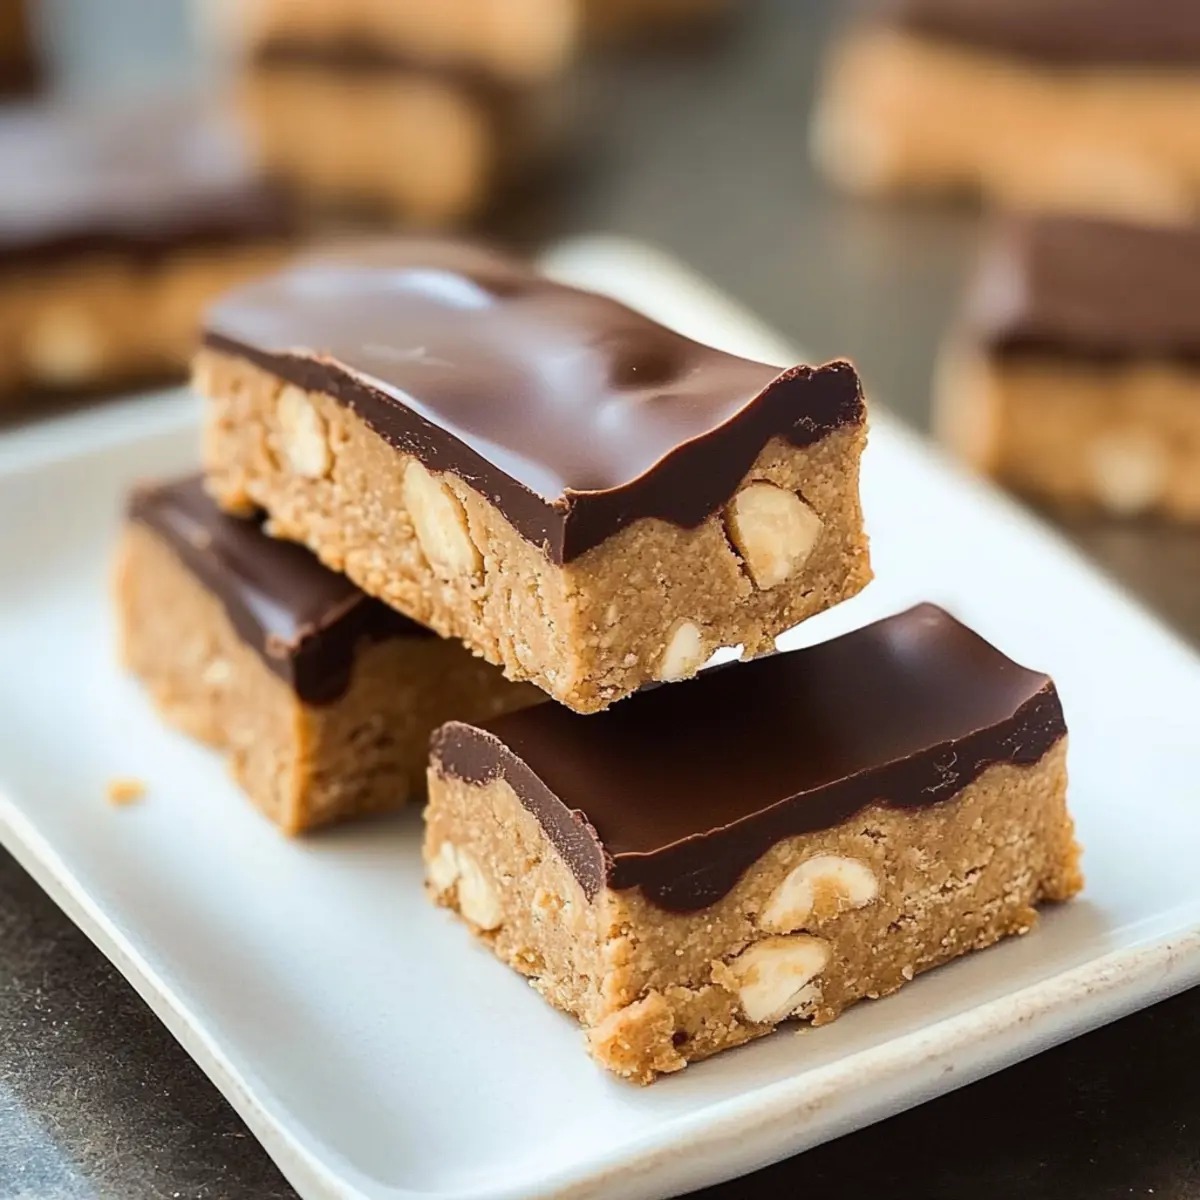
As I rummaged through my pantry, the stark contrast of colorful ingredients sparked a culinary idea: no-bake Protein Bars. With just four simple components, these bars seamlessly blend into my busy lifestyle, proving that healthy treats don’t have to skimp on flavor or require a ton of time. They’re a delightful option for anyone craving a nutritious boost without the hassle of complicated recipes. Plus, these bars cater to a variety of dietary needs—vegan, gluten-free, and customizable to suit your taste buds. The chewy texture combined with your choice of chocolate, peanut butter, or even banana makes them an inviting snack perfect for post-workout energy or a quick breakfast on-the-go. Ready to whip up a batch of these easy delights? Let’s get started!
Why are These Protein Bars a Game Changer?
Simplicity reigns supreme in this recipe, making it perfect for even novice chefs! Healthy, no-bake, and totally customizable, these protein bars fit seamlessly into any lifestyle. Crowd-pleasing goodness means they are perfect for sharing, whether it’s a family snack or post-workout treat. Rich texture meets incredible flavor with just a few ingredients—definitely more satisfying than store-bought options. Feeling adventurous? Try variations like Chocolate Nutella Bars or Banana Bread Bars!
Protein Bars Ingredients
• Let’s gather everything you need to make these delicious protein bars!
For the Base
- Peanut Butter – Provides structure and creaminess; substitute with almond butter or sunflower seed butter for allergy-friendly options.
- Protein Powder – Adds protein content and helps bind ingredients; opt for unsweetened for minimal sweetness or your favorite flavored version.
- Maple Syrup (or Honey) – Acts as a natural sweetener to enhance flavor; for a sugar-free option, consider using sugar-free maple syrup or stevia.
- Salt – Balances sweetness and enriches overall flavor.
Optional Add-Ins
- Chocolate Chips – Adds decadence and richness; use dark chocolate or dairy-free chips for a vegan-friendly treat.
- Mashed Bananas – Can replace syrup for natural sweetness and a delightful banana flavor.
- Chia Seeds – Adds texture and a nutritional boost, perfect for a healthy twist on your protein bars.
These protein bars are not just easy to make but are also versatile enough to meet your dietary preferences!
Step‑by‑Step Instructions for Protein Bars
Step 1: Combine Ingredients
In a mixing bowl, add 1 cup of peanut butter, 1 scoop of protein powder, 1/4 cup of maple syrup, and a pinch of salt. Use a spatula to stir until a thick dough forms. This should take about 2–3 minutes. The mixture will look smooth and slightly sticky, indicating it’s ready for the next step.
Step 2: Optional Chocolate Addition
If desired, melt 1/2 cup of chocolate chips in a microwave-safe bowl for 30 seconds, stirring every 10 seconds until smooth. Once melted, you can either mix it into the dough for a chocolate-infused flavor or save it as a coating. Either method adds an indulgent twist to your protein bars.
Step 3: Shape into Bars
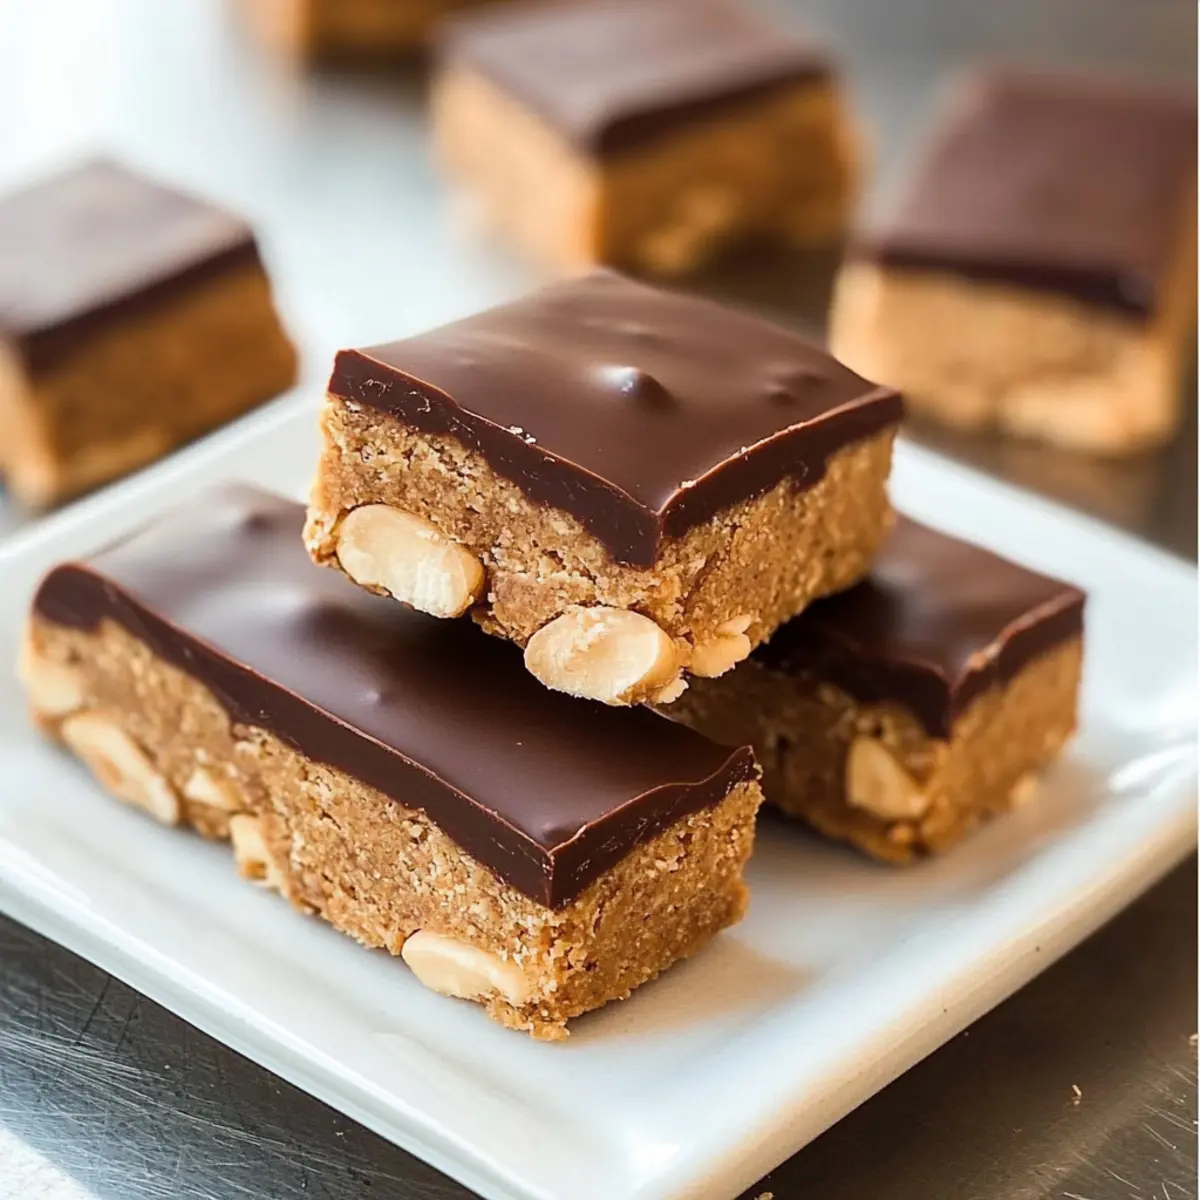
To shape your protein bars, you can either roll the dough into individual shapes by hand or press it into a lined 8×8-inch pan for uniformity. Use a spatula to flatten the surface, ensuring it’s compact and even. This step takes about 5 minutes, and the mixture should easily hold together without crumbling.
Step 4: Chill to Firm Up
Place the shaped bar mixture in the refrigerator and allow it to chill for at least 30 minutes. This will help the bars firm up, making them easier to cut. After chilling, they should be semi-firm and hold their shape when you take them out, perfect for slicing into your desired sizes.
Step 5: Optional Chocolate Coating
If you reserved some melted chocolate, spread it evenly over the top of the chilled protein bars, or dip each bar for an extra layer of richness. Place them back in the refrigerator for approximately 10 minutes so the chocolate can set. You’ll know it’s ready when the chocolate becomes firm to the touch.
Step 6: Slice and Store
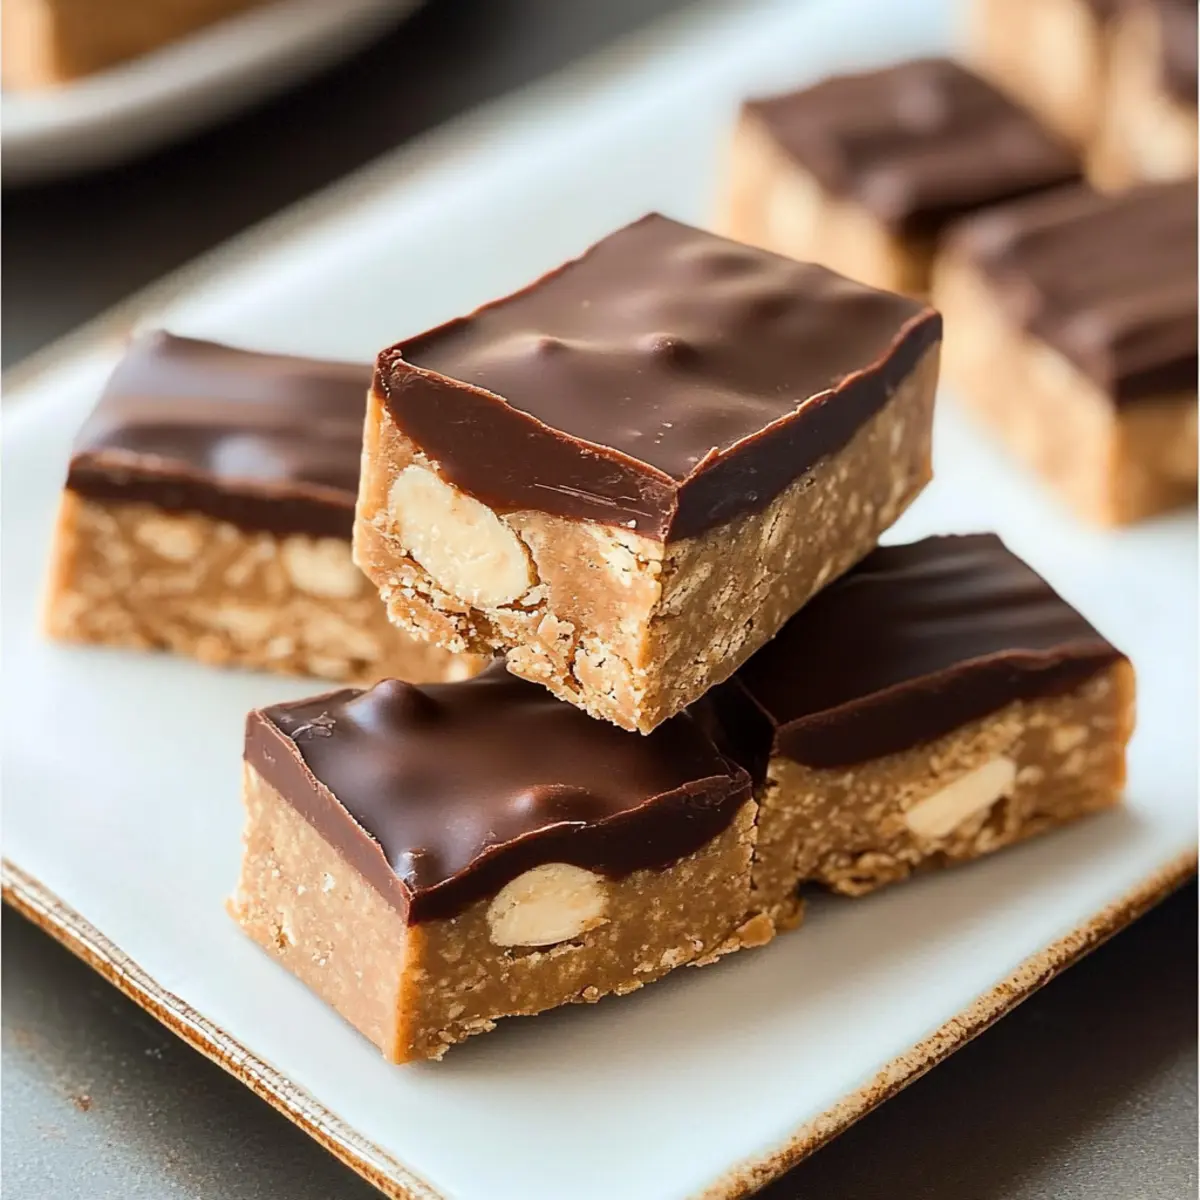
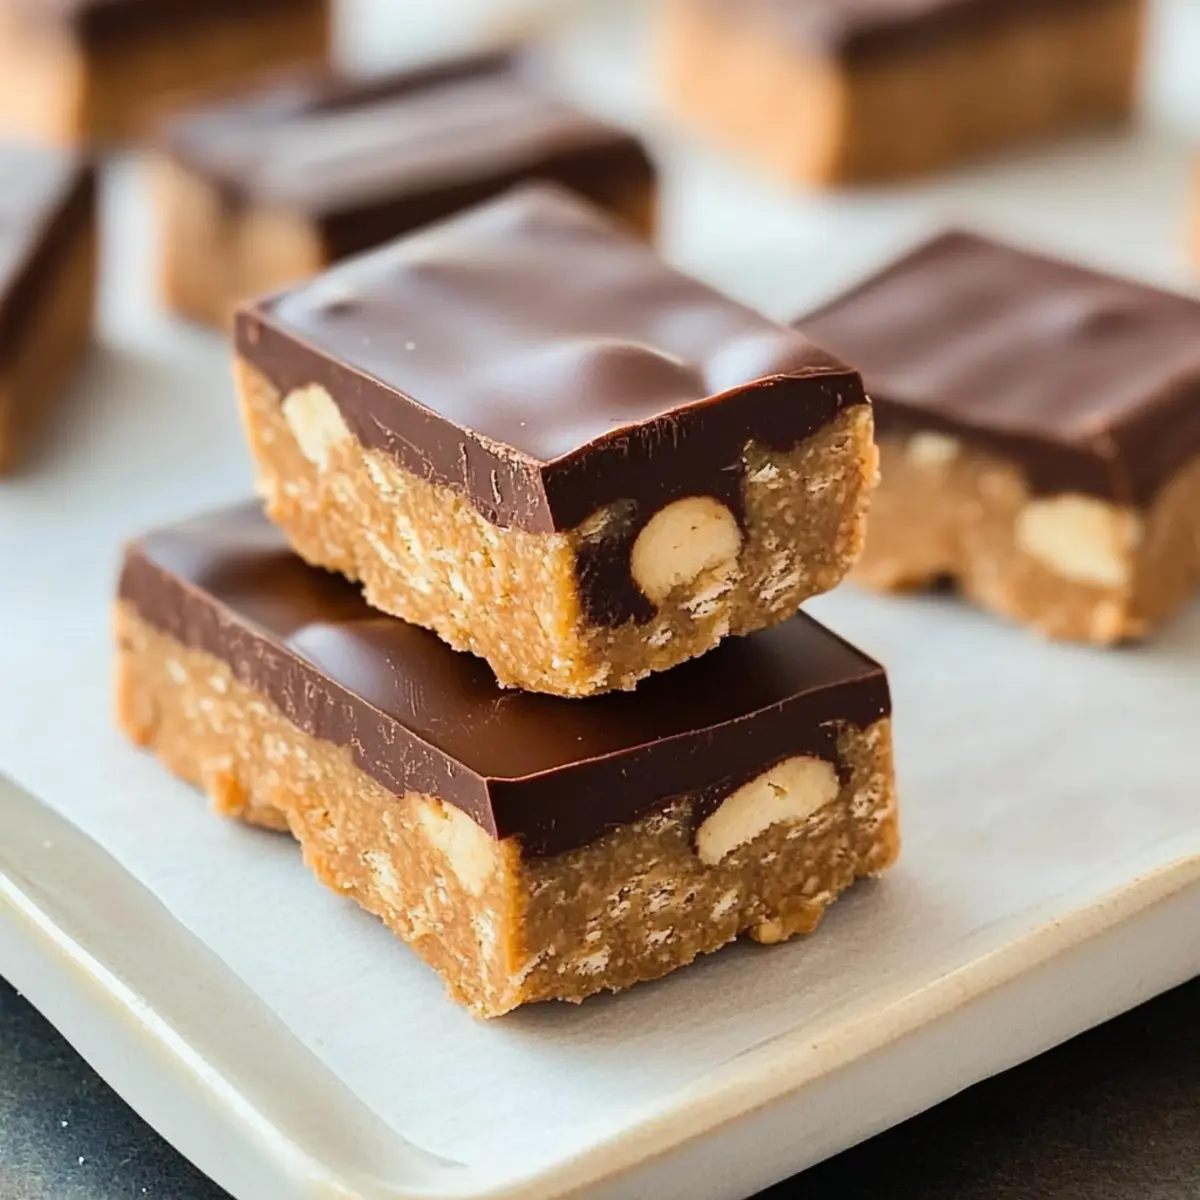
Once the chocolate is set, carefully lift the bars from the pan and slice them into your preferred size. Store the protein bars in an airtight container in the refrigerator, where they can last up to one week for fresh, delicious snacking whenever you need a boost! Enjoy these homemade protein bars as a healthy, on-the-go treat.
Make Ahead Options
These Protein Bars are perfect for meal prep enthusiasts! You can mix and shape the protein bar mixture and refrigerate it up to 24 hours before serving, ensuring you have a quick and healthy snack ready whenever needed. Simply follow the initial steps of combining the ingredients and pressing them into a lined pan, then cover and store in the fridge. If you prefer a little extra sweetness, melt the chocolate to coat the bars right before serving; this will keep their texture just as delicious. For longer storage, freeze the bars for up to 3 months, then thaw overnight in the refrigerator for a fresh, tasty treat.
Expert Tips for Protein Bars
- Choose Wisely: Ensure the protein powder has a flavor you enjoy; it greatly influences the overall taste of your protein bars.
- Texture Matters: Adjust the consistency by adding a bit more peanut butter or protein powder if the mixture feels too dry or crumbly.
- Chocolate Coating: For a smoother finish, mix a teaspoon of coconut or almond oil into your melted chocolate, ensuring it coats beautifully.
- Freshness Tips: Store protein bars in an airtight container in the fridge to maintain their chewy texture and flavor; they can last up to a week.
- Experiment Freely: Don’t hesitate to swap ingredients and explore variations; mixing in nuts, seeds, or dried fruits can lead to delightful new flavors!
Protein Bars: Flavorful Variations
Feel free to unleash your creativity and personalize these protein bars with exciting twists that awaken your taste buds!
-
Chocolate Delight: Add 1/4 cup cocoa powder to the base for a rich chocolate flavor. Double the chocolate fun by mixing in chocolate chips or topping the bars with melted chocolate.
-
Banana Boost: Mash one ripe banana and replace the maple syrup with it for a naturally sweet and fruity bar. This variation adds moisture and a delightful banana taste that you’ll crave!
-
Nut-Free Option: Swap peanut butter for sunbutter or soy nut butter to create a nut-free version. It’s equally creamy and delicious, perfect for school lunches or snacks!
-
Coconut Crunch: Stir in 1/4 cup of shredded coconut for a tropical vibe. The coconut adds both flavor and a touch of chewy texture that complements the bars beautifully.
-
Spiced Maple: Add a pinch of cinnamon or a dash of vanilla extract to elevate the flavor profile. This warm, aromatic twist adds cozy notes that turn these bars into a comforting snack.
-
Protein Blend: Experiment with different protein powders like vanilla, chocolate, or plant-based options for whatever mood strikes you. Mixing protein powders can create a taste adventure in every bite!
-
Chia Power: Incorporate 2 tablespoons of chia seeds to boost the nutritional value and add a fun crunch. These little seeds will also help bind the bars, enhancing texture.
Why not pair these bars with other protein-rich treats? You might enjoy nibbling on some Blueberry Cheesecake Protein or indulging in a bowl of Protein Pancakes. They make fantastic companions for your snacking journey!
How to Store and Freeze Protein Bars
Fridge: Store your protein bars in an airtight container for up to one week in the refrigerator. This keeps them fresh and ready for snacking whenever you need a nutritious boost.
Freezer: For longer storage, freeze the protein bars for up to three months. Wrap each bar individually in plastic wrap, then place them in a freezer-safe bag to prevent freezer burn.
Reheating: If you prefer warm bars, simply microwave them for 10-15 seconds. This enhances the flavors and gives them a gooey texture, making indulgence easier!
Cutting Tips: When slicing bars after they’ve chilled, use a sharp knife and a gentle sawing motion to prevent crumbling, ensuring your delicious protein bars remain intact.
What to Serve with 4-Ingredient Healthy No-Bake Protein Bars
Elevate your homemade protein bars into a delightful meal by pairing them with complimentary sides and drinks that enhance their wholesome goodness.
-
Fresh Fruit Salad: Bright, juicy fruits add a refreshing sweetness that balances the nutty richness of the protein bars. A mix of berries, melons, and citrus creates a vibrant, colorful dish.
-
Nutty Yogurt Parfait: Creamy yogurt layered with granola and nuts offers a crunchy contrast and additional protein, creating a satisfying breakfast or snack option. The creamy texture harmonizes beautifully with the chewy bars.
-
Smoothies: Blend leafy greens, banana, and almond milk for a healthy shake that provides vitamins alongside your protein bars. It’s a delicious way to sneak in extra nutrients!
-
Homemade Granola: A crunchy granola that’s packed with nuts and seeds complements the soft texture of the bars. Enjoy it on its own, or serve as a topping.
-
Chia Seed Pudding: A velvety pudding made with almond milk and sweetened with natural syrups mirrors the chewy texture of the protein bars. Its light fluffiness is a delight in any meal!
-
Herbal Tea: A warm cup of chamomile or peppermint herbal tea can soothe and perfect your snack time, allowing flavors to shine while providing a comforting experience.
-
Dairy-Free Ice Cream: For a sweet ending, pair these protein bars with a scoop of dairy-free ice cream. The cold creaminess contrasts nicely with the bars for a satisfying treat that feels indulgent but is still wholesome.
4-Ingredient Healthy No-Bake Protein Bars Recipe FAQs
How do I choose the right protein powder?
Absolutely! When selecting a protein powder, consider your taste preferences first. Unsweetened protein powders help maintain a neutral flavor while your favorite flavored version can enhance the taste. Check for allergen information if you’re sensitive to dairy or soy—many brands offer vegan alternatives like pea or rice protein that are just as nutritious!
What is the best way to store these protein bars?
Very! Keep your protein bars in an airtight container in the refrigerator for up to one week. This will help maintain their chewy texture and freshness. If you want them to last longer, freezing is a great option—just wrap each bar in plastic wrap and store them in a freezer-safe bag for up to three months. Don’t forget to label it with the date so you know when to enjoy them!
Can I freeze the protein bars? How?
Absolutely! To freeze your protein bars, follow these steps:
- First, cut the bars into your desired sizes.
- Wrap each bar individually in plastic wrap to prevent freezer burn.
- Place the wrapped bars into a freezer-safe bag or container.
- Label with the date and freeze for up to three months!
When you’re ready to enjoy them, simply thaw them in the fridge overnight or microwave for 10-15 seconds for that fresh-out-of-the-fridge taste!
What are some common issues with making protein bars?
The more the merrier! If your mixture is too dry, adding a little more peanut butter can help achieve the right consistency. Conversely, if it’s too wet, sprinkle in some additional protein powder until you reach a dough-like texture. Aim for a smooth, slightly sticky mixture—it should easily hold together without crumbling!
Are these protein bars suitable for everyone with dietary restrictions?
Absolutely! This recipe is quite customizable. Use almond or sunflower seed butter for nut-free options, and opt for sugar-free maple syrup or stevia for sugar-free choices. Each ingredient can be swapped out based on personal preference or dietary needs, making these protein bars a delicious treat for various diets!
Delicious No-Bake Protein Bars for Your Healthy Snack Fix
Ingredients
Equipment
Method
- In a mixing bowl, add peanut butter, protein powder, maple syrup, and salt. Stir until a thick dough forms, about 2-3 minutes.
- If desired, melt chocolate chips in a microwave-safe bowl for 30 seconds, stirring every 10 seconds until smooth.
- Shape the dough into bars or press into a lined pan, flatten the surface for uniformity.
- Chill for at least 30 minutes to help bars firm up.
- If using melted chocolate, spread it over the bars or dip them, then chill for 10 minutes to set.
- Slice the bars into desired sizes and store in an airtight container.
Leave a Reply