
As I pulled apart the warm, gooey layers of a freshly baked slider, a delightful combination of sweet and savory filled the air, making my mouth water in anticipation. Today, I’m excited to share my recipe for Glazed Pepperoni Pizza Sliders—a fun twist on the classic pizza that’s not only quick to prepare but also a guaranteed crowd-pleaser. Perfect for weekend gatherings or a cozy movie night at home, these sliders feature buttery Hawaiian rolls, elegant layers of pepperoni, and a luscious glaze that ties it all together. Trust me; one bite of these treats, and you’ll find yourself savoring every last crumb. Are you ready to elevate your slider game? Let’s dive into this irresistible recipe together!
Why Are These Sliders So Irresistible?
Simplicity at its finest: These Glazed Pepperoni Pizza Sliders come together quickly, making them perfect for busy weeknights or spontaneous gatherings.
Delicious Flavor Fusion: The contrasting sweet glaze coupled with savory pepperoni results in a taste explosion that you won’t forget.
Customization Galore: Feel free to swap out ingredients—try Muffin Breakfast Pizza for a breakfast twist or mix in your favorite Pastry Breakfast Pizza toppings for variety.
Crowd-Pleasing Appeal: These sliders are always a hit at parties, ensuring you leave your guests coming back for more.
Texture Perfected: Enjoy the delightful combination of soft, buttery rolls and gooey, melty cheese that makes each bite absolutely heavenly.
Glazed Pepperoni Pizza Sliders Ingredients
For the Sliders
• Hawaiian Slider Rolls – The perfect base that’s sweet and soft; can substitute with any soft bread rolls.
• Butter (2 tablespoons, softened) – Adds richness and moisture; can replace with margarine for a lighter touch.
• Pizza Sauce (1/2 cup) – Provides that essential pizza flavor; replace with marinara or spaghetti sauce if preferred.
• Grated Parmesan Cheese (3 tablespoons) – Introduces a savory kick; Romano cheese can be used for an even sharper taste.
• Provolone Cheese (9 ounces, about 11-12 slices) – Melts beautifully, complementing the pepperoni; feel free to swap for mozzarella for a milder flavor.
• Deli Style Pepperoni (1.5 ounces, about 12 slices) – Adds a delightful protein punch; any flavored salami works as a substitution.
• Pepperoni for Pizza (3 ounces) – Layered for extra flavor; can replace with diced ham or bacon for variety.
For the Glaze
• Butter (3 tablespoons, melted) – Forms the glaze for a glossy finish; olive oil can be used for a healthier option.
• Brown Sugar (2 tablespoons) – Sweetens the glaze perfectly; alternatives like honey or maple syrup work beautifully.
• Oregano or Italian Seasoning (1 teaspoon) – Adds aromatic depth; feel free to substitute with basil or thyme for a unique twist.
• Granulated Garlic (3/4 teaspoon) – Enhances the slider’s flavor; fresh minced garlic can amplify the taste greatly.
Dive into these Glazed Pepperoni Pizza Sliders, where each bite is a celebration of sweet and savory goodness!
Step‑by‑Step Instructions for Glazed Pepperoni Pizza Sliders
Step 1: Preheat the Oven
Begin by preheating your oven to 350°F (175°C). While it heats, line a 9×13″ baking dish with foil for easy cleanup and to help the sliders cook evenly. Make sure your baking dish is ready to accommodate the delicious layers of Glazed Pepperoni Pizza Sliders you’re about to assemble.
Step 2: Prepare the Hawaiian Rolls
Slice the Hawaiian slider rolls in half horizontally, ensuring you keep the tops and bottoms intact. Spread softened butter generously on the inner sides of the rolls. Place the bottom halves in the prepared baking dish and bake for about 5 minutes, or until they are lightly browned and fragrant, creating a lovely base for your sliders.
Step 3: Add the Sauce
Once the rolls are toasted, spread a layer of pizza sauce evenly over the bottom half of the buns. Sprinkle grated Parmesan cheese generously on top of the sauce to add a tasty and savory kick. This flavor foundation enhances the overall experience of your Glazed Pepperoni Pizza Sliders, making them irresistible.
Step 4: Layer the Cheeses and Pepperoni
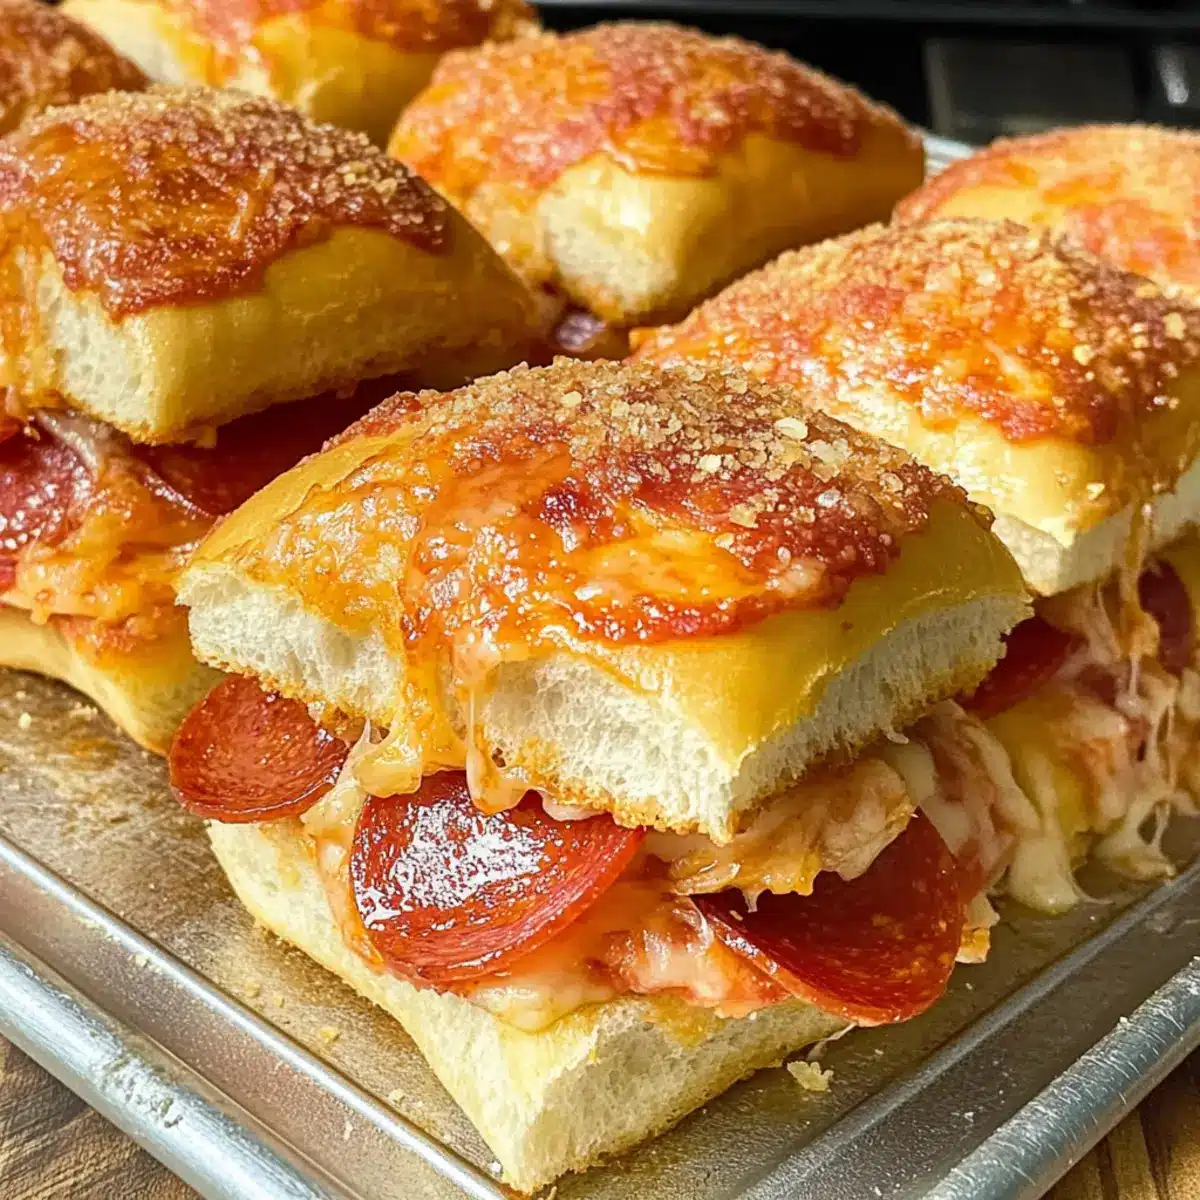
Now it’s time to build the layers: first, lay down slices of provolone cheese over the pizza sauce and Parmesan, ensuring every bite has that gooey goodness. Follow this with a layer of deli-style pepperoni slices. Enhance the flavors by adding another layer of provolone, then top with smaller pepperoni pieces for extra zest and texture.
Step 5: Cover with the Roll Tops
Carefully place the top halves of the Hawaiian slider rolls over the layered filling. Gently press down to ensure they sit snugly against the fillings. This step is essential to keep everything secure inside the Glazed Pepperoni Pizza Sliders while they bake, allowing the flavors to meld beautifully.
Step 6: Prepare the Glaze
In a small bowl, melt the remaining butter and mix in brown sugar, oregano, and granulated garlic until it’s well combined and dissolved. Brush this sweet and savory glaze generously over the tops of the slider buns. The glaze will add a delightful shine and enrich the flavors of your sliders as they bake.
Step 7: Bake the Sliders
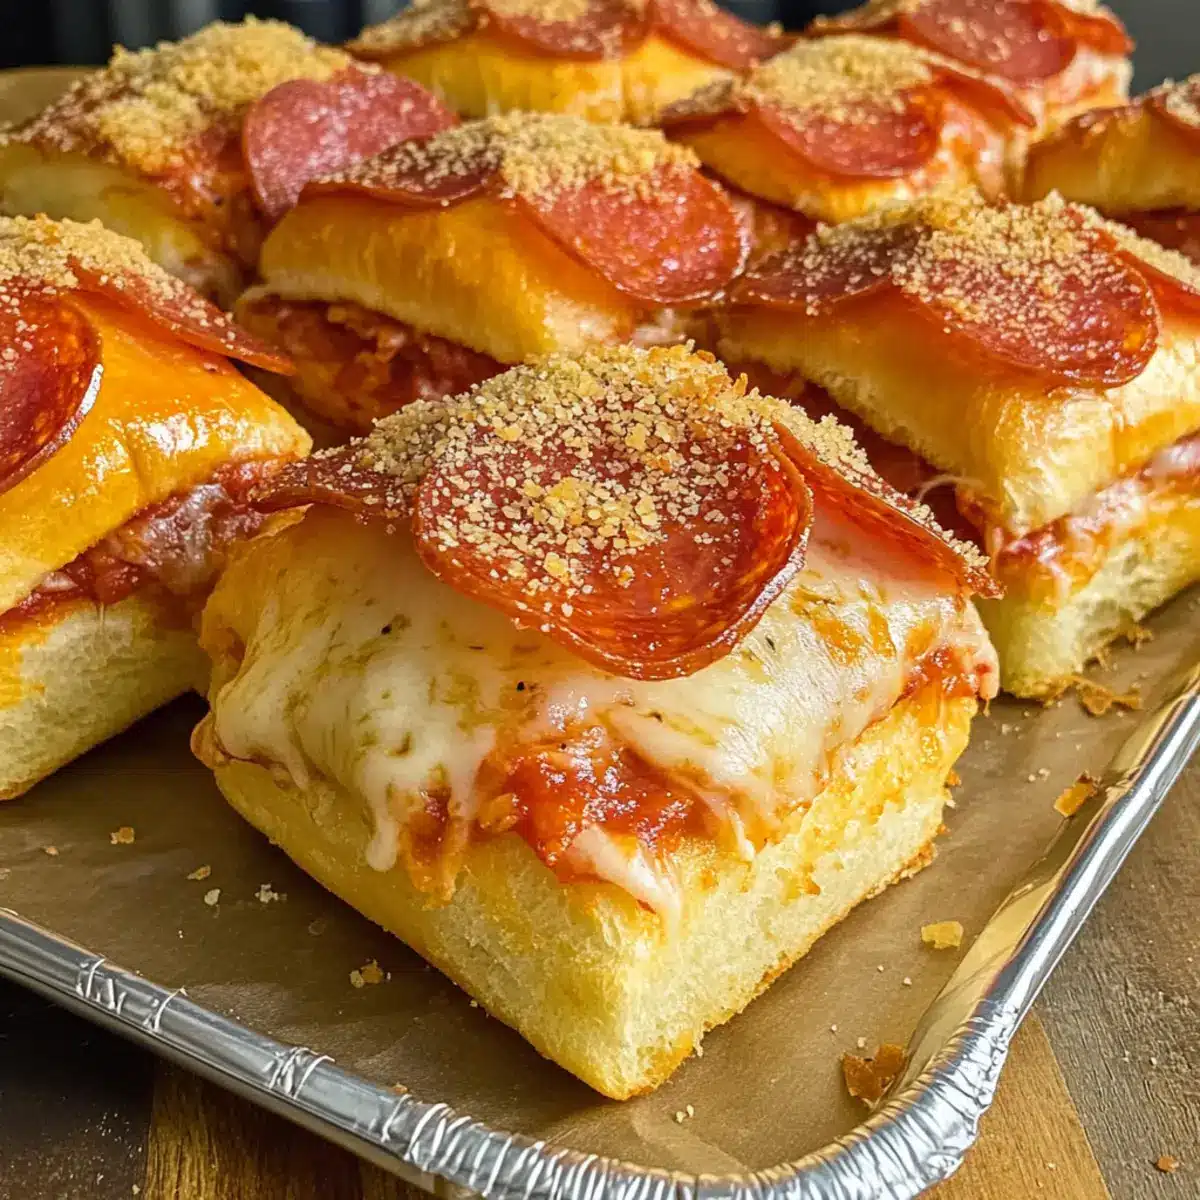
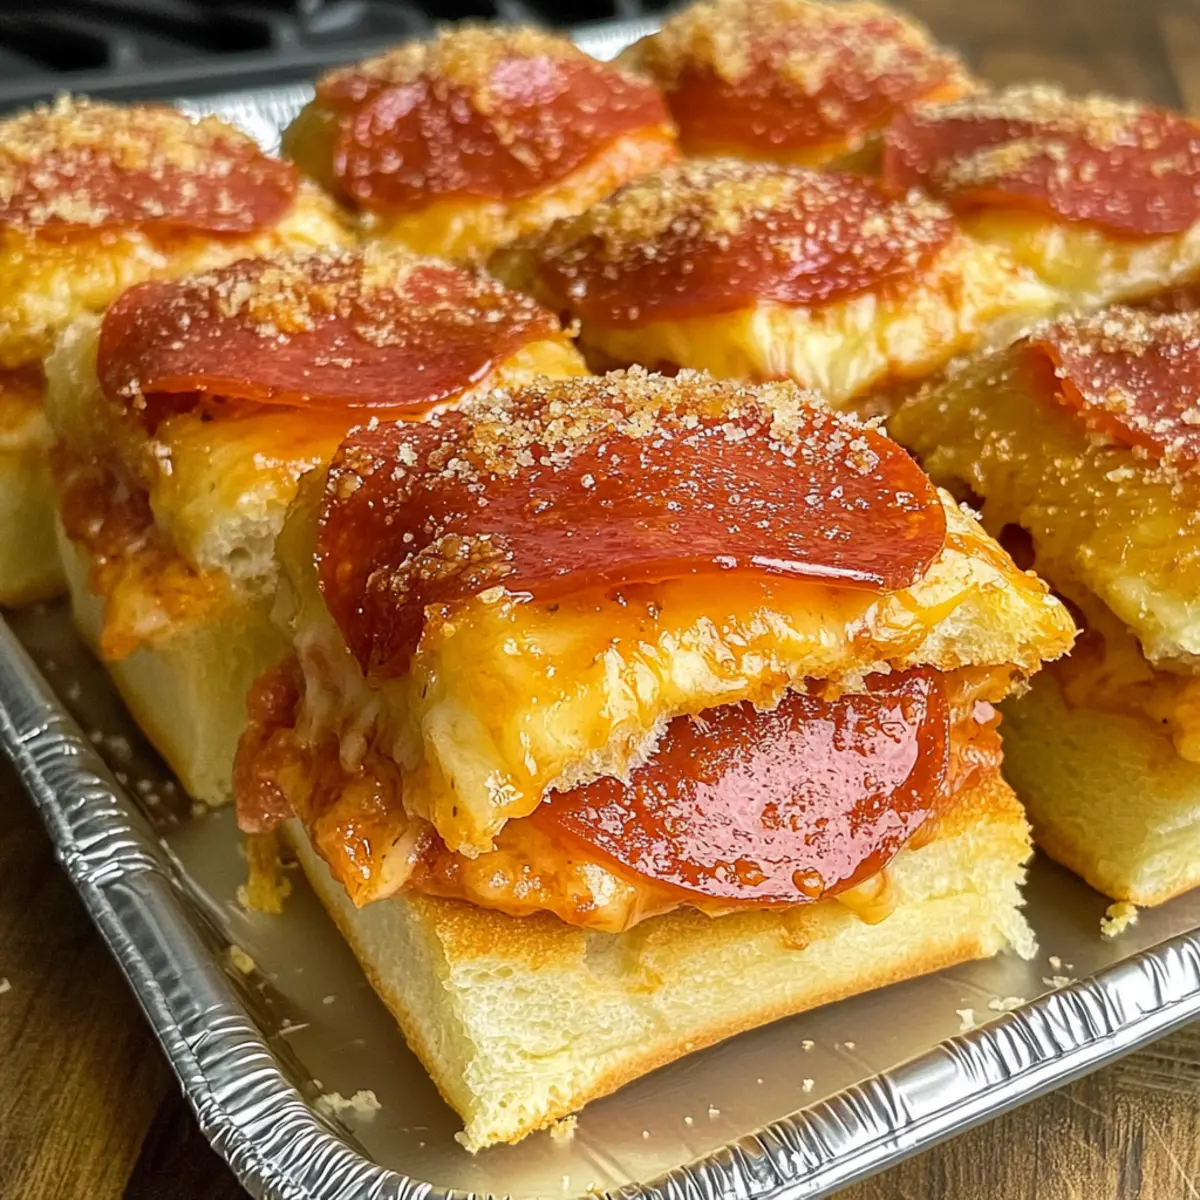
Place the baking dish in the preheated oven and bake the assembled Glazed Pepperoni Pizza Sliders for an additional 5–10 minutes. Keep an eye on them, removing them from the oven when the cheese is melted and the tops are golden brown, ensuring that they are perfectly cooked and appealing.
Step 8: Slice and Serve
After baking, allow the sliders to cool for a few minutes before slicing them into individual sliders. Serve warm, enjoying their delightful combination of sweet and savory goodness. These Glazed Pepperoni Pizza Sliders make for an irresistible treat that’s perfect for sharing!
Expert Tips for Glazed Pepperoni Pizza Sliders
-
Use Fresh Ingredients: Fresh pepperoni and quality cheeses enhance flavor. Avoid old or pre-sliced products for the best taste.
-
Layer Smartly: Distributing cheese evenly ensures every bite is creamy and gooey, making your Glazed Pepperoni Pizza Sliders even more delicious.
-
Perfect Baking Time: Keep an eye on the sliders; removing them when the cheese is melty prevents drying out and keeps the texture soft.
-
Customize Your Fillings: Experiment with different meats or veggies, like mushrooms or bell peppers, to tailor your Glazed Pepperoni Pizza Sliders to your taste!
-
Reheat Wisely: If you have leftovers, reheat in the oven to maintain their soft texture instead of using the microwave, which can make them soggy.
What to Serve with Glazed Pepperoni Pizza Sliders
Set the stage for a delightful meal with flavors that dance on your palate, each bite of savory goodness inviting you to indulge a little more.
-
Crispy Kale Chips: Lightly salted and baked to perfection, these crunchy bites offer a nutritious, crispy contrast to the sliders’ richness. Plus, they can be a fun finger food!
-
Marinara Dipping Sauce: A classic pairing, this robust sauce brings an extra layer of flavor. Dip your sliders for that perfect fusion of taste inspired by pizza.
-
Simple Garden Salad: A fresh mix of greens topped with a zesty vinaigrette elevates the meal, complementing the sliders’ warmth with a burst of vibrant flavor.
-
Sweet Potato Fries: Crunchy and slightly sweet, these fries introduce a hint of earthiness that balances the savory notes of the sliders beautifully.
-
Garlic Breadsticks: Soft and buttery, these are a must-have alongside your sliders. Scoop up extra marinara sauce for a richly satisfying bite.
-
Fruit Salad: A colorful mix of seasonal fruits brings a refreshing sweetness to your meal, cleansing the palate and adding a pop of color to the table.
-
Soft Drinks or Iced Tea: A cold drink is the perfect refreshment. Lemonade or sweet tea offers the ideal sweet contrast to the savory sliders.
Let each of these pairings complement your Glazed Pepperoni Pizza Sliders and turn your meal into an unforgettable experience that friends and family will cherish!
Variations & Substitutions for Glazed Pepperoni Pizza Sliders
Feel free to explore your creativity and customize these sliders to your taste—let your imagination run wild!
- Dairy-Free: Use coconut oil and dairy-free cheeses to make these sliders suitable for lactose intolerant guests. You’ll still achieve that deliciously rich flavor.
- Meat-Free: Swap out the pepperoni for grilled vegetables or chickpeas for a hearty vegetarian option. This adds a burst of color and nutrition!
- Spicy Kick: Add jalapeños or banana peppers for a touch of heat that can elevate the flavor profile beautifully. Heat seekers will love this twist!
- Sweet and Savory: Drizzle a balsamic reduction over the filling before baking for an unexpected burst of flavor that balances the glaze perfectly.
- Gluten-Free: Swap the Hawaiian slider rolls with gluten-free alternatives, keeping the joy of sliders alive for those avoiding gluten.
- Bread Alternatives: Try using croissants or bagels as a unique base, resulting in an entirely different flavor experience for your sliders.
- Flavor Infusion: Mix in a bit of pesto or sun-dried tomato spread with your pizza sauce for a rich, herby twist that dazzles the taste buds.
- Savory Sauce: Pair these sliders with a side of homemade Muffin Breakfast Pizza or a bite of Orange Maple Glazed for a delightful contrast of flavors!
Embrace these variations and create your perfect version of Glazed Pepperoni Pizza Sliders!
How to Store and Freeze Glazed Pepperoni Pizza Sliders
Fridge: Store any leftovers in an airtight container for up to 3 days. To maintain freshness, avoid leaving them out at room temperature for more than 2 hours.
Freezer: For longer storage, you can freeze your Glazed Pepperoni Pizza Sliders. Wrap them tightly in foil or place them in freezer bags for up to 2 months.
Reheating: To reheat, bake them directly from frozen at 350°F (175°C) for about 15-20 minutes, or until heated through and the cheese is melty.
Make-Ahead: Feel free to assemble your sliders in advance, cover, and store in the fridge overnight before baking for an easy option when hosting guests.
Make Ahead Options
These Glazed Pepperoni Pizza Sliders are fantastic for meal prep, saving you precious time during busy weeknights! You can assemble the sliders up to 24 hours in advance; simply prepare them up until the baking step, cover tightly with foil, and refrigerate. If you’re looking to enjoy them later, they can be stored unbaked in the fridge for up to 3 days. To maintain quality, wait to brush the sweet glaze on the tops until just before baking. When ready to serve, remove from the fridge, glaze, and bake as directed. You’ll have a delicious snack ready with minimal effort, perfect for gatherings or movie nights!

Glazed Pepperoni Pizza Sliders Recipe FAQs
What type of rolls should I use for the sliders?
Absolutely! Hawaiian slider rolls are the best choice because of their soft, sweet texture. If you need an alternative, any soft bread rolls will do. Just ensure they can hold up to the fillings and the glaze!
How should I store leftover sliders?
Store any leftovers in an airtight container in the refrigerator for up to 3 days. It’s best to let them cool completely before sealing to keep them fresh. Reheat them in the oven for a soft, delicious texture!
Can I freeze Glazed Pepperoni Pizza Sliders?
Yes, you can! To freeze, wrap each slider tightly in foil or place them in a freezer bag. They’ll be good for up to 2 months. When you’re ready to enjoy them, bake them directly from frozen at 350°F (175°C) for 15-20 minutes until heated through and the cheese is melty.
What if the cheese isn’t melting properly during baking?
If you notice that the cheese isn’t melting smoothly, it could be due to cold cheese being placed in the oven. Make sure to use cheese that’s at room temperature before layering. You can also allow the sliders a couple of extra minutes in the oven if needed, just keep an eye on them to avoid overbaking.
Are these sliders suitable for people with food allergies?
Pay attention to specific dietary needs: they contain gluten from the rolls and dairy from the cheese. For gluten-free, use gluten-free rolls, and for dairy-free, try vegan cheese alternatives. Always check labels for specific allergens, especially for toppings like pepperoni, as they vary by brand.
Can I make these sliders a day ahead of time?
Of course! You can assemble the sliders up to a day in advance. Just cover them loosely with foil and store them in the fridge. On the day of serving, simply pop them in the oven to bake when you’re ready—it’s a great time-saver for gatherings!
Glazed Pepperoni Pizza Sliders You'll Crave Every Time
Ingredients
Equipment
Method
- Preheat your oven to 350°F (175°C) and line a 9x13" baking dish with foil.
- Slice the Hawaiian slider rolls in half horizontally and spread softened butter on the inner sides. Place the bottoms in the baking dish and bake for 5 minutes.
- Spread a layer of pizza sauce evenly over the bottom halves of the buns and sprinkle grated Parmesan cheese generously on top.
- Layer slices of provolone cheese over the pizza sauce, followed by deli-style pepperoni and more provolone and smaller pepperoni on top.
- Place the top halves of the slider rolls over the layered filling and press down gently.
- Mix melted butter, brown sugar, oregano, and granulated garlic in a bowl. Brush the glaze over the tops of the slider buns.
- Bake the sliders for an additional 5–10 minutes until the cheese is melted and the tops are golden brown.
- Allow the sliders to cool for a few minutes before slicing and serve warm.
Leave a Reply