
As I rummaged through my pantry, a box of peanut butter cups caught my eye, igniting a playful spark of inspiration. What could be more delightful in the summer heat than dreamy Peanut Butter Cup Ice Cream Sandwiches? This easy dessert recipe combines the rich, nostalgic flavors of childhood treats with a fun twist that’s perfect for gatherings or lazy evenings at home. With 26 creative ice cream sandwich variations to explore, each one promises to be a crowd-pleaser, offering a delectable balance of chewy cookies and creamy fillings. Plus, they’re incredibly simple to whip up, making them a go-to choice for busy days or when you want to impress your friends. Are you ready to scoop up some joy? Let’s dive into the world of ice cream sandwiches that will make your summer a little sweeter!
Why Are Peanut Butter Cup Ice Cream Sandwiches Amazing?
Irresistible Combination: The fusion of creamy ice cream and rich peanut butter cups creates a delightful burst of flavor.
Childhood Nostalgia: These sandwiches bring back memories of carefree summer days, making them perfect for all ages.
Quick and Easy: With just a few ingredients and minimal prep, you can whip these up in no time—ideal for last-minute gatherings!
Versatile Variations: Feel free to experiment with different ice creams or cookie bases; the options are endless! For a fun twist, why not try pairing with flavors from our Cucumber Salad Sandwiches recipe?
Crowd-Pleasing Treat: Whether it’s a BBQ or a casual movie night, these sandwiches are guaranteed to impress your friends and family alike!
Peanut Butter Cup Ice Cream Sandwich Ingredients
• Get ready to indulge in sweet delight!
For the Cookies
- Butter – Adds richness and moisture; swap with coconut oil for a dairy-free option.
- Sugar – Provides sweetness and aids in browning; use brown sugar for deeper flavor.
- Egg – Binds the ingredients together; can be replaced with a flax egg for a vegan version.
- Flour – Gives structure to cookies; all-purpose flour works best, but whole wheat adds nutrition.
- Baking Soda – Helps cookies rise for a nice, chewy texture.
For the Ice Cream Filling
- Peanut Butter Cup Ice Cream – Offers a creamy base that pairs wonderfully with the cookies; feel free to use a dairy-free ice cream for a lighter dessert.
Add-ins (optional)
- Chocolate Chips – Add an extra layer of indulgence; mix dark and milk chips for a rich contrast.
- Chopped Peanut Butter Cups – Enhance the peanut butter flavor and add crunch; perfect for true peanut butter fans!
Step‑by‑Step Instructions for Peanut Butter Cup Ice Cream Sandwiches
Step 1: Preheat the Oven
Begin by preheating your oven to 350°F (175°C). This ensures it reaches the right temperature for baking your cookies, which are the foundation of your Peanut Butter Cup Ice Cream Sandwiches. While the oven warms up, line a baking sheet with parchment paper to prevent the cookies from sticking.
Step 2: Cream the Butter and Sugar
In a mixing bowl, combine softened butter and sugar. Using a hand mixer or stand mixer, cream them together on medium speed until the mixture is light and fluffy, about 2-3 minutes. This step is crucial for creating a tender texture in the cookies, perfect for your ice cream sandwich.
Step 3: Incorporate the Egg
Next, beat in one egg (or your chosen substitute) along with any flavor extracts like vanilla. Mix until just combined, ensuring a smooth consistency. This step enriches your cookie dough, binding the ingredients together for that delightful chewiness essential for your Peanut Butter Cup Ice Cream Sandwiches.
Step 4: Add Dry Ingredients
Gradually sift in the flour and baking soda into the wet mixture. Using a spatula or mixer on low speed, gently mix until fully incorporated, ensuring no flour pockets remain. This step builds the structure of the cookies, leading to a satisfying bite when layered with ice cream.
Step 5: Scoop and Shape the Cookies
Scoop generous tablespoons of dough onto the prepared baking sheet, spacing them about 2 inches apart. Flatten each scoop slightly for even baking. Bake in the preheated oven for 10-15 minutes, until the edges are golden brown and the centers appear set. These cookies will serve as the delicious outer layer for your ice cream sandwiches.
Step 6: Cool the Cookies
Once baked, remove the cookies from the oven and allow them to cool on the baking sheet for a few minutes before transferring them to a wire rack. Ensuring that they cool completely prevents the ice cream from melting instantly when you assemble your Peanut Butter Cup Ice Cream Sandwiches.
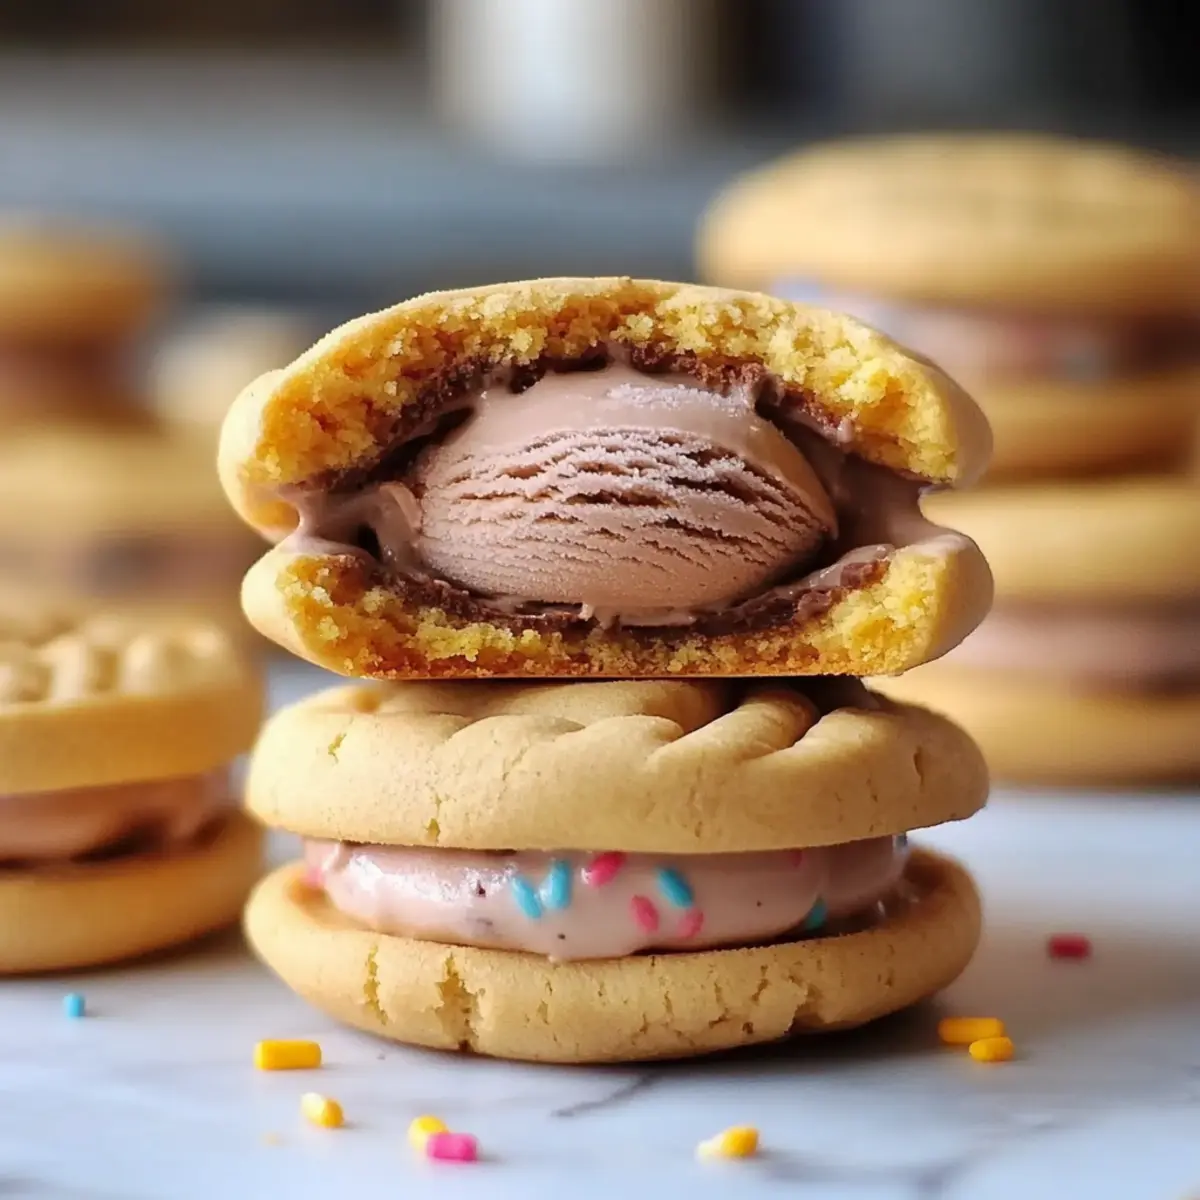
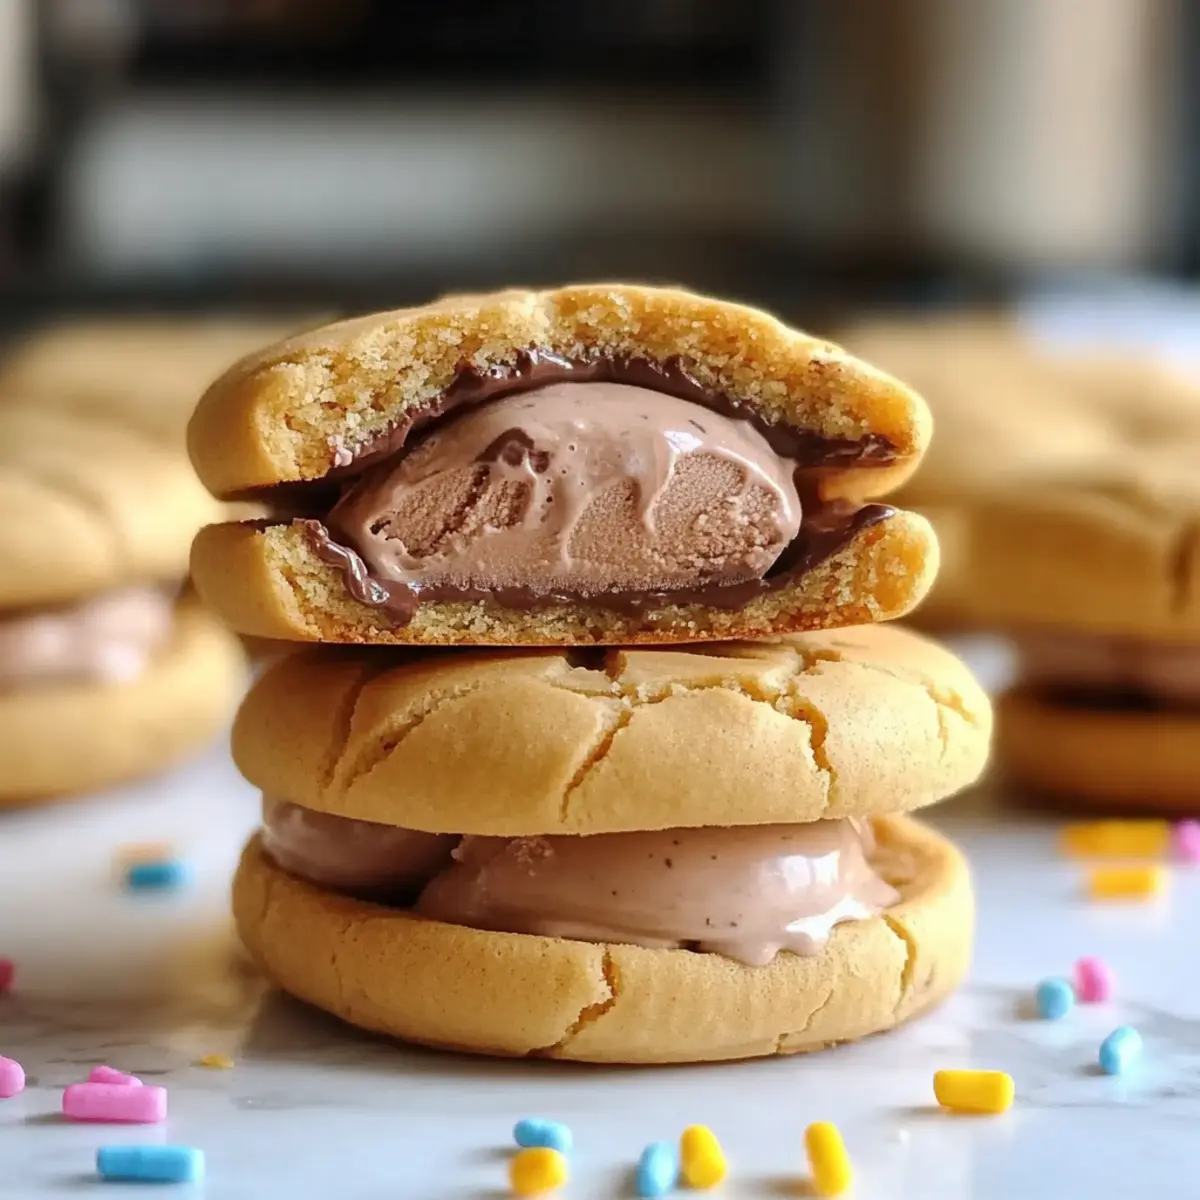
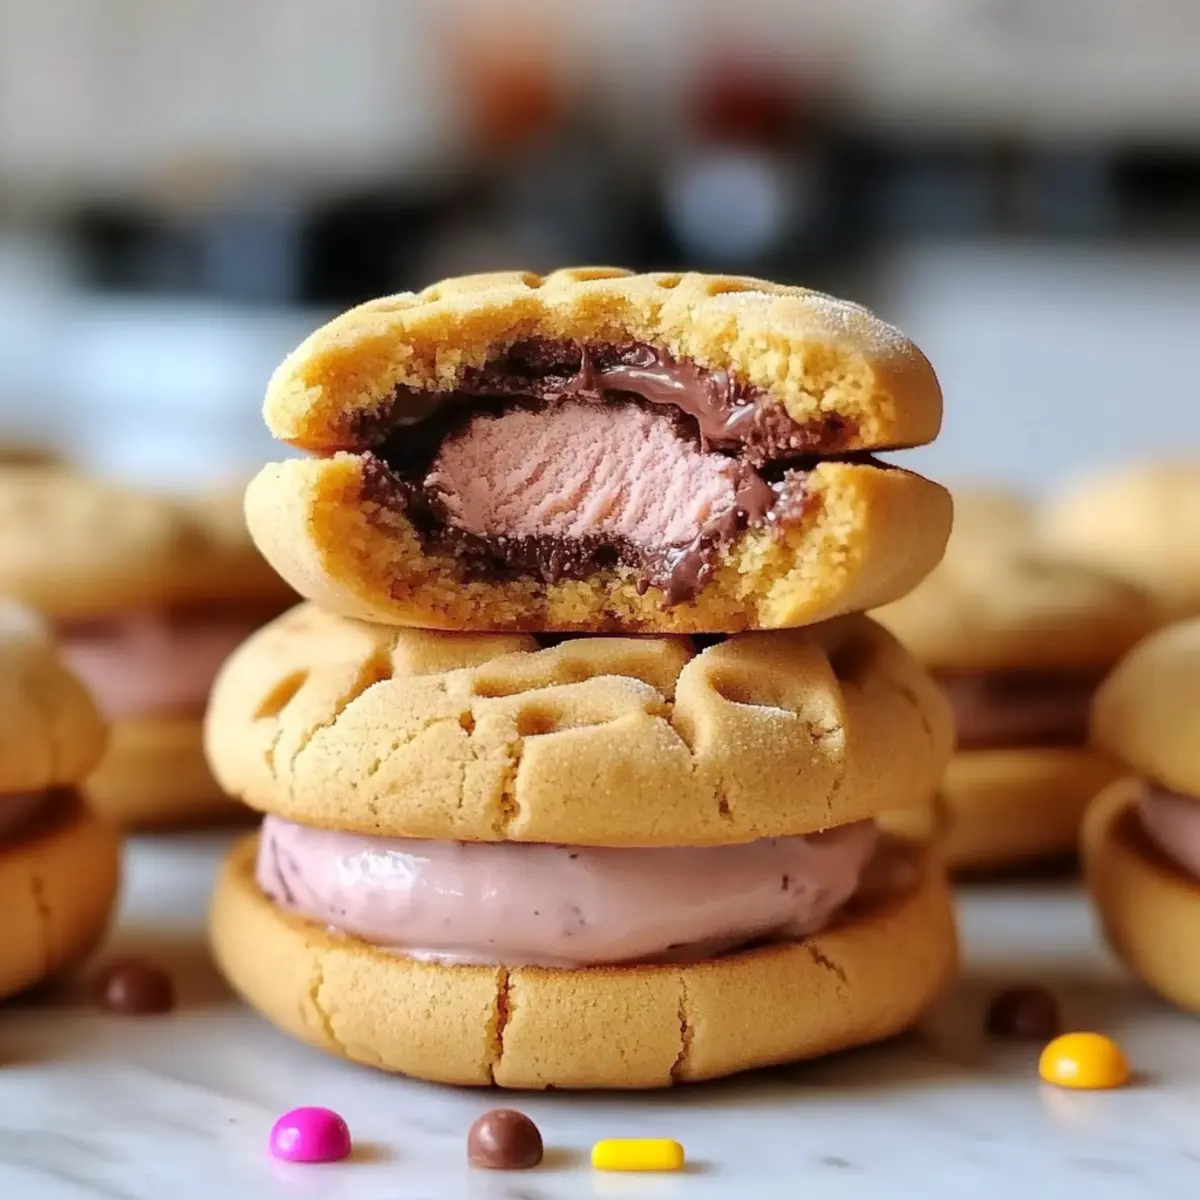
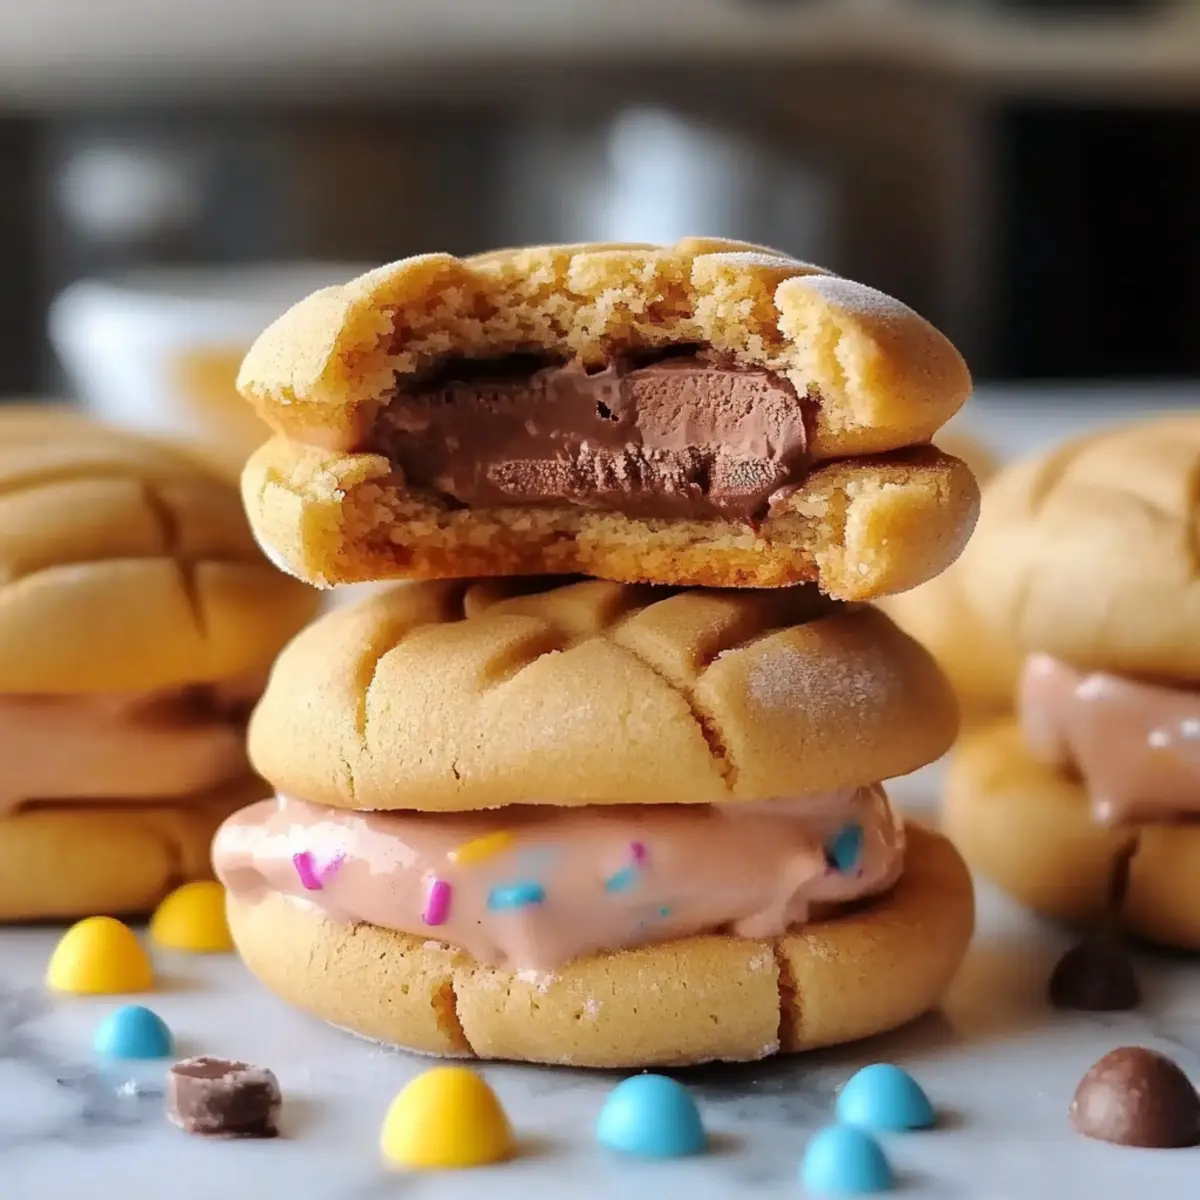
Step 7: Assemble the Sandwiches
Take your cooled cookies and place a generous scoop of peanut butter cup ice cream onto the flat side of one cookie. Top with another cookie, pressing gently to create a sandwich. Experiment with the amount of ice cream to suit your taste, ensuring a delightful balance between cookie and filling.
Step 8: Freeze and Serve
For best results, wrap each ice cream sandwich in plastic wrap and freeze for at least 30 minutes to firm up. This helps the cookies uphold their shape and creates a pleasantly cool treat perfect for hot summer days. Once ready, share your irresistible Peanut Butter Cup Ice Cream Sandwiches with friends and family!
What to Serve with Peanut Butter Cup Ice Cream Sandwiches
As summer days blend into warm evenings, you’ll want to create the perfect spread alongside your delightful ice cream sandwiches.
- Fresh Fruit Salad: Bursting with juicy sweetness, a mix of berries and melons provides a refreshing contrast to the creamy sandwiches, enhancing every bite.
- Chocolate Drizzle: A rich and luxurious chocolate sauce poured on top adds an indulgent touch and complements the peanut butter flavor beautifully.
- Homemade Whipped Cream: Light and airy, this creamy topping makes each bite feel like a cloud of sweetness, elevating your dessert experience.
- Crunchy Potato Chips: The salty crunch complements the sweet and creamy elements, creating a delightful dance of flavors that excites your palate.
- Milkshake: A thick and frosty chocolate or vanilla milkshake not only pairs perfectly but also embodies a nostalgic dessert experience of summer treat indulgence.
- Cookies and Cream Cupcakes: Pair your sandwiches with these delightful treats for a double dessert experience. The chocolate and cream align beautifully with the peanut butter flavors.
- Iced Tea or Lemonade: Refreshing and slightly tart, these drinks cleanse the palate, ensuring you’re ready for round two of peanut butter cup ice cream sandwiches!
Turn any gathering into a sweet celebration with these fantastic combinations!
Variations & Substitutions for Peanut Butter Cup Ice Cream Sandwiches
Get ready to elevate your ice cream sandwich game with delightful twists that will make your taste buds dance!
- Dairy-Free: Use coconut milk ice cream instead of traditional ice cream for a delicious and creamy alternative.
- Nut-Free: Replace peanut butter cups with sunbutter and chocolate chips for a nut-free treat that’s equally delectable.
- Gluten-Free: Swap all-purpose flour for a gluten-free baking blend to ensure everyone can enjoy these sweet sandwiches.
- Flavor Boost: Add a pinch of cinnamon or a splash of caramel extract into the cookie dough for a warm, inviting flavor.
- Textural Contrast: Incorporate crushed pretzels or granola into the cookie dough for an exciting crunch alongside the soft cookie.
For an extra fun twist, consider adding a layer of homemade Brown Butter Cookie dough for a richer depth of flavor. You can also try pairing them with a refreshing scoop of seasonal fruit sorbet for a lightened-up dessert.
- Over-the-Top: Elevate the indulgence by drizzling melted chocolate or caramel over the top of assembled sandwiches for a truly decadent experience.
- Ice Cream Swaps: Experiment with different ice creams such as mint chocolate chip or cookies and cream for an exciting flavor profile. Don’t forget to check out our Easy Cucumber Salad Sandwiches for a refreshing summer companion!
How to Store and Freeze Peanut Butter Cup Ice Cream Sandwiches
Fridge: Keep assembled sandwiches in the fridge for up to 3 days; however, for the best texture, it’s ideal to enjoy them fresh.
Freezer: Store peanut butter cup ice cream sandwiches in an airtight container in the freezer for up to 1 month. This keeps them fresh and ready for a quick treat!
Wrapping: To prevent ice crystals from forming, wrap each sandwich in plastic wrap or parchment paper before placing them in the freezer.
Thawing: When you’re ready to indulge, let the sandwiches thaw for about 5-10 minutes at room temperature for easier biting and maximum flavor!
Make Ahead Options
These Peanut Butter Cup Ice Cream Sandwiches are perfect for meal prep enthusiasts! You can prepare the cookie dough up to 24 hours in advance by storing it in the refrigerator. Just scoop the dough balls and place them on a baking sheet in the fridge, covered tightly to prevent drying out. When you’re ready to bake, simply follow the recipe’s baking instructions. Additionally, the assembled sandwiches can be made up to 3 days ahead; just wrap each sandwich tightly in plastic wrap and store them in the freezer. This way, you’ll have delicious, chewy ice cream sandwiches ready to impress your guests at a moment’s notice! Remember to let them sit at room temperature for a couple of minutes before serving to ensure a perfect texture.
Expert Tips for Peanut Butter Cup Ice Cream Sandwiches
- Cookie Texture: For chewier cookies, don’t overbake. Bake until edges are golden, and let cool completely to maintain the softness.
- Ice Cream Choice: Opt for a good-quality peanut butter cup ice cream for the best flavor, or try making your own for a personal touch!
- Assembly Tip: Scoop ice cream using a large cookie scoop for even portions—this creates the perfect balance between the cookies and filling.
- Freezing Trick: To prevent melting during assembly, briefly freeze the cookies before adding the ice cream. This keeps them sturdy and easy to handle.
- Experiment Fearlessly: Don’t hesitate to mix in other flavors; crushed cookies or sprinkles add a delightful flair to your peanut butter cup ice cream sandwiches!
Peanut Butter Cup Ice Cream Sandwiches Recipe FAQs
What type of peanut butter cup ice cream should I use?
I recommend using a good-quality peanut butter cup ice cream, which enhances the overall flavor of the sandwich. You can also make your own ice cream if you’re feeling adventurous, adding even more personalization to your treats!
How should I store my peanut butter cup ice cream sandwiches?
For the best texture, store assembled sandwiches in an airtight container in the freezer for up to one month. They’re perfect for quick snacks! Remember to wrap each sandwich in plastic wrap to avoid ice crystals forming.
Can I use different cookies for my ice cream sandwiches?
Absolutely! You can experiment with various cookie types, like chocolate chip or oatmeal, for a unique twist. Just make sure the cookies are sturdy enough to hold the ice cream without breaking.
What are some alternatives for making these sandwiches vegan?
To create vegan peanut butter cup ice cream sandwiches, replace the butter with coconut oil, use a flax egg (1 tbsp ground flaxseed mixed with 2.5 tbsp of water), and opt for dairy-free peanut butter cup ice cream. This way, you can enjoy a delicious dessert without any animal products!
How long can I keep the sandwiches in the fridge?
You can keep assembled sandwiches in the fridge for up to 3 days; however, they are best enjoyed fresh for optimal texture and flavor. If you like them chilled, consider freezing them instead!
What should I do if my cookies turn out too soft?
If your cookies are too soft after baking, it could be that they need a bit longer in the oven, around 1-2 minutes more. Make sure to let them cool on a wire rack as this helps them firm up and become chewy, making them ideal for ice cream sandwiches.
Peanut Butter Cup Ice Cream Sandwiches for Ultimate Indulgence
Ingredients
Equipment
Method
- Preheat the oven to 350°F (175°C) and line a baking sheet with parchment paper.
- Cream the softened butter and sugar in a mixing bowl until light and fluffy, about 2-3 minutes.
- Incorporate the egg (or substitute) and mix until smooth.
- Gradually add flour and baking soda, mixing until fully incorporated.
- Scoop dough onto the baking sheet, flatten slightly, and bake for 10-15 minutes until golden brown.
- Cool cookies on a wire rack after removing from oven.
- Assemble each sandwich by placing a scoop of ice cream between two cookies.
- Wrap sandwiches in plastic wrap and freeze for at least 30 minutes.
Leave a Reply