
A mouthwatering concoction just came out of my kitchen, and I can hardly contain my excitement! I’m talking about the show-stopping Red Velvet Brownie Pudding—a dessert that perfectly merges the indulgent richness of brownies with a warm, gooey center that’s sure to impress. This delightful treat is not only incredibly easy to whip up but also a guaranteed crowd-pleaser at any gathering. The soft, velvety texture complemented by a subtle tang from buttermilk makes it the ultimate comfort food, ideal for cozy date nights or festive celebrations. Ready to take your dessert game to the next level? Let’s dive into this sumptuous recipe and create something irresistible together!
Why is This Dessert So Irresistible?
Decadent, this Red Velvet Brownie Pudding is an indulgent treat that promises to satisfy even the toughest critics. Easy-to-make with just a few simple steps, it’s a delightful option for both novice and seasoned bakers alike. Unique flavors emerge from the tang of buttermilk, enhancing the classic brownie taste while offering an exciting twist. Versatile enough for any occasion, it’s the perfect dessert for celebrations or casual get-togethers. Plus, serving it warm alongside your favorite ice cream takes it to a whole new level! Don’t forget to check out our tips for achieving that perfect molten center for your next dinner party.
Red Velvet Brownie Pudding Ingredients
Here’s what you’ll need to create this dreamy dessert!
For the Batter
- Unsalted Butter – Adds richness and moisture; substituting with margarine works for a dairy-free option.
- Large Eggs (room temperature) – Vital for achieving the soft center and providing stability.
- Granulated Sugar – Sweetness and moisture retention are key; brown sugar can be swapped for added depth.
- Natural Cocoa Powder – Essential for flavor; don’t use Dutch-processed for the best red velvet result.
- All-Purpose Flour – Provides the necessary structure; feel free to use gluten-free flour as an alternative.
- Kosher Salt – Enhances all the flavors; sea salt can serve as a great substitute.
- Buttermilk – Adds just the right acidity for a tender crumb; you can mix whole milk with vinegar as a substitute (3 tbsp milk + 1 tsp vinegar).
- Vanilla Extract – For a flavorful boost; pure vanilla is always preferred.
- White Vinegar – Works together with buttermilk for that balanced flavor profile.
- Red Food Coloring – Gives the signature red hue to your dessert; beetroot powder is a natural alternative too.
Each ingredient brings something special to the table, ensuring your Red Velvet Brownie Pudding will turn out absolutely divine!
Step‑by‑Step Instructions for Red Velvet Brownie Pudding
Step 1: Preheat and Prepare
To start, preheat your oven to 325°F (163°C). While the oven is heating, generously butter a 9×9-inch baking dish, ensuring complete coverage for easy release later. This step sets the foundation for a beautifully baked Red Velvet Brownie Pudding that you’ll love serving.
Step 2: Whip the Eggs and Sugar
In a stand mixer, combine room temperature large eggs and granulated sugar. Whip on medium-high speed for 5 to 10 minutes until the mixture becomes thick, pale, and fluffy. This process incorporates air, helping to create that luscious texture that is characteristic of our Red Velvet Brownie Pudding.
Step 3: Sift Dry Ingredients
In a separate bowl, sift together your natural cocoa powder, all-purpose flour, and kosher salt. Sifting not only removes lumps but also aerates the dry ingredients. This step is crucial for achieving the perfectly moist and fudgy consistency of your Red Velvet Brownie Pudding.
Step 4: Combine Wet Ingredients
Reduce the mixer speed to low and carefully add in the buttermilk, vanilla extract, white vinegar, and red food coloring. Mix until just combined, being mindful not to overmix. You’ll notice a beautiful red hue developing, enhancing the visual appeal of your decadent dessert.
Step 5: Incorporate Dry Ingredients
Gradually add your sifted dry ingredients to the wet mixture, mixing on low speed until just blended. It’s important to stop mixing as soon as no dry flour is visible; overmixing can result in a dense texture, which we want to avoid in our delightful Red Velvet Brownie Pudding.
Step 6: Add the Melted Butter
With the mixer running at low speed, slowly pour in your melted unsalted butter. Continue mixing just until the butter is well incorporated into the batter. The addition of butter enriches your dessert, giving it that creamy, luscious finish.
Step 7: Prepare the Water Bath
Pour the Red Velvet Brownie Pudding batter into your prepared baking dish. Place this dish into a larger roasting pan and fill the outer pan with hot water until it reaches halfway up the sides of the baking dish. This water bath ensures even baking and helps maintain moisture.
Step 8: Bake to Perfection
Carefully transfer the pans to the preheated oven. Bake your Red Velvet Brownie Pudding for 55 to 65 minutes. Start checking at the 55-minute mark; the edges should be set while the center retains a gentle jiggle. This indicates it’s perfectly baked with that desired molten texture.
Step 9: Cool and Serve
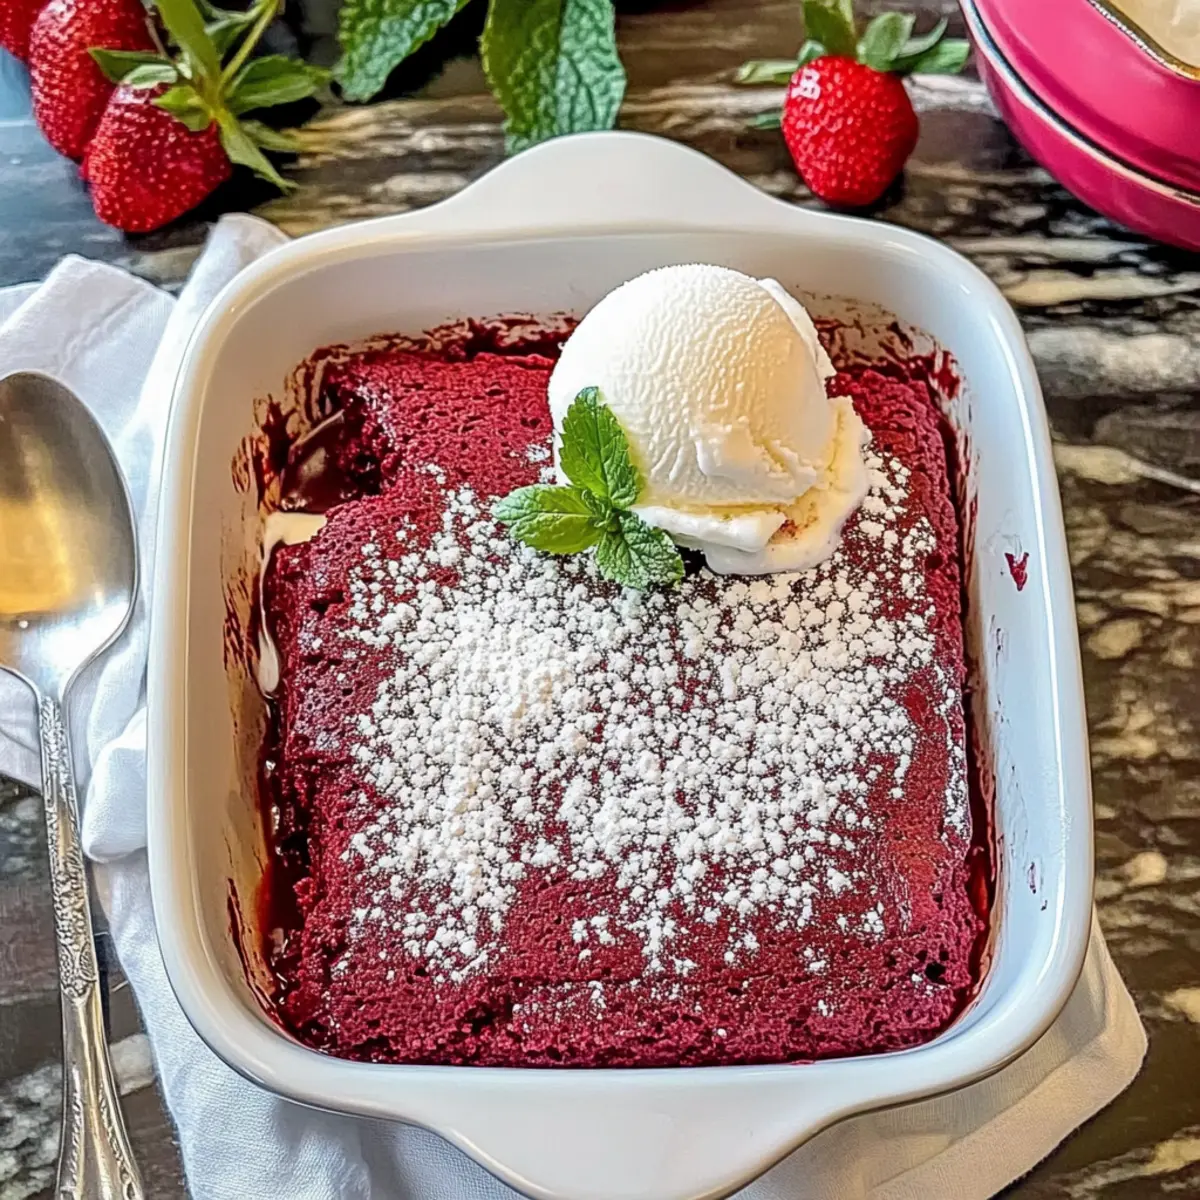
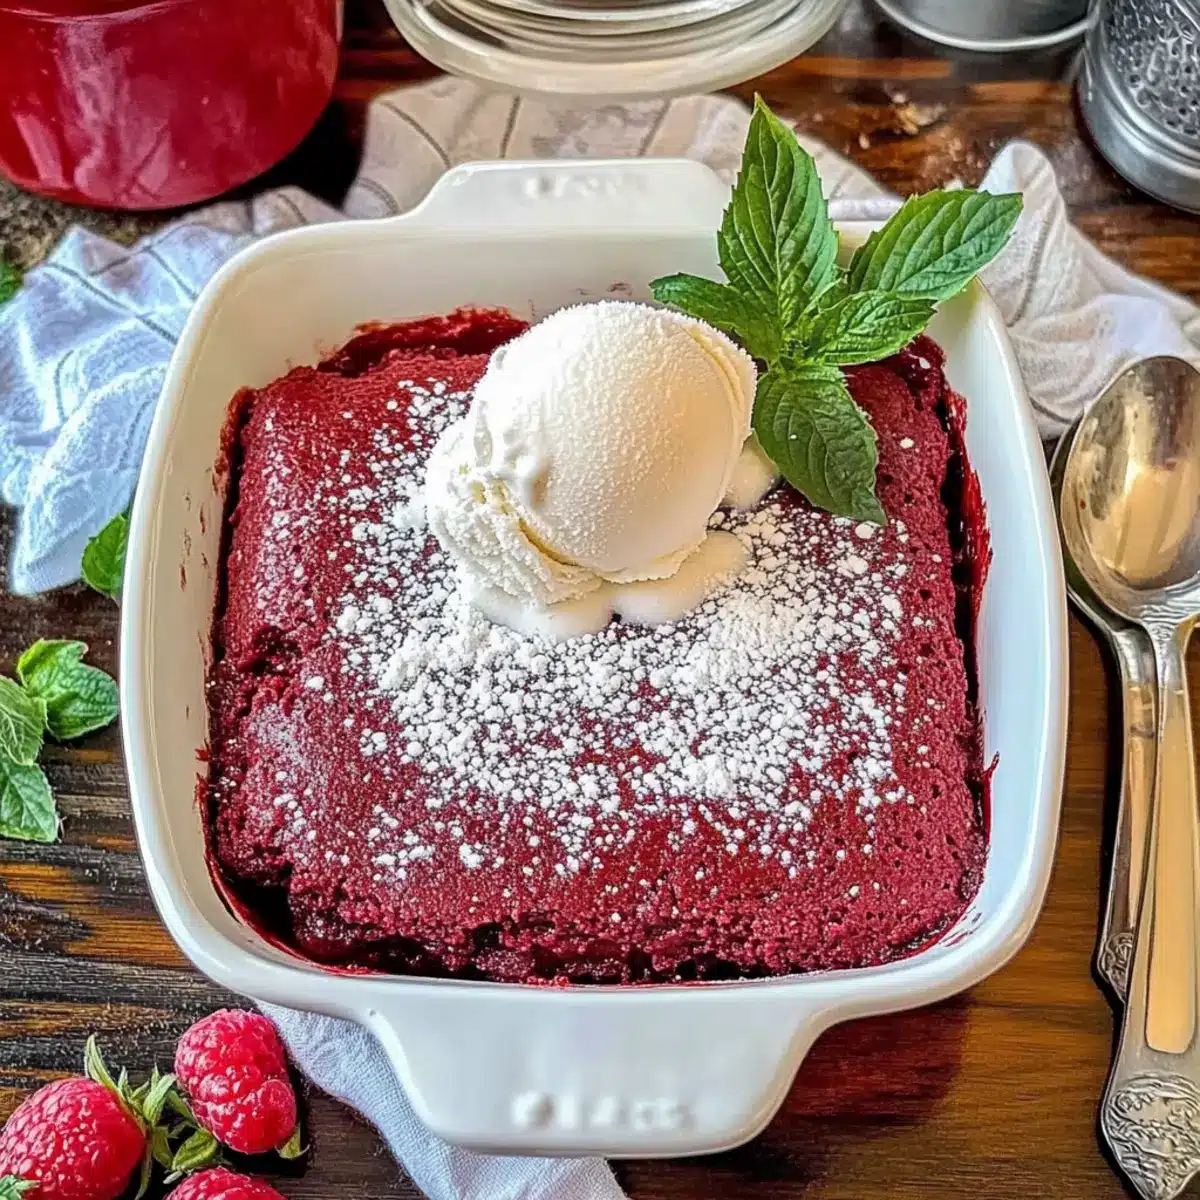
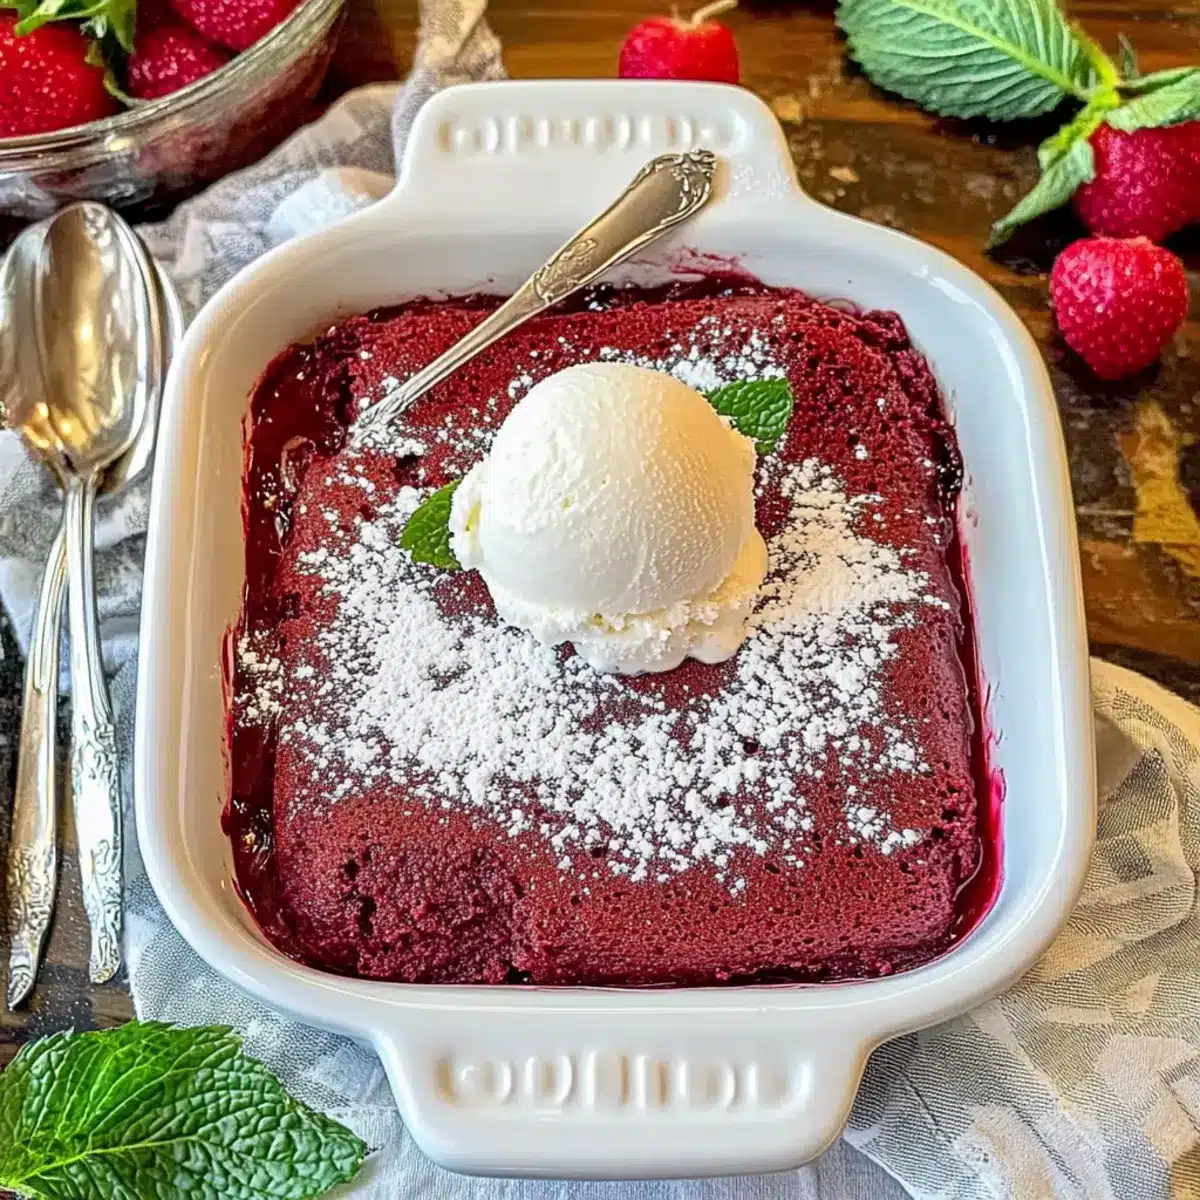
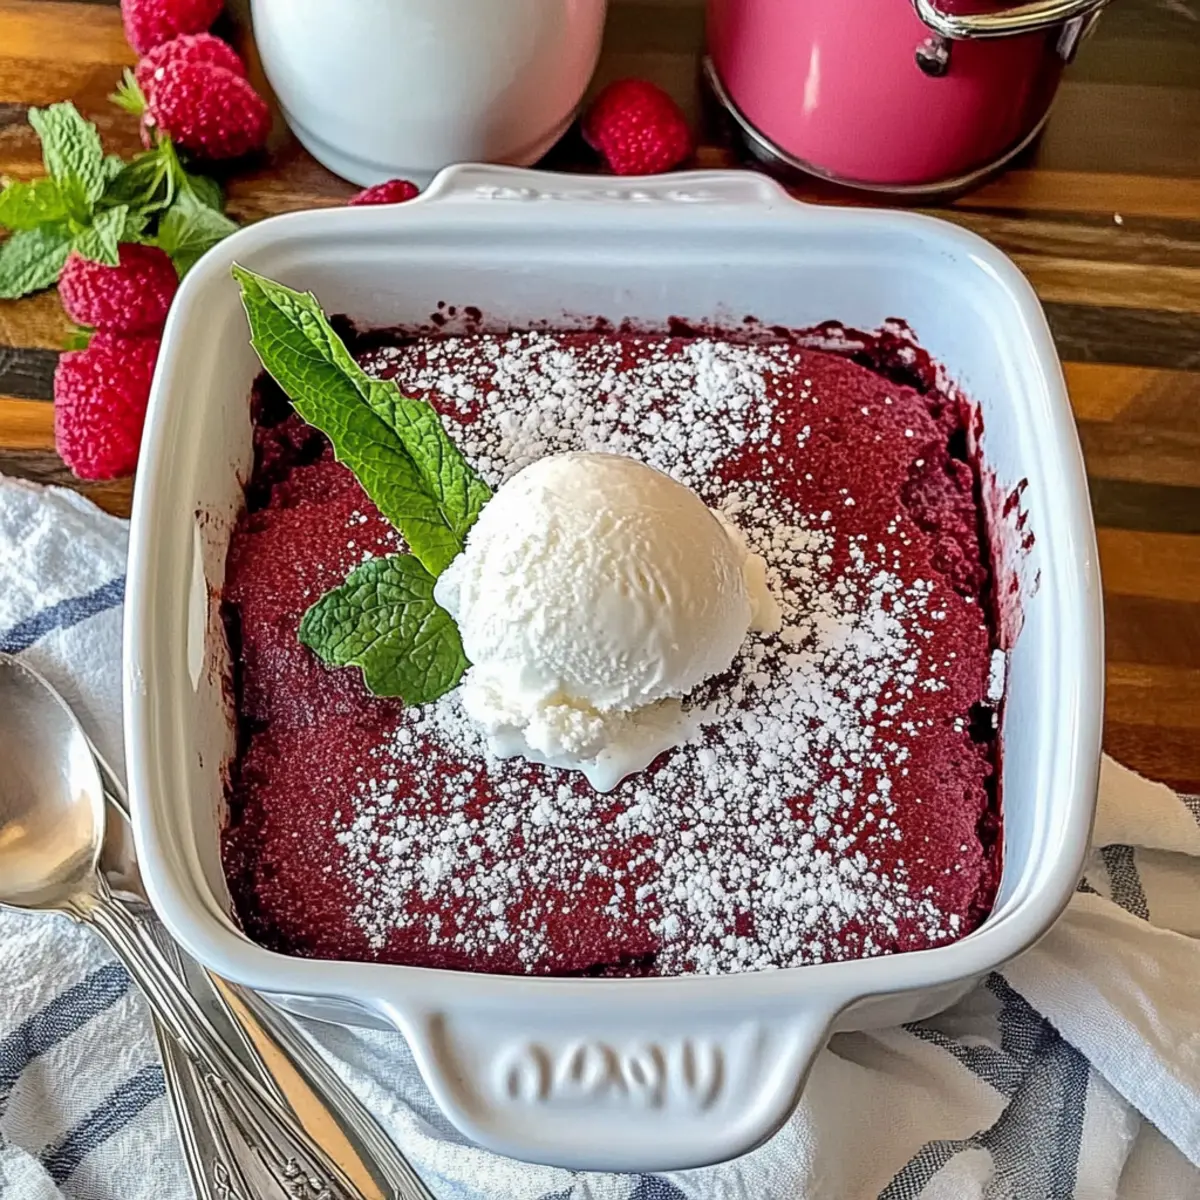
Once baked, remove the pudding from the oven and let it cool for 10 to 15 minutes. This rest period allows the center to set slightly while still being warm and gooey. Scoop into bowls and serve with a scoop of vanilla ice cream for the ultimate indulgent treat!
Expert Tips for Red Velvet Brownie Pudding
- Proper Egg Beating: Whip the eggs until thick and pale to ensure a light, airy structure for the pudding-like center.
- Avoid Overmixing: Mix the batter until just combined to prevent a dense texture; the right consistency is crucial for your Red Velvet Brownie Pudding.
- Water Bath Importance: Don’t skip the water bath! It provides even baking and maintains moisture, avoiding dry edges.
- Set Baking Time: Check for set edges and a slightly jiggly center at 55 minutes. Overbaking can lead to a dry dessert.
- Color Enhancement: For a more vibrant hue, use gel food coloring instead of liquid. It will intensify the beautiful red of your pudding!
- Flavor Enhancements: Try adding a dash of espresso powder to elevate the chocolate notes in your Red Velvet Brownie Pudding, delighting every bite.
How to Store and Freeze Red Velvet Brownie Pudding
Room Temperature: Store uneaten portions in a cool, dry place for up to 2 hours. However, it’s best enjoyed fresh for optimal flavor and texture.
Fridge: Keep leftovers in an airtight container in the refrigerator for up to 3 days to maintain freshness. Allow it to cool completely before sealing to prevent condensation.
Freezer: For longer storage, freeze the Red Velvet Brownie Pudding in a sealed, freezer-safe container for up to 2 months. Thaw in the refrigerator overnight before reheating.
Reheating: Gently reheat individual portions in the microwave for about 30-45 seconds, or until warmed through. Serve warm, topped with ice cream, for a delightful treat!
What to Serve with Red Velvet Brownie Pudding
Indulging in a bowl of warm Red Velvet Brownie Pudding is truly a delight, but have you considered what to serve alongside this decadence?
- Vanilla Ice Cream: A classic pairing that contrasts the warm, fudgy texture. The cold ice cream melts into the pudding, creating a heavenly mixture.
- Whipped Cream: Light and airy, freshly whipped cream adds a delightful sweetness and complements the rich flavors of the brownie pudding beautifully.
- Fresh Berries: The tartness of raspberries or strawberries balances the sweetness, providing a vibrant pop of color and flavor.
- Chocolate Sauce: Drizzling a rich chocolate sauce amplifies the chocolate notes, making every spoonful an indulgent experience.
- Espresso: A cup of strong espresso elevates the flavors, highlighting the brownie pudding’s chocolate richness while providing a satisfying finish to the meal.
- Crunchy Nuts: Chopped walnuts or pecans add a wonderful crunch and nutty flavor, creating a delightful contrast to the smooth dessert.
- Mint Leaves: Fresh mint leaves bring a refreshing burst and beautiful presentation, enhancing the overall experience.
- Caramel Sauce: Swirling in a caramel drizzle adds a sweet, buttery layer that harmonizes perfectly with the chocolate tones of the pudding.
- Chocolate Chip Cookies: Serving warm cookies alongside provides a fun, nostalgic twist to your dessert spread that everyone will love.
- Sparkling Wine: A glass of bubbly can elevate the dessert occasion, adding a touch of celebration to your brownie pudding experience!
Red Velvet Brownie Pudding Variations
Get ready to have fun in the kitchen and customize your dessert to suit your cravings!
- Gluten-Free: Use a gluten-free flour blend to maintain that fudgy texture without compromising on flavor. The result will still be indulgent and delightful.
- Nutty Crunch: Add chopped pecans or walnuts for a satisfying crunch. They provide a textural contrast that beautifully complements the gooey center.
- Dairy-Free: Substitute butter with coconut oil or vegan butter to create a rich, non-dairy version without sacrificing taste. It’s a great option for those with dietary restrictions.
- Chocolate Lovers: Fold in some semi-sweet chocolate chips for added chocolate flavor that will melt into the pudding, enhancing each spoonful. It’s a chocolate lover’s dream!
- Festive Spice: Mix in a teaspoon of cinnamon or a hint of nutmeg to add warm spices that bring out the cozy flavors of the dessert. Perfect for holiday gatherings!
- Zesty Twist: Adding orange or lemon zest can brighten up the pudding’s flavor profile, lending a surprising, refreshing bite amidst the rich chocolate.
- Boozy Delight: For a grown-up version, incorporate a tablespoon of bourbon or dark rum into the mix for depth and warmth in every luscious bite.
- Fruit Topper: Serve with fresh raspberries or strawberries for a tart contrast to the sweetness, elevating your dessert visually and taste-wise.
Each variation brings a unique twist, ensuring your Red Velvet Brownie Pudding is never the same twice! For more delightful baking projects, don’t forget to check out our recipe for Chocolate Chip Cookies and learn how adding crunchy toppings can transform your desserts. Now, get ready to impress with your delicious creations!
Make Ahead Options
Preparing your Red Velvet Brownie Pudding ahead of time is a fantastic way to save time on busy nights! You can make the batter and refrigerate it for up to 24 hours, keeping it fresh while saving you precious time. Simply prepare the batter following the initial steps, then cover the mixing bowl tightly with plastic wrap before refrigerating. When you’re ready to bake, pour the chilled batter into the prepared baking dish and place it in the water bath before baking as instructed. This way, you’ll still enjoy that creamy, decadent dessert with minimal last-minute effort, ensuring it’s just as delicious!
Red Velvet Brownie Pudding Recipe FAQs
How do I know if my ingredients are ripe and ready to use?
Absolutely! For the best results in your Red Velvet Brownie Pudding, make sure your eggs are at room temperature. This helps them whip up beautifully to create that light texture. Also, if your butter looks creamy and soft but not melted, you’re good to go!
What’s the best way to store leftover brownies?
Very! Store any leftover Red Velvet Brownie Pudding in an airtight container in the refrigerator for up to 3 days. Be sure to cool it completely before sealing to avoid unwanted moisture inside the container. This ensures wonderful taste and texture when you indulge again!
Can I freeze the Red Velvet Brownie Pudding, and how?
Absolutely! To freeze your Red Velvet Brownie Pudding, let it cool completely, then slice it into portions. Wrap each piece tightly in plastic wrap and place them in a freezer-safe container. It can be frozen for up to 2 months. When you’re ready to enjoy, simply thaw individual portions in the refrigerator overnight, then gently reheat in the microwave for 30-45 seconds.
What should I do if my pudding isn’t setting properly?
Not a problem! If your Red Velvet Brownie Pudding doesn’t set as expected, it could be due to underbaking or not using the water bath. Ensure it’s baked until the edges are firm and there’s a slight jiggle in the center. Adjust your baking time if needed, and try to always use a water bath to maintain even moisture throughout the baking process.
Are there any dietary considerations I should keep in mind?
Certainly! This recipe contains common allergens like eggs and dairy. If you’re making it for someone with dietary restrictions, you can substitute the unsalted butter with coconut oil for a dairy-free version. For a gluten-free option, swap the all-purpose flour with a gluten-free flour blend. Be mindful of the food coloring if there are concerns about allergies—opt for natural options like beetroot powder instead.
Decadent Red Velvet Brownie Pudding You Can't Resist
Ingredients
Equipment
Method
- Preheat your oven to 325°F (163°C) and butter a 9x9-inch baking dish.
- In a stand mixer, whip room temperature eggs and granulated sugar for 5 to 10 minutes until thick and fluffy.
- Sift together cocoa powder, flour, and salt in a separate bowl.
- Reduce mixer speed to low and add buttermilk, vanilla extract, white vinegar, and red food coloring; mix until just combined.
- Gradually incorporate the sifted dry ingredients until just blended, being careful not to overmix.
- Slowly add melted butter to the batter with mixer on low speed until just incorporated.
- Pour batter into the baking dish, place in a larger pan, and fill with hot water halfway up the sides.
- Bake for 55 to 65 minutes, checking at 55 minutes for set edges and a jiggle in the center.
- Cool in the pan for 10 to 15 minutes before serving warm, preferably with vanilla ice cream.
Leave a Reply