
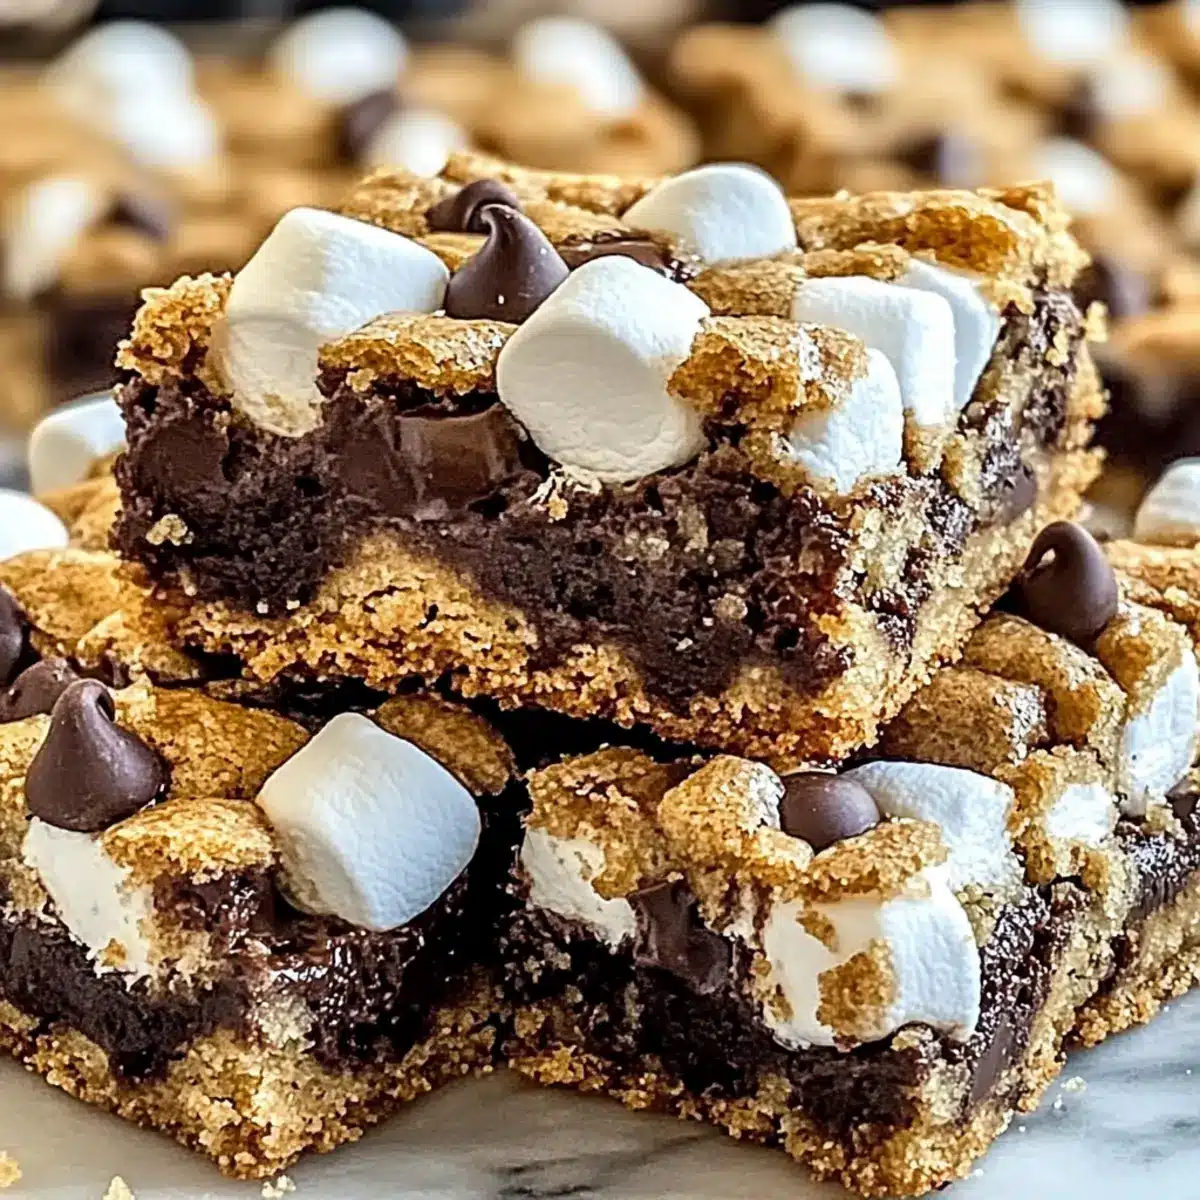
As I rummaged through my pantry one afternoon, a container of graham cracker crumbs caught my eye, instantly transporting me back to those cozy campfire nights filled with laughter and gooey s’mores. That moment sparked the creation of these Easy S’mores Cookie Bars, the ultimate nostalgic treat that blends the classic flavors of summer with the convenience of baking. Not only are these bars super quick to whip up, but they’re also endlessly customizable to suit any craving—imagine swapping chocolate types or tossing in some crunchy nuts! Perfect for family gatherings or a sweet indulgence on a busy weeknight, each chewy, chocolate-filled bite takes me straight back to childhood memories. Curious to unlock the magic of s’mores in a new way? Let’s dive in!
Why are S’mores Cookie Bars a must-try?
Nostalgic Flavor: These S’mores Cookie Bars evoke childhood memories of summer nights, combining chocolate and marshmallows in a deliciously soft cookie.
Quick & Easy: Whip them up in no time, making them perfect for busy evenings.
Customizable Delight: Mix things up with your favorite chocolate or even add nuts for extra crunch.
Family-Friendly: A sweet treat the whole family will love, ideal for gatherings or end-of-week indulgences.
Gluten-Free Option: Easily adapt the recipe with gluten-free ingredients, ensuring everyone can enjoy!
With each bite, you’ll find yourself reminiscing about campfires and laughter, making these bars an unbeatable choice for any dessert lover. If you’re also intrigued by cookies with a twist, check out my favorite Brown Butter Cookie and Flourless Fudge Cookies recipes!
S’mores Cookie Bars Ingredients
Unleash the magic of s’mores right in your kitchen!
For the Cookie Base
• Unsalted Butter – Provides richness and moisture; substitute with coconut oil for a dairy-free option.
• Brown Sugar – Adds moisture and deep flavor; can be replaced with coconut sugar for a different taste.
• Granulated Sugar – Enhances sweetness; use only brown sugar for denser bars.
• Large Eggs – Binds the ingredients and adds moisture; use flaxseed meal mixed with water as a vegan substitute.
• Vanilla Extract – Boosts the overall flavor; vanilla bean paste offers a more intense alternative.
• All-Purpose Flour – Gives structure; opt for a gluten-free flour blend for gluten-free bars.
• Baking Soda – Acts as a leavening agent to achieve the perfect rise.
• Salt – Enhances flavor; omit if using salted butter.
For the S’mores Filling
• Graham Cracker Crumbs – Contributes key s’mores flavor and texture; gluten-free options are available.
• Chocolate Chips – Adds sweetness and richness; swap for dark or white chocolate to mix flavors.
• Mini Marshmallows – Provides the gooey, essential s’mores element; larger marshmallows can be cut down.
Optional Toppings
• Extra Chocolate Chips – For added gooeyness and sweetness; use your favorite chocolate variety.
• Extra Marshmallows – Make the center even more indulgent with additional marshmallow layers.
With these ingredients, you’re poised to create delightful S’mores Cookie Bars that are bound to transport you back to your fondest memories of campfires and joy!
Step‑by‑Step Instructions for S’mores Cookie Bars
Step 1: Preheat the Oven
Begin by preheating your oven to 350°F (175°C). As it warms, grab a 9×13 inch baking pan and grease it lightly; this will prevent your S’mores Cookie Bars from sticking. You might also consider lining it with parchment paper for extra ease when removing the bars after baking.
Step 2: Cream the Butters and Sugars
In a large mixing bowl, combine softened unsalted butter, brown sugar, and granulated sugar. Using an electric mixer, cream the mixture on medium speed for about 2-3 minutes until it’s light and fluffy. This step is crucial as it incorporates air, giving your cookie bars the perfect texture.
Step 3: Add Eggs and Vanilla
Next, crack in the large eggs, adding them one at a time while mixing well between additions. Then, pour in the vanilla extract, blending until fully incorporated. This step not only adds flavor to your S’mores Cookie Bars but also helps bind the ingredients together for a rich, cohesive dough.
Step 4: Mix Dry Ingredients
In a separate bowl, whisk together the all-purpose flour, baking soda, and salt until evenly combined. Gradually add this dry mixture to your wet ingredients, mixing on low speed until just combined. Be careful not to overmix, as keeping the dough tender will ensure a chewy final product.
Step 5: Incorporate S’mores Components
Gently fold in the graham cracker crumbs and chocolate chips using a spatula. This step is where the nostalgic flavors of classic s’mores begin to shine through your cookie dough. Ensure they are evenly distributed throughout the mixture for delightful bites in every square.
Step 6: Create the Base Layer
Spread half of the cookie dough evenly into your prepared baking pan, pressing it down firmly to create a smooth base layer. This will form the foundation of your S’mores Cookie Bars, so aim for an even surface to ensure consistent baking.
Step 7: Add Marshmallows and Dough Topping
Sprinkle mini marshmallows generously over the base layer, ensuring even coverage. Then, dollop spoonfuls of the remaining cookie dough over the marshmallows, gently spreading it out to enclose them. This creates that signature gooey center we all love in S’mores Cookie Bars.
Step 8: Top with Extras
For an extra indulgent touch, scatter additional chocolate chips and marshmallows on top of the final layer of dough. This not only enhances the sweet flavor and presentation of your bars but also adds to the gooeyness once baked.
Step 9: Bake to Perfection
Place the baking pan in your preheated oven and bake for 25-30 minutes. Keep an eye on them; the S’mores Cookie Bars are ready when the edges turn golden brown and a toothpick inserted in the center comes out with a few moist crumbs clinging to it.
Step 10: Cool and Slice
Once baked, remove the pan from the oven and allow it to cool in the pan for about 10 minutes. After that, transfer the bars to a wire rack to cool completely. Once cool, slice them into squares, and get ready to enjoy a heartfelt taste of nostalgia!
Expert Tips for S’mores Cookie Bars
- Perfect Texture: Avoid overmixing the dough after adding the flour to maintain a wonderfully chewy texture in your S’mores Cookie Bars.
- Quality Counts: Use high-quality chocolate chips and fresh eggs for the best flavor; it makes a noticeable difference in your final treat!
- Watch the Oven: Check your bars as they near the 25-minute mark to prevent overbaking. You want them soft and gooey, not dry.
- Serve Warm: If your bars ever turn out too dry, serve them warm with a scoop of ice cream to bring back that gooey goodness!
- Experiment Freely: Feel free to experiment with different chocolate types or add chopped nuts to customize your S’mores Cookie Bars to your liking.
What to Serve with S’mores Cookie Bars
Indulging in rich and gooey S’mores Cookie Bars is a delightful experience, and pairing them with complementary sides can elevate your dessert adventure even further.
- Vanilla Ice Cream: The creamy coldness contrasts perfectly with the warm, gooey bars, making each bite an irresistible experience.
- Caramel Sauce Drizzle: A sweet and sticky caramel adds depth and extra richness, enhancing the chocolate and marshmallow flavors beautifully.
- Fresh Strawberries: The bright, juicy sweetness of strawberries offers a refreshing contrast, balancing the richness of the cookie bars perfectly.
- Chocolate Milk: A nostalgic drink choice that amplifies the chocolatey goodness, creating a cozy dessert moment reminiscent of childhood.
- Homemade Lemonade: The zesty freshness cuts through the sweetness, providing a delightful palate cleanser that complements the bars.
- Coconut Whipped Cream: Light and airy, this tropical topping adds a unique flair, bringing an island vibe to your dessert spread.
Each pairing option not only complements the flavors of the S’mores Cookie Bars but also adds new textures and sweetness, ensuring a well-rounded dessert experience everyone will love!
How to Store and Freeze S’mores Cookie Bars
Room Temperature: Store the cookie bars in an airtight container at room temperature for up to 5 days to maintain freshness and flavor.
Fridge: If you prefer, these S’mores Cookie Bars can be refrigerated for up to 7 days. Just ensure they are well-wrapped to prevent them from drying out.
Freezer: For longer storage, individually wrap each bar and freeze them for up to 2 months. Thaw at room temperature or warm slightly in the microwave before serving for a gooey treat.
Reheating: If you enjoy warm bars, pop them in the microwave for 10-15 seconds to refresh their soft, gooey texture, reminiscent of freshly baked S’mores Cookie Bars!
Make Ahead Options
These S’mores Cookie Bars are perfect for meal prep enthusiasts! You can prepare the cookie dough up to 24 hours in advance, allowing you to refrigerate it in an airtight container for optimal flavor and freshness. Additionally, you can also mix the dry ingredients (flour, baking soda, and salt) and store them for up to 3 days to streamline your baking process. When you’re ready to bake, simply fold in the graham cracker crumbs, chocolate chips, and marshmallows, then spread the dough in the pan and bake according to the original instructions. This way, you’ll have delicious, gooey dessert bars ready to impress with minimal effort!
S’mores Cookie Bars Variations & Substitutions
Feel free to get creative with your S’mores Cookie Bars and tailor them to your unique taste!
- Chocolate Twist: Swap in dark or white chocolate chips for a different flavor profile that complements the marshmallows beautifully.
- Nutty Addition: Add chopped pecans or walnuts to the dough for a delightful crunch that contrasts wonderfully with the gooey center.
- Flavored Marshmallows: Experiment with flavored marshmallows like chocolate or caramel for an unexpected twist that elevates the classic s’mores flavor.
- No-Bake Option: For a quicker treat, try making no-bake s’mores cookie bars by using a graham cracker crust without baking the dough.
- Peanut Butter Bliss: Mix in a half cup of peanut butter to the dough for a dreamy, nutty flavor that pairs perfectly with chocolate and marshmallows.
- Spice it Up: Add a pinch of cinnamon or a dash of sea salt to enhance the flavors with a warm, comforting touch.
- Healthier Swap: Substitute half the butter with unsweetened applesauce for a lighter version that still packs a delicious punch.
- Mini Size: For bite-sized treats, press the dough into a mini muffin tin for adorable, poppable s’mores treats that are perfect for gatherings!
Whether you want to try classic flavors or get adventurous with new ones, these variations ensure there’s a S’mores Cookie Bar for everyone. And if you’re still in the mood for cookies, don’t miss out on my beloved French Toast Cookies or the rich Flourless Fudge Cookies!
S’mores Cookie Bars Recipe FAQs
How do I select the ripeness of the ingredients?
Absolutely! When choosing your ingredients, particularly the eggs and butter, opt for freshness. Eggs should be clean and unblemished, while unsalted butter should be firm yet pliable at room temperature. Quality ingredients make all the difference, and I love using organic for an extra boost.
How should I store leftover S’mores Cookie Bars?
Very simply! Store your S’mores Cookie Bars in an airtight container at room temperature for up to 5 days. If you prefer a chilled treat, they can last in the fridge for up to 7 days. Just make sure they’re well wrapped to maintain their soft texture.
Can I freeze S’mores Cookie Bars?
Yes, indeed! To freeze, individually wrap each bar in plastic wrap or aluminum foil, then place them in a freezer-safe container. They can be frozen for up to 2 months. When ready to eat, thaw at room temperature or warm in the microwave for about 10-15 seconds to bring back that soft, gooey goodness.
What if my cookie bars turn out dry?
If your S’mores Cookie Bars come out dry, don’t worry! I recommend serving them warm with a scoop of vanilla ice cream or a drizzle of chocolate sauce. This not only adds moisture but also enhances the overall flavor. For next time, keep an eye on them in the oven, especially around the 25-minute mark, to avoid overbaking.
Are S’mores Cookie Bars safe for people with allergies?
While these bars are delicious, they do contain common allergens like gluten, dairy, and eggs. However, you can tailor the recipe for dietary needs: use gluten-free flour, coconut oil instead of butter for a dairy-free version, and flaxseed meal mixed with water as a substitute for eggs for a vegan option. Remember to read labels carefully if you’re concerned about cross-contamination!
Irresistible S'mores Cookie Bars Melting with Nostalgic Flavor
Ingredients
Equipment
Method
- Preheat your oven to 350°F (175°C) and grease a 9x13 inch baking pan.
- In a large mixing bowl, cream together the softened butter, brown sugar, and granulated sugar using an electric mixer for 2-3 minutes.
- Add eggs one at a time, mixing well, then add the vanilla extract and blend until well incorporated.
- Whisk together the flour, baking soda, and salt in a separate bowl, then gradually add to the wet ingredients.
- Fold in the graham cracker crumbs and chocolate chips gently using a spatula.
- Spread half of the cookie dough into the prepared baking pan, pressing it down firmly.
- Sprinkle mini marshmallows over the base layer, then dollop spoonfuls of the remaining dough over the marshmallows.
- Scatter additional chocolate chips and marshmallows on top of the final layer.
- Bake for 25-30 minutes until the edges are golden brown.
- Cool in the pan for about 10 minutes, then transfer to a wire rack to cool completely and slice into squares.
Leave a Reply